Photo Laser Engraving: How to Laser Engrave Pictures

Photo laser engraving is a great way to turn your pictures into personalized objects. Read all about it and start laser engraving pictures!
We’re always looking for excuses to play with lasers, and laser engraving is a great place to start. Put simply, laser engraving is the process of carving a design into an object using a concentrated beam of energy. The laser acts like a knife when you whittle something, but with much more precision since it’s guided by a machine instead of hands. It also produces less waste due to its precision.
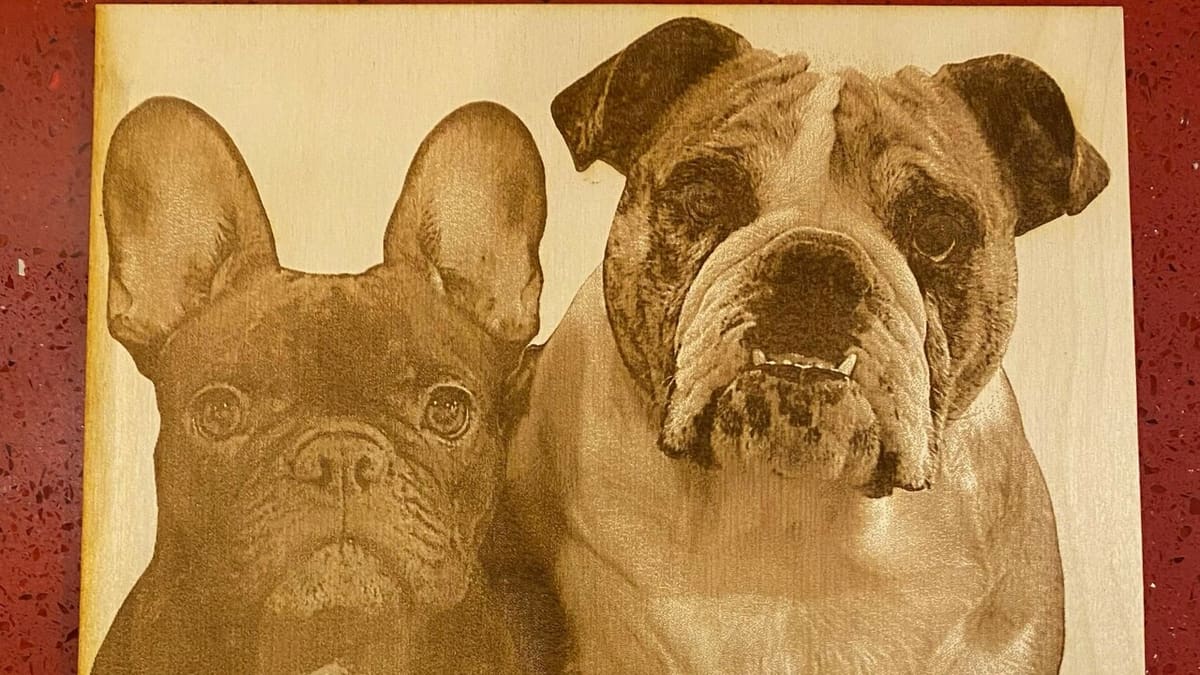
These properties make laser engraving ideal for transferring photos to another surface. You don’t lose the important details that make photos the perfect records of your best moments, and you have a huge variety of materials to choose from, including plastics, wood, glass, stone, and metals.
You can create art and jewelry with laser engraving, and it has a lot of industrial applications. It acts the same way as a precision carving tool that helps with detail work, such as cutting internal lenses for machines and adding an image directly onto printing plates to avoid film.
Laser engraving has revolutionized all areas of photo reproduction. Read on to take advantage of its ease of use and powerful effect!
Why Do It
Laser engraving has a lot of advantages as a way to work with your photos:
- Preservation: With the introduction of smartphones, you can easily save every moment you shoot – and laser engraving is also a very solid alternative to saving your precious moments. A laser-engraved photo will last for years and even generations! Plus, you don’t have to worry about a frame.
- Detail and variety: Due to its precision, laser engraving lets you produce art that retains the level of detail you had in the original shot. With that clarity, expanding your portfolio is as simple as buying a laser engraver. You will also be able to duplicate the same photo onto various materials.
- Gifting: In addition to keeping your photos safe, laser engraving them looks really cool. That, coupled with the ability to use it on decorative or functional objects, such as jewelry, bookends, and plaques, gives you endless options to make your best memories even more celebratory.
- Minimally invasive: The possibility to laser engrave without directly contacting the materials as tough as stainless steel is a great advantage. This helps maintain the original quality and physical integrity of the material compared with manual engraving.
- Versatility: If a laser engraving machine is minimally calibrated, it will enable you to create many diverse high-quality and great-looking designs ranging from very simple to sophisticated complexity.
- Affordability: Since laser engraving machines last longer than other engraving machines and require less maintenance, using them will be economically beneficial.
- Mass production: Since the laser engraving process is automated, it can easily adopt large-scale production if it’s what you’re after.
Materials
You’ve got a lot of options here. Be aware that they all take to engraving differently, and you should adjust matters accordingly depending on what you use.
- Natural materials: These include wood of both hard and soft varieties, stiff papers and fiberboards, and latex. Typically, soft woods take the least amount of laser wattage, and any paper-based materials will need a way to be simultaneously cooled to prevent the laser’s heat from igniting them. Some examples are cork, plywood, chipboard, solid wood (or timber), and natural wood (or real wood).
- Plastics: Not all plastics are created equal when it comes to laser engraving. The appropriateness of a specific plastic depends on its composition. Additives and finishing processes can alter their abilities to absorb light spectrum properties, which means certain combinations will melt instead of taking the engraving. In general, acrylic and other cast resins are the best plastics to engrave with, though polyamide, acetals, and polyethylene can be engraved too.
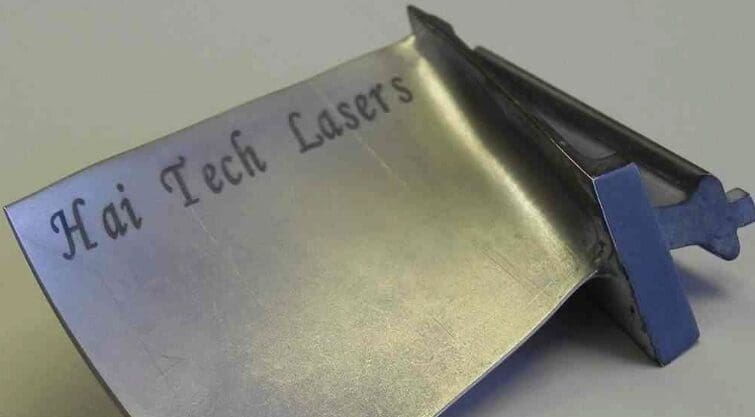
- Metals and coated metals: Both require high-density lasers for engraving, which will leave a prominent marking on the surface. They’re naturally resistant to heat, meaning that they’re great at keeping laser energy in line. It just takes a little more oomph for them to accept the carving. Some examples of these materials are steel, brass, aluminum, titanium, stainless steel, and tungsten.
- Stone and glass: These are the most finicky materials to use when laser engraving your photos, but their striking effects are worth it. When a laser beam hits glass or stone, the laser fractures, and in doing so, it exposes natural grains and crystal structures in the material. You shouldn’t use these materials for engravings that have extended flat plains. If you want to add another layer of visual interest to your laser-engraved photos, stone and glass do it naturally.
- Fabric and leather: Leather laser engraving can be done with natural and synthetic options. Quality laser engraving can work on Nubuck (leather made from top-grain calfskin or cowhide), synthetic, or suede leather.
What You'll Need
Laser engraving your photos is a simple process, but it does require a few specialized tools and materials. Here’s what you need to get started:
A Dynamic Photo
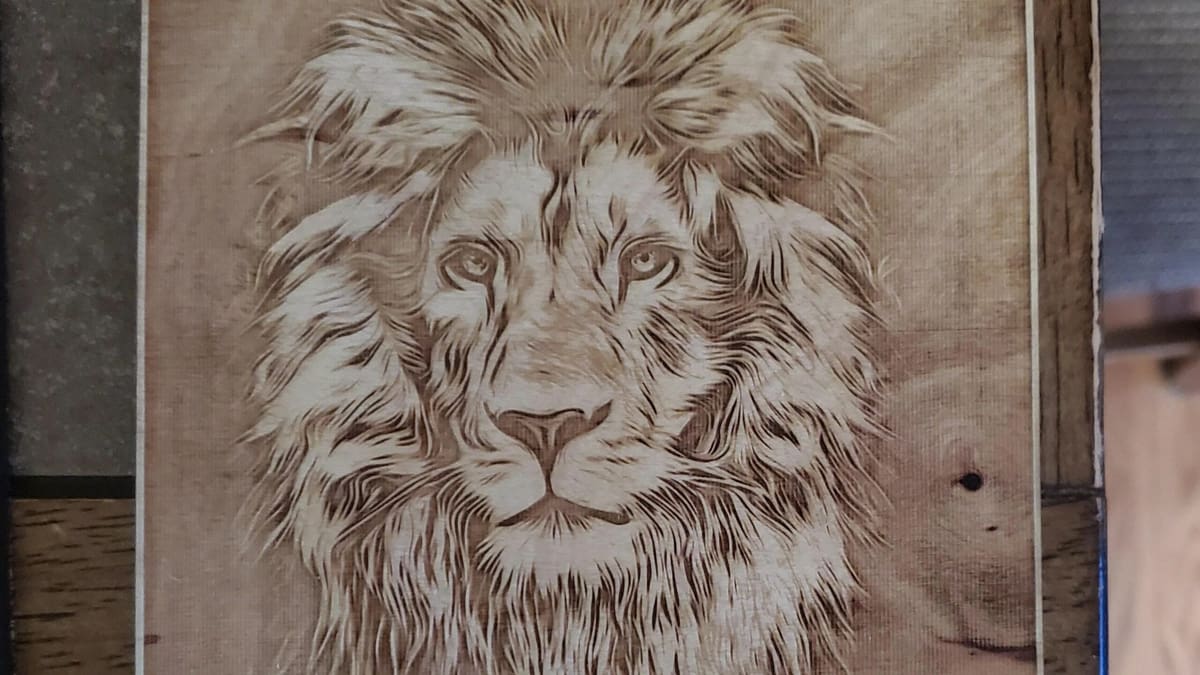
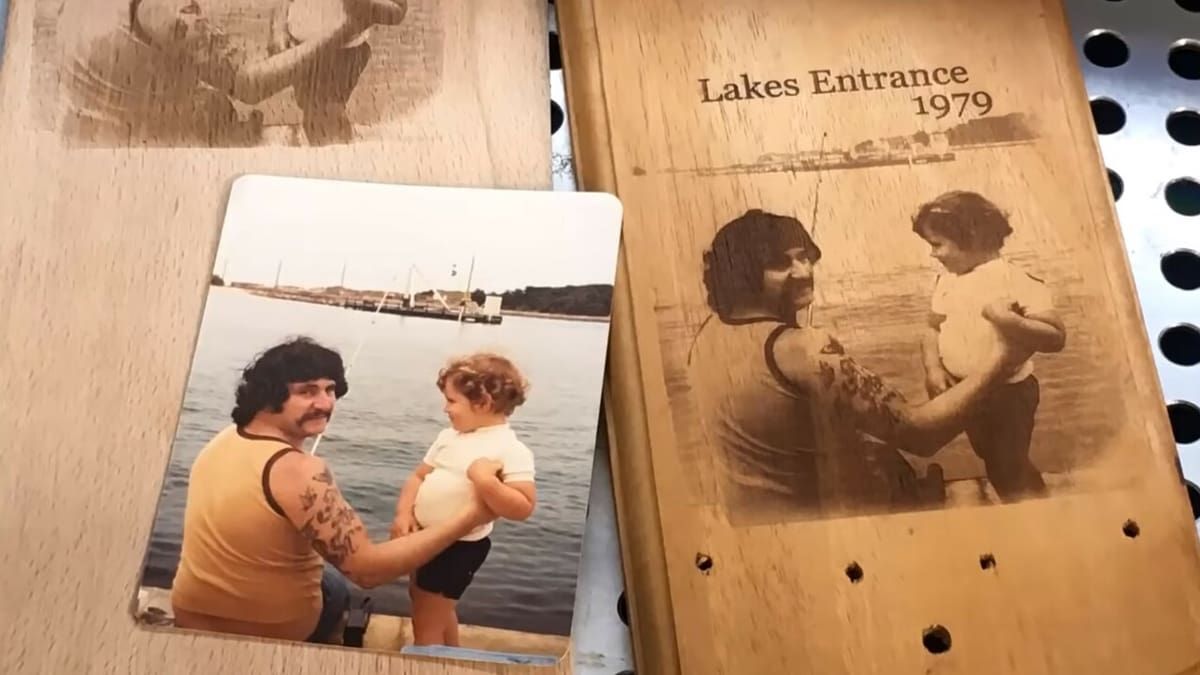
Not all photos are ideal for laser engraving. To get the most out of the process, make sure you choose something that’s in focus, contains a high level of detail, shows a lot of color gradient from dark to light, and doesn’t contain large blocks of solid color. Clear photographs of faces offer a great level of detail and interest, for example, and they’re easy to cut out of a background if necessary. Your photo should have a resolution of at least 300 DPI to get clear details.
Photo Editing Software
Use whatever software you’re comfortable with for this step. There are a lot of free programs that have all you need, and so as long as you can crop, take out a background, and sharpen, you’re set.
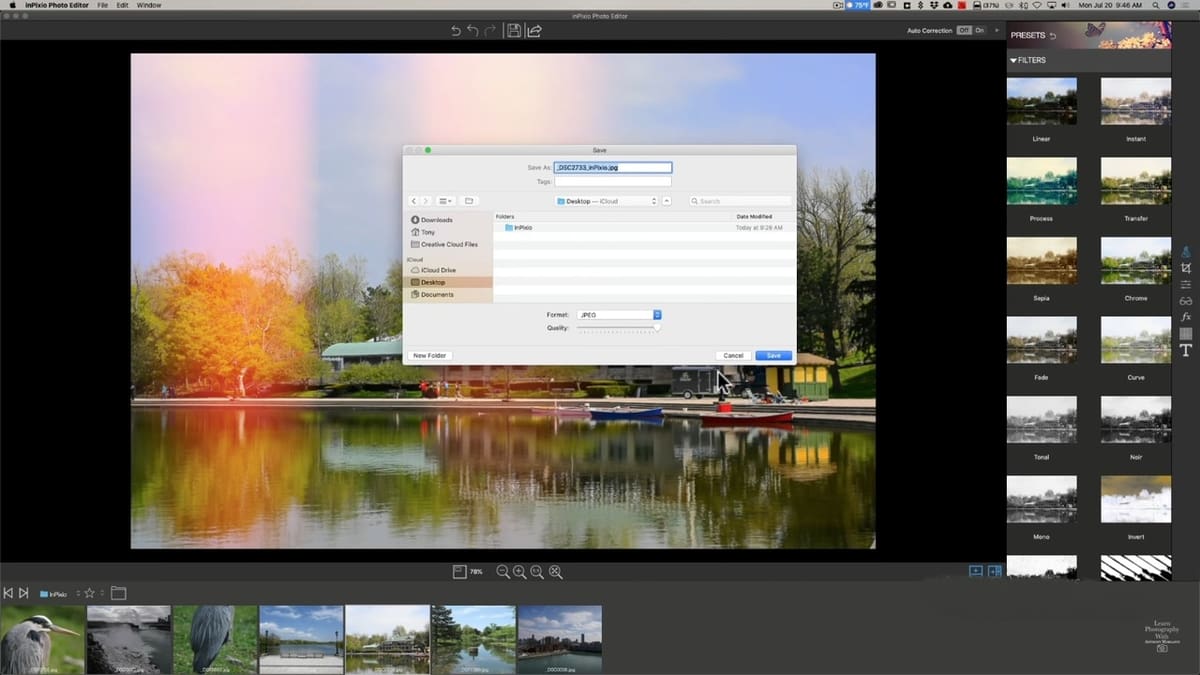
GIMP is the original free workhorse competitor with Photoshop – it’s got many of the same tools, just in slightly different configurations. InPixio is super simple but still has all you need, and Pixlr gives you excellent handling when you want to take out or clean up a background. You can also use the famous Adobe Photoshop for this purpose. Affinity Photo is another alternative for editing your photos, though Photoshop is preferred with more tools, features, and functionality. Last but not least, CyberLink PhotoDirector has image enhancement capability with AI algorithms.
ImagR is a cloud-based option specifically designed for editing and preparing photos for laser engraving. The process is carried out in six easy steps: uploading your photo, cropping, resizing, adding text, choosing the material, and finally downloading your image in the desired format. You can either use its limited services for free or opt for a paid subscription with full services. There’s also a library of images made for engraving using this service. They use wood, scratch paper, and canvas for their products.
Laser Engraving Machine
One of the only drawbacks of laser engraving your photos is that you’ll have to invest in a separate machine designed specifically for this process unless you’re willing to go into the trouble of changing your 3D printer’s setup for different projects. Your own rig will cost you an average of a couple of thousand dollars for good quality. The following are a few options:
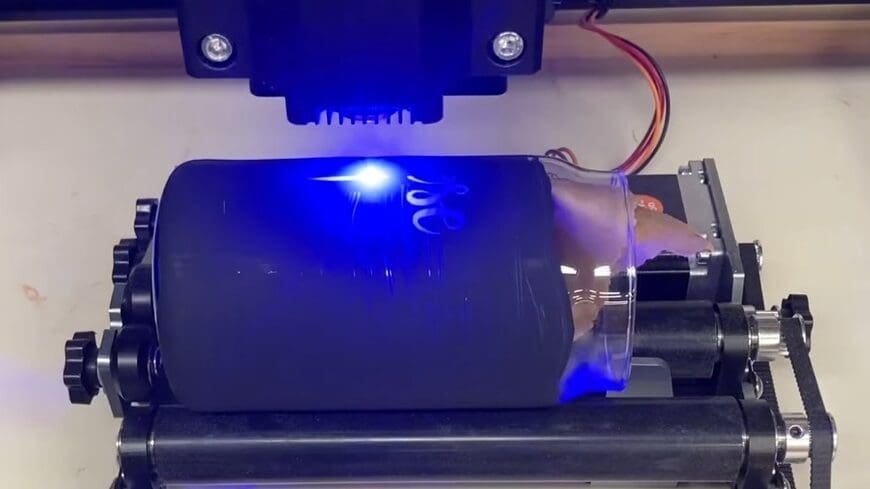
- The LaserPecker 2 (∼$2,000) uses dual lens galvanometer technology, leading to great details of up to 2K resolution. It’s also capable of doing 360° rotary engraving on cylindrical surfaces such as bottles or pencils. This machine can engrave on paper, cardboard, wood, leather, acrylic, anodized or painted aluminum, and stainless steel. However, it can’t engrave on pure metal, PVC, PET, and other plastics.
- Gweike Cloud (∼$3,200) applies industrial-grade laser technology to home use and is much faster (3.4 times) than other machines. The manufacturer offers a 12-month guarantee with a machine purchase. Its work area is 20.08″ x 11.8″ or 510 mm x 300 mm, and its carving speed can reach as high as 600 mm/s. It’s compatible with software such as AutoCAD, SolidWorks, PowerPoint, Illustrator, and Photoshop.
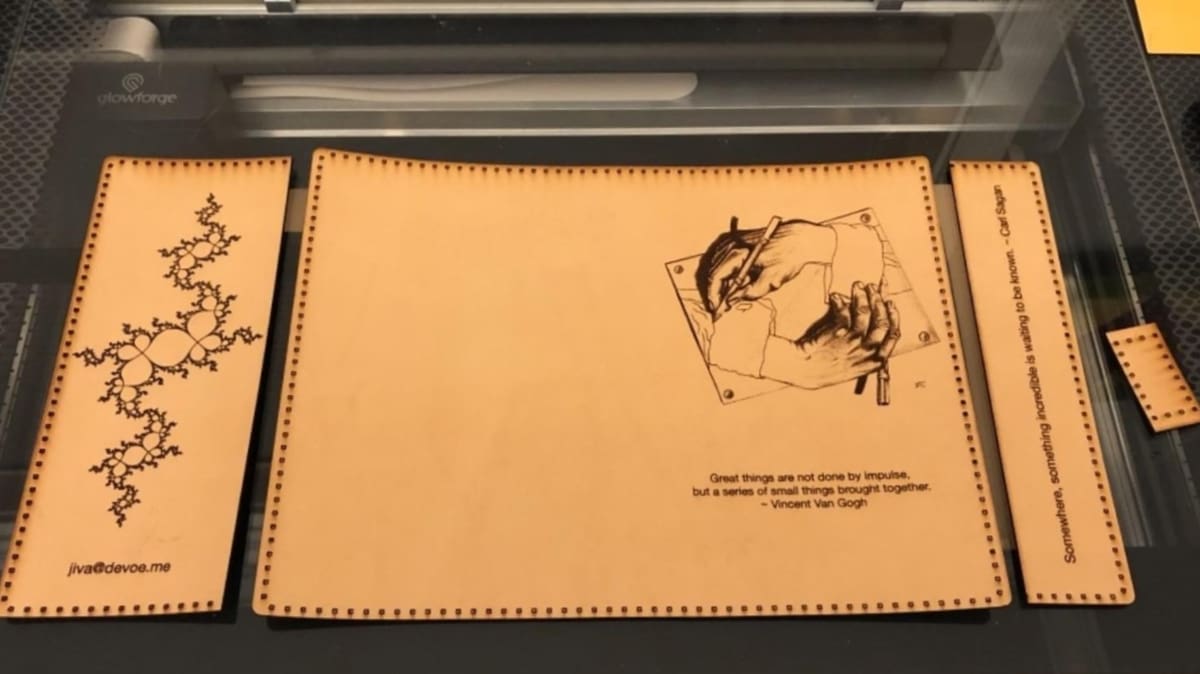
- The Glowforge Plus (∼$4,000 for the Plus model) offers a premium laser engraving experience. It boasts fast speeds and a sleek design, as well as compatibility with a variety of device operating systems, so you can print directly from your smartphone if you want.
- Tecollection Laser (∼$1,450) has an FDA-certified water cooling CO2 laser engraver, and its rotary construction makes it ideal for engraving curved surfaces like thermoses. Plus, it’s compact enough to be practical for desktop storage without sacrificing workspace (which is 20 x 12 inches).
- Creality’s 3D laser engraver kit (∼$60) isn’t a separate engraving machine, but it can be mounted to your Creality 3D printer and turned into an engraving machine. This way, your printer can perform 3D printing and laser engraving functions with some slight adjustments.
How to Do It
Now that you know what tools you need, it’s time to get to the fun part: playing with lasers! And don’t worry, laser engraving your photos takes a lot less time and effort than blowing up the moon. Here are the steps:
1. Adjust Your Photo
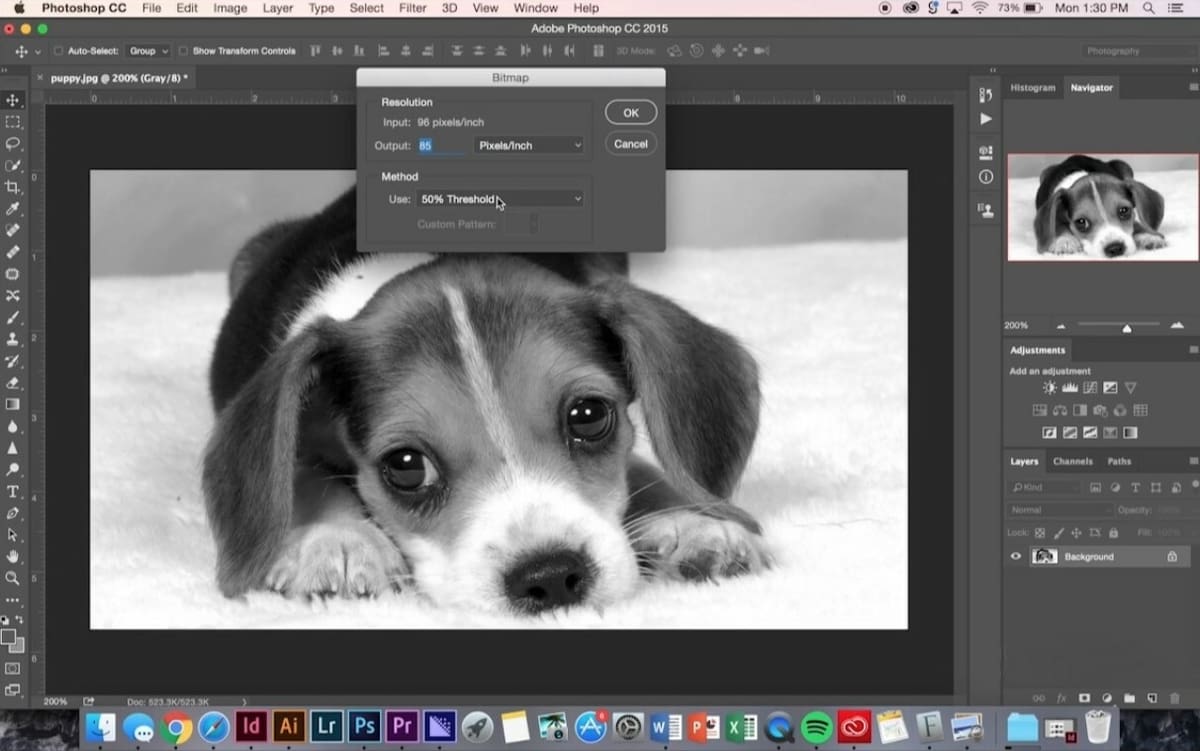
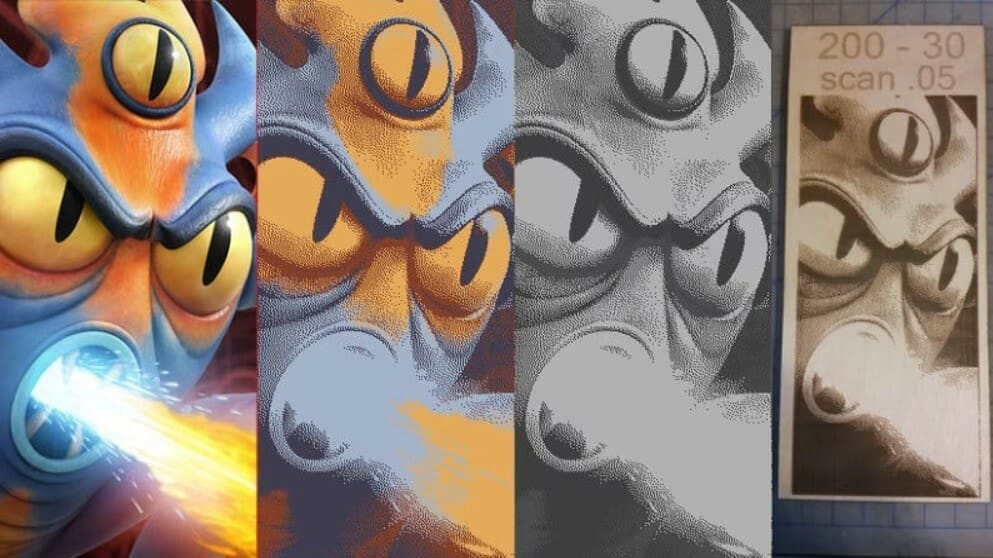
Cropping and background removal are optional but highly suggested steps before starting your laser. Converting the photo to a simplified indexed color scheme, then into grayscale, is a must. This means telling the computer to use a smaller list of colors to display your photo, causing the color version of your photo to seemingly lose quality (because the colors don’t transition into each other as smoothly). Using fewer colors means an easier changeover to grayscale.
This step is necessary because it breaks down the gradient changes into something the laser engraver understands and can perform as a carving tool. (Check out the photo in the “Tips & Things to Watch out For” section for an example.)
There are a lot of advanced photo editing steps you can learn that will translate to different intensities and levels of detail in your engravings, but you can work up to those as you build experience.
If you’re engraving a photo with faces, then you should consider these actions in photo editing software for quality results:
- The intensity of black color on the face should be 10-15%.
- The eyes should be almost white with only 3-6% black color intensity.
- Light hair strands create more light, and dark hair strands darken.
- Make sharper eyes, eyelashes, eyebrows, lips, and hair.
2. Convert Your Photo
You’ll need to convert your photo into a BMP file format. This is another step in which you shouldn’t have to use a separate photo program. Some options, like Adobe Photoshop, let you save in this file format. However, if your current editing program doesn’t have this conversion or saving option, you can use Paint in Windows to open and convert your photo.
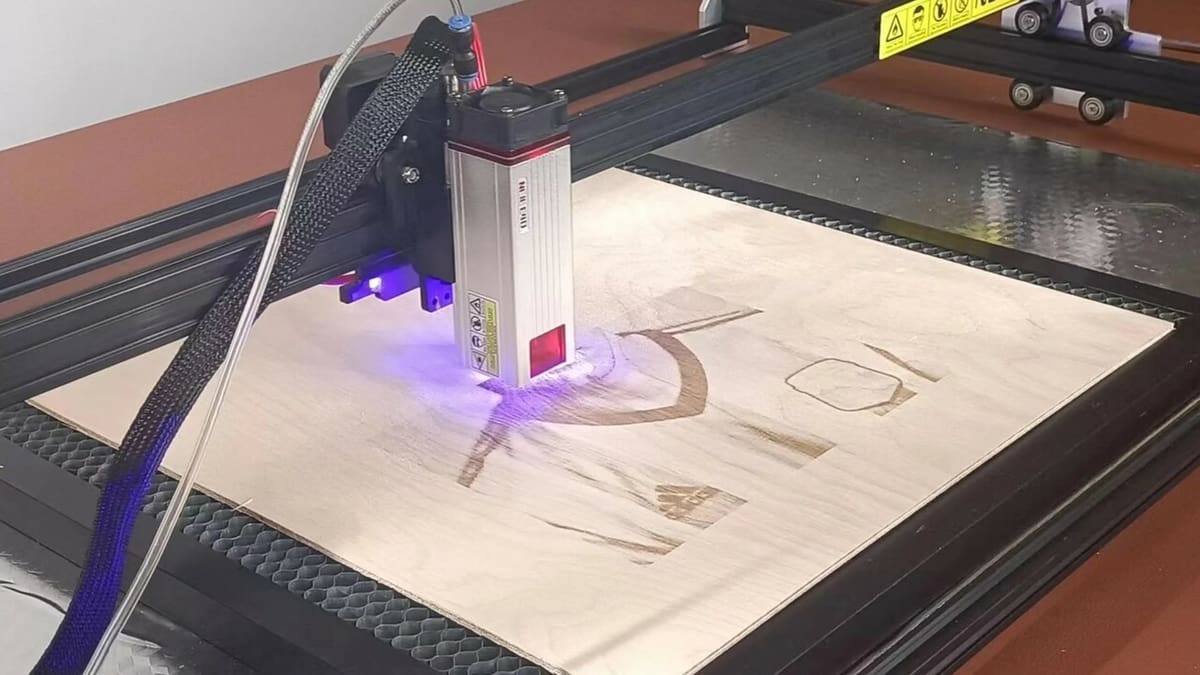
3. Laser Engrave
After you’ve successfully converted your photo, you’ll need to send the file to your laser engraving machine. Much like a 3D printer, you send your file to the laser engraver either through a USB drive or directly into the engraving machine via a cable or wireless connection.
From this point, the laser will do all the work. Hit “Start”, and watch your creation come to life.
4. Post-Process, if Necessary
Depending on the engraving machine, photo, and, most importantly, material, you may need some post-processing after successfully engraving your photo. This may be sanding, varnishing (if you use wood), or wiping the product with a damp sponge to remove the soot and dust.
Tips
Now that you know the basics, here are a few ways to make sure laser engraving your photos goes smoothly.
- Photo selection: Leave out large areas of single colors and expansive backgrounds with one or two small subjects. Neither type of photograph gives laser engravers enough information to make a clear copy. If you have a photo with a solid-colored background but a varied foreground that would engrave perfectly, you can replace the background with a white or clear layer in your photo editing software.
- Image resolution: This applies to both scanning and engraving. We stated before that an ideal resolution for engraving your photo is at least 300 DPI. We recommend scanning your photos at a low resolution of 200 or 300 DPI to ensure that they are small enough to edit in your chosen graphics software. Also, make sure that you choose the highest resolution images when obtaining digitally from the internet for better engraving. When it comes to the camera, we recommend modern digital cameras over older cameras of 2 mega pixels and below, or phone cameras.
- Color scanning: Working with scanned images is just as easy as working with photos you’ve directly uploaded from a camera. Just make sure you scan in color even if the original’s in black and white (that’s possible on most scanners). The additional information from the color gives you more to work with when preparing the image.
- Material selection: Each material produces its own engraved look for the same photo. Therefore, it’s good practice to test a variety of materials with the same photo and choose the one that creates your desired look.
- Software selection: Using software like PhotoGrav or EngraveLab PhotoLaser Plus will make photo editing easier than working solely with your graphics software. These are specifically designed for detailed photo conversion of laser output to a wide variety of materials.
- Practice: The famous saying “Practice makes perfect” applies here as well. Your laser engraving skills will improve as you keep going, and you will achieve better results over time. Do a test engraving every time you change your photo settings. As you get into the swing of laser engraving your photos, you might be tempted to skip this. Don’t! Even small changes in photo settings can make big differences in your finished project.
- For example, changing the tone contrast between the dark and light areas on your photo makes its gradients look sharper or softer. When these settings are over a range rather than on or off, those same gradual changes go into your engravings. You won’t know exactly how it translates to the specific material and photo you’re using until you test it and ensure it matches your planned vision.
Services
If you can’t or don’t want to buy your own machine, you can find a number of services that will laser engrave your photos for you. All you need to do is send them your files. Here are a few options to consider:
- Laser Cutting, Inc.: This is an established company with a large range of fabrication services available, which means it’s also super familiar with laser engraving materials and can help you choose exactly what you need for your specific order.
- Industrial Commercial Graphics: If you need help in the design area of laser engraving, these guys have your back. You can upload your own photos and then get assistance with the rest of your design to personalize it further or add some artistic flair. They also offer discounts on bulk orders.
- EpilogLaser: Don’t click on their project gallery unless you have several hours to study the intricacy and variety of their results. You’ll find a huge selection of materials with an emphasis on photo engraving. If you can slap a photo on it, these folks can do it for you.
- Hai Tech Lasers, Inc.: They’ve been in the business of industrial laser marking and engraving for over 30 years, and they supply well-known companies like Honeywell, Parker Hannifan, and Dow Corning with laser engraving systems. They offer stainless steel and aluminum laser engraving services. You can request a free quote for a customized laser service.
License: The text of "Photo Laser Engraving: How to Laser Engrave Pictures" by All3DP is licensed under a Creative Commons Attribution 4.0 International License.