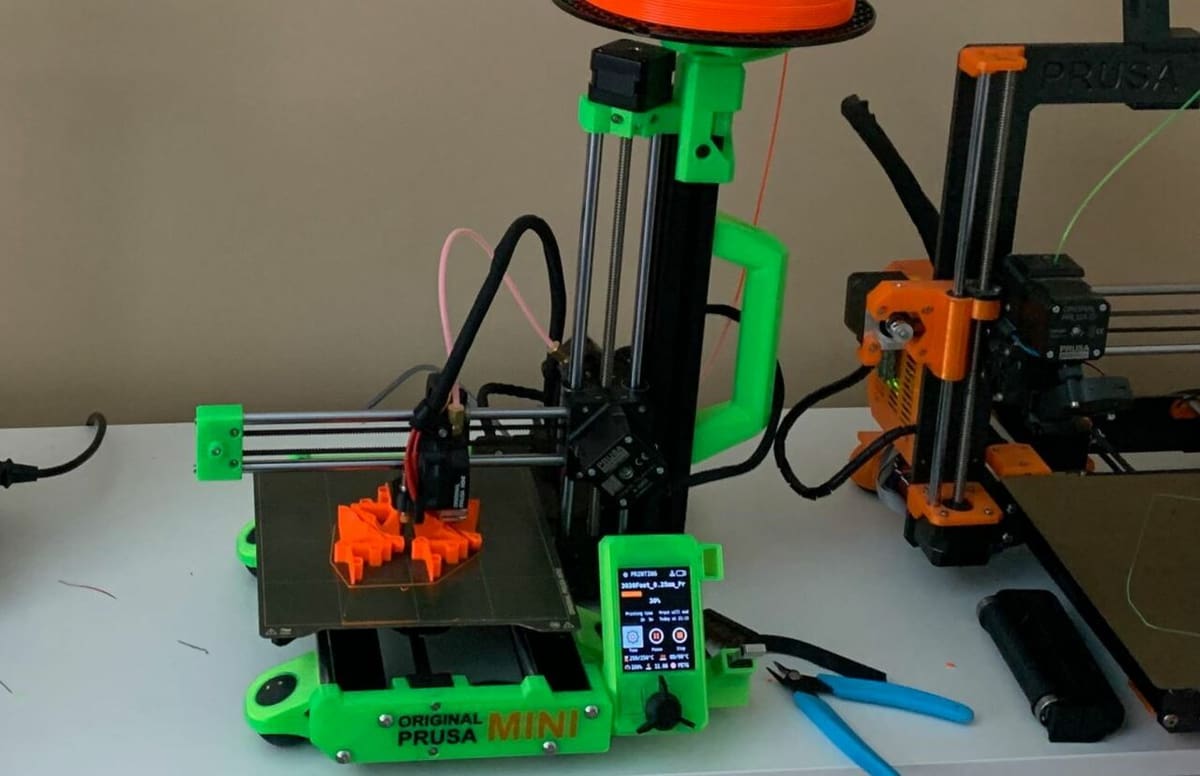
The Best Prusa Mini/Mini+ Upgrades & Mods

The Prusa Mini and Mini+ are remarkable machines, especially for their price. Make them even better with these Prusa Mini upgrades and mods!
The Prusa Mini and Mini+ are compact, affordable, and high-performing machines. From the makers of the famed Prusa i3 MK3S, they’re made to be both great first printers and rugged workhorses. Underneath the approachable price tags are powerful electronics, a clean interface, and built-in network connectivity.
For around $400, however, you’re not going to get all of the bells and whistles. Compared to the bigger i3 MK3S, the Prusa Mini and Mini+ are missing the Bondtech drive gears and a built-in spool holder, among other features.
Thankfully, those looking to upgrade their Minis have the chance to do so with a host of printable and purchasable upgrades. These bridge the gap between the entry-level Mini and the performance, polish, or convenience that you might be looking for. Because of the similarities between the Mini and Mini+, all the mods included in the list should work for both printers.
If you see something on the list that you’d like to get professionally 3D printed, try Craftcloud. Entrust the experts with making sure you get the best 3D printed parts to add to your beloved Mini.
So, without further ado, let’s dive into our list!
To Buy
First up, we have the upgrades that come with a price. While there’s a small upfront investment in purchasable mods, the proof is in the improved printing!
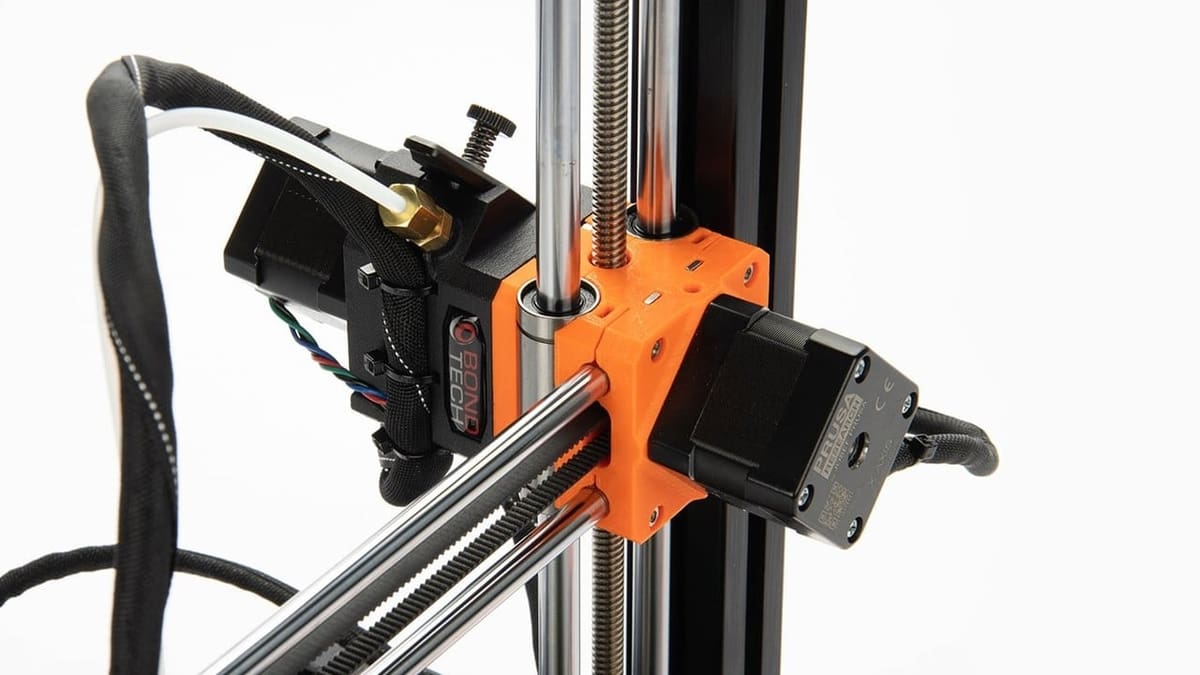
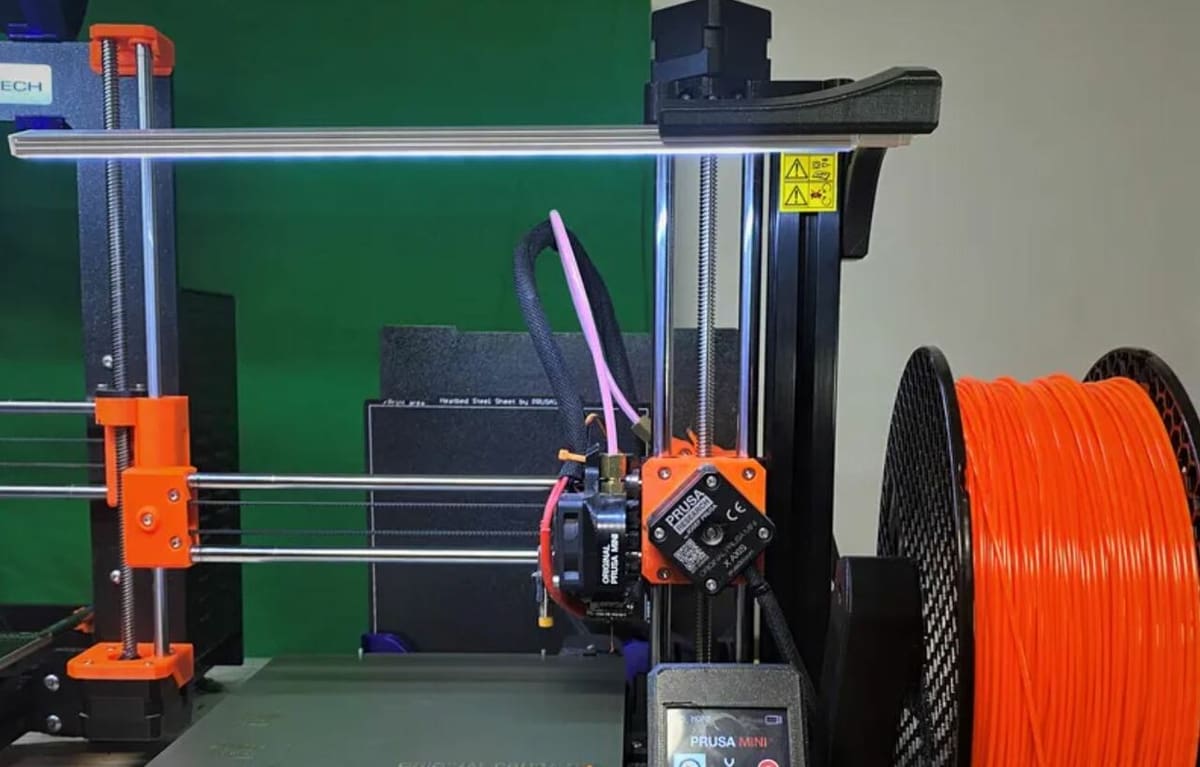
Bondtech IFS Extruder
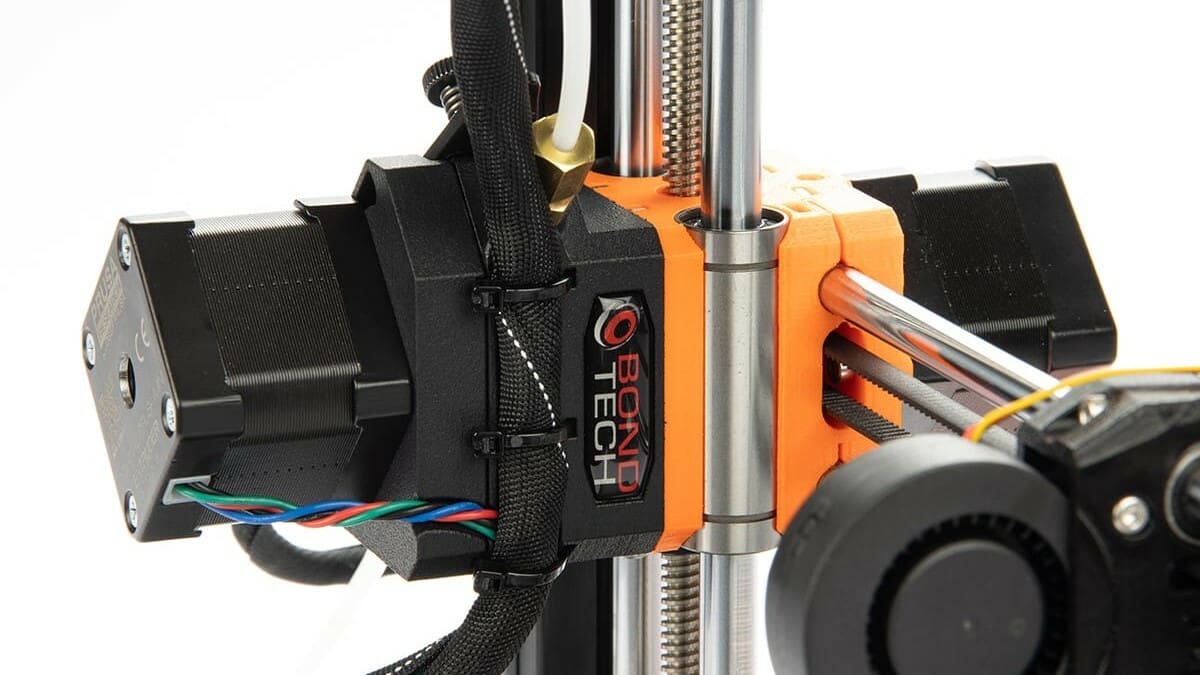
One of the premiums you lose with Prusa Mini is the genuine Bondtech IFS Extruder drive gears of the i3 MK3S+. While this is perfectly acceptable for the price range, users looking for slightly better performance (and willing to pay for it) will benefit from the famed Bondtech system.
This upgrade kit swaps directly into the machine, improving precision, durability, and retraction performance. An in-depth tutorial is included in the setup guides to help you through the upgrade, though some prior experience with 3D printers may be helpful.
Note: Due to a firmware change, the necessary modification to the steps per mm settings can’t be stored permanently on the motherboard. Instead, follow the official installation instructions to modify your slicer’s start G-code or refer to this forum discussion.
- What it improves: Retractions and extrusion precision
- Who made it: Bondtech
- Cost: ~$75
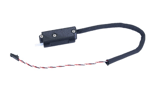
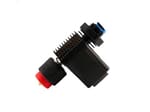
IR Filament Sensor
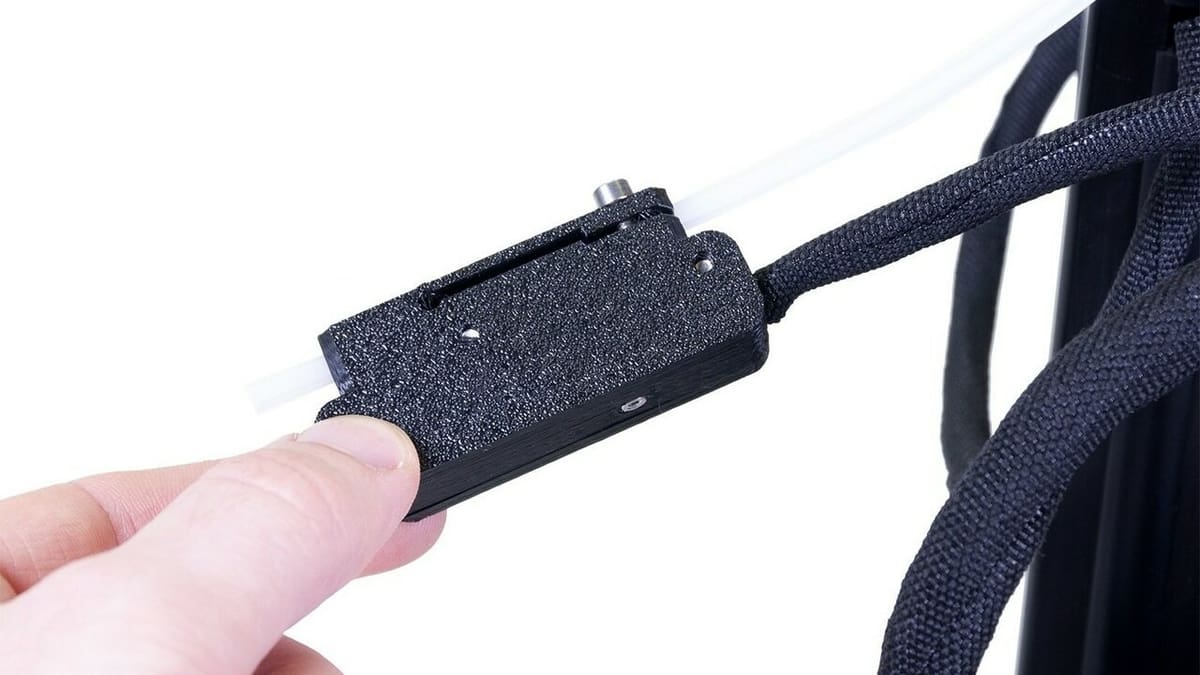
The IR filament sensor is an optional upgrade from Prusa Research, meaning you can choose to have it delivered with your original purchase of a Mini or buy it later. Filament detection adds an extra layer of streamlining and reliability by protecting against failures caused by filament shortages.
While certainly not a must-have, this upgrade gives you extra peace of mind and leaves you with one less thing to worry about. You can find the installation guide on Prusa’s website.
- What it improves: Adds filament runout detection
- Who made it: Prusa Research
- Cost: ~$20
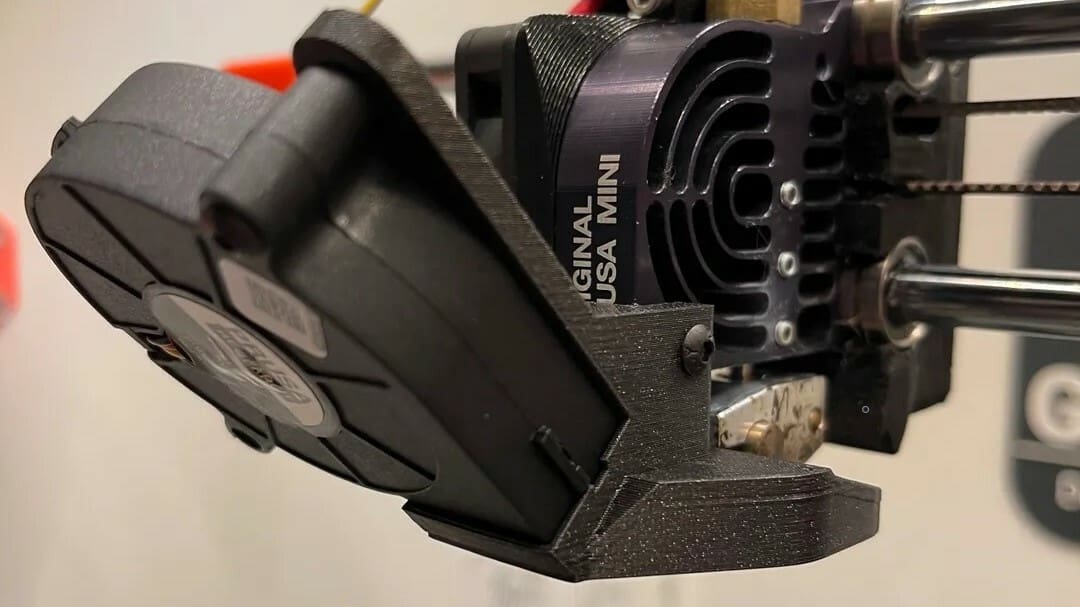
Revo Micro
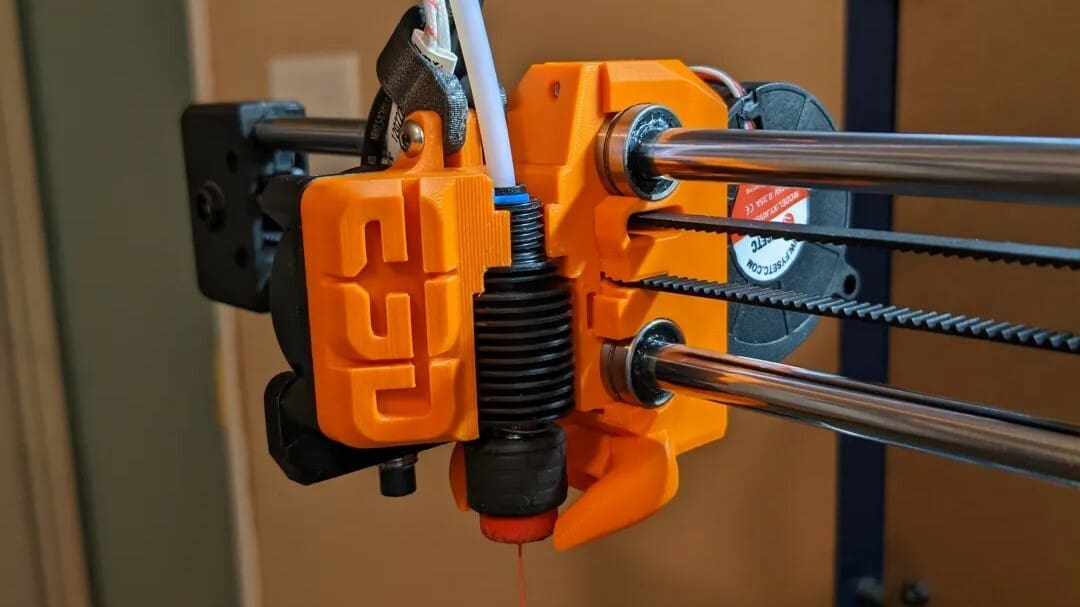
This is an E3D Revo Micro hot end upgrade for the Prusa Mini+, housed on the printer with a few 3D printed components. It lets you use the original Prusa Mini fan with the Edition 2 adapter to efficiently cool the hot end and eliminate heat creep.
E3D provides a comprehensive and easy-to-follow guide for upgrading your Mini+ with Revo Micro, showing how to attach the Mini’s stock fan without any issues. Alternatively, you can follow the instructions to set up your hot end from this video tutorial. For best results, the maker recommends printing the housing at a 0.2-mm layer height using PETG or ASA.
If you wish to take your upgrade further, there are a few 3D printable mods that go great with the adapter, such as the MM10 Prusa Mini mod, saving you from having to cut your stock PTFE tube.
- What it improves: Adds the benefits of the Revo Micro hot end
- Who made it: E3D
- Cost: ~$85
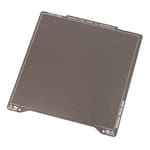
Textured PEI Sheet
PEI sheets are great for bed adhesion and post-printing cleaning of heated beds. The stock removable magnetic heated bed on Prusa’s Mini and Mini+ makes it easy to upgrade or swap between the PEI sheets differing in properties and uses that are made for these printers.
Among these steel sheets, a textured PEI powder-coated spring steel sheet is a worthy upgrade to have on hand. Some of its noteworthy features are that it’s reversible, meaning that you can use both sides for printing. Prints also pop off easily after the bed cools down, and it’s great for printing models using PETG. However, you can also easily print with other filaments, in particular flexible materials.
Finally, before you make full use of this sheet with your printer, you may have to do some calibration and a few test prints to get a perfect first layer. This ensures that you don’t face any print failures.
- What it improves: Provides a textured surface on the base layer of your print along with greater bed adhesion
- Who made it: Prusa Research
- Cost: ~$30
Remote Monitoring (with OctoPrint)
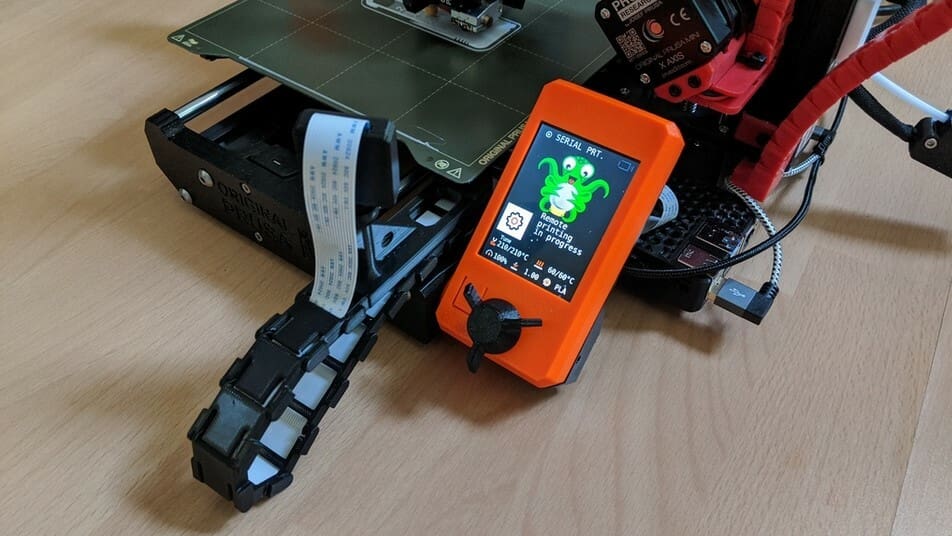
One of the most popular upgrades for Prusa printers is OctoPrint, the open-source remote 3D printer server that runs off a single-board computer, like a Raspberry Pi board (recommended models include the 3B, 3B+, 4B, or Zero 2 W). OctoPrint allows you to control many aspects of your printer remotely, such as temperature, motion, G-code, and prints, and it can also be used with a camera to monitor your print.
You can access OctoPrint’s features through its web interface. As OctoPrint is community-developed, you can also install plug-ins to the program that enable even more functions, such as linear advance control or multiple cameras.
Installing OctoPrint isn’t the easiest of processes, but, as it’s such a popular upgrade, there are many online resources for configuring and setting it up. You can also 3D print a case to store your Raspberry Pi (or other boards) right next to your printer so that it can tether to the machine’s mainboard.
While OctoPrint is free, keep in mind that you’ll need to buy the board and, to monitor the prints, a camera and camera mount, which we’ll go over further below.
- What it improves: Adds remote printer control with camera monitoring and other features
- Who made it: Gina Häußge
- Cost: $50-$300 (depending on Raspberry Pi and camera model)
- Where to find it: OctoPrint
Enclosure
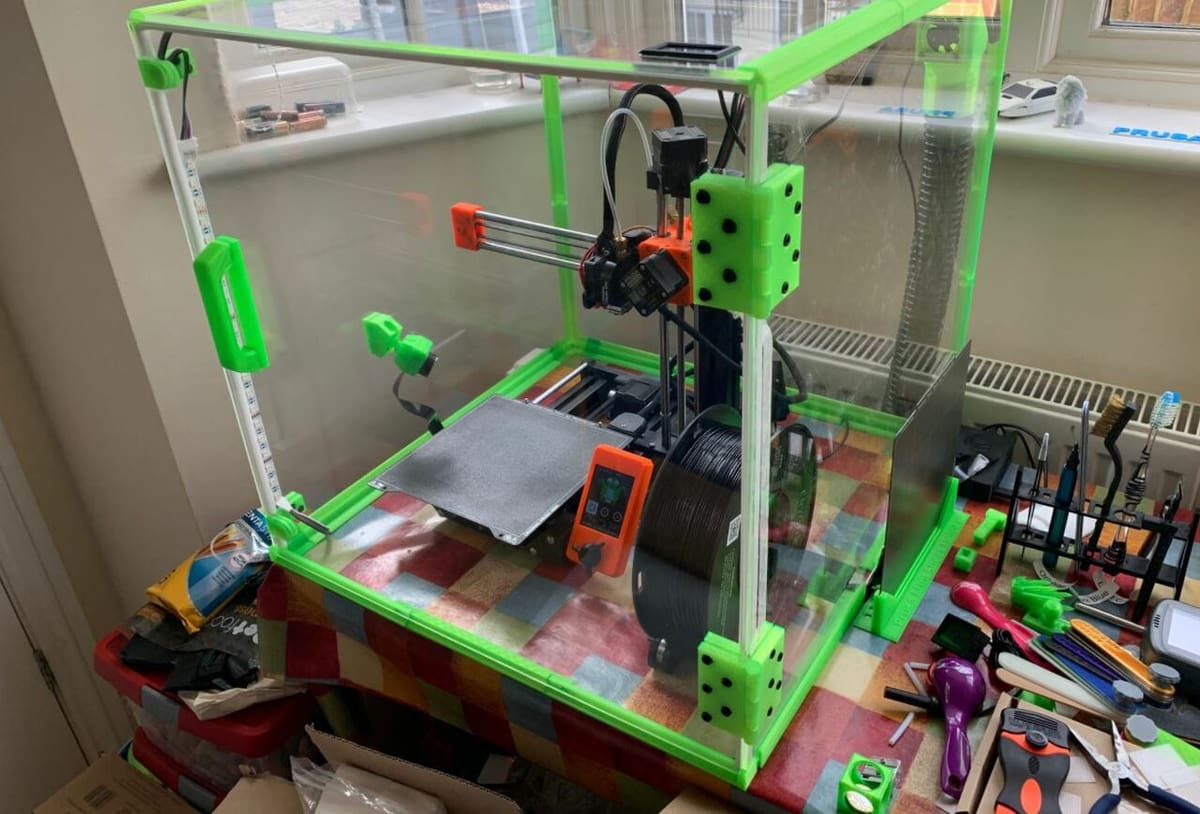
While the Mini and Mini+ are great 3D printers, they aren’t capable of properly printing heat-sensitive materials like ABS. To print this type of material, an enclosure is recommended to keep heat in and cold or drafty air out. Luckily, you can buy or DIY one for the Prusa Mini+, and many different options are available.
There are a few different enclosure options, both to buy and DIY, and because the Mini+ is, well, not that large, enclosures meant for bigger printers can also work. Of course, the larger the enclosure, the less effective it is at keeping cold air and drafts out, so it’s ideal to have one that closely fits the perimeter of your printer.
3D printing or DIYing an enclosure for your Mini+ allows you to customize and lower the cost of the upgrade, as you can 3D print some components on your Prusa Mini (or other printers, depending on the requirements). But if you want to avoid the hassle, there are options that will fit your needs, straight out of the box.
- What it improves: Allows you to print heat-sensitive materials, like ABS or ASA
- Who made it: Mikolas Zuza and many others
- Cost: $0-$300
- Where to find it: Amazon (to buy); Prusa Research (to DIY)
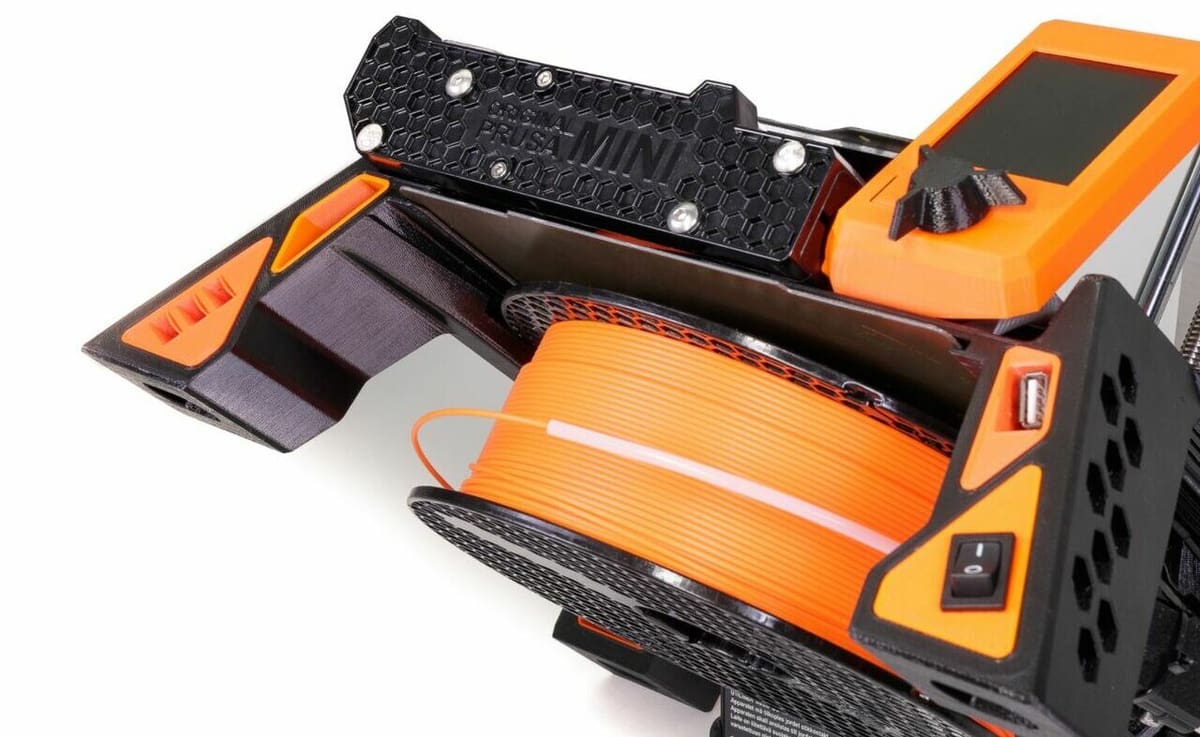
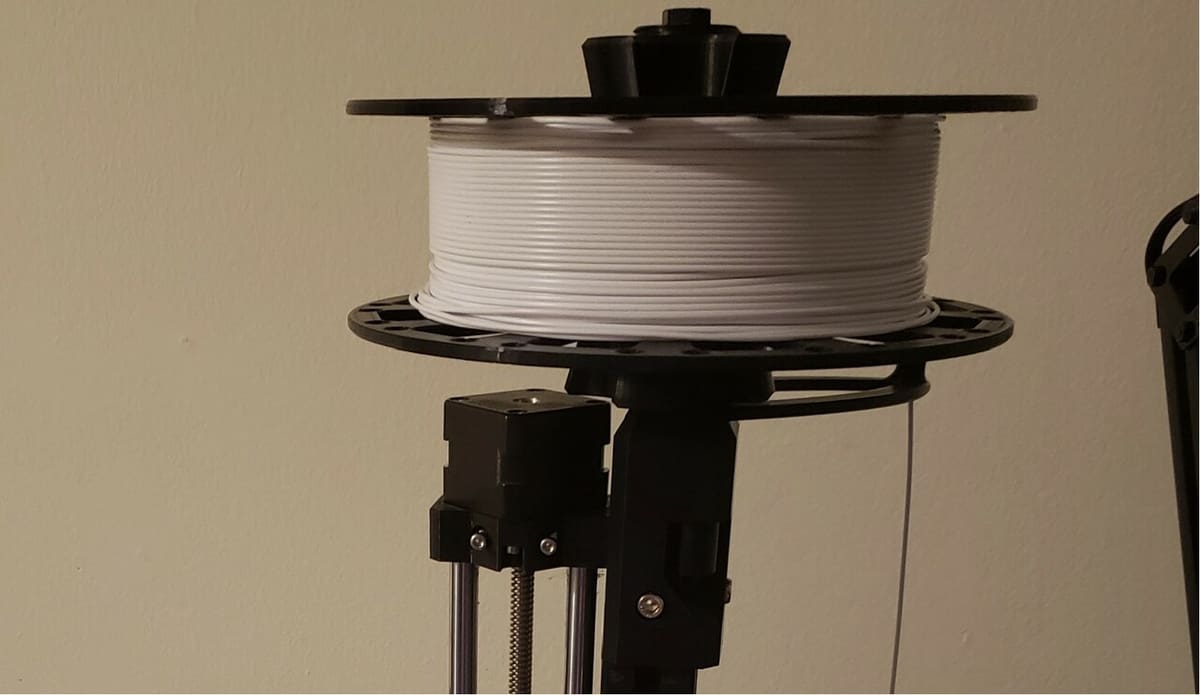
Spool Holder
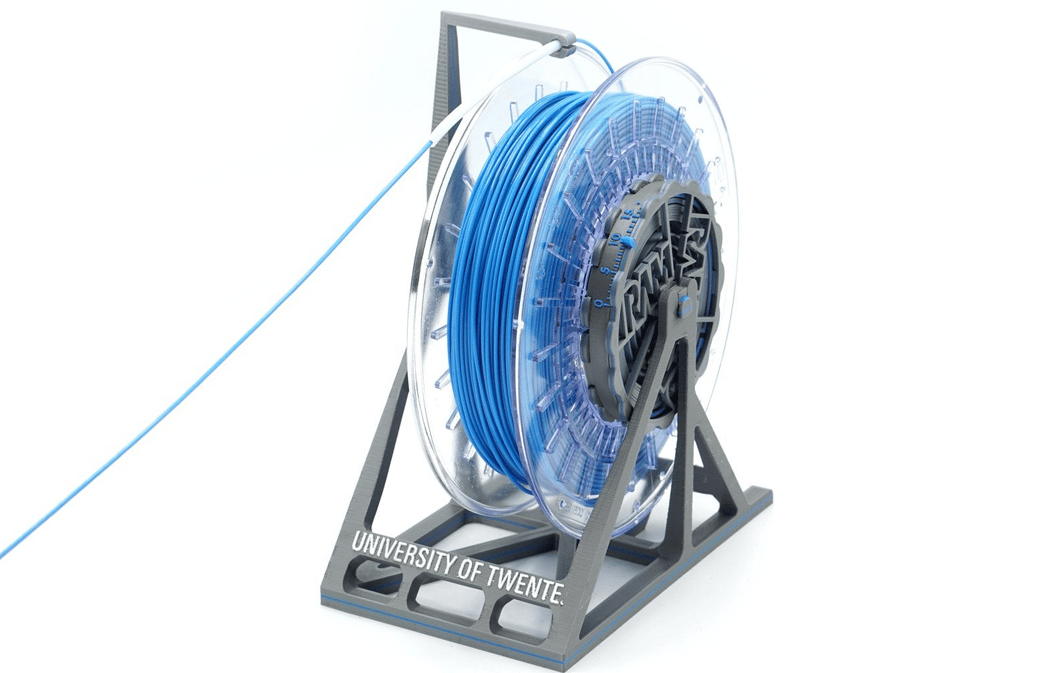
The Prusa Mini ships with a compact, adjustable external spool holder. It certainly does the job well, but it lacks any bells and whistles and requires readjustment before changing spool sizes.
If you’re looking for more mounting options, moisture protection, automatic rewinding, or other features, consider an upgrade. There are some great options out there available to buy, or there are some impressive designs you can print yourself. We give our top picks in our dedicated list, where you’ll find solutions ranging from elegantly simple to appropriately sophisticated.
- What it improves: Replaces the spool holder with a better one
- Who made it: VincentGroenhuis and many others
- Cost: $0-$70
- Where to find it: Amazon (to buy); Thingiverse (to print)
Overhead Printer Lights
Late nights fixing your 3D printer are an experience all 3D printing enthusiasts will face at one point, even owners of a machine as high-quality as the Prusa Mini+. An overhead printer light helps illuminate the Mini’s build space and all the machine’s nooks and crannies so that you can find lost components. This upgrade will also let you (or a camera) see your printer better when it’s at work.
There are many ways you can attach an overhead light to your Prusa Mini+, but most involve a 3D printed attachment, as the Prusa Mini doesn’t have a top X-axis gantry. Prints like a light mount allow you to affix a cabinet light or string of LEDs through adhesive pads or screws.
- What it improves: Illuminates the build area of the printer
- Who made it: Zelrick
- Cost: ~$20
- Where to find it: Amazon, Printables (mount)
To Print
Next, we have some upgrades along the DIY lines that involve printing your own mods. However, some will still require purchased parts, like nuts and bolts.
Official Prusa Mini Base
Despite having a small frame, the Prusa Mini and Mini+ require a fair amount of additional space for the power cable PSU, filament spool (and spool holder), and storing extra components. So, users at Prusa developed the Prusa Mini Base. This upgrade is meant to reduce the Mini’s X/Y footprint by using four legs to lift the machine, moving some of the printer’s additional features into this new under-space. Additionally, this printer base keeps the Mini’s anti-vibration pads (at the bottom of the legs) to help prevent ringing.
The filament spool goes under the machine, and, using a PTFE tube, filament is routed to the printer’s Bowden extruder. The PSU box on the power cable is moved to the back of the printer, and the mainboard’s USB port and the power switch are placed on one of the legs. There are also many other storage features, such as a tool drawer and a slot for an extra build plate.
The Prusa Mini Base uses almost 30 different 3D printable parts, totaling just over 700 g of filament. Some other hardware and electronic components (e.g. wire extensions, screws) are also required. Still, the upgrade shouldn’t be too hard to build, given the detailed assembly instructions.
- What it improves: Reduces the X/Y area of the Mini and adds more storage spots
- Who made it: DavidWarboss
- Where to find it: Printables
Webcam Mount
While we’ve already discussed a remote monitoring upgrade for the Prusa Mini+, you’ll want a good mount to go along with your camera. Luckily, you can find many different webcam mounts specifically for the Mini+ on repositories like Thingiverse and Printables (all free).
You should choose what mount you use based on a few factors, such as compatible cameras, viewing angle, adjustability, and printability. A few great options include this articulated corner mount, this X-axis gantry mount, and this stationary front-side mount. Besides the 3D printed components, all you’ll need are a few screws or bolts, and you’re good to go!
- What it improves: Allows you to remotely monitor your 3D printer and create timelapses, photos, and videos
- Who made it: N/A (varies)
- Where to find it: Thingiverse, Printables
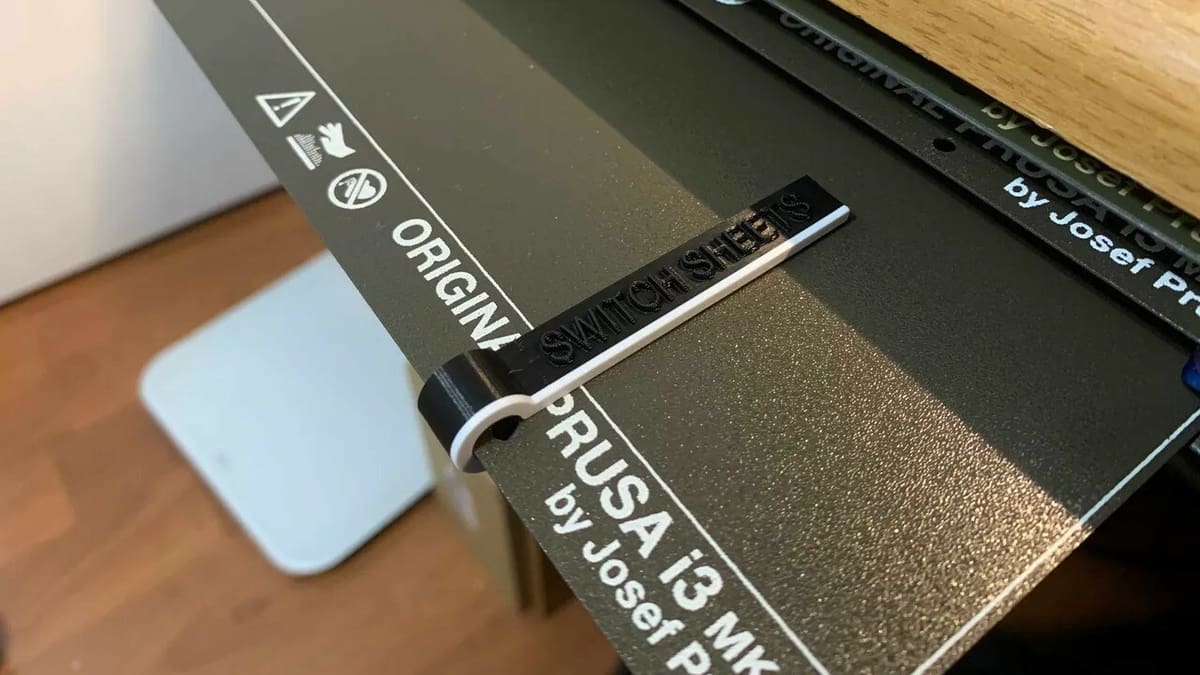
Heated Bed Thumb Tabs
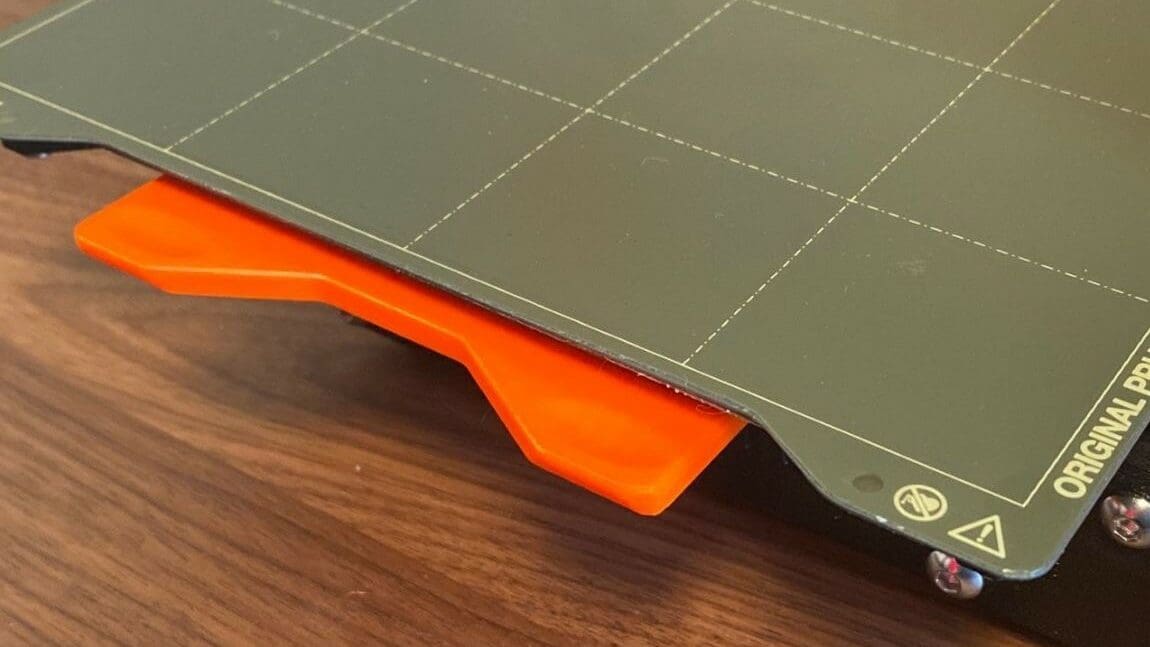
Sometimes, trying to remove the Mini’s magnetic build plate ends up moving the entire printer. This is due to there being nothing on the bed carriage to hold onto or push off of while you remove the plate.
These heated bed thumb tabs attach to the Y-carriage and provide this missing leverage point, which results in a more effortless bed removal process. Just note that the tabs will be in contact with the heated bed, so make sure that they’re printed in something that can endure the high temperatures.
- What it improves: Makes build plate removal easier
- Who made it: KevinBarker
- Where to find it: Printables
Power Adapter Holder
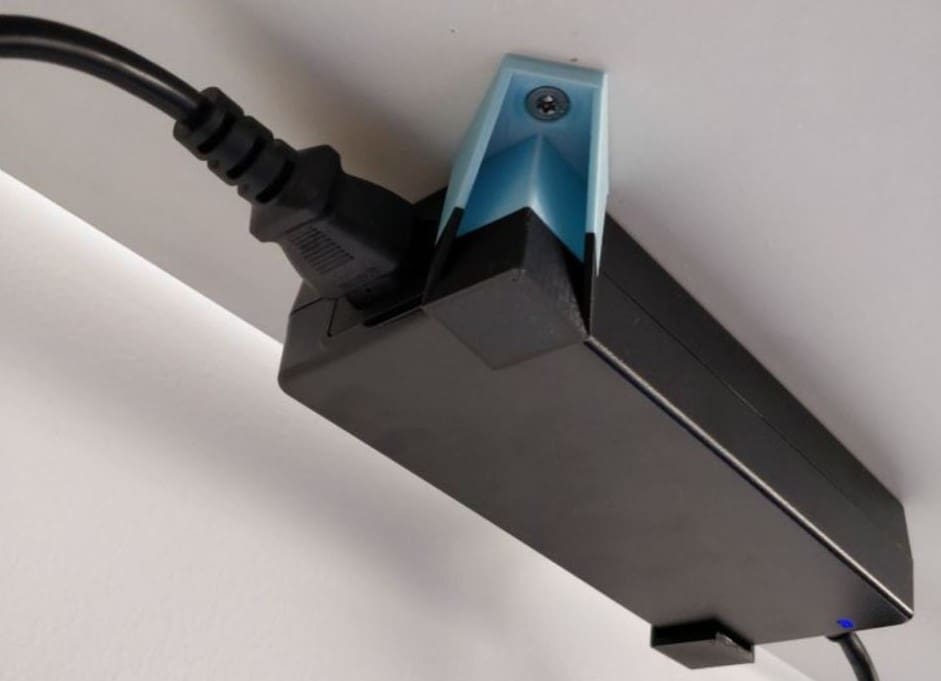
The Prusa Mini ships with a large external power adapter, as pictured above. While this takes power safely out of the equation, it does mean that you have a large, black brick sitting on the table.
This power adapter holder secures the adapter to any place of your choosing, be it on the wall or tucked away under a table (above). Printing is quick due to the simple design, and installation only requires as few as two countersunk M4 screws.
- What it improves: Secures the power supply out of the way
- Who made it: SkovKnudsenInventions
- Where to find it: Printables
Cable Chain
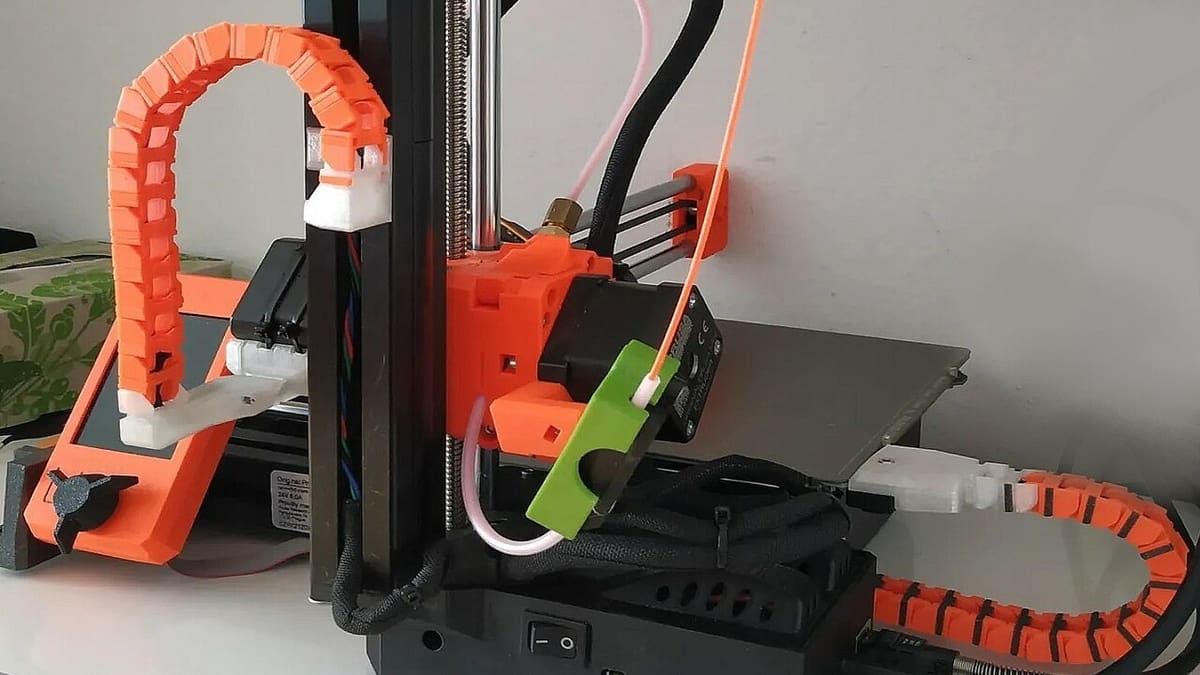
These 3D printed cable chains are for your Prusa Mini and Mini+ printer’s X-axis and heated bed, and they’re great for improving cable management and extending cable life.
The chain keeps the end connections stationary during movement, allowing the wire to bend with a minimum bend radius (bending more than this can cause wear and tear to the cable). Additionally, these chains keep the cables away from all the moving parts, avoiding any cable-related mishaps.
The designer recommends printing the chain with PLA or PETG at 15% infill and a 0.2-mm layer height. Following printing, the assembly will require a few nuts, bolts, and zip ties.
If you’re planning to use this chain with your Mini+, you should know that there might be some drilling required in the electronics case for a better fit of the 3D printed heated bed mount.
- What it improves: Tidies cable management
- Who made it: Subtle3D
- Where to find it: Printables
Squash Ball Feet & Spool Holder
Reducing the vibrations your 3D printer produces is one surefire way to improve the quality of your prints (reduces ringing and ghosting), and squash ball feet can help you do this. This upgrade involves mounting squash balls to the bottom of your 3D printer to absorb any vibrations. On top of improving print quality, squash ball feet also help reduce the noise levels of your printer.
To add this upgrade to your Prusa Mini+, all you’ll need are six squash balls, four 3D prints, and a handful of screws (specified on the project page). As for printing the squash ball holders, the designer listed that they used a 0.25-mm layer height, 3+ perimeters, and a 30% infill density. While the maker of this project didn’t explicitly go over how to assemble and install the feet, you can check the comments and pictures for some help.
- What it improves: Reduces vibrations to prevent ringing and ghosting on prints; relocates the filament spool
- Who made it: erickson85
- Where to find it: Printables
Hot End Shield

Hot end burns are never fun. With a hot end shield, you can cover up the hot parts of your Prusa Mini to prevent accidental bumps and burns. Simply print them out of a material capable of withstanding the hot end’s radiated heat and snap them onto the extruder fan. No tools or screws are required.
The two different designs included offer differing degrees of coverage, depending on your preference.
- What it improves: Covers the hot end to prevent burns
- Who made it: Mathieu
- Where to find it: Printables
Tool Holder
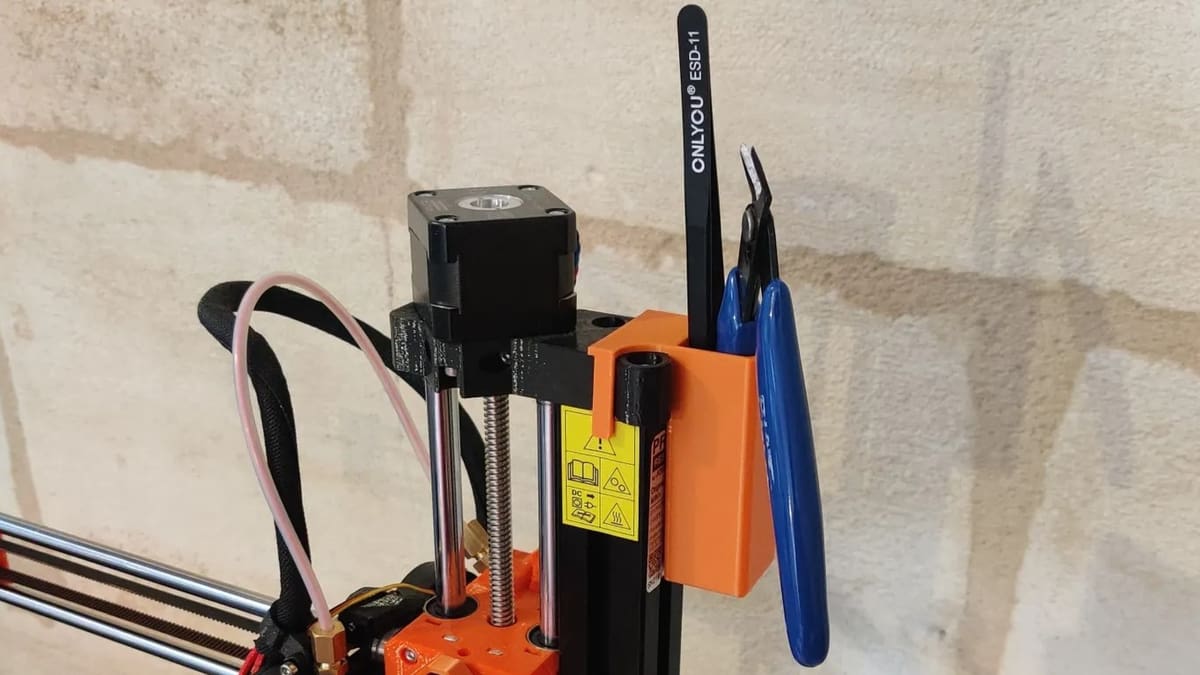
3D printing usually ends up requiring some basic tools. This compact tool holder clips onto the Prusa Mini so that the essentials are always at your fingertips, ready to be used. You’ll find enough space for flush-cutters, tweezers, and a small spatula, or any other tool selection of your choice.
The model can be printed upside down to avoid the use of any supports. Note that the Prusa Mini’s safety sticker (pictured above) must be removed for the holder to clip on.
- What it improves: Provides easy access and organization of essential tools
- Who made it: GillyBarr
- Where to find it: Printables
Top Spool Holder
While we already covered spool holder upgrades, this is another option that positions the filament spool above the printer to minimize the machine’s X/Y footprint. Of course, placing the spool on top of the printer isn’t typically the best idea because the added weight might increase vibrations during printing (which can lead to ringing). However, if you have limited space for your printer, this alternative spool holder might be a practical upgrade.
To make this spool holder, you’ll need the two 3D printable parts, a 5/16-inch bolt (and nut), as well as a few screws for mounting the assembly. Printing the parts should also be fairly easy, and the designer provided a few of the slicer settings they used, including a 0.15-mm layer height, 15% infill density, and 2 perimeters.
- What it improves: Reduces the machine’s X/Y footprint by relocating the filament spool to the top side of the printer
- Who made it: zoula
- Where to find it: Thingiverse
Fan Duct
Fans are essential to your 3D printer’s components because they allow them to operate efficiently while preventing overheating. You can add a few optional fans to increase your printer’s efficiency or functionality, including a part-cooling fan.
Whether you require one depends on a few factors, including the filament you’re using and the print setting. However, there’s no downside to having this fan duct upgrade on your Prusa Mini (unless you intend to use ABS). It might come in handy in several scenarios, such as using it to print and experiment with different materials.
Remember that if you only want to print models in PLA, printing the fan duct in PETG may suffice. When printing models other than PLA, it’s advisable to use ABS or PC.
- What it improves: 3D printed part visibility and print quality
- Who made it: OlofOgland_31
- Where to find it: Printables
Extruder Visualizer
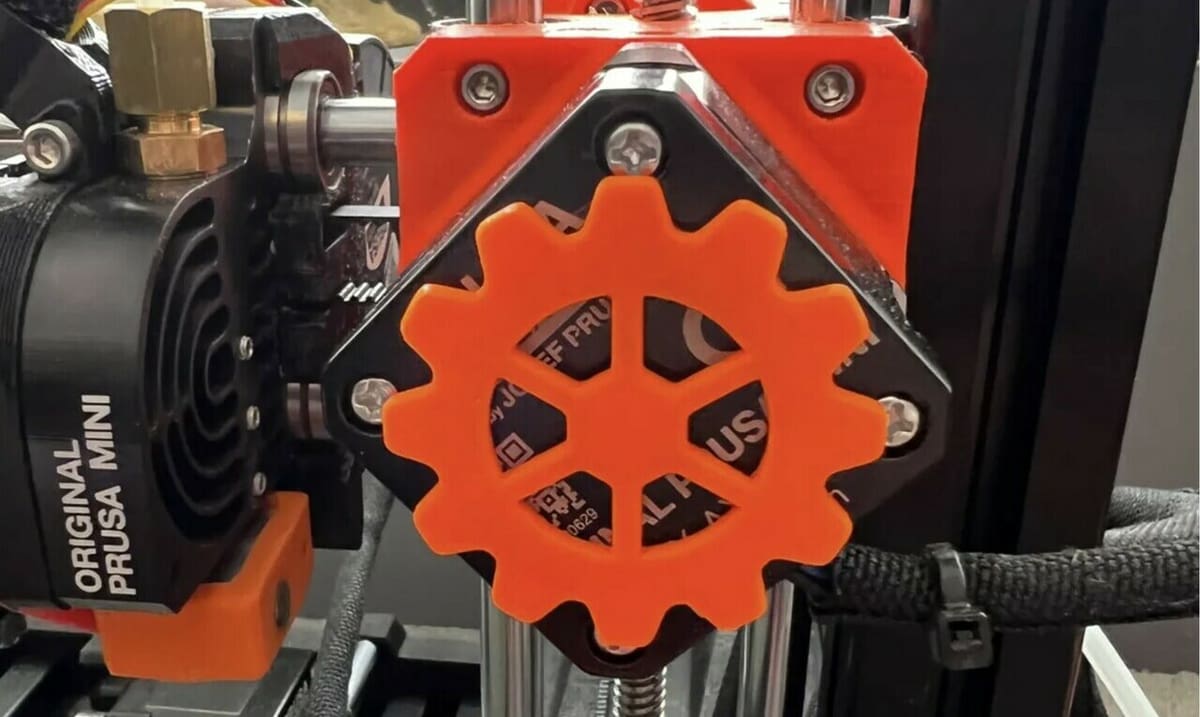
Another simple upgrade for the Prusa Mini+ is a custom extruder visualizer. For reference, an extruder visualizer is just a term for a model that spins with the extruder motor, so you always know when it’s not working.
This specific upgrade is a collection of 3D printable extruder visualizers, each with a unique design, like a skull, flower, or gear (pictured above). It’s worth noting that these visualizer models were technically designed for the Prusa i3 MK2/S and MK3, but they are also perfectly compatible with the Prusa Mini’s extruder.
To attach a visualizer model to your printer’s extruder, you’ll just need the 3D print, an 8 x 3 mm Neodymium magnet, and some super glue. Simply glue the magnet to the back of the visualizer model, let it dry, and stick it on the backside of the extruder motor. Additionally, printing the model should be very straightforward as it’s completely flat and has a relatively simple design.
- What it improves: Adds to the visual aesthetic of your 3D printer, and allows you to customize your printer’s look
- Who made it: Cube3DWorld
- Where to find it: Printables
Z-Axis Brace
This is a support brace that strengthens the Prusa Mini’s vertical axis by making a sturdy connection between the aluminum extrusion of the Z-axis to that of the Y carriage.
The connection and improved printer stability significantly improve print quality. To put this to the test, a maker printed a Z wobble test tube after installing this brace, and the before and after results are clearly visible in the side-by-side comparison image.
- What it improves: Provides more stability to Z-axis
- Who made it: Victor
- Where to find it: Printables
Storage Boxes
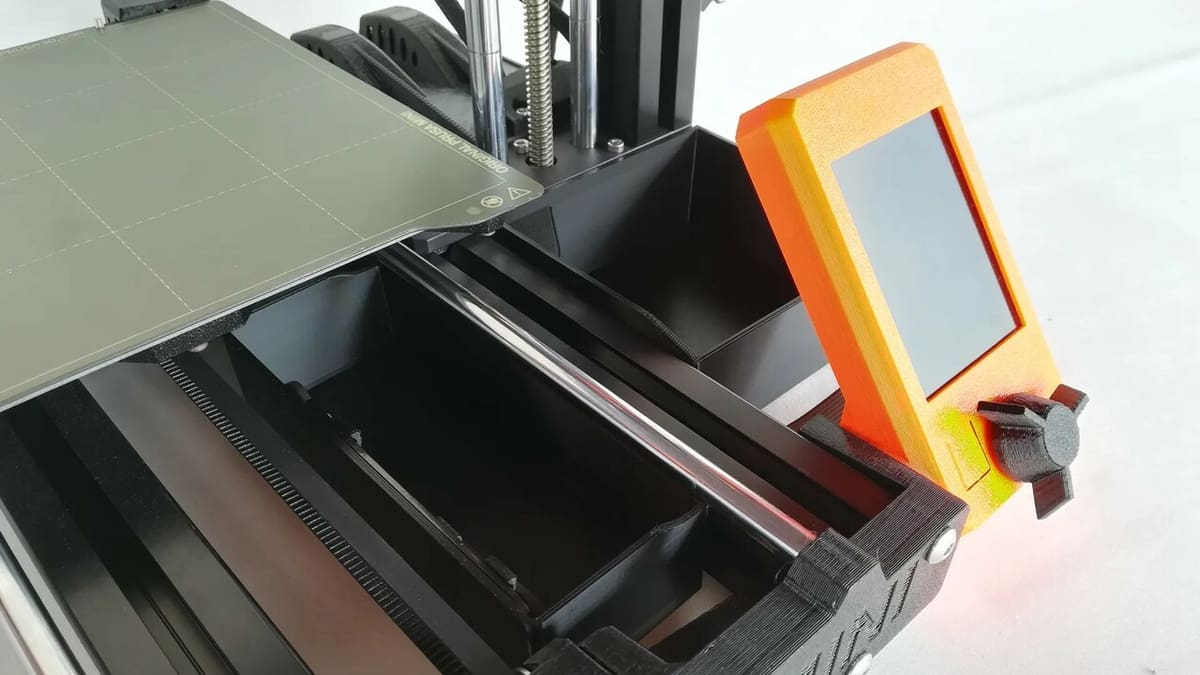
While this mod won’t affect prints themselves, it will make the overall experience easier (or at least more organized). It’s a convenient set of storage boxes to store all your Prusa Mini’s tools and accessories. One goes under the heated bed and the other sits behind the display, easily clipping onto the aluminum extrusion.
You can only access the one under the bed when nothing is being printed, so it’s better to store things you won’t need often (spare parts and rarely used tools, for example). Although the other box is easily accessible, it has a relatively smaller storage space.
The maker suggests printing the boxes using a 0.2-mm layer height with 20% infill and two perimeters.
- What it improves: Multiple storage options for tools and accessories
- Who made it: MOCmaniac
- Where to find it: Printables
LCD Back Cover
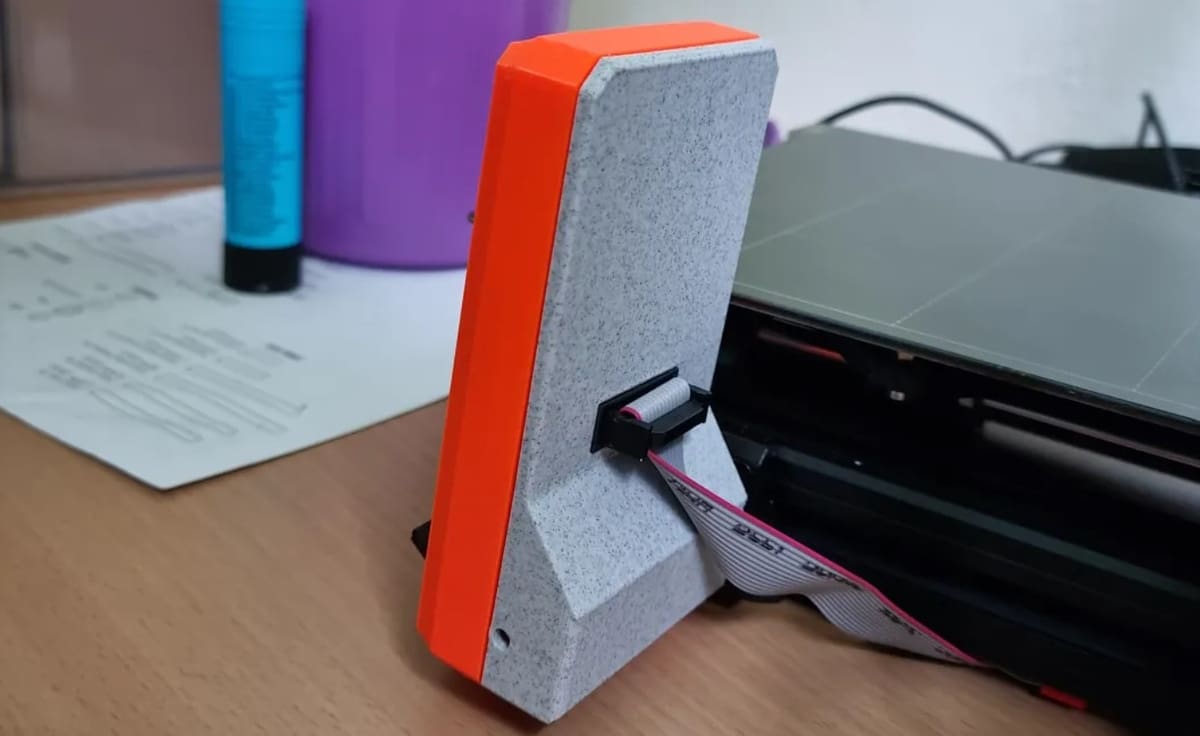
The Prusa Mini ships with an LCD screen that’s nice and large, but the execution seems incomplete: The back is uncovered. Aside from appearing unpolished, this means that the electronics are exposed to the elements, which is a potential hazard.
A printed back cover is a simple fix that keeps the LCD protected against dust, debris, and accidental splashes. As an added bonus, it should also improve the ergonomics for those who hold the screen while scrolling. The designer also includes STEP files should you want to modify the design.
- What it improves: Covers up and protects the exposed back of the LCD screen
- Who made it: Somnium
- Where to find it: Printables
LCD Cable Clip
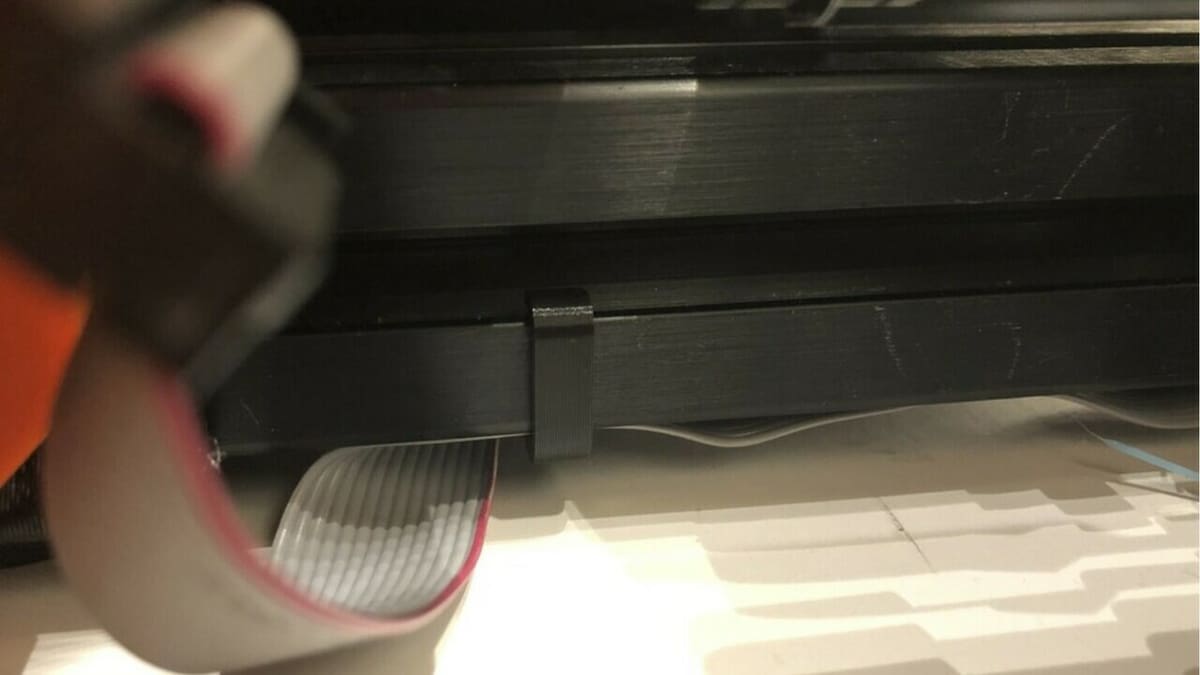
One of the more simple upgrades you can make to your Prusa Mini+ is this 3D printable LCD cable clip. The clip holds back the LCD ribbon cable and tucks it closer to the machine’s frame so your printer doesn’t look messy and in disarray. And, the best part is that this upgrade consists of just a singular 3D printed part, which doesn’t require supports or any special slicer settings.
- What it improves: Keeps the LCD cable out of the way and makes the printer look cleaner
- Who made it: A-make-designs
- Where to find it: Thingiverse
Plotter
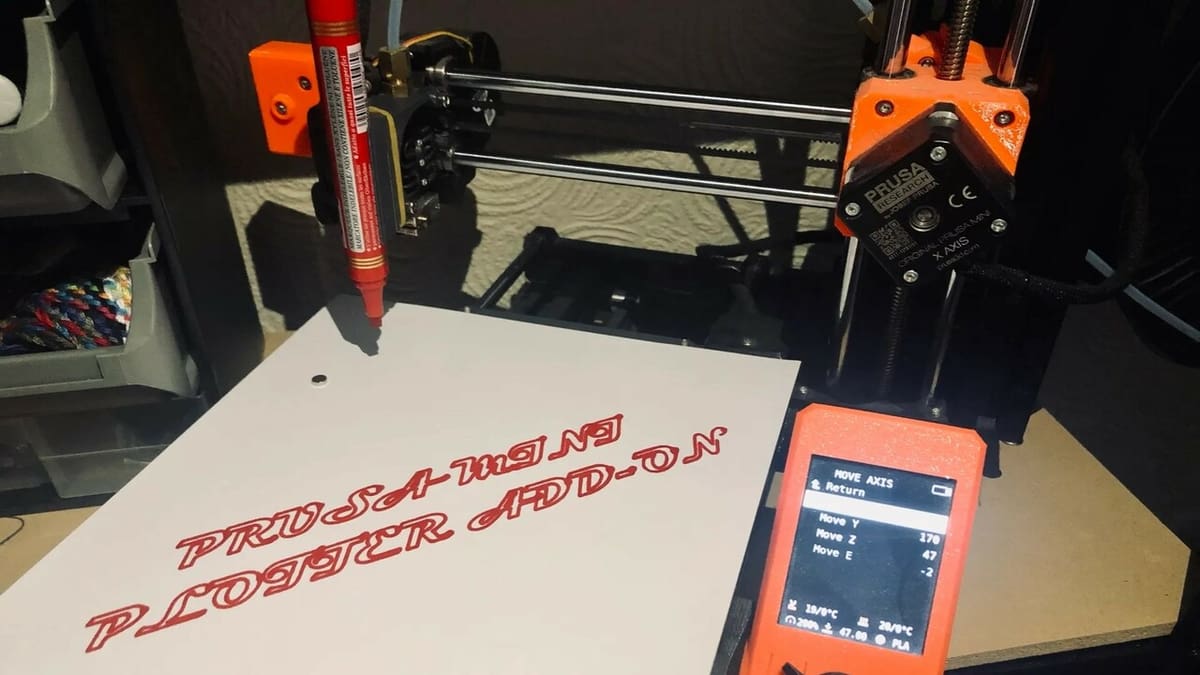
This is a mod that allows you to use your Prusa Mini as a plotter by attaching a pen. You can use any marker or writing instrument as long as the 3D model is modified accordingly to meet the size requirements.
To fix the plotter’s 3D printed parts to your machine, you’ll need a few M3 screws, a rubber band, and a few magnets (to secure a paper on the steel bed). Once you’ve attached your add-on and the paper is in place, use Inkscape to produce G-code for the plotter and let your Mini do all the writing and drawing!
- What it improves: Temporarily use your printer as a 2D plotter
- Who made it: itsaMeWolf
- Where to find it: Printables
Carrying Handle
The Prusa Mini and Mini+ are pretty small and lightweight printers. You can use this handle attachment to take advantage of the Mini’s portability. If you’re worried about the integrity of the handle, rest assured because the maker states that this handle successfully worked (when printed with certain settings) with a load of 75 kg – much heavier than the Mini.
This handle design has two accessible screw holes that you can use to attach the upgrade to the printer’s side (Z-axis gantry). According to the designer, you can use two M5x12 mm button head bolts and two M5 3030 T-slot nuts.
The creator of this design listed that a 30% infill density was used with supports activated, most likely to handle the overhangs caused by the screw holes.
- What it improves: Makes the Mini more portable and movable
- Who made it: MattStultz
- Where to find it: Printables
License: The text of "The Best Prusa Mini/Mini+ Upgrades & Mods" by All3DP is licensed under a Creative Commons Attribution 4.0 International License.
CERTAIN CONTENT THAT APPEARS ON THIS SITE COMES FROM AMAZON. THIS CONTENT IS PROVIDED ‘AS IS’ AND IS SUBJECT TO CHANGE OR REMOVAL AT ANY TIME.