
Prusa MK4: Input Shaping – All You Need to Know

On the Prusa MK4, input shaping is possible – but not everyone is happy about it. Read on to learn more about Prusa's implementation.
Quick printing is all the rage these days, and the Prusa MK4 is no exception to this craze. But to print fast and retain good quality, advanced methods have been developed to keep the best of both worlds.
Input shaping is one of these technologies. With it, users can say goodbye to the typical drop in quality that comes with faster printing. In this article, we’ll cover what input shaping is and why you might want to use it on your own prints. We’ll also tell you about Prusa Research’s implementation of input shaping on the MK4 and how to use it.
Let’s dive in!
Input Shaping 101
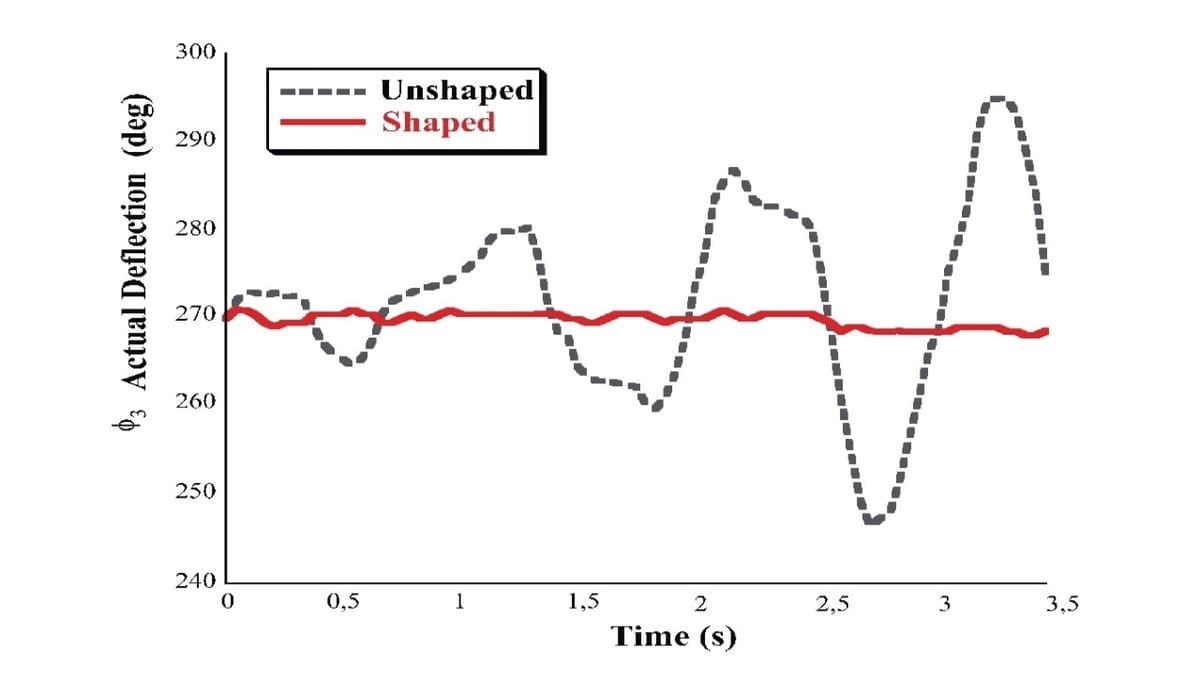
Simply put, input shaping is the process of reducing or “canceling out” unwanted resonant vibrations in a printer’s frame and motion system. These vibrations occur due to rapid movements and quick accelerations while printing at high speeds.
Input shaping aims to reduce and remove these resonances by utilizing complex mathematical models to slightly alter the movements of the printer, compensating for vibrations. To achieve this, the printer’s firmware requires the resonant frequencies to be tuned.
There are a couple of ways to go about this tuning. The tuning can be done automatically with the aid of an accelerometer or manually via a simple test print and measurements.
After everything has been tuned and the input shaper is up and running, it bolsters print quality when printing at rapid speeds. Common artifacts such as ghosting and ringing can be reduced or even completely eliminated.
Prusa's Implementation
But how did Prusa implement input shaping on the MK4?
The MK4 has a pre-calibrated input shaper, which means that no tuning is done by the user. However, this lack of tuning has come with a bit of controversy.
Instead of including an accelerometer to actively measure and compensate for the aforementioned resonant frequencies, Prusa has performed these measurements ahead of time, then pre-loaded the frequencies in their print profiles.
If you’re going for the assembled version of the MK4, the preconfigured input shaper is likely to work just fine. Your printer will not vary much from the factory conditions where the testing and tuning took place. Moreover, it has also been argued that, thanks to shorter belts and simpler routing, the design of the printer decreases the need for custom input shaping configuration.
As many users have pointed out, though, problems are likely to arise if you’re assembling the printer yourself or making substantial modifications to it. Even the physical location of the printer can introduce variations that may disturb the preconfigured input shaping frequencies.
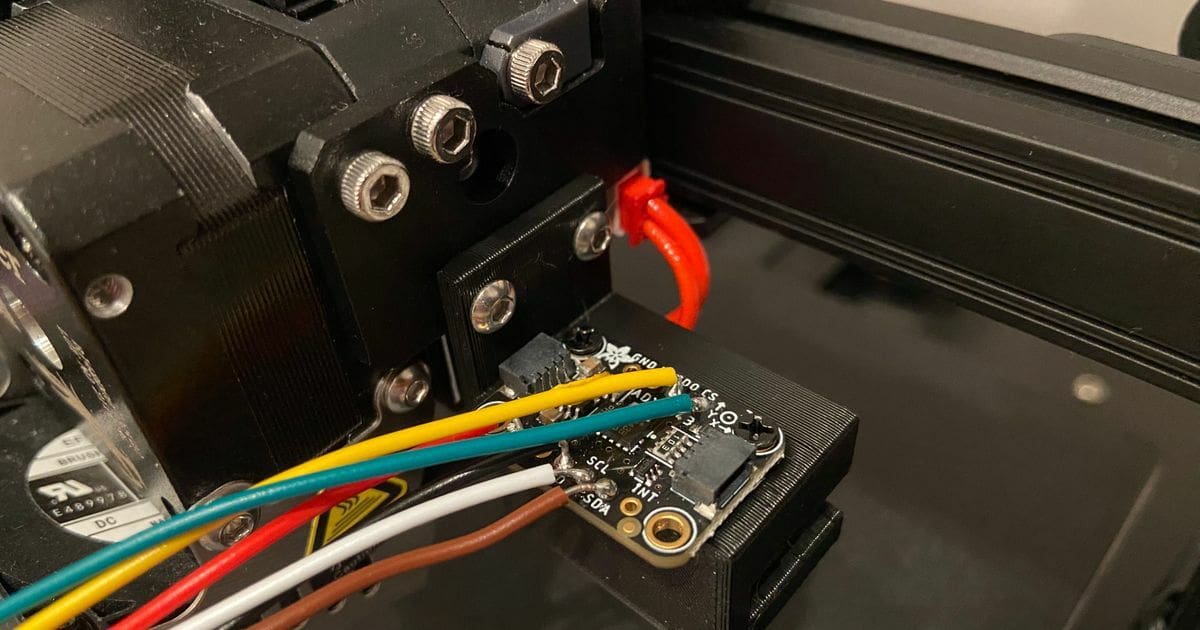
For these reasons, some in the community have taken the initiative and developed projects to add accelerometers to their MK4s. There’s even an accelerometer mount design available at Printables. Judging from this GitHub, quite of bit of tinkering is required to get everything up and running – at your own risk. And after all of that, there may be some compatibility issues.
Use
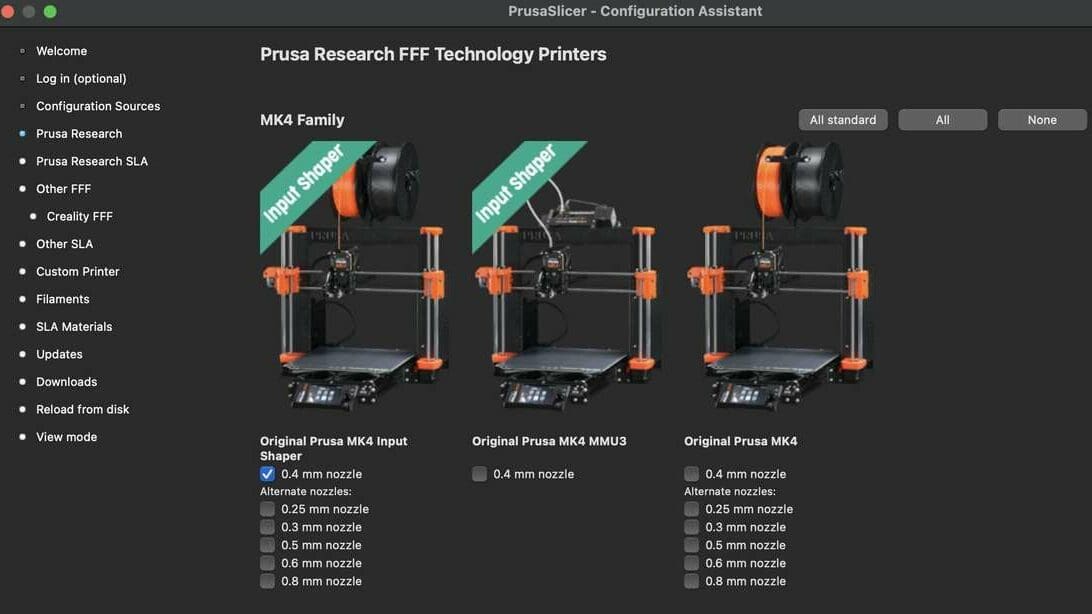
Using the MK4’s preconfigured input shaping capabilities on your prints is as simple as selecting a new profile in PrusaSlicer. Simply select, or if necessary, add the “MK4 Input Shaper” profile, which is separate from the normal profile.
This profile adds some G-code before each print to set input shaping parameters, as well as provides a bump in speeds and accelerations. The profile includes both structural and speed presets. The former is a bit more precise with more quality but comes at the cost of slightly reduced speeds. The latter, as its name implies, completes models a bit faster with a small sacrifice in print quality.
After selecting the new printer profile, slice as normal, and your print will now use input shaping!
G-code Modifications
For those who want to tinker more with the input shaper parameters, Prusa allows users to easily modify them (just not measure them) during each print using simple G-code commands. Specifically, it uses the M593 command in Prusa’s firmware.
This command can take five parameters: a damping ratio, input shaper frequency, type of input shaper (i.e. the mathematical model that is used), vibration reduction (used on certain input shapers), and whether to limit the shaping to the X or Y-axis. The main parameters that affect the performance of the shaper are the frequency and type of input shaper.
User Experience

Users’ experience with Prusa’s input shaper has been mixed. Some users have experienced print quality problems, although many others are saying that the quality has been great, that the input shaper has never caused them problems, and that they use input shaping all the time with no issues.
In our own testing, we experienced mixed results. While we did see a reduction of artifacts on the ringing tower tests, the print quality benefits didn’t hold up when we printed Benchies and gargoyle models. Where the input shaper profile excelled for us was print time: We saw significant reductions for both the Benchy and gargoyle prints.
Print quality issues aside, the loudest trend among users is their frustration with Prusa Research’s exclusion of an accelerometer, which we discussed earlier. Many users want one to make input shaping more accurate – so much so that some of them are taking matters into their own hands.
Input Shapers Compared
Input shaping is not a feature unique to Prusa machines and can be seen all across the market. In recent years, printers with input shaping out of the box have been popping up left and right with the rise of high-speed printing.
Klipper is a very popular firmware choice for printers that need to go fast. Klipper-based machines (both home-built and commercial offerings) very commonly utilize an accelerometer or print test to calibrate their input shapers. Bambu Lab printers take a similar approach, using a built-in accelerometer that automatically calibrates input shaping. In the Bambu Lab ecosystem, the feature is called “vibration compensation”.
The obvious difference between these two approaches and Prusa Research’s is the exclusion of an accelerometer and the ability to custom tune resonant frequencies. Other than than, the available input shaping algorithms are the same,
More recently, good old Marlin has supported a lightweight implementation of input shaper that can be used on many Marlin-based printers. Like Prusa Research, Marlin opted out of the accelerometer approach, so the tuning process must be done manually.
License: The text of "Prusa MK4: Input Shaping – All You Need to Know" by All3DP is licensed under a Creative Commons Attribution 4.0 International License.