PrusaLink & Prusa Connect: What Is It & How to Use Them

PrusaLink & Prusa Connect are both powerful pieces of software that add new features to Prusa printers. Read on to learn more about them!
In the world of Prusa 3D printers, navigating the distinctions between PrusaLink and Prusa Connect can be a source of confusion. Both of these tools serve as remote management solutions, designed to facilitate the control of Prusa printers from a distance, whether you’re overseeing one printer or managing a fleet of machines.
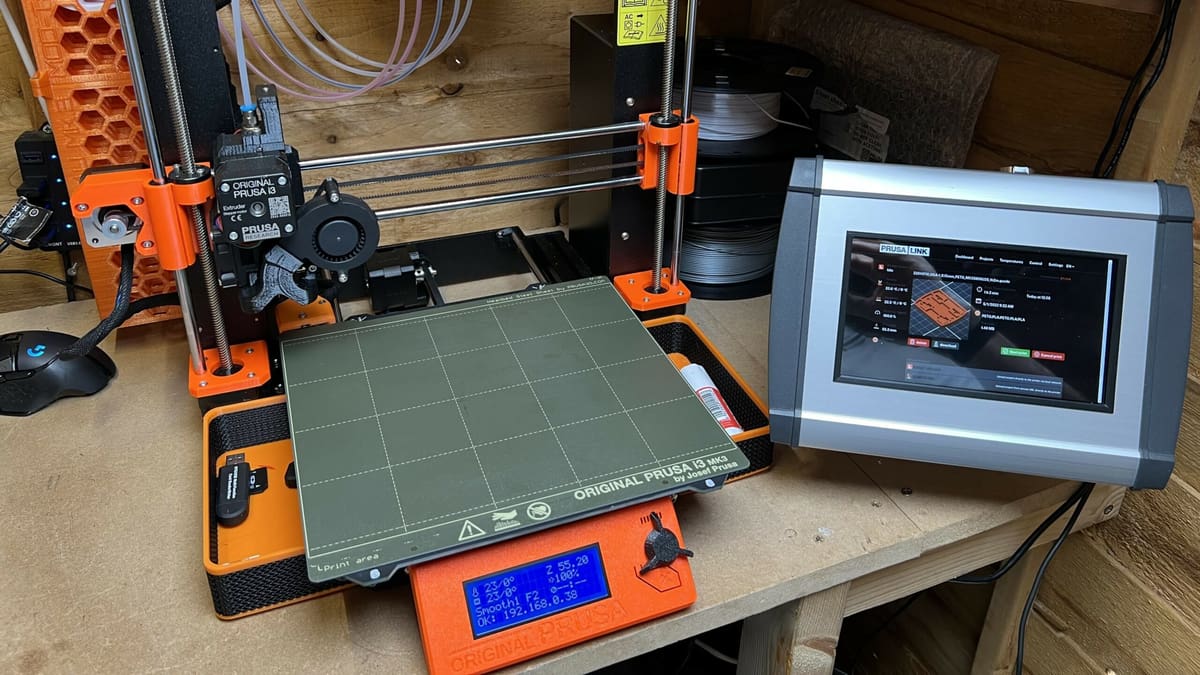
PrusaLink and Prusa Connect act as bridges between you and your Prusa printer, enabling remote control and monitoring. They streamline your 3D printing processes and enhance the overall user experience. However, they are not the same. Similar to OctoPrint, PrusaLink runs locally on your printer and is accessible from the local network. It communicates with Prusa Connect, a cloud-based service that lets you control your printer from anywhere in the world.
In this article, we’ll dive further into PrusaLink and Prusa Connect and cover how to set them up on your printer. Whether you’re a seasoned Prusa user or just starting out, we’ll help you make sense of these remote control solutions and harness their power for smoother 3D printing experiences. Let’s get started!
What is Prusa Connect?
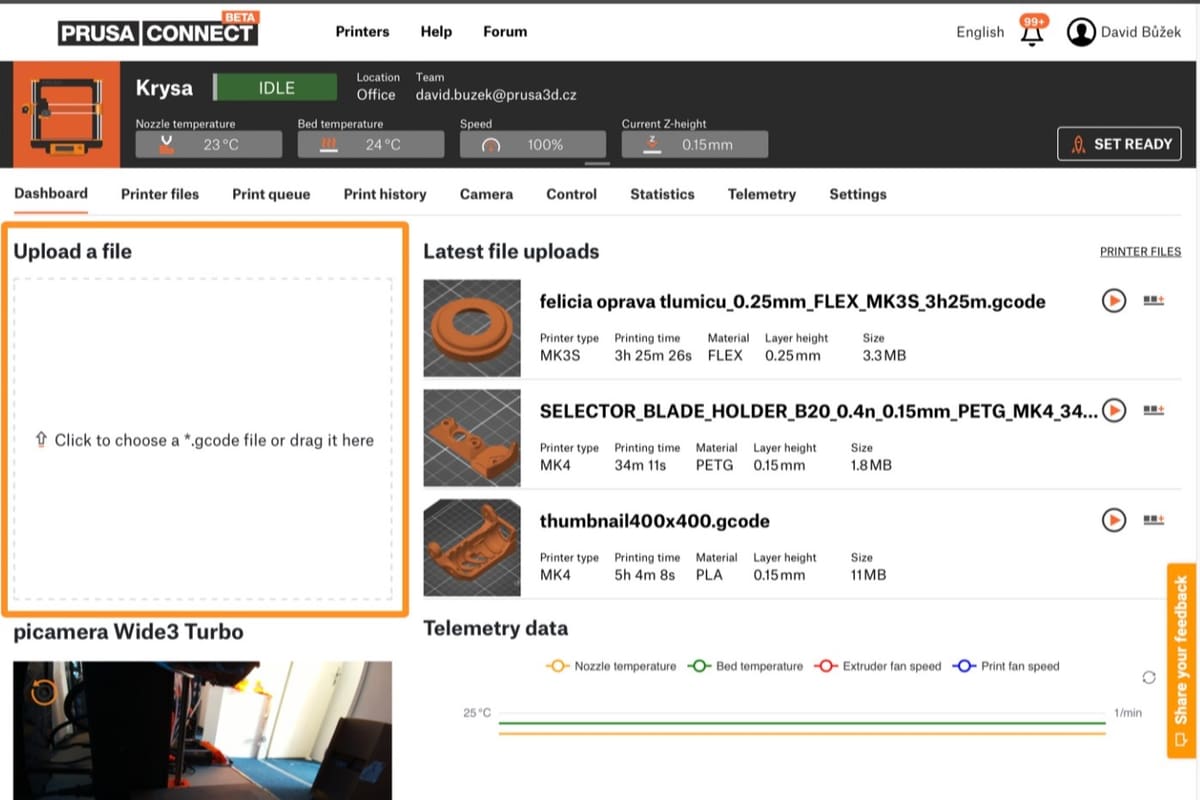
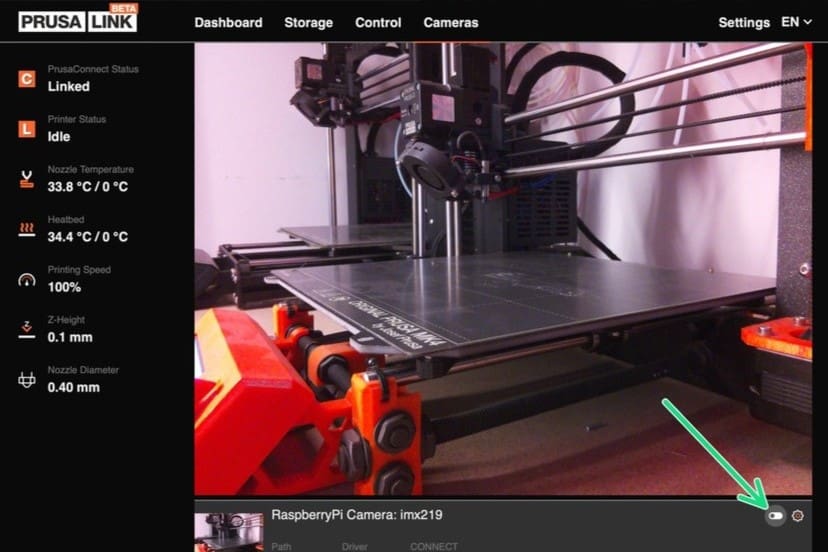
Prusa Connect is a cloud-based interface that seamlessly integrates with PrusaLink-enabled printers, providing an accessible way to remotely manage your 3D printing fleet. While it excels in overseeing multiple printers, it can also cater to the needs of a single printer. For those looking to enhance their 3D printing experience with visual monitoring, PrusaLink also offers optional camera functionality.
As of now, Prusa Connect extends support primarily to Prusa’s MK series, including the MK2.5, MK2.5S, MK3, MK3S, MK3S+, and MK4, as well as the XL, with support for the Mini and SL series currently in development. The cloud-based nature of this platform means you can connect to any PrusaLink-equipped printer from virtually anywhere in the world.
Upon installation, Prusa Connect grants you a generous 1 GB of cloud storage, ensuring ample space for your 3D printing projects. It’s important to note that Prusa Connect is still in its beta stage, leaving room for additional features and improvements in the future.
The advantages of Prusa Connect include its proficiency in monitoring and managing prints from a distance, which proves invaluable for lengthy print jobs or those overseeing a multitude of Prusa printers. However, it’s worth acknowledging that, like any technology in its early stages, it may exhibit occasional reliability issues. Users have reported instances of Prusa Connect unlinking from their printers, file transfers not going through, unstable connections, and general reliability issues.
What is PrusaLink?
PrusaLink, at its core, serves as the bridge between a Prusa printer and wireless connectivity, enabling remote control of the printer. It operates locally on a printer, similar to OctoPrint, and is accessible from a local network. It’s necessary for using Prusa Connect.
Notably, PrusaLink allows direct print uploads from PrusaSlicer, streamlining the 3D printing workflow and eliminating the need for SD card file transfers altogether. PrusaLink also hosts a web interface for accessing and controlling core printer functions, although it’s important to note that Prusa Connect boasts a more extensive set of features.
Currently, PrusaLink supports a range of Prusa printer series, including the MK, Mini, and SL series, as well as the XL variant. However, keep in mind that the MK2.5 and MK3 series require an additional Raspberry Pi to run PrusaLink, which is not required for the MK4 series. In addition, the Mini series requires purchasing a small add-on board for seamless integration, but this still comes out to be cheaper than the Raspberry Pi solution.
The benefits of using PrusaLink include its seamless workflow, integration, and the ability to access your printer from a webpage, but it’s also worth noting that some printer models require additional hardware to make use of these features. Some Reddit users are fans of Prusa Link for its speed and reliability, but note that it’s unfortunately not customizable with plug-ins.
Setup
Installing PrusaLink and Prusa Connect on your printer is a relatively straightforward process, but there are some key steps and considerations to keep in mind along the way, especially since the process depends on your specific printer model.
Before diving into the installation process, it’s crucial to ensure that your printer is running the latest firmware. Firmware updates can address compatibility issues and improve overall performance.
MK2.5 Series
- Before you get started installing PrusaLink, the first step is to make sure you have the right hardware. The hardware requirements for using PrusaLink with the MK2.5 series include:
- A Raspberry Pi 3/3+/4
- A power supply for the Pi
- MicroSD card for the Pi
- USB-A to USB-B cable (usually included with the printer for firmware updates)
- You can then download the most recent PrusaLink software image from GitHub and flash it to the SD card using the Raspberry Pi Imager. Don’t forget to configure the wireless details in the settings menu. Otherwise, you won’t be able to wirelessly access PrusaLink.
- Plug the Raspberry Pi into your printer (the port is on the top of the board in the back), turn the Pi on, and then turn the printer on.
- Ensure the RPi port in Menu > Settings > RPi port is off. This is a common mistake users make that will prevent the printer from detecting the Pi. (The RPi port setting turns on the internal port on the board for use with the Pi Zero models, not the external USB port.)
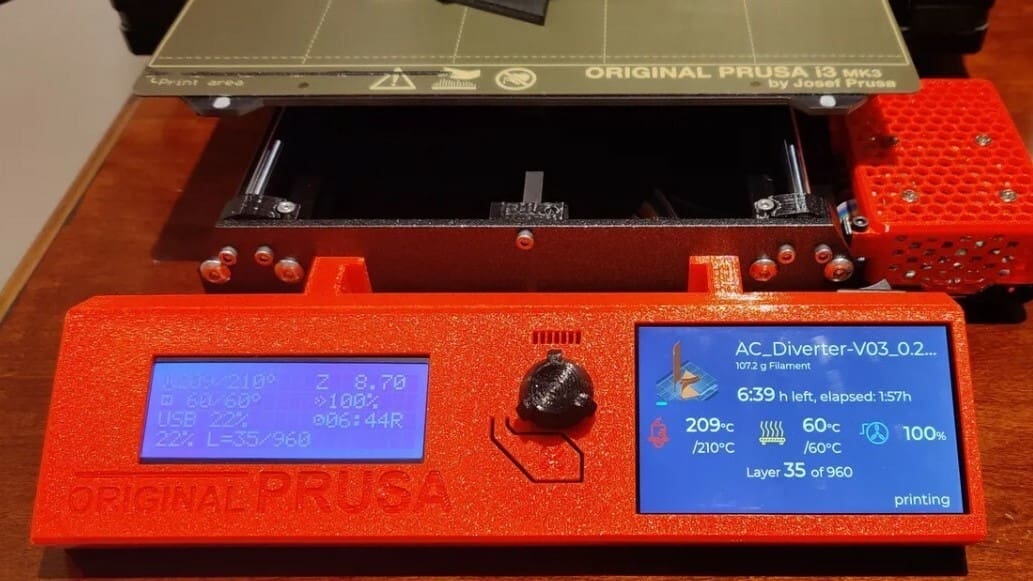
On your first power-on after installing the Pi, it will take a while. Users have reported it taking 5 to 10 minutes for everything to set itself up, so be patient! After PrusaLink boots up, you should see a series of numbers (an IP address) on the main menu of the printer. If you don’t see these, you can navigate to Menu > Support and scroll to the bottom to see the IP. You may also use the hostname you set when imaging the Pi. Enter this number into a browser connected to your network. If you see the PrusaLink wizard, you’ve successfully installed PrusaLink on your printer. Congrats!
MK3 Series
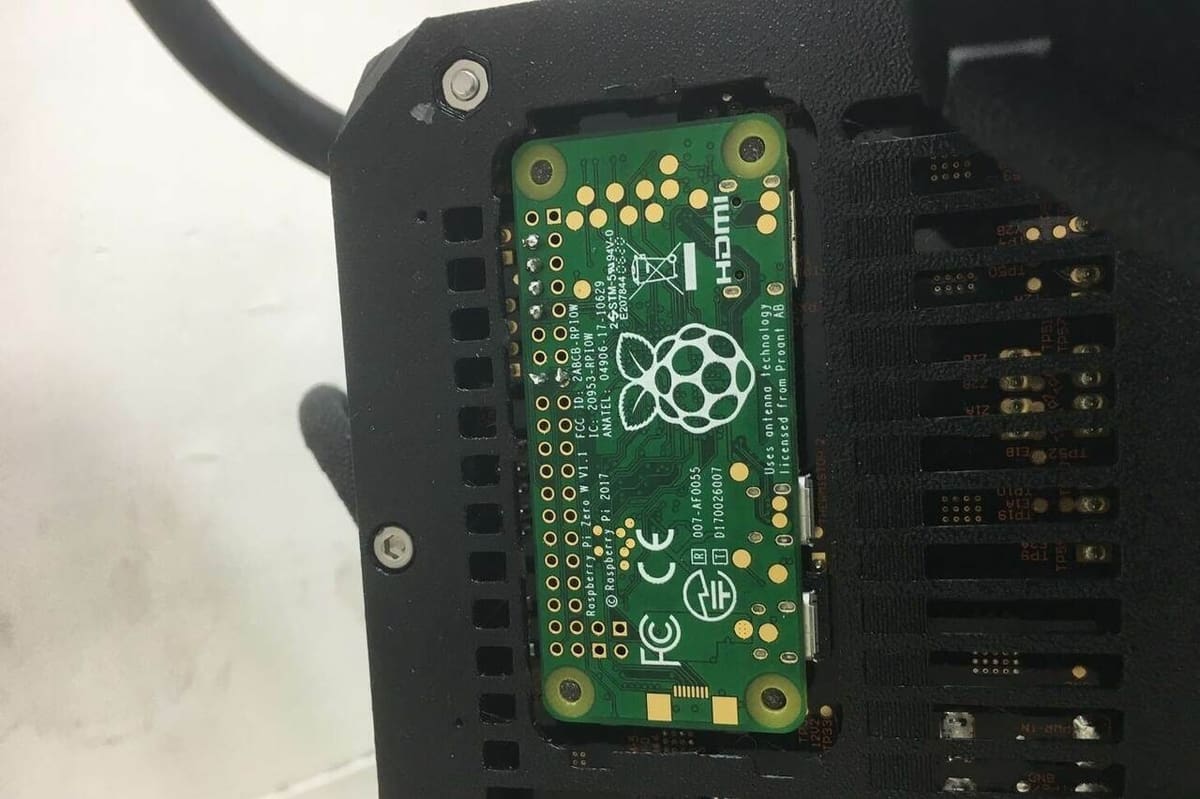
A Raspberry Pi Zero W or Zero 2 W can be integrated directly into the case if you have one handy. If not, the same process for the MK2.5 series will work just as well.
For the Zero models, ensure that you have long pins, about 18-20 mm in length, so that they can reach from the Pi to the printer’s board. You’ll also want to enable the RPi port, located in Menu > Settings > RPi port, so that the printer can communicate with the Pi. The Zero models will take quite a while on the first power-on, but after the process is complete, you’ll be able to proceed with the PrusaLink setup as normal.
MK4/XL
Wireless functionality is already built in for these printers. To finish the setup process, simply complete the following steps:
- Navigate to the Menu > Settings > Network > Default and make sure “Wi-Fi” is selected.
- Now, navigate to Settings > Network > Wi-Fi > Setup Wi-Fi module. Your printer will take things from here!
Mini Series
The Mini requires the installation of a separate wireless module onto the mainboard. After installing the module, the setup process is very similar to that of the MK4 and XL.
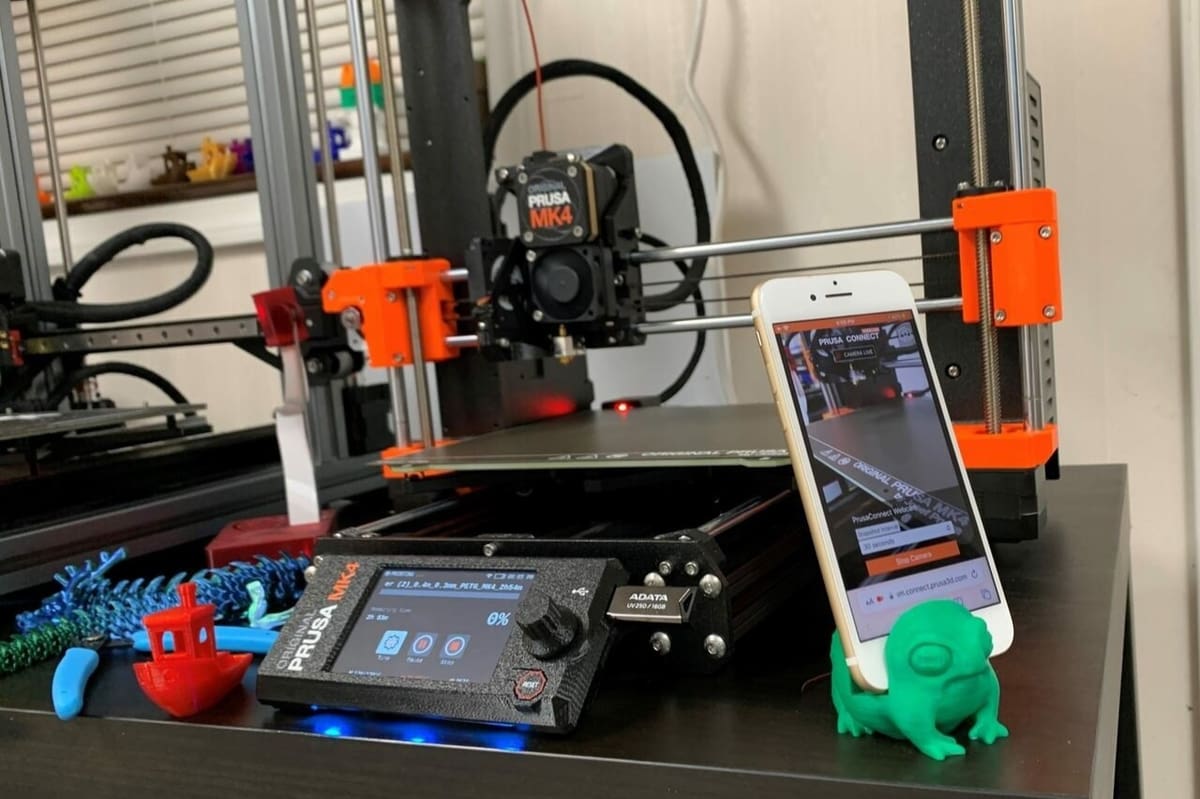
Prusa Connect
After you’ve successfully set up PrusaLink on your printer, you’ll need to add your printer to Prusa Connect. This will allow you to gain access to many more features, such as true remote monitoring from anywhere, a more detailed user interface, and print upload and storage, among other things. Here’s how you can do it:
- Log into your Prusa account, if you haven’t already. Then, navigate to Prusa Connect’s “Add printer” page.
- From there, select your printer’s model. Remember, the Mini and SL series are sadly not supported yet, but you may still use PrusaLink’s web interface on the local network.
- Follow the prompted steps to add your printer to Prusa Connect.
And that’s it! You should now successfully be up and running with PrusaLink and Prusa Connect on your 3D printer.
Alternatives
When considering alternatives to PrusaLink and Prusa Connect, the prominent contender that emerges is OctoPrint, a favored choice among 3D printing enthusiasts. OctoPrint’s robust platform makes it a compelling option for those seeking remote management capabilities.
OctoPrint distinguishes itself with a great number of customization options. It boasts a thriving community of users and developers actively contributing to its library of plug-ins, such as the extremely popular Octolapse and other useful plug-ins such as OctoEverywhere, Obico, and OctoDash. This thriving ecosystem empowers users to fine-tune their 3D printing experience to their precise specifications, offering unparalleled flexibility and adaptability.
However, Prusa Connect offers unique advantages of its own. This Prusa-crafted solution brings a streamlined approach to printer control, and it’s seamlessly designed to harmonize with Prusa printers. What sets it apart is its ability to oversee multiple printers with ease and maintain heightened security, particularly when used beyond the local network.
Prusa Connect may be the preferred option for Prusa printer users who value a streamlined and secure approach. On the other hand, OctoPrint may be better for users who prefer customization and flexibility, with its large library of plug-ins and active user base. The choice between Prusa Connect and OctoPrint ultimately hinges on your specific needs and preferences, with each offering a distinct set of features and advantages.
License: The text of "PrusaLink & Prusa Connect: What Is It & How to Use Them" by All3DP is licensed under a Creative Commons Attribution 4.0 International License.