PrusaSlicer Infill Patterns: All You Need to Know

PrusaSlicer infill patterns are some of the most diverse of any slicer. Read on to learn which one is best for you!
Infill is one of the most important settings in the 3D printing process. Depending on your use case, you can choose to make parts completely hollow, completely solid, or somewhere in between! Most commonly, infill patterns are used to fill in part – but not all – of a model. This helps strengthen the part and provides support for the top layers of a print.
The ability to vary the interior structure and strength of a part is unique to 3D printing and additive manufacturing. In contrast, injection molding involves filling a mold with material. This creates solid parts with little to no control over the internal structure pattern. Similarly, subtractive manufacturing technologies (like CNC machines) carve material away from a solid piece. Much like injection molding, the result is a part that is as solid as the original material.
However, it’s important to note that not all additive manufacturing technologies use infill patterns. For instance, SLS technologies default to printing completely solid parts (i.e. 100% infill). While these technologies may be capable of printing infill patterns, trapped powders can interfere with the final part. As such, it’s more common to print solid parts.
On the other hand, FDM technology works great with infill. Infill comes in many different patterns, each of which is better for certain applications. In this article, we’ll look at the various infill patterns offered by PrusaSlicer, one of the most popular 3D printing slicer programs on the market today. Now let’s get started!
Which Patterns Are Best?
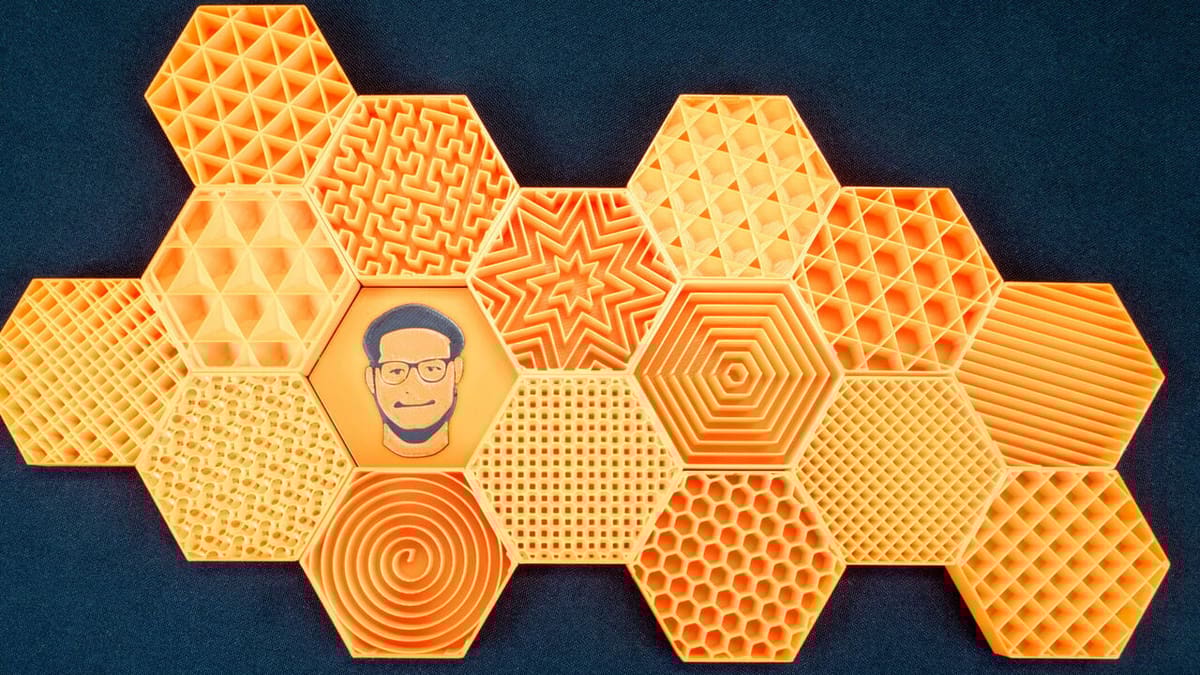
PrusaSlicer offers a variety of interesting infill patterns, each of which is better for certain applications. Some might print quickly but offer poor support, while others might be dense but inflexible. We’ve categorized each pattern as functional, decorative, or basic, depending on its application.
There are a number of factors one can use when categorizing infill patterns. These include the following:
- Print speed: How quickly can the pattern be printed?
- Density: How much filament is used to create the pattern?
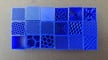
- Visuals: How does the pattern look when using transparent filament? How does it look when exposed? (If you want to add more texture to an otherwise flat top layer, leaving the infill exposed can be a great choice!)
- Support for top layers: How well will the top layer of a print be supported?
- Flexibility: How flexible will the print be with this infill pattern?
- Filling: How suitable is the pattern for filling with resins or other substances? This is especially important for parts that may be used as molds for urethane casting.
Now, let’s get to the list!
Functional Infills
These infills might not win any design awards, but each offers important benefits in strength, print speed, or density.
Cubic
Cubic infill patterns consist of paths crossing at each layer to ultimately form 3D cubes. PrusaSlicer offers three varieties: standard, adaptive, and support.
Standard Cubic
Standard cubic infill prints a uniformly distributed cube pattern with one corner facing down. Due to its excellent vertical strength and rigidity, cubic infill is one of the most popular 3D infills.
- Advantages: Standard cubic infill is strong in multiple directions. It also creates air pockets for heat insulation and floating prints.
- Disadvantages: Standard cubic infill is rigid and will not be suitable if you want flexible parts.
- Use cases: Parts that need high horizontal and vertical strength will benefit from a standard cubic infill. This pattern will also benefit parts that provide heat insulation or require the ability to float.
Adaptive Cubic
Adaptive cubic infill varies the frequency of the lines depending on how close they are to the sides of the model. The closer they are to the edges, the denser the infill pattern (and vice versa). This means that the pattern has excellent horizontal strength but isn’t uniform across the entire section.
- Advantages: Adaptive cubic infill strengthens the walls of the model while conserving filament. It also prints faster than the standard cubic pattern.
- Disadvantages: The total strength of the part may not be as high when using an adaptive cubic infill.
- Use cases: Adaptive cubic infill works best for big prints with a greater internal volume and stresses on the perimeters.
Support Cubic
Support cubic infill varies the density of the pattern depending on how close it is to the top of the model. The closer the print is to the top, the more frequent the lines will be. Because of its sparse nature, support cubic is excellent in both the time it saves and the material it uses. It also provides great vertical strength.
- Advantages: Support cubic has the lowest material consumption and print time of all the functional infills. It also provides excellent support for the top layer of the model.
- Disadvantages: Support cubic infill will have lower strength overall, especially near the bottom of the model and in the horizontal direction.
- Use cases: Parts that don’t have high strength needs, need to conserve material, or need to be printed quickly will benefit from support cubic infill.
Gyroid
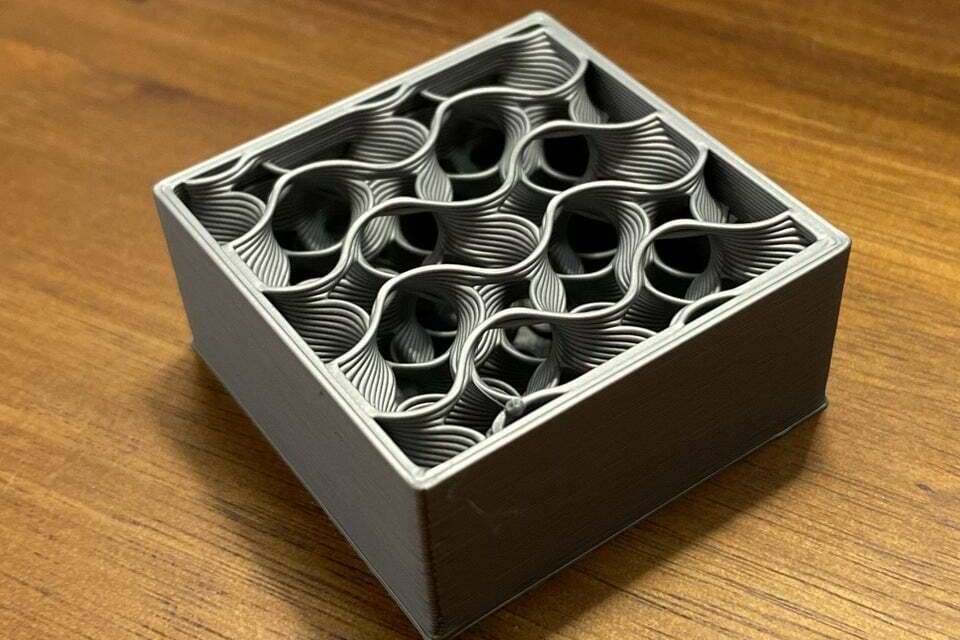
Gyroid infill is a wavy pattern modeling the shape of a gyroid. It has an excellent strength-to-weight ratio, one of the fastest printing speeds, and perhaps for these reasons, is the default setting in many Prusa printing profiles.
- Advantages: Gyroid infill provides equal strength in all directions, prints quickly, has a high strength-to-weight ratio, and can be reinforced by filling it with liquids or other substances!
- Disadvantages: Gyroid infill isn’t as strong as other infill patterns. Due to its asymmetrical shape, it’s also less rigid than other patterns.
- Use cases: Gyroid infill is a good go-to for functional parts, balancing high strength, material conservation, and print speed.
Honeycomb
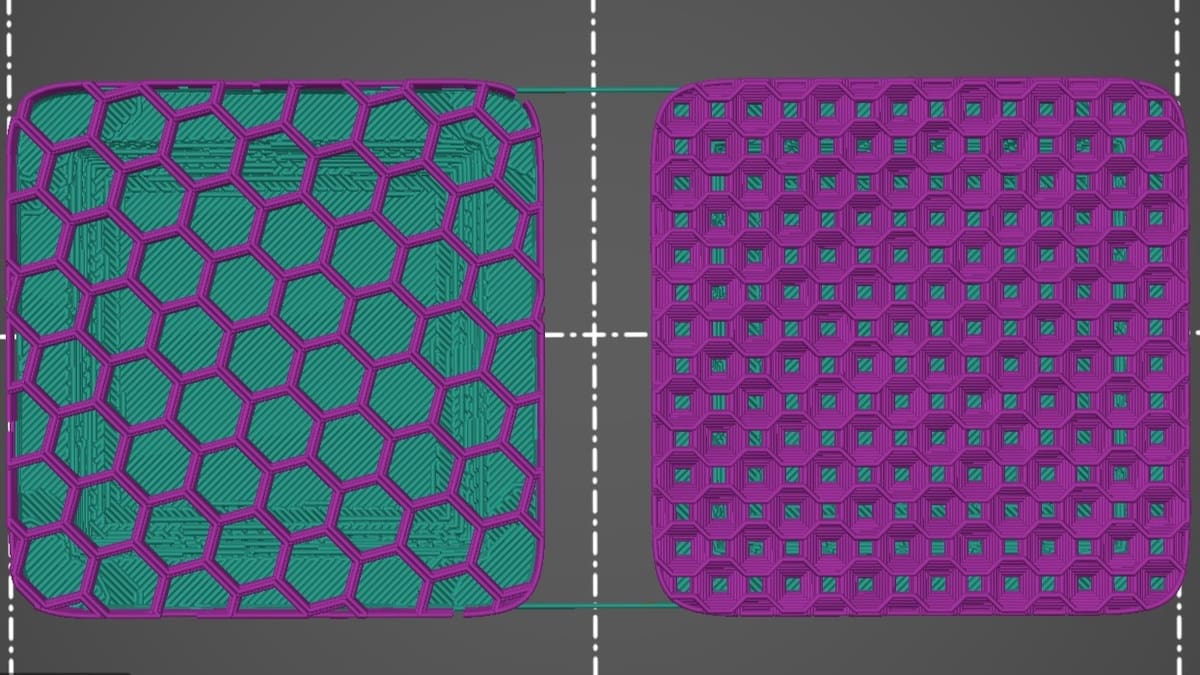
The honeycomb infill pattern creates a grid of hexagons within the model. As one of the first infill patterns, honeycomb remains very popular in 3D printing today. PrusaSlicer offers two varieties: standard and 3D.
Standard Honeycomb
In the standard honeycomb pattern, a hexagonal grid is printed at each layer. This makes the pattern excellent for parts that require high horizontal strength and rigidity.
- Advantages: Standard honeycomb has high mechanical resistance and horizontal strength. It’s also optimized to avoid filament accumulation at line intersections, which can cause print failure in severe cases.
- Disadvantages: Standard honeycomb has a higher material consumption than other infill patterns. Its complex geometry also leads to longer print times.
- Use cases: Standard honeycomb works great for parts where horizontal strength is a priority.
3D Honeycomb
In the 3D honeycomb pattern, hexagonal grids are printed with periodically increasing and decreasing thickness. This makes the pattern the best choice for parts that require high strength in the vertical direction.
- Advantages: Due to its 3D nature, 3D honeycomb has a higher vertical strength than standard honeycomb. Like the standard honeycomb, it also minimizes filament accumulation at line intersections.
- Disadvantages: 3D honeycomb has longer print times and greater material consumption than many other infill patterns on this list, including standard honeycomb.
- Use cases: 3D honeycomb is ideal for parts where overall strength is a priority (at the cost of high filament usage and long print times).
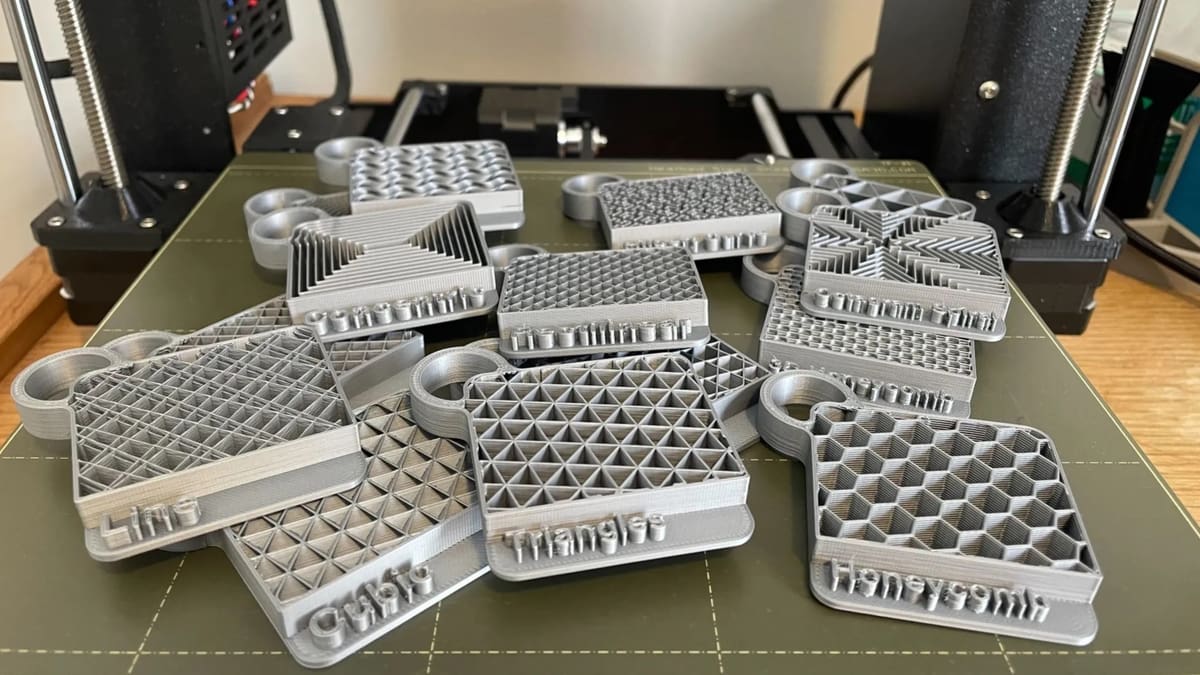
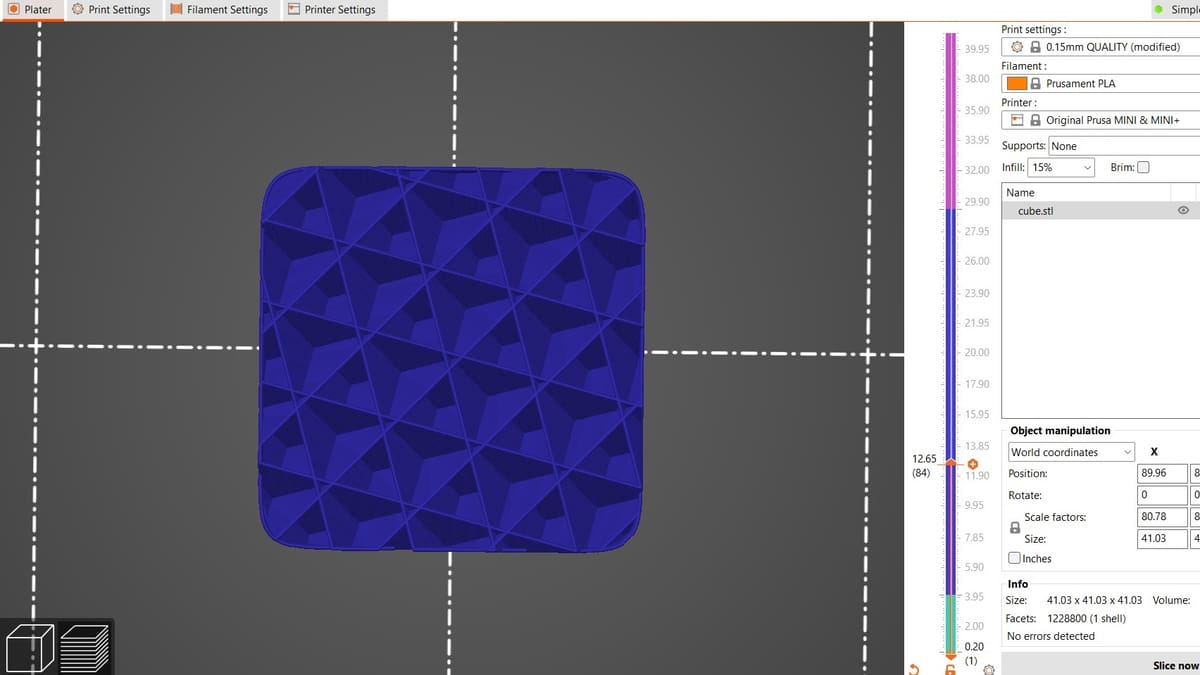
Triangles & Stars
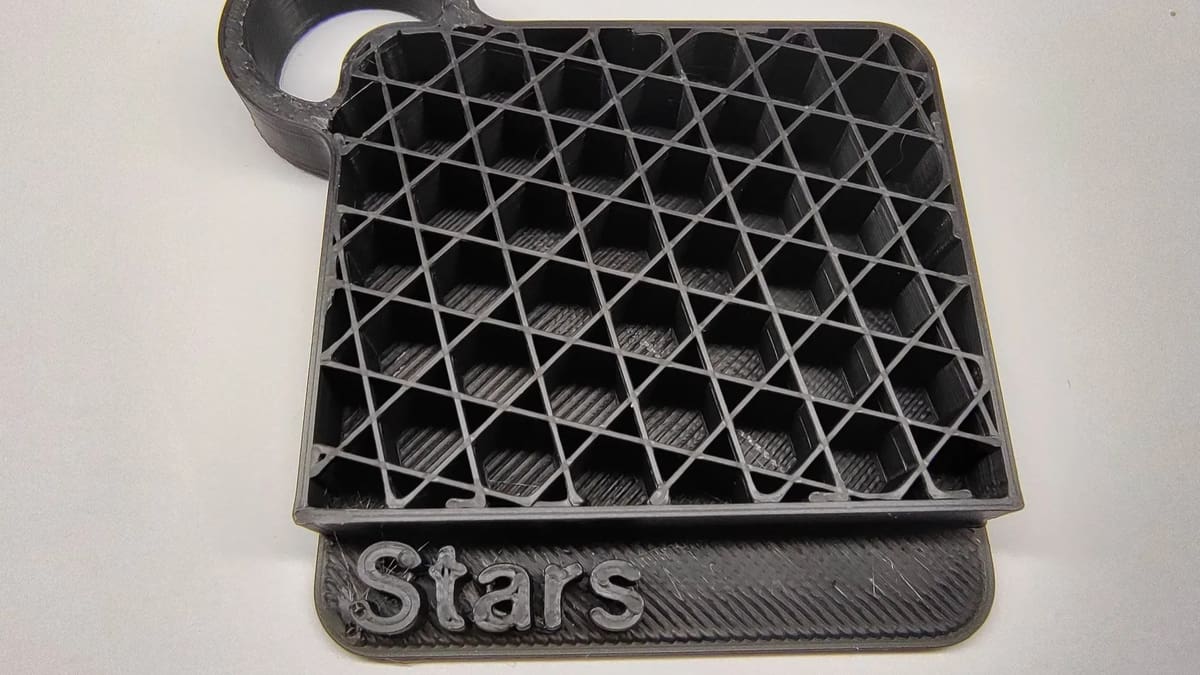
PrusaSlicer offers two infill patterns, triangles and stars, with very similar properties and benefits. The triangle pattern prints lines in a triangular grid, while the stars pattern prints lines in a six-pointed star shape. Both patterns have great horizontal strength and good flexibility.
- Advantages: Both of these patterns offer high horizontal strength and print relatively quickly. They also offer decent flexibility for most models.
- Disadvantages: Both patterns have issues with excess filament accumulation at line intersections, which can cause defects and print failures in severe cases.
- Use cases: These patterns work well for simple parts where horizontal strength is a priority.
Decorative Infills
Although these patterns may not perform as well in the majority of functional applications, their visual intrigue keeps them popular. A few are also useful for flexible prints.
Concentric
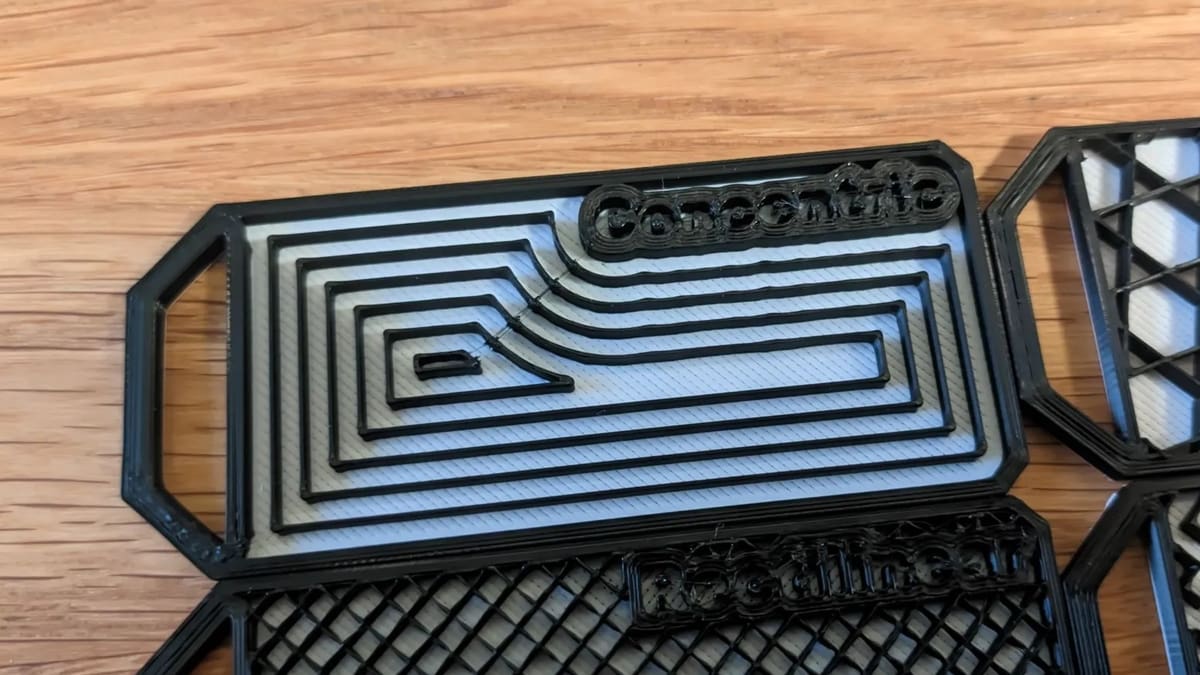
The concentric infill pattern traces the model perimeter, gradually making the outlines smaller towards the center. Aside from looking cool, this pattern is great at conserving material and is one of the best choices for flexible designs.
- Advantages: Due to the spaces between its lines, the concentric pattern is easily filled with resins and other liquids. It also conserves material and offers high flexibility relative to other decorative patterns.
- Disadvantages: Concentric infill often takes longer to print than other infill patterns.
- Use cases: Concentric infill works well with transparent or flexible models where visual intrigue is key.
Archimedean Chords
The Archimedean chords pattern prints lines in a part-wide spiral, ignoring the design’s walls. Like the concentric infill pattern, these disconnected lines make this pattern one of the best choices for flexibility and a good pattern for conserving material.
- Advantages: Archimedean chords are very thin, which saves both material and time. They’re also easily printed using liquids such as epoxy resin.
- Disadvantages: The Archimedean chords pattern is one of the weakest infill options.
- Use cases: Flexible models, models that need to be filled with resin, and decorative models will all benefit from the Archimedean chords pattern.
Octogram Spiral
One of the coolest-looking patterns that PrusaSlicer offers, the octogram spiral prints lines in a star pattern within the model. With its intriguing design, this pattern offers great flexibility and looks awesome in transparent parts.
- Advantages: The octogram spiral offers some of the best top layer support of the decorative infill patterns. It’s also flexible and visually interesting.
- Disadvantages: The octogram spiral is one of the slowest patterns to slice and print.
- Use cases: The octogram spiral works best for decorative parts, especially those where the infill will be exposed. It’s also quite good for flexible parts.
Hilbert Curve
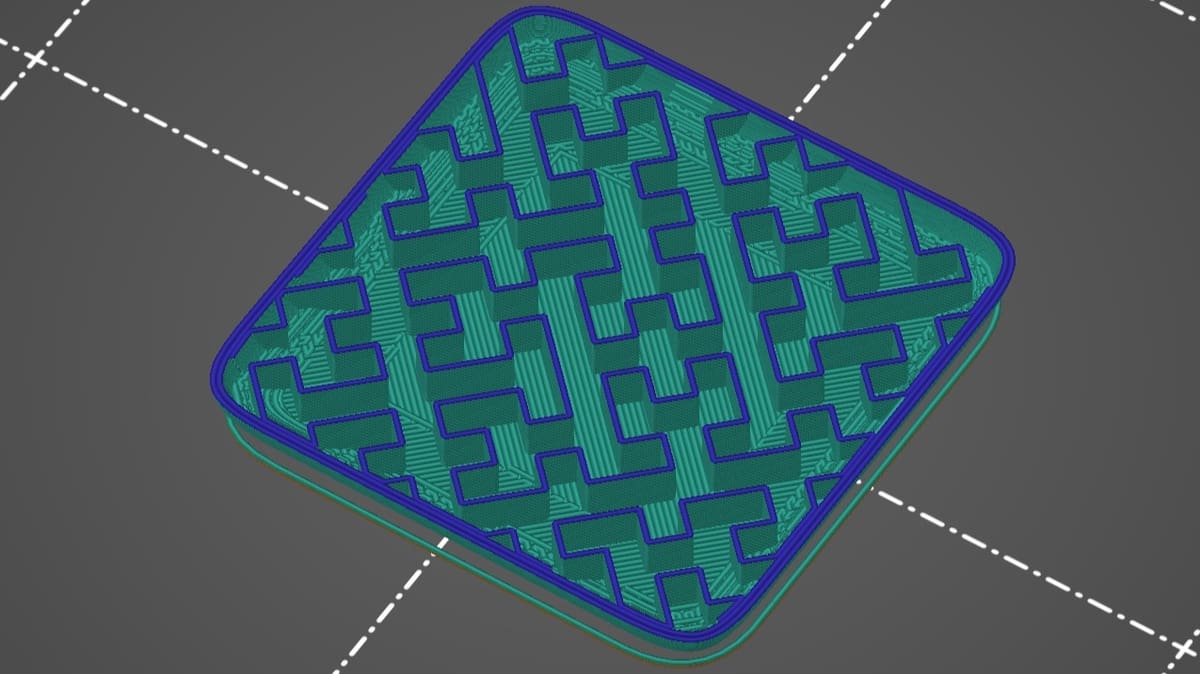
The Hilbert curve pattern creates a rectangular labyrinth within the model. With its non-traditional look, the Hilbert curve is great for any application where the infill is exposed. It also offers good flexibility and rigidity.
- Advantages: The Hilbert curve offers a non-traditional look that’s flexible and able to filled with liquid resins or epoxy for reinforcement.
- Disadvantages: Like the other decorative patterns, the Hilbert curve also has long print times and high material consumption.
- Use cases: The Hilbert curve is perfect for decorative parts, where a unique infill pattern is required.
Lightning
Ported directly from Cura, Lightning is a branching infill that generates from the walls towards the center of the model. It isn’t uniform across each layer, given that it gets progressively denser as it goes up to support the top layers. This pattern saves a lot of filament and time, at the expense of a mostly hollow part.
- Advantages: Lightning infill saves print time and material, without affecting the external appearance of the part.
- Disadvantages: Lightning infill won’t provide the same amount of support and sturdiness as other patterns. It’s also slightly more prone to failure, as it uses angles scaffolding to reach the top.
- Use cases: Parts that are purely ornamental like miniatures and busts, as well as rapid and cheap prototypes.
Basic Infills
If your infill doesn’t need to fulfill any particular purpose, these basic patterns are a great choice. In fact, they’re some of the most popular options for standard models!
Rectilinear
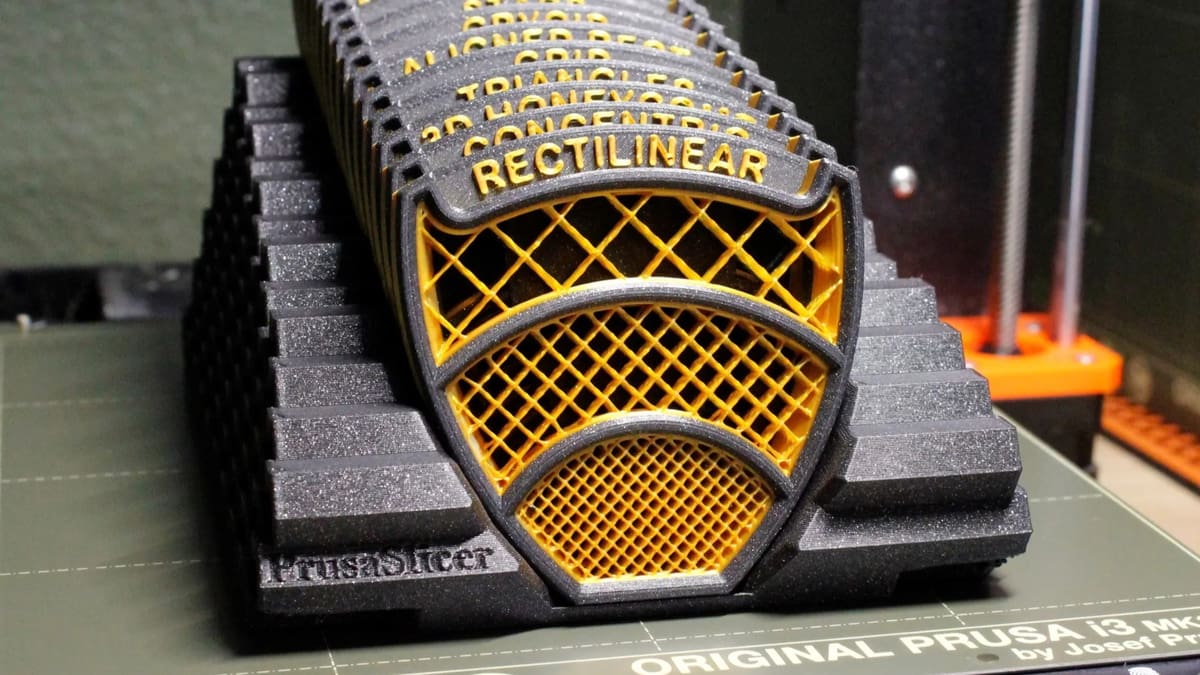
The rectilinear infill pattern is a 3D printing staple. If you need a fast and easy infill option, rectilinear infill may be for you!
Standard Rectilinear
In the standard rectilinear pattern, lines are printed perpendicular to each other to form a rectangular grid. Unlike the “grid” pattern, however, this pattern always prints in the same direction. While this may increase print speeds, it also increases the chances of delamination. However, the standard rectilinear pattern is still an excellent choice for rigid parts that need to be printed quickly.
- Advantages: The standard rectilinear pattern provides good support for the top layer. It’s also the default option for all solid (100% infill) parts.
- Disadvantages: Because the same pattern is repeated for every horizontal layer, the standard rectilinear pattern doesn’t provide much vertical strength.
- Use cases: Basic parts that need high horizontal strength and support will benefit from the standard rectilinear pattern.
Aligned Rectilinear
In the aligned rectilinear pattern, parallel lines are created within the model. Unlike the “line” pattern, these lines don’t cross, providing more flexibility within the part. As such, aligned rectilinear is considered one of the best designs for saving time, and it provides great flexibility.
- Advantages: Aligned rectilinear saves time relative to the standard pattern. It also doesn’t accumulate material at line crossings and offers great flexibility.
- Disadvantages: Aligned rectilinear is one of the least dense infill patterns, and it may have issues with top layer bridging and surface quality.
- Use cases: Aligned rectilinear works best for parts that need to be printed quickly while balancing material consumption.
Grid
Much like the rectilinear pattern, grid creates an array of rectangles within a model. Unlike rectilinear, however, grid rotates the pattern 90° each layer. This provides greater vertical strength and layer adhesion over the standard rectilinear pattern; parts that are printed in only one direction may delaminate more easily. Grid is considered an excellent pattern for rigidity and is great for horizontal strength.
- Advantages: Grid is one of the simplest and fastest patterns to print. In fact, it’s the default in many older slicing programs.
- Disadvantages: Filament tends to accumulate at grid intersections. This can cause print defects and failures as the nozzle crosses the accumulations.
- Use cases: Grid works well for simple parts that need to be printed quickly.
Line
Line is similar to rectilinear in that filament is printed in an evenly distributed pattern. However, the lines don’t cross at perpendicular angles. This asymmetry prevents the waste of material at line intersections, making line an excellent choice for parts that need to conserve material.
- Advantages: Unlike rectilinear, line doesn’t waste material at line intersections. It also prints quickly, relative to many of the other infill patterns.
- Disadvantages: Line infill provides little vertical strength.
- Use cases: Line is a great option for basic parts that require high horizontal strength and support.
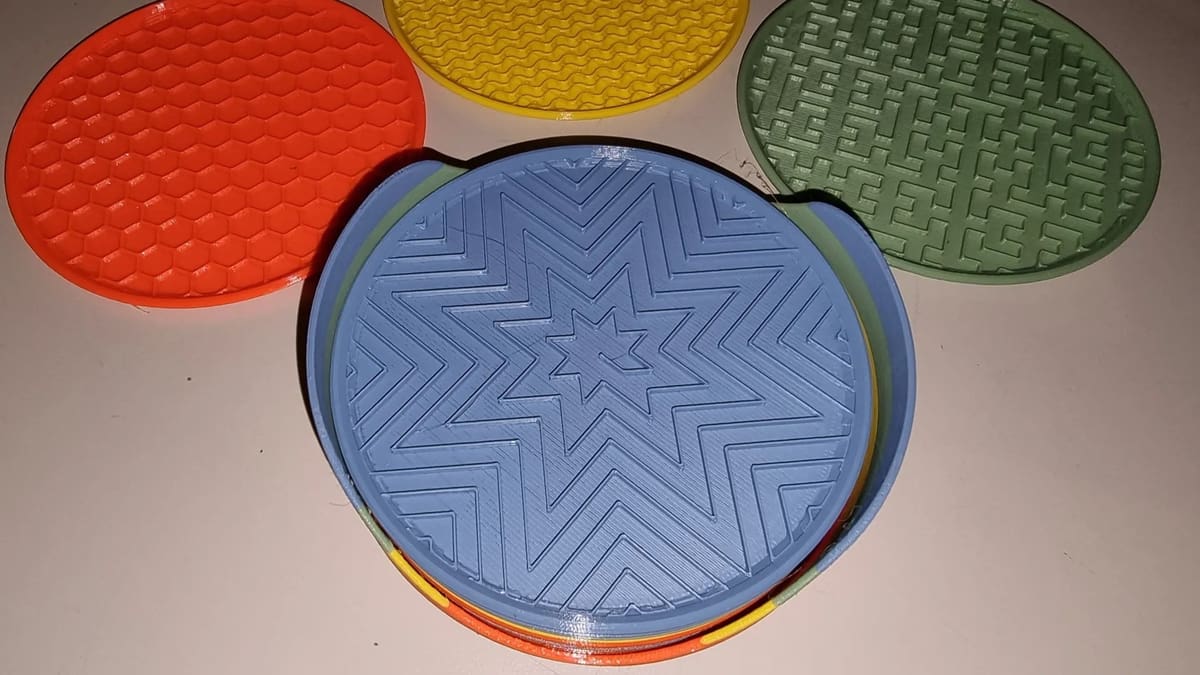
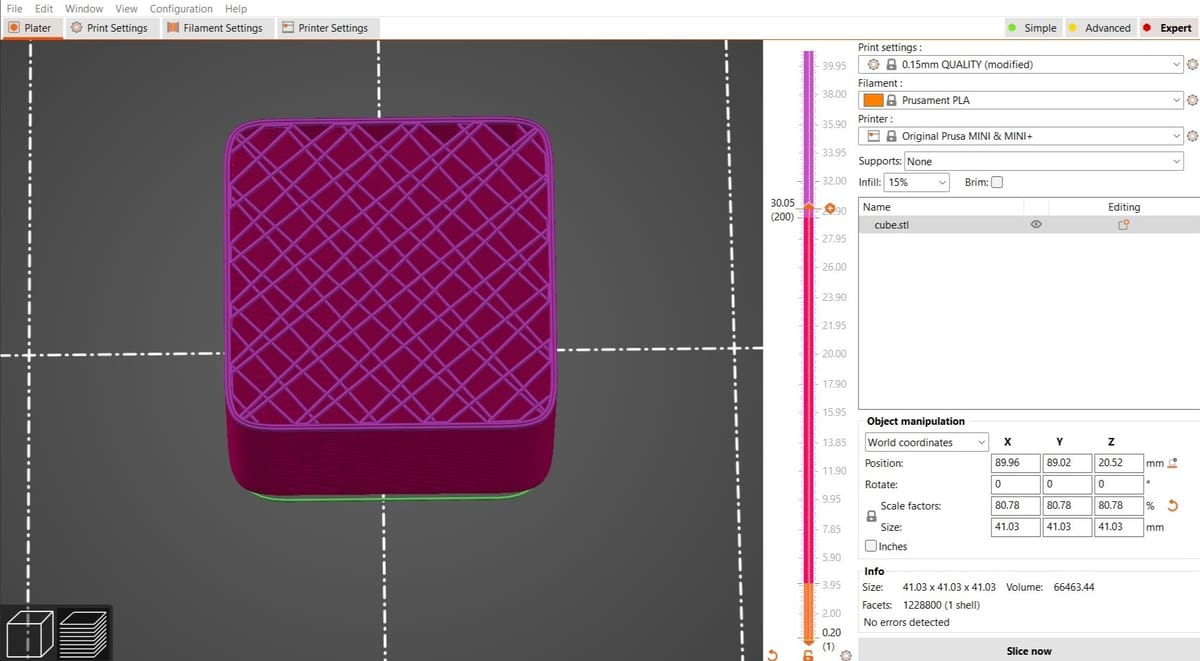
Bonus: Top & Bottom Layers

Many of the patterns that are used in infill can be applied to the top and bottom layers, too. It’s really simple: from the same Infill menu, simply change the Top fill and/or Bottom fill pattern.
While they don’t offer an increase in performance or strength, they sure help with the looks. Here’s a quick summary of the options you can find in PrusaSlicer:
- Rectilinear: The most efficient (and fastest) pattern the slicer can identify to extrude the top layer. Filled in by zig-zagging in a continuous line, then going back to fill in gaps.
- Aligned rectilinear: Similar to the rectilinear pattern, but all lines are extruded in the same direction.
- Monotonic: Similar to aligned rectilinear, but all lines are extruded left-to-right in a single, even front. Produces the most even-looking surface texture.
- Concentric: Follows the perimeter of the model inward to a central point.
- Hilbert curve: A decorative, wormy pattern similar to the infill pattern above.
- Archimedean chords: An outward-spiraling circular pattern.
- Octogram spiral: An eight-pronged star pattern that starts in the center and expands edgeward. Great for dual-color filaments.
License: The text of "PrusaSlicer Infill Patterns: All You Need to Know" by All3DP is licensed under a Creative Commons Attribution 4.0 International License.