RaiseCloud: What Is It & How to Make It Work

Managing a print farm is difficult but not with RaiseCloud, Raise3D's free tool! Read on to learn more about this powerful resource.
Managing multiple 3D printers is not easy. As anyone who runs a print farm would point out, keeping track of all the machines, files, and print jobs can be an organizational nightmare. That is where a print management tool like RaiseCloud comes into play.
RaiseCloud is 3D printer manufacturer Raise3D‘s solution to tracking and controlling 3D printers from afar. Highly praised for its ease of use, RaiseCloud allows users to access their printers from anywhere in the world via the internet, with on-the-fly controls available as if engaging with the printer directly. Simply log on to their web interface or app (which is available for both iOS and Android), and you have instant access to cloud-shared files, webcam streams, status summaries, and more. With the newest RaiseCloud releases, many bugs from early Beta users have been addressed, making for a near-seamless transition between laptop and phone.
If you don’t have a Raise3D 3D printer, fret not; third-party users can also benefit via Raise3D’s OctoPrint plug-in. With the RaiseCloud OctoPrint plug-in installed on your Raspberry Pi, you get free access to RaiseCloud Lite, which includes all of the core RaiseCloud features at no expense to your OctoPrint functionality. (Note that Raise3D calls the OctoPrint plug-in RaiseOcto, but OctoPrint calls it RaiseCloud. As such, we’ll be referring to the OctoPrint plug-in as RaiseOcto in this article. RaiseOcto is also still in Beta testing.)
Here, we’ll run you through the basic functions that you can expect from RaiseCloud: printer management, print job management, file sharing, and IdeaMaker integration. By the end, we hope to leave you with a better idea of what this powerful tool is capable of, with additional resources to kickstart your RaiseCloud experience.
Let’s get started!

Feature #1: Printer Management
One of RaiseCloud’s biggest perks is its ability to manage whole fleets of 3D printers. While you could certainly pair just one machine, many of its tools are oriented to print farm setups.
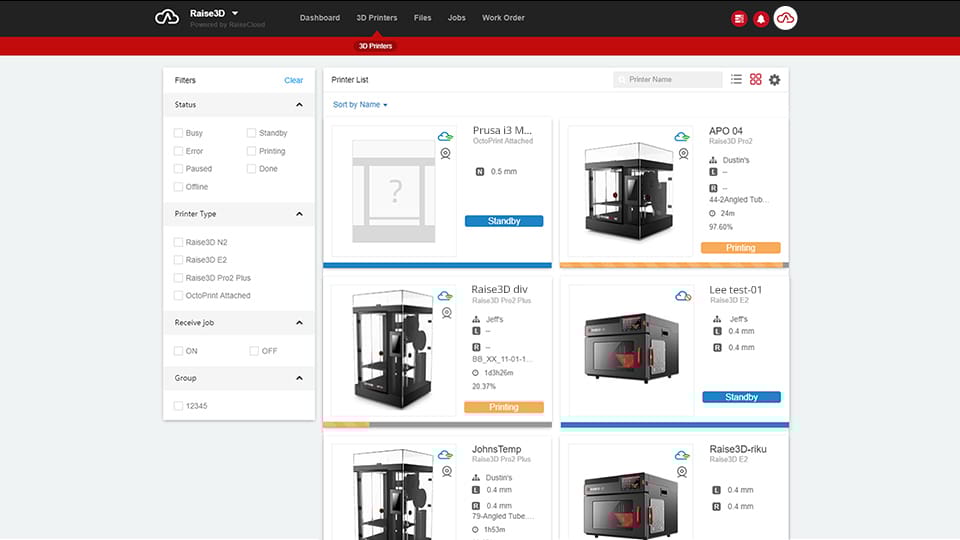
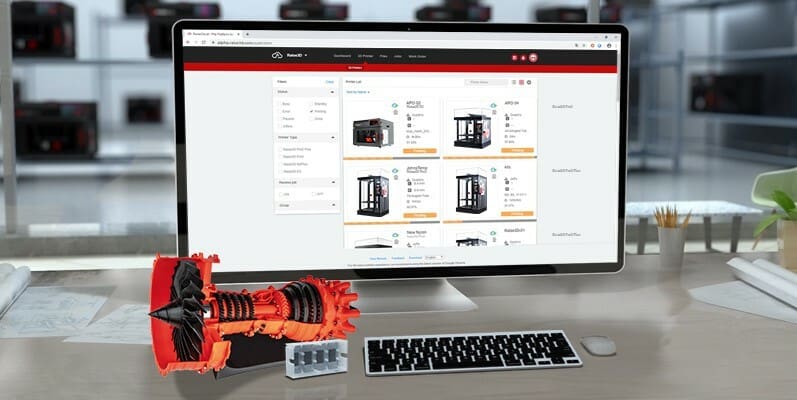
The layout, for instance, is optimized for high-level, at-a-glance access to information, which is delivered through arrayed tiles (as shown above). These tiles scale automatically based on the number of printers connected, with colorful labels to differentiate busy and available machines.
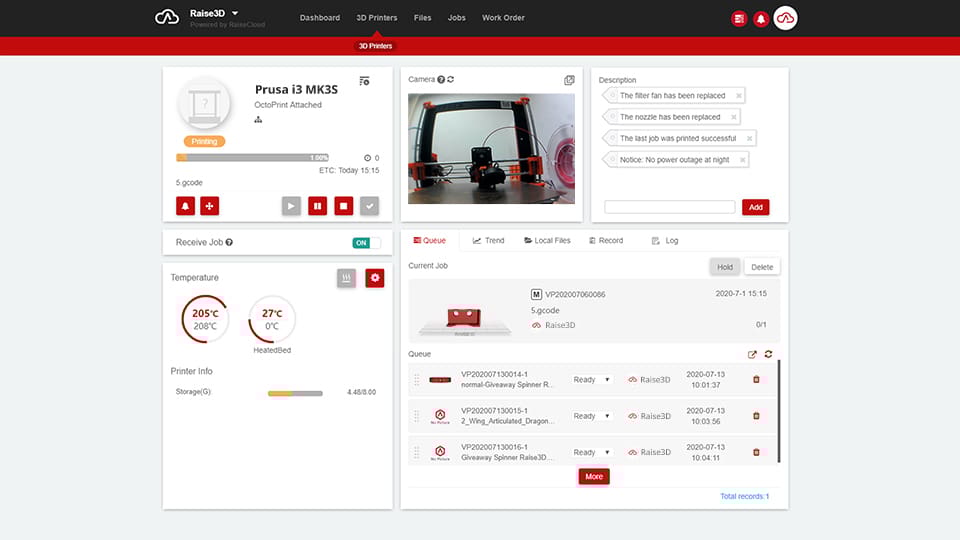
Aside from being able to view and filter your printers by status, RaiseCloud also provides much finer controls for individual settings. Above is an example of a printer dashboard, where you can see live readouts of various printer settings as the machine runs.
With just a quick glance, you can identify the loaded filament(s), machine temperatures, queued prints, and more, alongside a handy webcam stream for close monitoring. Many of the printer settings are also directly editable from the web interface, offering ample on-the-fly adjustability. Feel free to tweak temperatures and adjust feed rates as if you were engaging with the printer directly!
Feature #2: Print Job Management
Once you have your printers in order, RaiseCloud can also help you make sense of the print jobs that need to be taken care of.
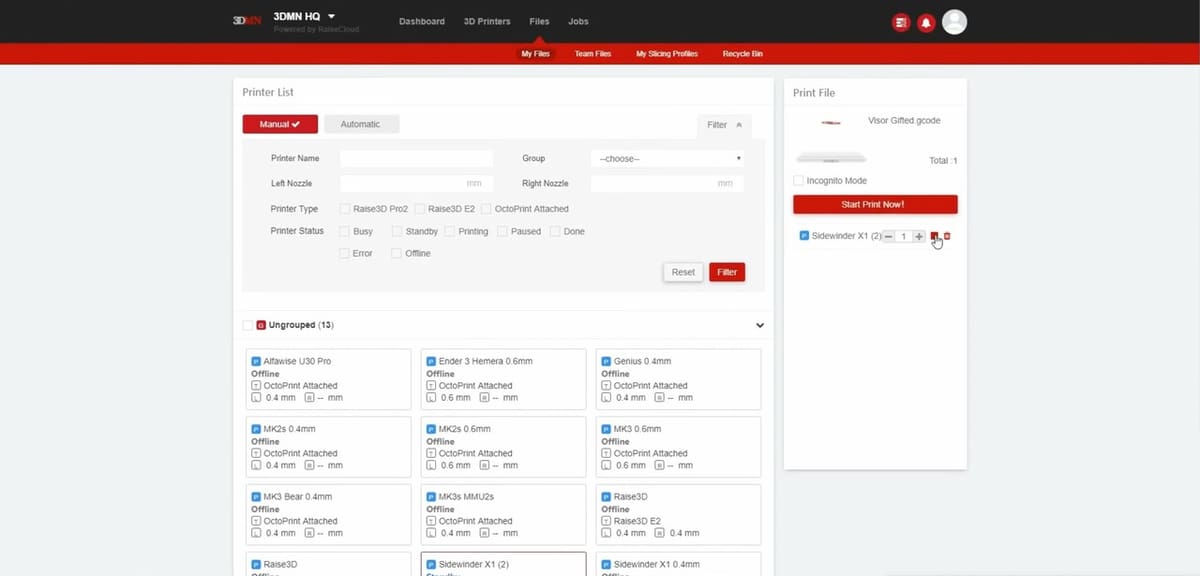
When starting a print, RaiseCloud gives you the option to select from all of your available printers, indicating their statuses and specifications (as shown above). From there, your prints are added to the appropriate printers’ queues, found within the printer dashboards (shown previously).
In the same dashboards, you’ll also find options to automatically or manually move through the queues, along with notification settings for when each job finishes.
When working with multiples team members, RaiseCloud can also help you organize jobs before sending them off to your printers.
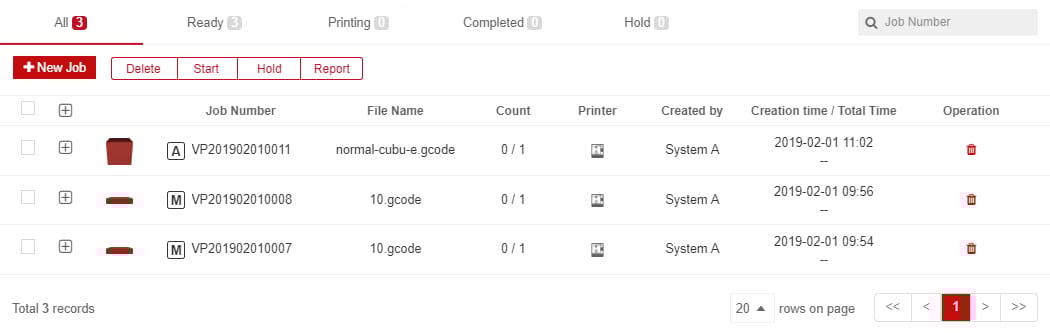
Under the “Jobs” tab, you’ll find filters and labeling options that will sort prints by priority and readiness, along with an option to hold certain ones for review. These filters provide an additional point of streamlining for incoming jobs, ensuring that the right ones get sent at the right time.
If you’re interested in your team’s printing statistics, RaiseCloud even allows you to generate reports on your job history.
Feature #3: File Storage & Sharing
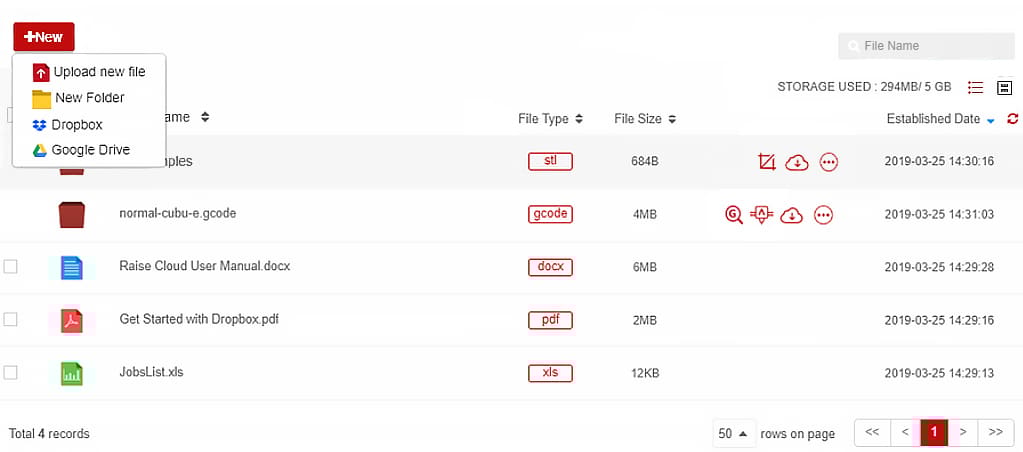
Much like Google Drive or OneDrive, RaiseCloud has file storage capabilities. Under the “Files” tab, you’ll find a place to store private and shared files of various formats, from PDF documents to G-code scripts. A separate location is dedicated to slicing profiles, which can be shared and downloaded to keep all team members on the same page. File uploads are fairly flexible, with choices for PC and cloud uploads.
Once files are uploaded, additional tools are available to those with whom the files are shared.
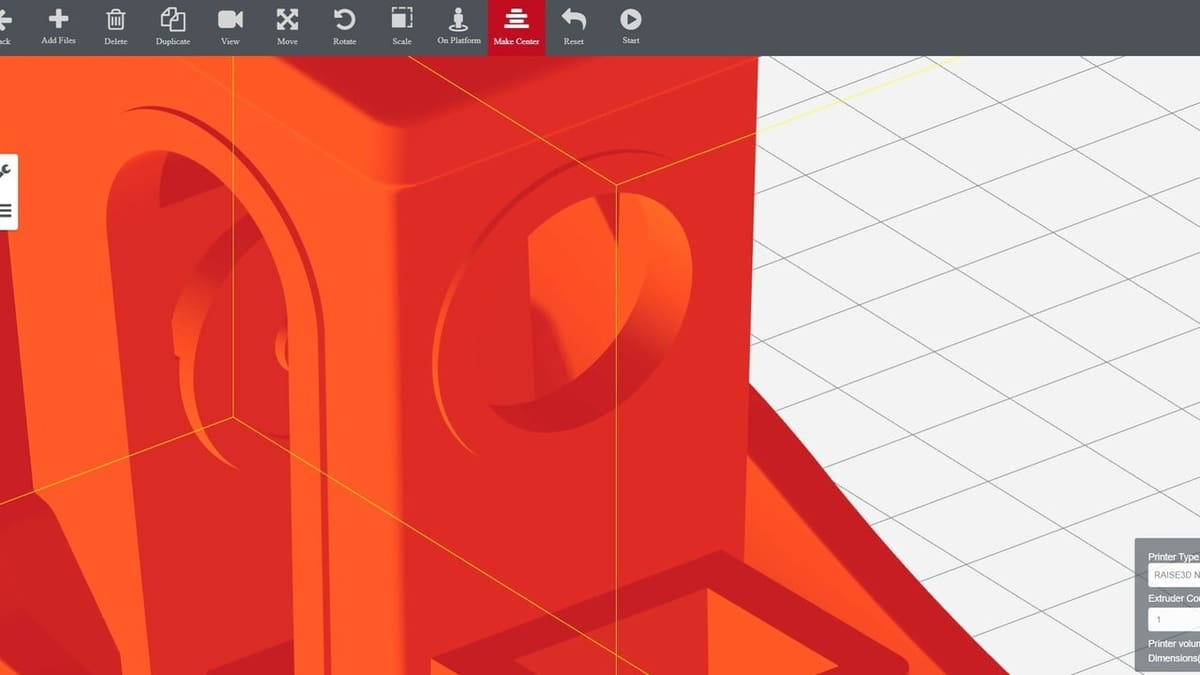
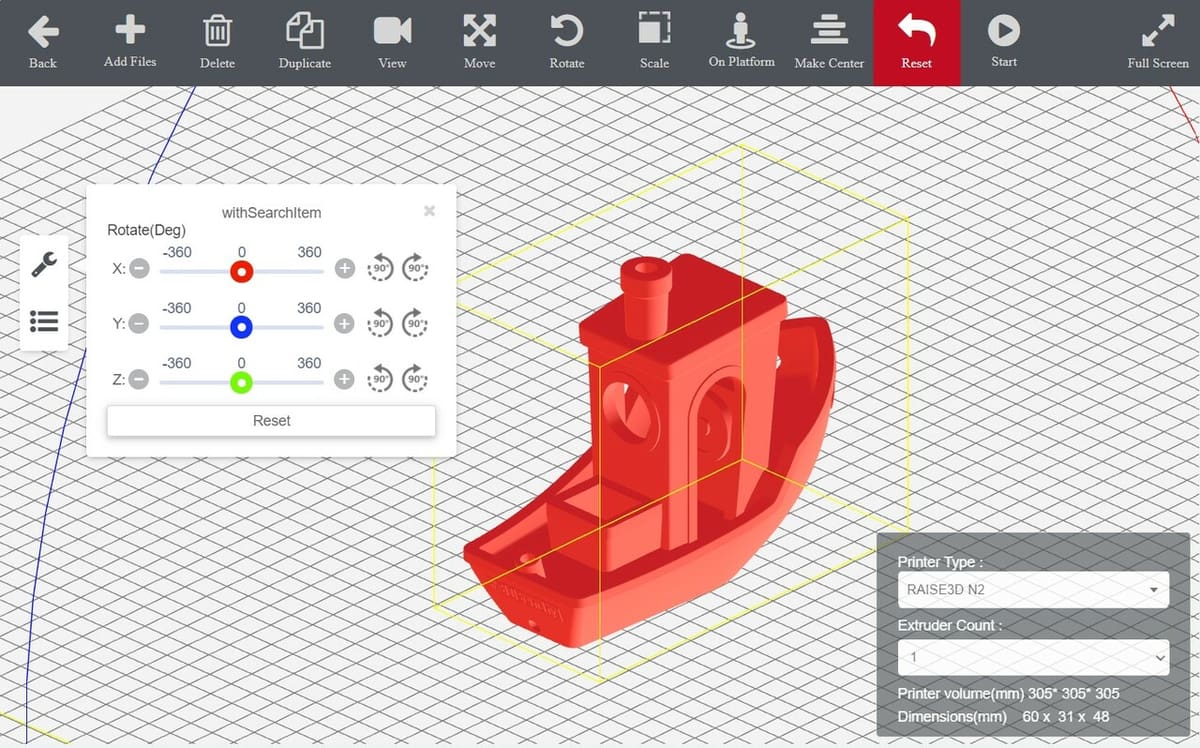
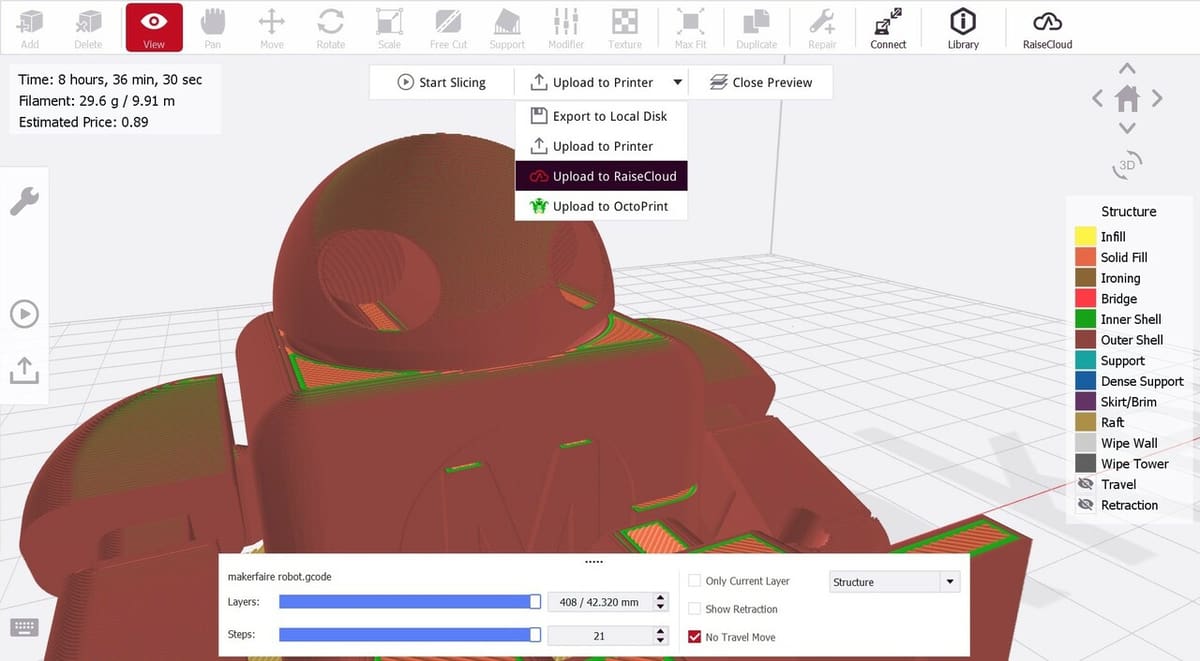
G-code files, for instance, can be edited directly from RaiseCloud’s text editor before printing. Mesh files (such as STLs) have the benefit of RaiseCloud’s built-in slicer (shown above). Instead of going through an external slicer, you can take an uploaded file, pre-process it with a saved profile, and assign it to the appropriate printer, all from your browser or phone!
Feature #4: IdeaMaker Integration
Aside from producing 3D printers and RaiseCloud, Raise3D also offers a powerful slicing software, IdeaMaker. If you’re an IdeaMaker user, RaiseCloud offers you an additional level of streamlining, as files can be sent directly to and from the slicer.
In IdeaMaker, logging in to your Raise3D account will allow you to upload your sliced prints directly to RaiseCloud (as shown above). Alternatively, if you’re working with files stored in RaiseCloud, you have options to open them directly in the IdeaMaker desktop app.
By taking advantage of IdeaMaker integration, individual team members can process files as needed from their computers before uploading them to RaiseCloud for organization and prioritization. While certainly not a make-or-break feature, this level of streamlining is a nice touch for frequent IdeaMaker users.
Final Thoughts
There you have it: RaiseCloud’s core features! If you think you or your team could benefit from this free and powerful tool, we’ve gathered some resources to help you get started.
If you’re working with Raise3D’s printers, your machines are directly compatible with RaiseCloud. To begin, follow Raise3D’s binding guide to connect your first printer, which opens access to all of the aforementioned features.
If you’re using third-party printers, your first order of business is to get OctoPrint set up on all of them. The process can be quite confusing if you’re new to it, so we’ve put together a handy guide to get you going.
From there, you’ll want to install RaiseOcto, Raise3D’s custom OctoPrint plug-in; you can find it in the OctoPrint plug-in manager under “RaiseCloud”. After installation, simply follow Raise3D’s third-party pairing guide, which will run you through the quick binding procedure.
With that, you’re ready to run! Despite everything we’ve covered, we’ve barely managed to scratch the surface of what RaiseCloud has to offer. To get the most out of your RaiseCloud experience, please refer to Raise3D’s full manual.
Happy printing!
License: The text of "RaiseCloud: What Is It & How to Make It Work" by All3DP is licensed under a Creative Commons Attribution 4.0 International License.