Raspberry Pi Case: How to Model Your Own 3D Printed Case

Need a Raspberry Pi case for a project? Learn how to make the best enclosure for your Raspberry Pi with our tutorial on Raspberry Pi cases!
Designing Custom Enclosures
Every great electronics project can benefit from a custom enclosure and with the rise of 3D printing, building your own enclosure is easier than ever.
But why have an enclosure at all? Well, there are many reasons:
- Safety: Enclosures will keep you and your electronics safe. You don’t have to worry about accidentally dropping a metal component onto your board only to have something short circuit. If you’re working with higher voltages, that could give you a bit of shock.
- Personalization: You may want to personalize your enclosure, either with your name and branding, or instructions for the intended user.
- Distribution: Maybe you’re a developer and have invented a cool new board that you’d like to safely distribute among your beta testers. 3D printing an enclosure is the way to go!
- Organization: A project with a well-designed enclosure is more presentable and it’s also easier to explain your project when the wiring is arranged neatly, rather than having things all over the place.
- Upgrades: There may be a time when your project grows or has morphed into something new with an additional prototype board. CAD makes it easy to create a new and improved case, carrying your project safely through to completion.
When it comes to a Raspberry Pi, the mini-computer that’s often used in 3D printing, there are two main ways to create a custom enclosure: start from scratch or modify an existing design to suit your needs.
We’ll cover what you need to do before you start designing, share some tips to keep in mind when you’re designing, and finally, recommend software that you’ll use. Let’s dive in!
Preparing For Design
Before you get started with your design, it’s a good idea to collect important information that’ll come in handy during the design process.
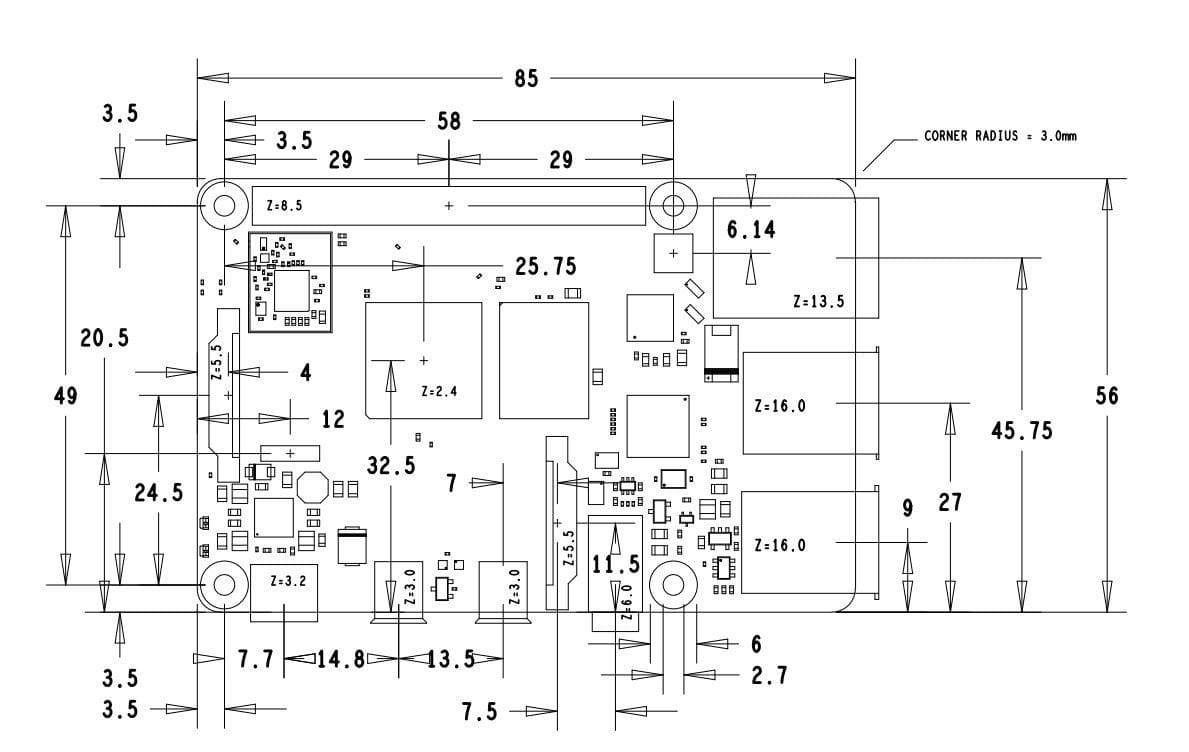
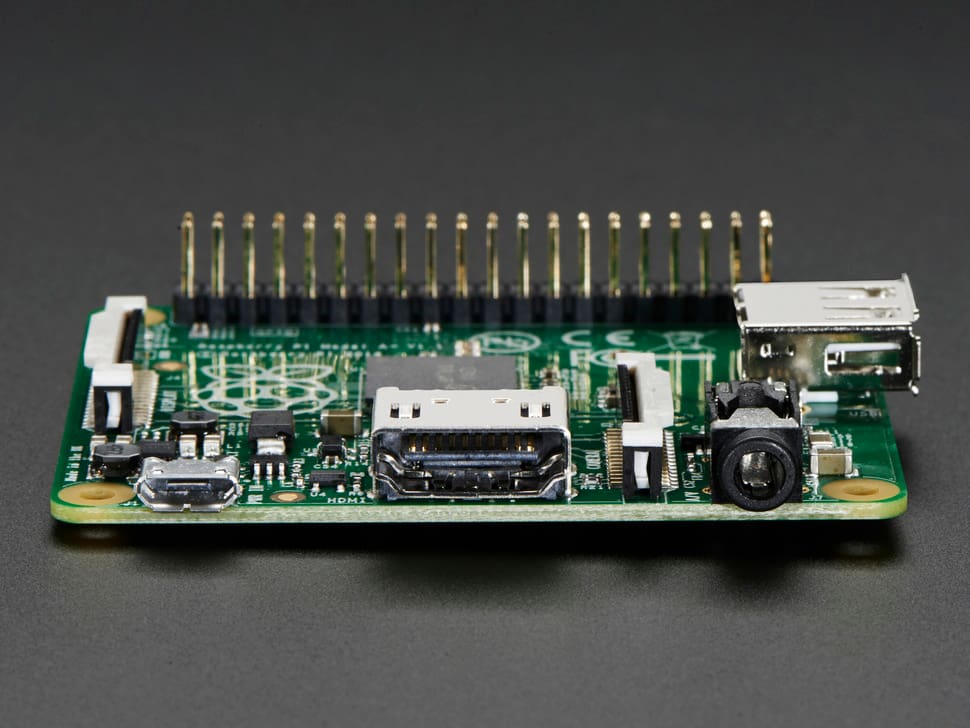
- Mechanical drawings: First off, make sure to get your hands on the mechanical drawings for your Raspberry Pi under the hardware documentation page on the official site. These drawings will give you the exact position of the mounting holes and the dimensions of all the input and output ports that you might need to access.
- 3D model: While the official 2D dimensions will be useful, it’s also helpful to have a 3D model of the Raspberry Pi for you to use as a reference so there’s no interference between your case and the board. GrabCAD has some good 3D models of the Raspberry Pi that are free to download. Make sure you double-check critical dimensions of the 3D model with official 2D drawings to ensure accuracy.
- Measuring tools: You also may find yourself working with a completely new shield that’s attached to the Pi, or some other component for which the dimensions aren’t available. In such a case, you’ll need to use some additional measuring tools, like Vernier calipers, to find the required dimensions before you get started.
- Search existing designs: Another great way to design your enclosure is to make use of existing designs available on Thingiverse or other similar websites, and use those designs as a starting point to build from. This helps you save time and avoids you having to reinvent the wheel.
Now that you’re aware of the dimensions, let’s take a look at a few things you’ll need to keep in mind while designing your case.
Important Notes
There are a few critical things for you to be thinking about when designing your case:
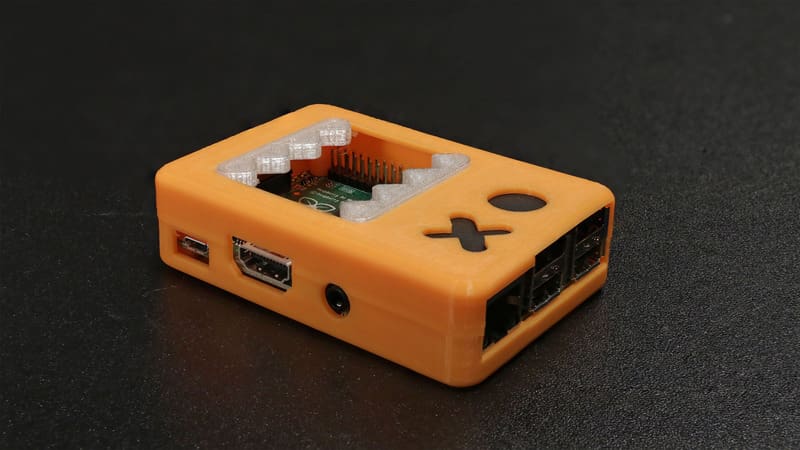
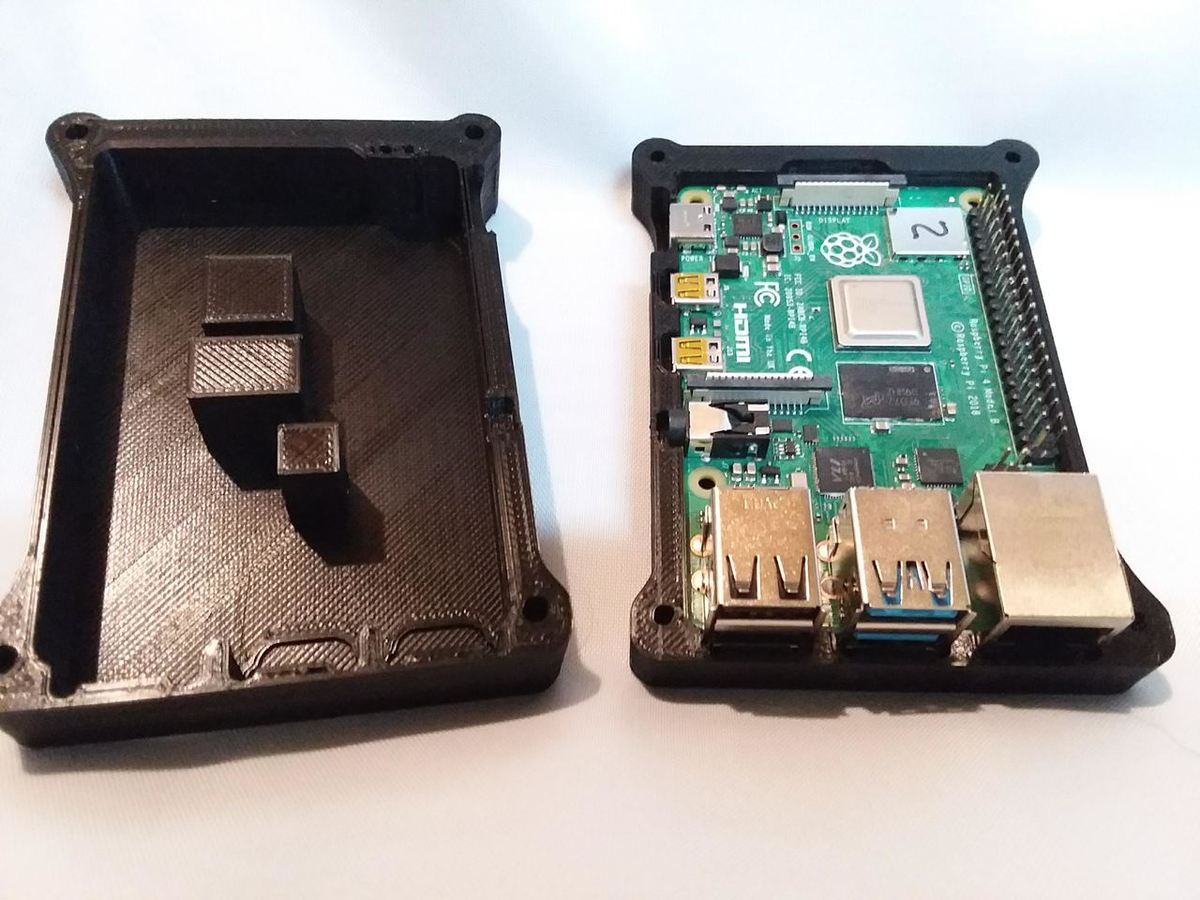
- Open slots: It may be obvious, but remember to have open slots for all of the ports that you plan to use, such as the USB slots, HDMI output, or the headphone jack. Also, make sure the micro SD card is accessible without having to disassemble the enclosure, otherwise you’ll have a hard time when you need to swap the OS or increase system storage.
- Wall thickness: Ensure that your case’s wall thickness is above 1.5 mm, and for good, durable results, we’d recommend having it at about 3 mm thick. Also, keep about 1 mm spacing between the walls of the case and the Pi to make sure it fits nicely.
- Ventilation: The Raspberry Pi also tends to heat up a bit when you’re using it, so ensure that you have some cooling vents and spaces for heatsinks or fans built-in. It’s also a good idea to leave a bit of space (around 5 to 10 mm) under the Pi for ventilation.
- Accounting for heat: When heated, certain features, such as holes, will tend to contract, while outer dimensions tend to expand. This phenomenon is known as horizontal expansion, and while slicers such as Cura have settings like ‘Hole Horizontal Expansion’ which helps you compensate for shrinking holes, it’s still a good idea to design the case with slightly larger hole sizes. As a basic guideline, the amount of expansion is usually around 0.3 to 0.5 mm.
- Text: When designing custom enclosures, you may also want to emboss or engrave some text, and for it to print well, remember to have a minimum height of about 2 mm and minimum width of about 0.6 mm.
Joints & Fasteners
Enclosures in most cases (pun intended!) will need to be built from two parts that sandwich your electronics between them. For most people, having fasteners visible on the surface makes the design look a bit ugly, but lucky for us, 3D modeling and printing provides a good solution.
Let’s look at two main methods with which we can join parts:
- Snap fits are a great way to join two parts made of plastic by simply pushing them into each other. There are many types of snap fit joints, like cantilever or annular type connectors.
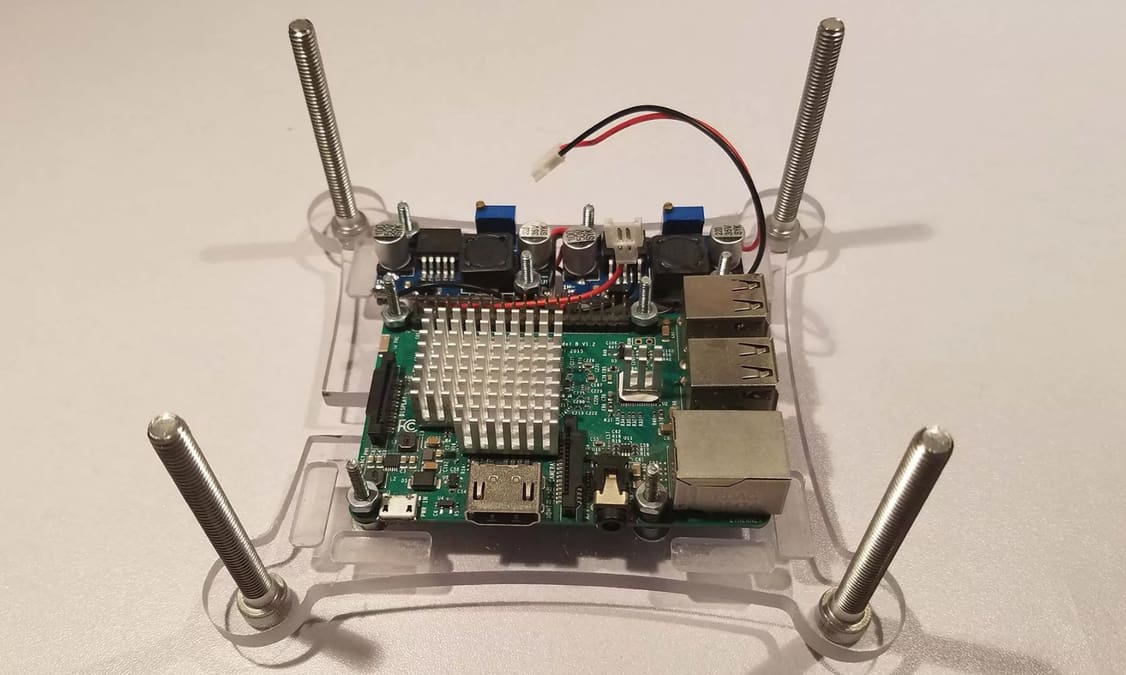
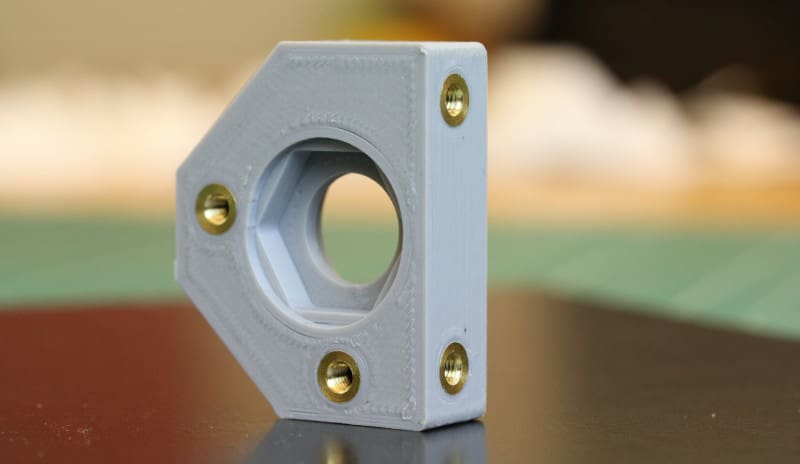
- Fasteners, more commonly called nuts and bolts, are another great way to assemble your enclosure. One of the best ways to make sure your fasteners aren’t visible from the front is to design pockets for the nuts to slide into, with the bolts threaded in from the rear. Alternative methods of adding fasteners include:
- Manually creating threads with a tapping tool
- Using brass threaded inserts
Apart from joining the two parts of your enclosure together, it’s also important to keep in mind how your project’s going to be mounted. On a wall? To a desk? Whichever’s the case, make sure to plan ahead to ensure that assembly and access to the parts you’ll need have been accounted for.
Now, let’s take a look at the best software for modeling your case and go over some helpful tips when you’re designing.
Design Tools & Tips

Software
For enclosure design, it’s best to make use of parametric modeling tools such as Fusion 360, Onshape, or FreeCAD because parametric software allows you to change important dimensions later on without impacting the entire design. This isn’t always the case with other design tools available in the market.
Another great tool worth mentioning would be Tinkercad, as it has a ready-to-use Raspberry Pi model available as a drop-in. It’ll save you some work and be a reliable model to use as a reference. You can then continue to build your case around the Pi block, using the basic shapes available.
A Few Additional Notes
- Resistive LCD touch screens are quite popular and economical for Raspberry Pi projects. When building an enclosure for a touch screen, make sure to have adequate space between the enclosure and the touch screen surface. If the enclosure comes in contact with the screen, the touch features of the screen tend to stop being responsive. A gap of 0.3 to 0.5 mm should be sufficient.
- If you’re using onboard components with heat sinks, it might be a good idea to try adding an additional cooling fan to help manage heat.
- Beware of metal fasteners falling into or touching any components on the Raspberry Pi or other boards. In case you need to have a set of fasteners on the inside of your enclosure, use nylon ones instead of metal to avoid the possibility of shorting components.
Keep It Rolling!
Getting started with your design can be a daunting task at first, but there’s lots of resources that are available to help. Or, you can always use an existing design as your basis.
Enjoy your new enclosure!
Lead image source: S-Config
License: The text of "Raspberry Pi Case: How to Model Your Own 3D Printed Case" by All3DP is licensed under a Creative Commons Attribution 4.0 International License.
CERTAIN CONTENT THAT APPEARS ON THIS SITE COMES FROM AMAZON. THIS CONTENT IS PROVIDED ‘AS IS’ AND IS SUBJECT TO CHANGE OR REMOVAL AT ANY TIME.