10 Good Reasons to Use Cura

Cura is one of the most popular slicing software options for 3D printing. Check out 10 reasons why you should consider using it.
While slicing and printing can be pretty demanding, Cura can make things easier. Whether you’re a beginner just learning the ropes or a veteran trying to streamline your printing farm, Cura can help you out.
Even though it’s part of the Ultimaker workflow, Cura can be used with almost any printer, like Creality’s Ender 3, for example. As long as your printer doesn’t require the use of proprietary software, Cura is here for you.
In this article, we’ll focus on the main points of why you would want to use Cura and its most recent (5.0) update! A few things are pretty straightforward and refer to its accessibility and ease of use, while other reasons are more advanced and might not be aspects you’ve previously considered.
Continue reading to learn something new about one of the best slicer programs out there!

Accessibility
One of the main reasons to use Cura is its accessibility, which is twofold: ease of use and price. The user interface is clean and uncluttered, the functions and tools are straightforward, and it’s got a gradual learning curve that eases beginners into 3D printing. The program’s free to download and use – no strings attached or subscriptions required! And it’s non-existent price tag doesn’t translate into quality issues: Because it was specifically designed for professional printers, you get professional quality software.
Of course, there are other popular options that are free or that offer subscription-based licenses, so let’s look at how Cura stands out from the crowd. For example, Autodesk’s Netfabb is great for higher-tier designing and offers slicing features like interior lattice and selective space structures, as well as simulation capabilities. However, the free version is only available for educational use, and the professional subscription costs $4,870/year.
Simplify3D is used by intermediate and pro users who appreciate multi-part customization and the possibility of fixing STL files. On the downside, the program also hasn’t presented many noticeable updates lately. There’s also no free version available; the full cost is around $150, although certain groups can apply for a 25% discount.
For fans of open-source development, there’s also Slic3r and its forks, PrusaSlicer and SuperSlicer. Like Cura, these programs are free, and they’re great if you prefer adjusting your settings and printer’s abilities through G-code. Yet, while you can make more edits with G-code, the applications are lacking other Cura features, like the cloud-based marketplace, and there’s a significant learning curve.
While Cura may not have some higher-tier slicing features that paid versions provide, like selective space editing, it more than makes up for it with its intuitive design flow and numerous features. So if you’re not looking for specific advanced features, Cura may be one of the best options given that it’s one of the few that’s easy to use, has enough settings to keep professionals happy, and is free!
Computer Compatibility
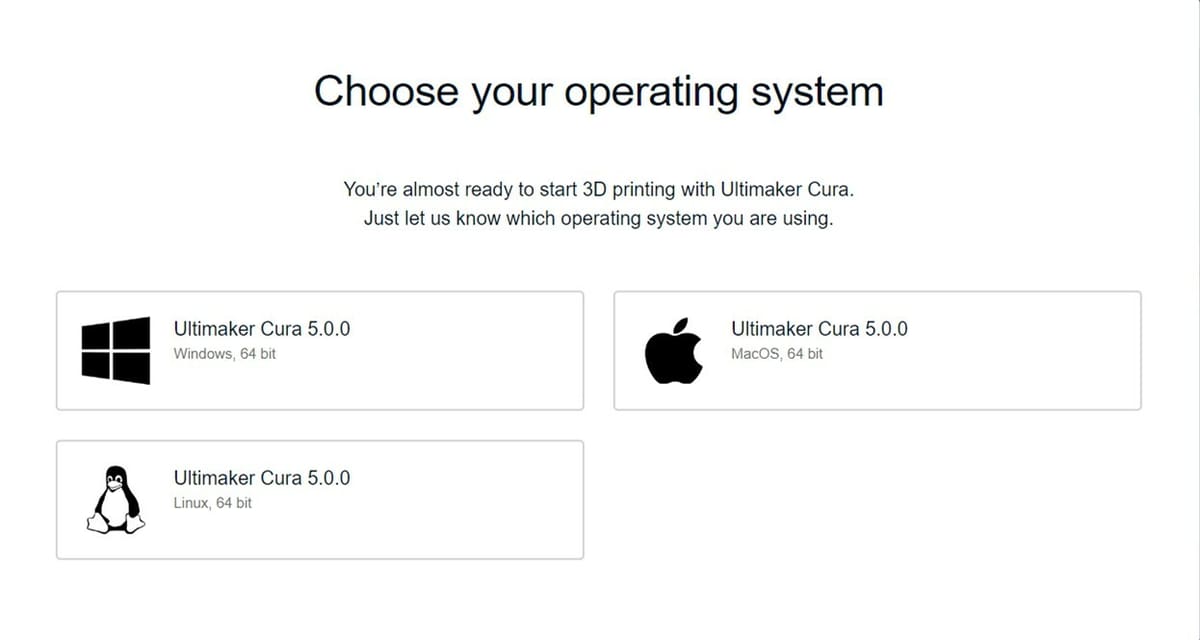
A positive aspect of Cura is that it offers constant updates. The most recent, Cura 5.0, allows Apple M1 compatibility and works on speeding up slicing and printing. Even before the most recent update, Cura has supported Windows and even Linux systems.
On top of being able to work with most operating systems, Cura works with just about every 3D model file: You can import file formats like STL, 3MF, OBJ, X3D, and more! For more advanced users who may want to modify the G-code, it’s possible to import several file types – all you need is a notepad program to edit the plain text G-code files. And you can export G-code, STL, 3MF, UFP, and OBJ file formats.
Because Cura is compatible with so many systems and files, you should have no problem making it fit into your printing setup. Take a look at all the different files you can work with and start experimenting with your workflow. The open-source nature of the program allows you to use just about any CAD software and 3D printer out there.
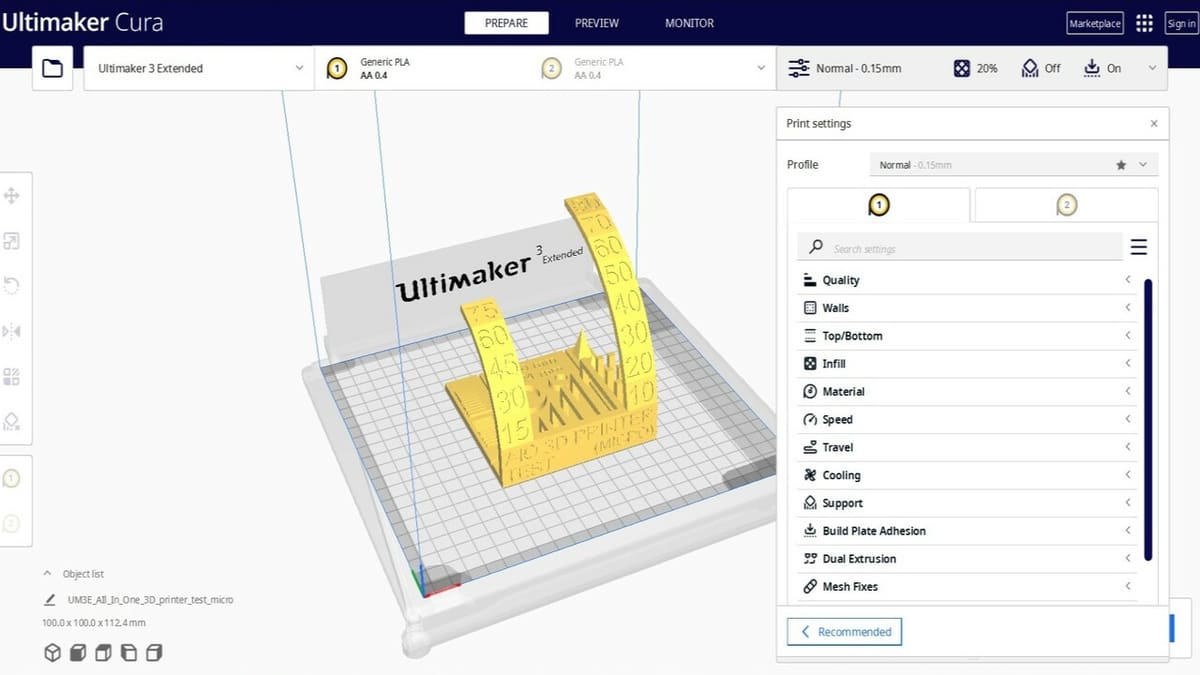
Printing Profiles
When it comes to print profiles, Cura has some defaults to get started with that accommodate a variety of printers of different brands. These defaults are groups of settings, such as top and bottom layer number, layer height, and speed, which are meant to provide the most typical options depending on what you want to print.
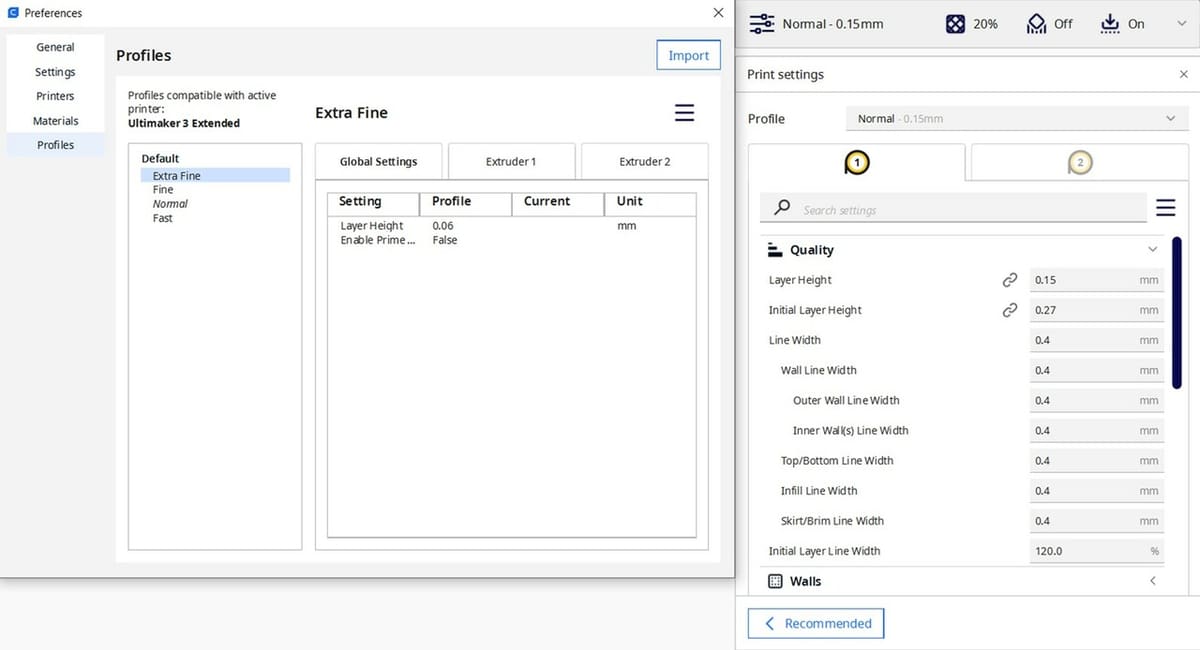
The profiles pictured above are based on using an Ultimaker 3 Extended. Other printers may have more or fewer default settings, with different names and alternatives. For example, while the Ultimaker 3 Extended only has four default options, when slicing for a Prusa i3 Mk3/Mk3S, the profiles available are Extra Fine, Normal, Fine, Draft, Extra Fast, Coarse, and Extra Coarse, which use six different layer heights.
For all printers, the available profiles will cover a range of options, and each can be useful depending on what you want to print. The names generally signify the layer height or how fast an object may be printed. It’s worth noting that there are some reasons why you may not want to use Fast or Extra Fine for certain prints, so let’s take a look at the outlines for each of the default settings for an Ultimaker 3 Extended.
Extra Fine
The slowest of all the default settings, Extra Fine prints at a steady 60 mm/s and extremely thin 0.06-mm layer height. The top and bottom layers are both almost 17 layers each. Extra Fine goes the slowest in order to have the best control of print quality and is the thinnest to make the part as smooth as possible. When you have an intricate print, something incredibly small, or a combination of the two, Extra Fine may just be the best way to go.
Fine
In this setting, printing speed is kept at 70mm/s and layer height is 0.1 mm, and 10 layers are printed for the top and bottom. Great for final drafts, this option comes in handy for smaller or more intricate objects that the faster settings can’t handle. This is also used as a rough draft for precision objects that require a high amount of metric accuracy, like text or objects that have to fit together, and it’s slightly less time-consuming than Extra Fine settings.
Normal
This option – perhaps surprisingly – prints at a higher speed than the Fast default at 80mm/s. Even with a higher print speed, it’s still slower because the thin 0.15-mm layer height requires more layers for the same thickness. The top and bottom each have seven layers printed. Many use this default setting for most of their prints because it’s a good balance of speed, detail, and strength, and when some detail is needed, it’s still great for draft prints.
Fast
This default setting is the fastest and least detailed. It prints at a brisk 70mm/s and at a 0.2-mm layer height, 0.05 mm thicker than the Normal option. Both the top and bottom are printed with only five layers, the least of all these profiles, but it’s enough to keep the top or bottom from breaking easily. This is great for larger parts where detail isn’t a priority, or for rough draft test prints.
Custom
The default settings above may not work for every machine or every project. You can select a profile and then modify some of the settings (e.g. infill percentage) to fit the needs of the particular part. If you want to access this altered profile for future prints, it can be saved into a custom profile.
Interestingly enough, the wall thickness stays the same with all defaults, at 0.8 with a wall count of 2. The reason for this is that, while the layer height may change, the print width stays the same. Material settings such as Printing Temperature and Build Plate Temperature also stay the same, as well as the infill density at 20%. You can try each of your printer’s default profiles to see what works for you, and if none fit your needs, keep reading to learn about all the different customizable settings!
Plenty of Settings
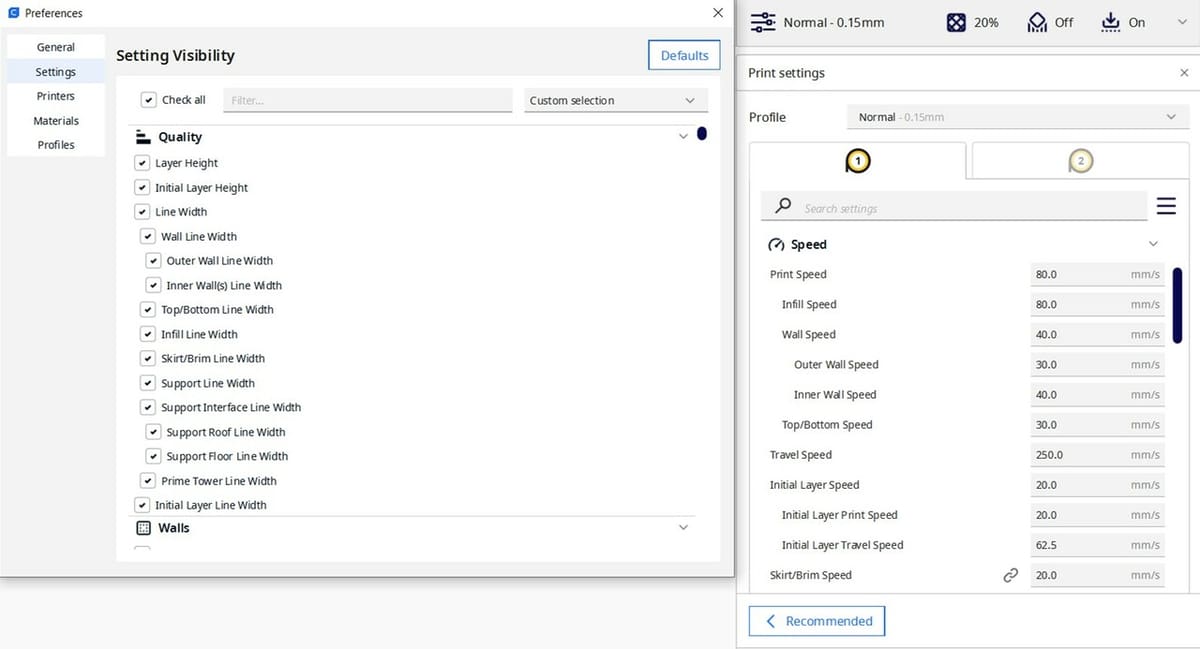
One of Cura’s strengths is how intuitive it is. It has about 400 settings if you check out the “setting visibility” tab, or you can stick with Basic, Advanced, or Expert. Whichever you choose, each setting is clearly displayed, organized, and easy to find and use. Each setting even comes with a description of what it does so you can alter your settings without needing to do any additional research.
Some of the most commonly edited settings like Print Speed, Layer Height, and Top/Bottom layers were mentioned in the previous section, but there are several others to consider. A few of the top edited settings are Wall Thickness and Wall Line count, as well as Infill and Infill Pattern, which are all used to help strengthen a part.
There are also many settings geared toward successful printing in Material Settings, like Printing Temperature, Flow, and Retraction, all of which help make sure the material is extruded correctly. When needing to adjust bed adhesion, settings like Build Plate Temperature and Skirt, Brim, and Raft are perhaps the most helpful. For more intricate prints with lots of overhangs, you may want to check out the Support settings as well as Cooling and Dual Extrusion, if your printer is equipped for these.
Cura has a large number of settings that you can alter, although in reality a lot of them rarely need to be changed. Other software like Netfabb may have more advanced features (e.g. interior lattice structures), but Cura can still achieve the same with its use of Tree Supports, Infill Support, and some crafty CAD work.
Updates are also happening constantly, so while Cura may not have as many fancy features that subscription software have, it may eventually add them.

Material Compatibility
When it comes to filaments, the only limits are what your FDM 3D printer can handle. If your printer is retrofitted for abrasive materials like metal, ceramic, carbon fiber, wood, or high-temperature materials like nylon, then Cura either already has or can get you all the material settings you need. For those without a hardened nozzle, Cura still has you covered with PLA, ABS, TPU, PETG, HIPS, and PVA settings.
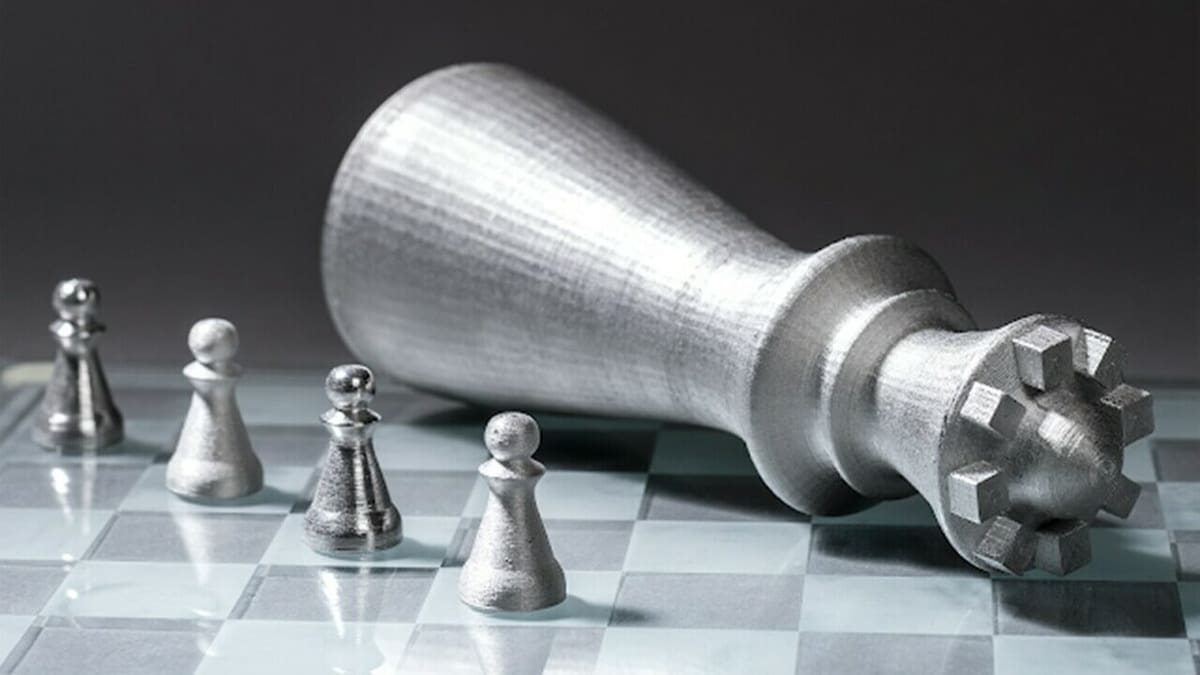
For each filament, Cura either already has a default setting in Manage Materials, or you can go to the Marketplace and search for the material to import. The newest update has incorporated settings for 3D printing metal materials like the BASF Ultrafuse 17-4PH and Ultrafuse 316-L stainless steel filaments. These are two recent examples of the many materials tested by Ultimaker printers to get rid of the guesswork, however, they aren’t rated for all 3D printers so some adjustments may be required if you have a different machine.
A great deal of slicers allow you to import new materials, but few have such streamlined access to new materials and settings like Cura’s Marketplace. If you’re working with a new or rather exotic material, Cura has probably done much of the legwork in order to get you a successful print.
Plug-ins
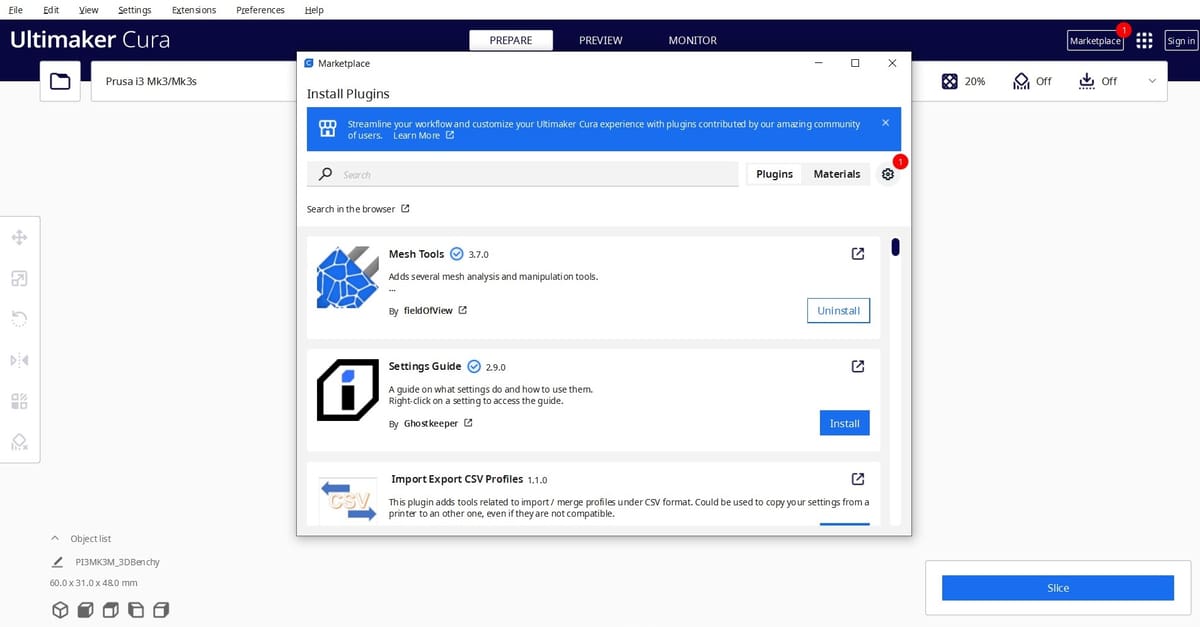
The Marketplace is your one-stop shop for most of your printing needs. In it, you can find plug-ins – components that add extra functionality – to make printing easier. You can easily access it by clicking the Marketplace button in the top-right corner of Cura.
Among the many plug-ins (or add-ons) available, one that’s especially useful for beginners – or those delving deeper into Cura’s settings – is Ghostkeeper‘s Settings Guide. When the information provided by Cura isn’t enough to help you figure out if you’re opting for the right feature or what kind of adjustments you need to make, this plug-in can help you understand each of the settings, what they do, and how to use them.
You can also find Auto-Orientation by nallath, which automatically repositions models to lessen the amount of supports needed, and Z Offset Setting by fieldOfView to adjust the distance between the nozzle and the print bed, among other options.
You can also take a look in the Marketplace at some of the more popular brands of material, such as Polymaker, Proto-Pasta, NinjaTek, eSun, Matterhackers, and even ColorFabb’s Color on Demand filaments. Each material has been tested on Ultimaker printers to check print quality and to see which materials are compatible enough to be printed together.
Fast Slicing
When it comes to slicers, you want speed, ease of use, and accuracy. Ease of use has already been mentioned, but Cura’s recent 5.0 update truly focuses on speed and accuracy.
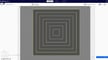
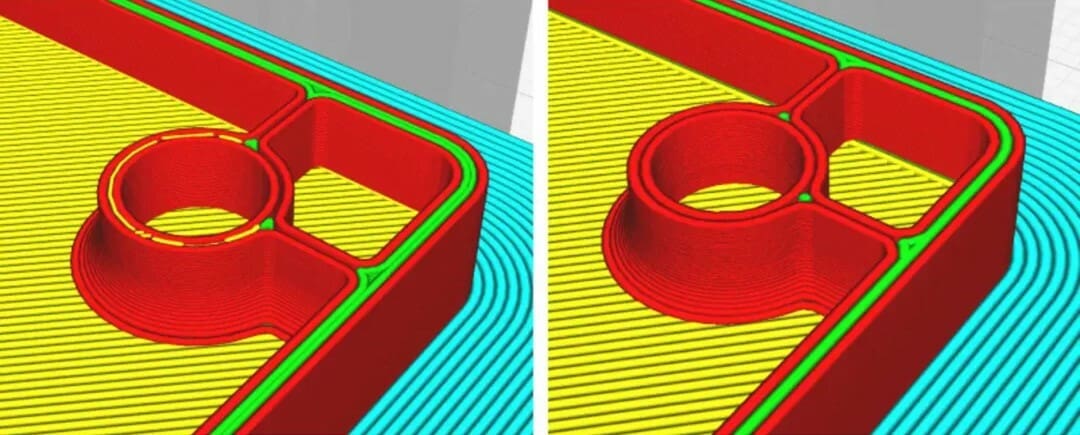
A neat addition is the new variable line width feature that automatically changes the line width consistency during slicing in order to lower print time and prevent gaps in printing.
Without this feature, many fine details wouldn’t be possible to make. Another bonus is that it create stronger parts. Changing to variable line width may seem like a small alteration, but it can decrease print times by up to 20%.
Remote Printing

Lots of printers nowadays come with wireless capabilities that allow you to send files, start prints, and even monitor your printer’s progress from your computer or phone. This can be helpful when you have lots of printers or if you’re not near your machine.
If you have an Ultimaker printer, Cura’s remote printing is quite amazing. In order to use this feature, you have to connect your printer to your computer via Wi-Fi before you can send prints (or monitor prints, if you have a camera). If you don’t have an Ultimaker or another wireless printer that has a Cura-supported plug-in, you’ll need to use OctoPrint.
There are a few ways to control your 3D printer remotely, like MatterControl, 3DPrinterOS, and others, but OctoPrint seems to work the best with Cura. Almost any open-source printer can be modified to use OctoPrint, and with Cura’s OctoPrint Connection plug-in, wireless printing is available for just about anyone!
Ultimaker Academy
If you’re new to 3D printing and are eager to learn, there are a lot of tutorials out there to get started, including some directly from Cura. These lessons are provided by the Ultimaker 3D Printing Academy, which offers online courses about printing, materials, and Ultimaker printers.
If you have an Ultimaker printer, you can register it to gain access to a product-specific course, or you can subscribe to one of the software plans, with different courses and numbers of seats available depending on the subscription level.
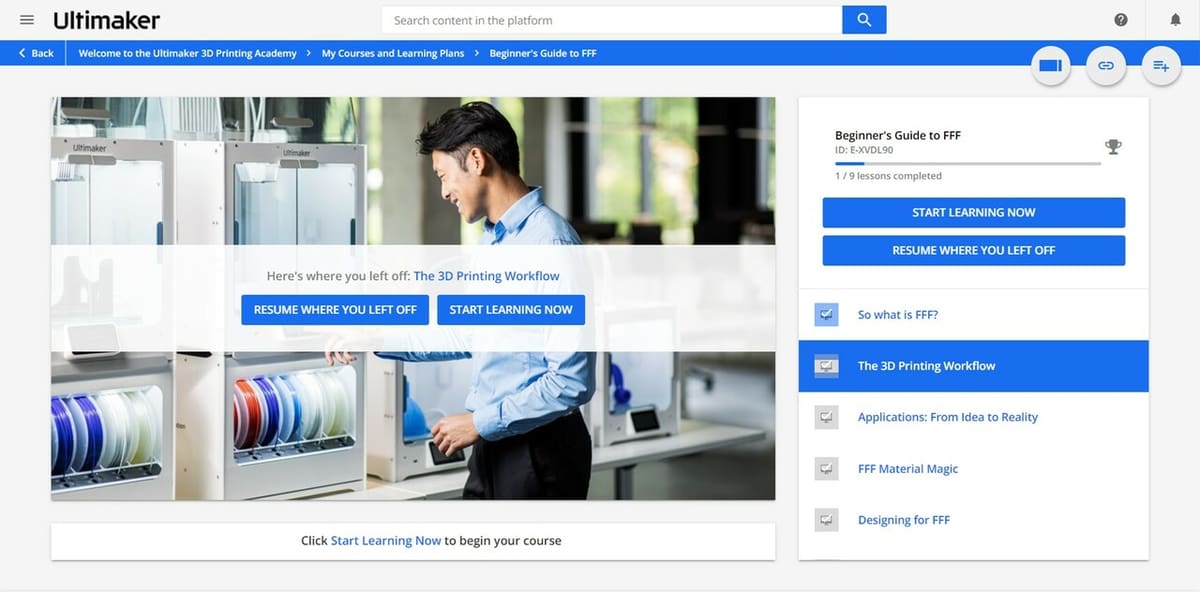
Ultimaker’s 3D Printing Academy has 10 courses that overall take about 4 hours to complete, with no single course taking more than an hour. You can start off with “Beginner’s Guide to FFF”, which is an hour-long course that covers the 3D printing workflow, designing, materials, Cura, tips, and workspace considerations. It does state that you need an Ultimaker printer as well as Cura, but in reality, you can follow along with your own printer to learn.
When done with the first course and its nine lessons, you can start on the shorter courses. Each course takes only about 10-30 minutes to complete and teaches about FFF (FDM) materials as well as tips, terminology, and best practices. This is definitely something to look into if you’re just starting out, or even as a refresher if there’s something you’ve forgotten.
Support
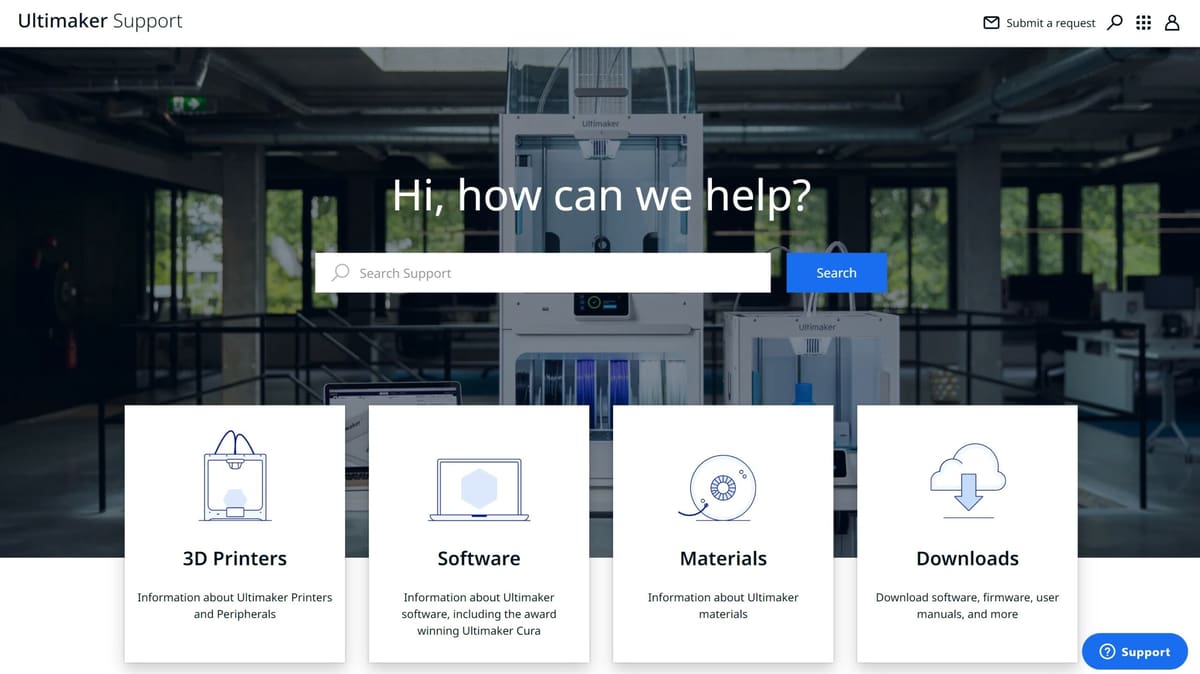
Cura has a great open-source following where anyone that has used Cura can help others with any issues that may come up. This means that if you have an issue, you could get support from official forums, professionals, and hobbyists alike. Be sure to check out both official and third-party forums for all your printing needs.
For example, an issue that may occur when you start printing is that, instead of the print happening in the center of the build plate, it gets shifted to the front-left corner. Checking with other makers will reveal that you simply need to change where the printing home axis is located. Issues related to third-party products and modifications can include flashed software, new print heads, plug-ins, and printer malfunctions, all (or most) of which can all be answered in the forums linked above. A quick Google or YouTube search should also lead to useful information.
So if you’re new to printing, surf the web for support. If you’re a veteran or extreme hobbyist, please jump onto some of the forums and give your advice and tips as well. Community support is one of the most important aspects of 3D printing; it has helped evolve the entire industry and is still helping to this day!
License: The text of "10 Good Reasons to Use Cura" by All3DP is licensed under a Creative Commons Attribution 4.0 International License.