Repetier Server: How to Set One Up

Repetier Server is an OctoPrint alternative that's easy to set up and offers tons of control features. Read on to learn how to set it up!
Remote control servers for 3D printers have become very popular in the 3D printing industry, with projects like OctoPrint and AstroPrint attracting thousands of users. These systems are super helpful for printing because they enable you to remotely start and stop prints, set temperatures, and so much more. Additionally, they give you an alternative user interface as well as a few extra capabilities that your printer’s default LCD might not already offer.
Repetier Server is another terrific 3D printer server option. Though it’s perhaps less popular among hobbyists than OctoPrint, it still has lots of features that shouldn’t be overlooked. Its capabilities include webcam monitoring, a separate LCD interface, integrated slicing for 3D models, and more.
Similar to OctoPrint and other remote control servers, Repetier Server runs off of a host computer – most commonly a Raspberry Pi board – along with a few other components like an LCD screen. In this article, we’ll show you how to set up Repetier Server for your 3D printer. Enjoy!
Benefits
Similar to an OctoPrint server, Repetier Server offers many benefits for your overall 3D printing experience. The most obvious one is the remote control capabilities. Once set up and connected, you’ll be able to remotely access an interface with a full control panel for your printer. You can move all the axes on your printer, control the fan speed, set the bed and nozzle temperatures, and manually send G-code commands straight to your printer’s motherboard.
Besides remote printer control, Repetier Server provides online slicing, so you don’t even need a sliced G-code file to start a print remotely. Instead, you can upload your 3D model into the server’s online slicer interface. Here, you can scale, move, and otherwise manipulate the model before slicing it into a printable G-code file that you can send to your printer.
Additionally, Repetier Server’s built-in slicer provides many different slicing options. According to their documentation, you can pick what slicing platform you want to use – for example, Cura and PrusaSlicer – as well as different pre-configured slicer profiles within each slicer option. This allows you to find the perfect slicing profile to fit your specific 3D printer.
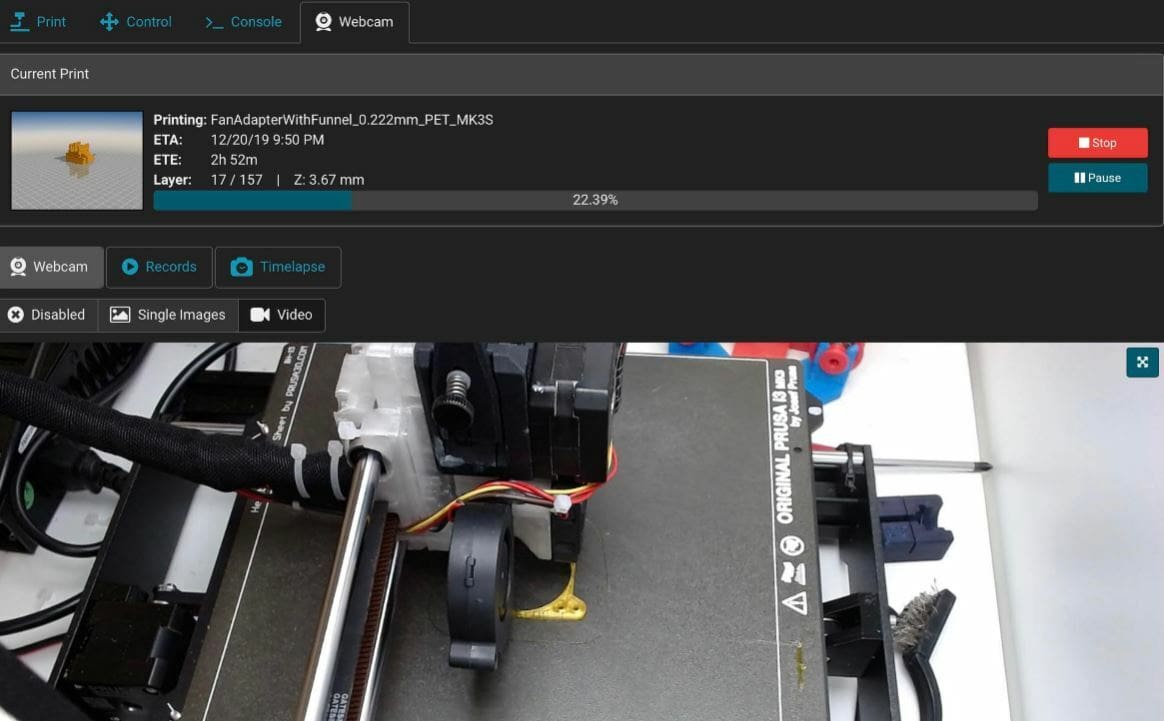
And, like most remote printer control servers today, Repetier Server also offers a webcam stream section. Here, you’ll be able to monitor your printing progress with a live stream from a webcam connected to the server’s hardware.
What Do You Need
If you want to setup Repetier Server, there’s some hardware required to do so. The following is an overview of the components you’ll need:
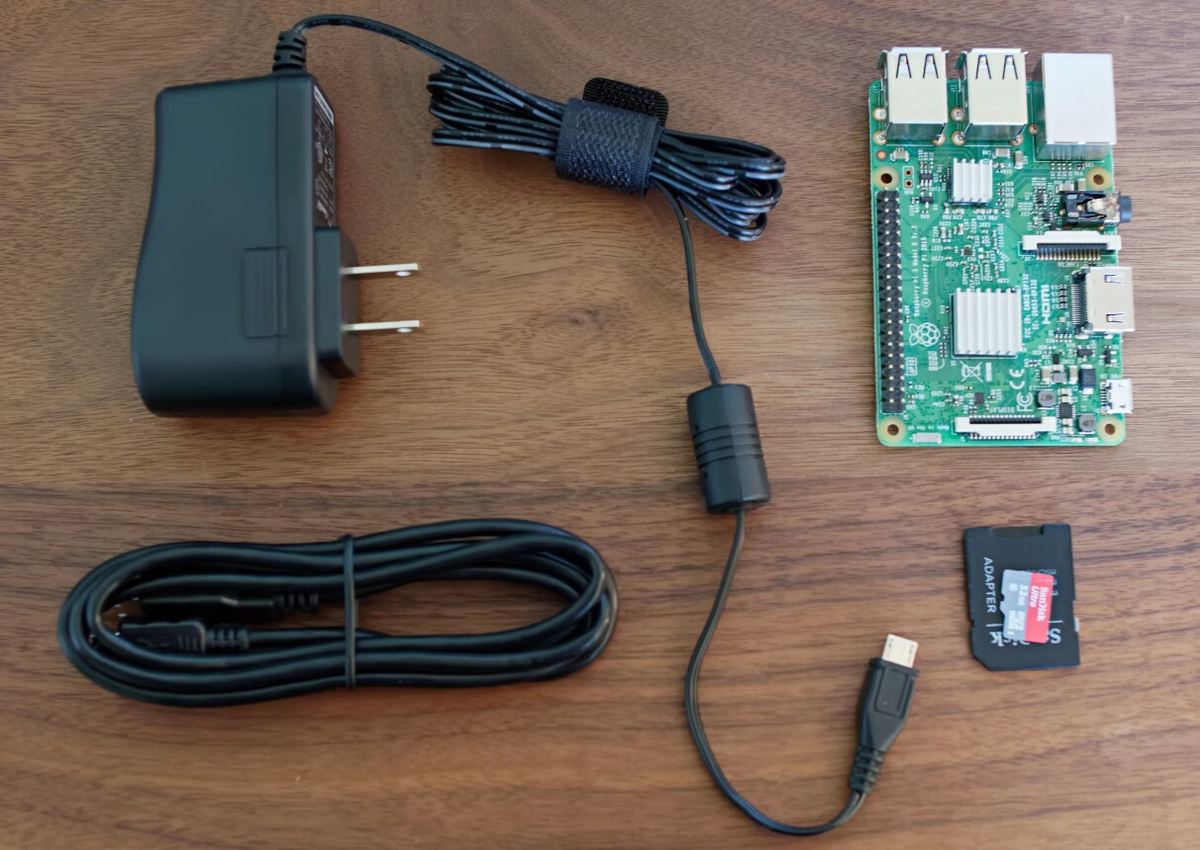
- Host computer: A computer is needed to host the server, and for this tutorial, we’ll specifically present how to set up a Repetier Server with a Raspberry Pi. We suggest using a Pi with USB ports, a display connector, and a camera port, such as the Pi 3B+ or 4. However, you could use virtually any computer, including an old PC desktop or another SBC. Just make sure you can change the OS first.
- Compatible power supply: You’ll need a sufficient power supply for the host computer to ensure it has proper power all the time. For most Pi boards, you’ll want a 3A 5.1-V DC output power supply.
- USB cable: A USB cable is needed to establish a connection from the host computer to your 3D printer’s motherboard.
- MicroSD card: If you’re using a Raspberry Pi or other SBC as the host computer, a MicroSD card is necessary for running the compatible Repetier Server OS on the Pi board. While you won’t need all the space, a MicroSD card with 32 GB or more is preferred. Also, make sure you have a USB-to-MicroSD card reader.
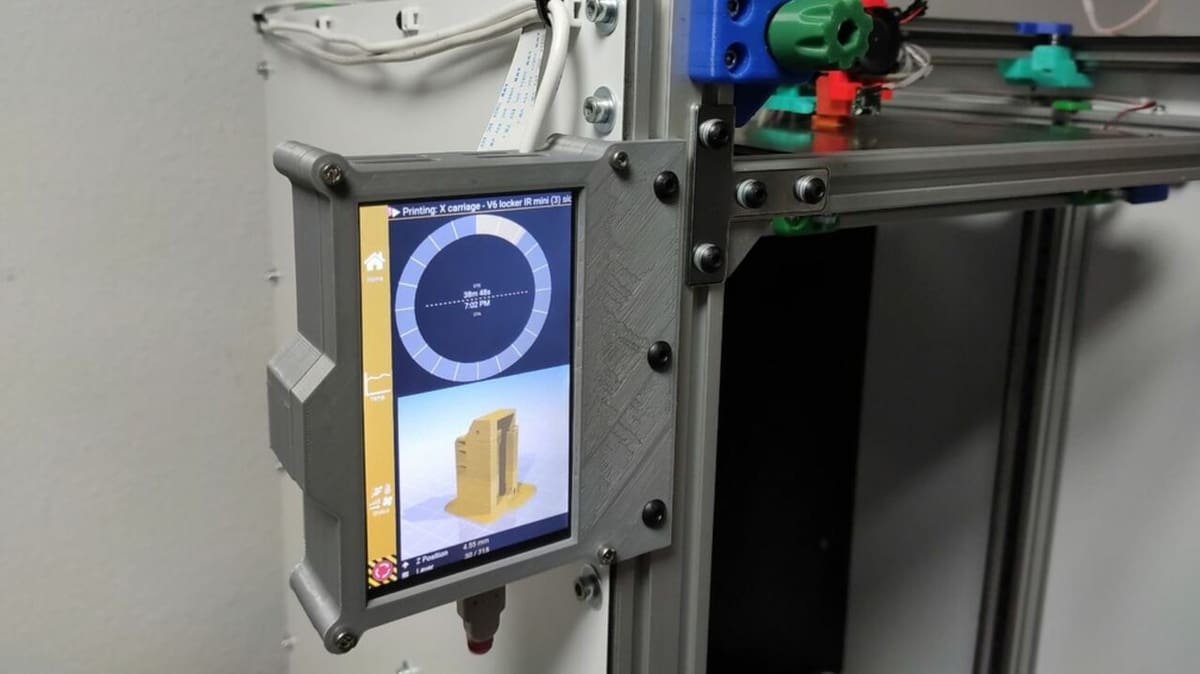
- Compatible display screen: To set up the Repetier Server, you’ll need a display screen that you can connect to your Pi board (or another host computer device) to go through the initial setup steps.
- Laptop or PC: Lastly, you’ll need a personal computer of some sort to flash the OS image to the host computer. The operating system of your computer doesn’t really matter as long as it can run a web browser.
On top of these hardware components, you’ll also want Raspberry Pi Imager installed on your laptop or PC. It’s image flashing software that’s needed to load the Repetier Server firmware to your Pi board’s MicroSD card. You can download Raspberry Pi Imager for free from Raspberry Pi’s website.
Once you’ve got all of this, you’re ready to get started!
Flashing the Image
The first step to setting up Repetier Server on your Raspberry Pi is to flash the operating system image to your Pi’s MicroSD card:
- Open your Laptop, head to a web browser, and go to Repetier’s Configuration Image Page.
- Click the option titled “Raspberry Pi Image”, which will take you to a new page.
- Download the latest version of the Repetier Server image, which should be the top option with a download icon in the name. For this guide, we chose the V33 Bullseye edition of the software, but newer versions might be available for you. The zip file for the firmware image is pretty large (over 1 GB), so the download might take a while.
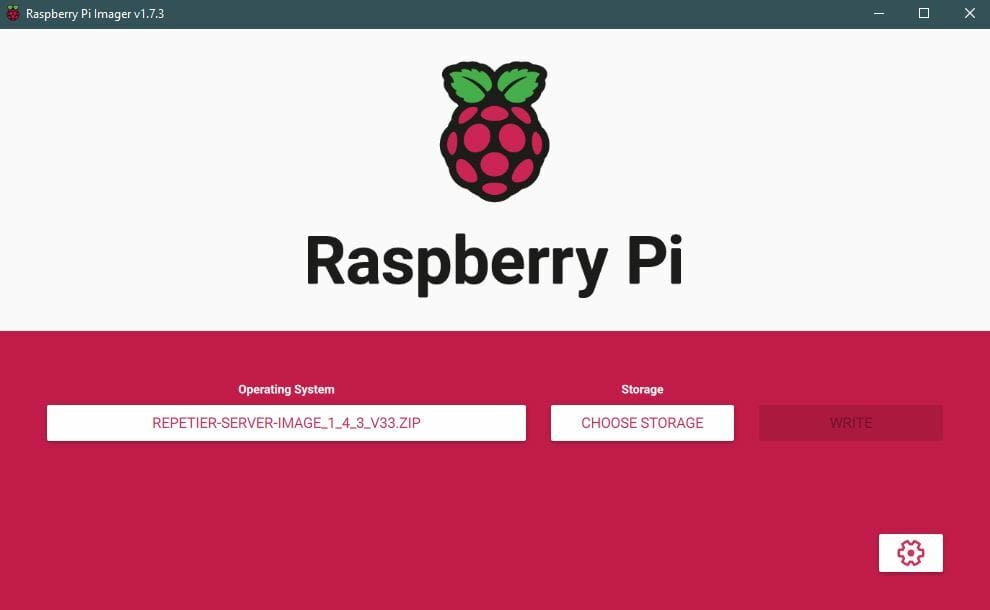
- Open Raspberry Pi Imager on your computer.
- Click “Choose OS”, then “Use Custom” at the bottom of the list, and select your downloaded Repetier Server image zip file from your computer.
- Plug the MicroSD card for your Raspberry Pi board into your computer. (You might need a USB-to-MicroSD converter for this.)
- On Raspberry Pi Imager, select “Choose Storage” and click on the inserted MicroSD card.
- Click “Flash” to load the firmware image to the MicroSD card. This process might take a few minutes, so sit tight!
Connecting to Internet
Next, we’ll need to connect Repetier Server to the internet. If you have a hardwired internet connection via an Ethernet cable, you can skip this step because the firmware will automatically detect the connection and use it.
But, if you’re planning on using Wi-Fi, you’ll need to set up the connection on your Raspberry Pi board. There are two ways of doing this; either through an access point using your computer (Option 1) or through your Pi board’s connected display (Option 2).
Option 1
- Remove the MicroSD card from your computer and insert it into your Pi board’s respective slot. Make sure the board is powered off when doing this.
- Plug in your monitor or LCD screen to your Pi board.
- Power on the Pi board and wait for it to boot up with the new Repetier Server firmware. As it’s the first time, it might take a few minutes.
- On your computer or a Wi-Fi enabled smartphone, go to your Wi-Fi settings.
- Find the Wi-Fi option titled “RepetierServer” (this is the SSID) and connect to it. The password should be “12345678”.
- Once connected, open a web broswer on your smartphone or computer, then go to http://RepetierServer.local. If this doesn’t work, try going to http://10.10.10.1, which is the default IP for your Repetier server.
- Once on the web interface, review the terms and conditions statement and agree in order to continue.
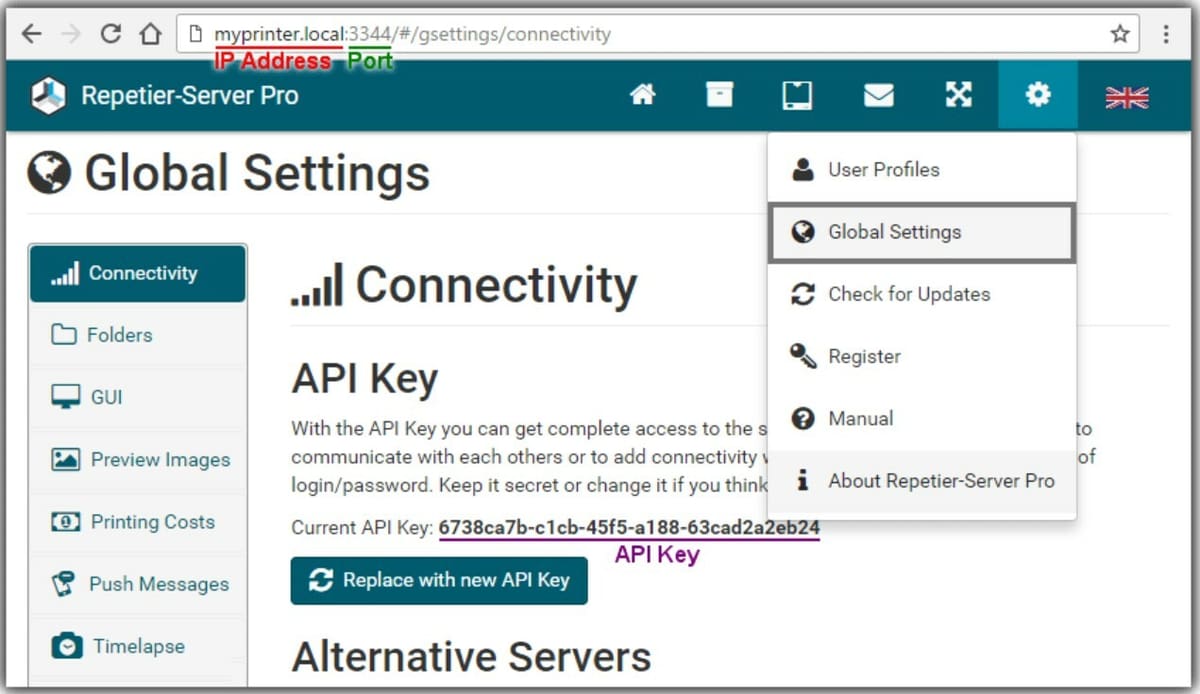
- Find the Settings icon located in the top right corner of the interface.
- Click “Global Settings” from the drop-down menu, then select the “Network/Time” option.
- Go to the “Connection Settings” tab and input the region ID based on what country you’re located in.
- Go back to the “Available WLAN Router” tab and select the Wi-Fi network that you want to use from the available options.
- Type in the password for the chosen Wi-Fi network, then click “Connect”.
Option 2
- Follow steps 1 through 4 from the previous method.
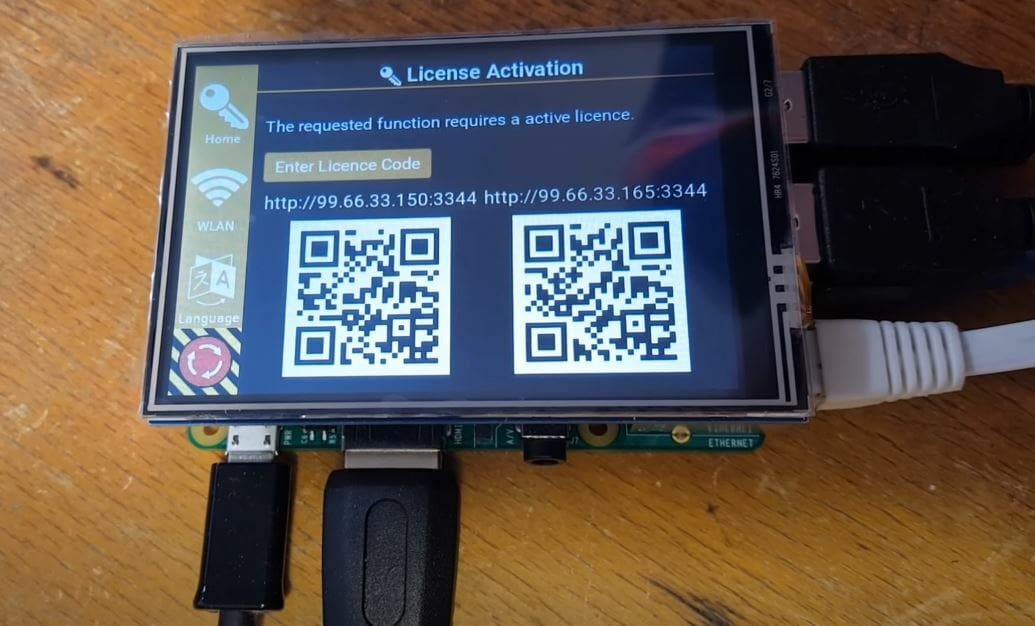
- On the LCD interface, click the “WLAN” tab from the sidebar, then select “More”.
- Enter in the region ID based on what country you’re in.
- Click on the “WLAN” tab again.
- Select the network you want the server to run on from the options available.
- Click on the “Password” section, then type in the password for the respective network SSID.
- Click Enter, then “Connect”.
- Wait for the Pi to connect. Once connected, the Wi-Fi network that you’ve connected to should be labeled in orange text.
Configuring the Server
Next, we need to configure Repetier Server based on your setup. This step is technically optional if everything is working perfectly. But if you want to connect a webcam, rotate the interface on the connected LCD, or implement another change, you’ll need to configure the software a bit.
Under the “Special Cases/Troubleshooting” heading of Repetier’s Raspberry Pi Image web page, you’ll see a list of common issues and solutions that involve changes to the settings or even adjustments to the configuration file. If your special case requires changes to the configuration file, you can do that as follows:
- Turn off your Raspberry Pi board (and connected display).
- Remove the MicroSD card.
- Plug the MicroSD card into your computer
- Open your computer’s file explorer, then click the inserted MicroSD card storage device.
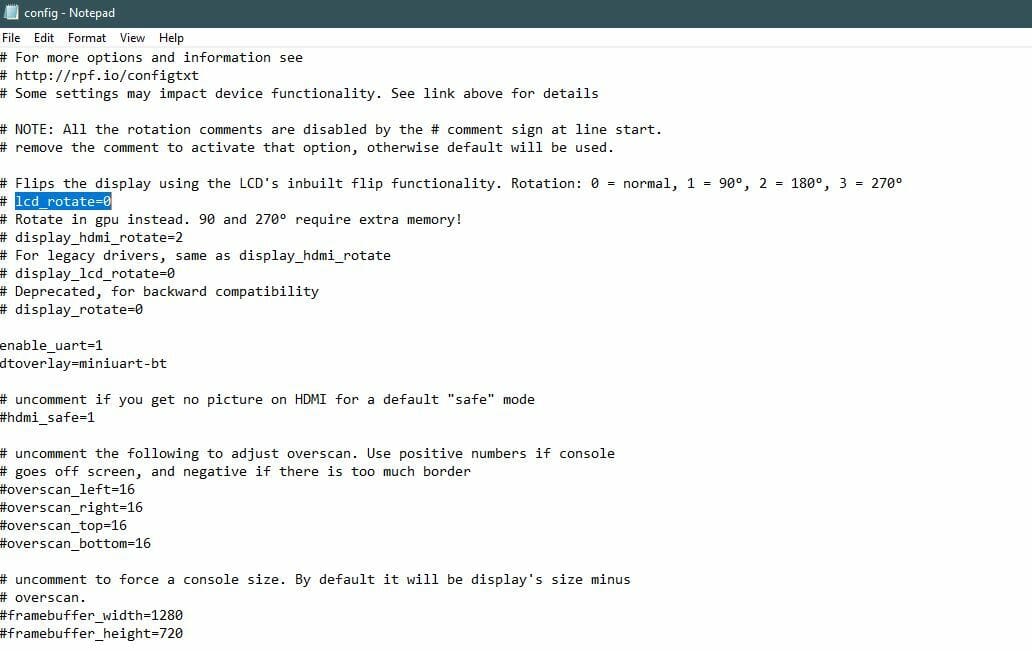
- Locate and open the file titled “config.txt”. You can open this file in any text editor application such as Microsoft Notepad.
- Based on the guidance provided in Repetier’s Special Cases/Troubleshooting documentation, make adjustments to the configuration file relevant to your special case.
- Save the changes and eject the MicroSD card.
- Reinsert it into your Pi board.
- Power on the board (and connected displays), then make sure everything works as desired.
Connecting to the 3D Printer
Now that we’ve connected the server to the internet, it’s time to configure it to your 3D printer. Follow the steps below to do so:
- Make sure your Raspberry Pi board (and the connected display) and your 3D printer are powered on.
- Connect the Pi board to your printer via a USB cable.
- On your laptop (or PC), open a web browser and go to http://RepetierServer.local. This will connect you with the online interface for your Repetier Server host.
- Click “Add new Printer”, then enter a name for your 3D printer.
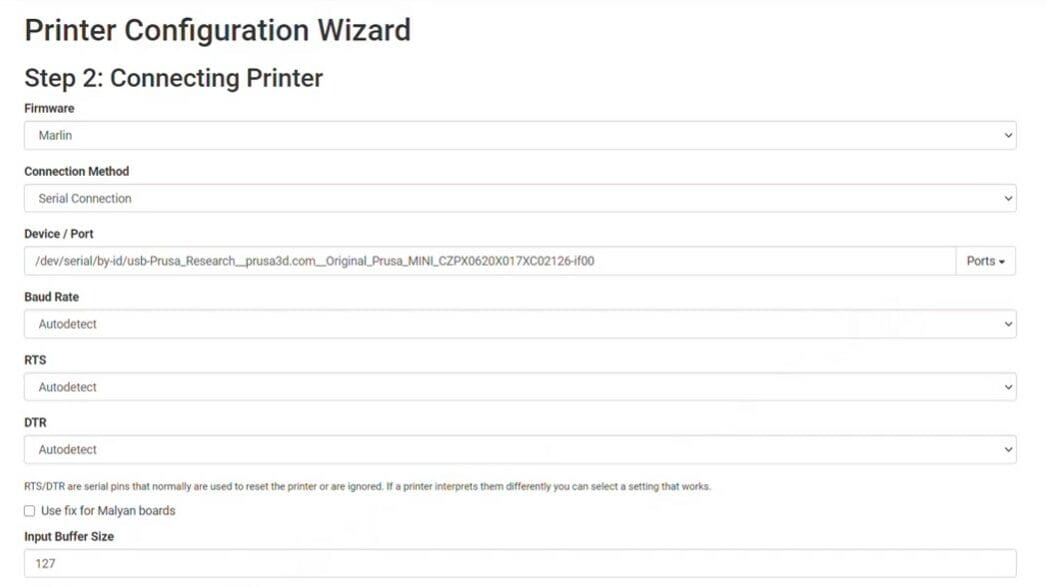
- Click “Continue with Step 2”. On the next page, input the requested information about your printer. You should be able to leave all of the default information the same, but make sure that you’ve chosen the “Firmware” flavor that your printer is running.
- Click “Continue with Step 3”. This will connect your Repetier Server to your connected 3D printer, which can take a few seconds.
- On the “Step 3: Geometry” page, you’ll need to input the physical parameters of your printer. This includes the shape of the bed, X- and Y-axes limits, and the maximum Z-axis height. If you don’t know this information, you should be able to find it on the website of the manufacturer of your printer.
- Click “Continue with Step 4”, then confirm the number of extruders and accepted filament diameter of your printer. If you have a heated bed, make sure to select “Yes” for this setting. The same goes for the “Heated Chamber Installed” option.
- Click “Continue with Step 5” and input the number of fans you have installed on your printer. Most printers should have two or three.
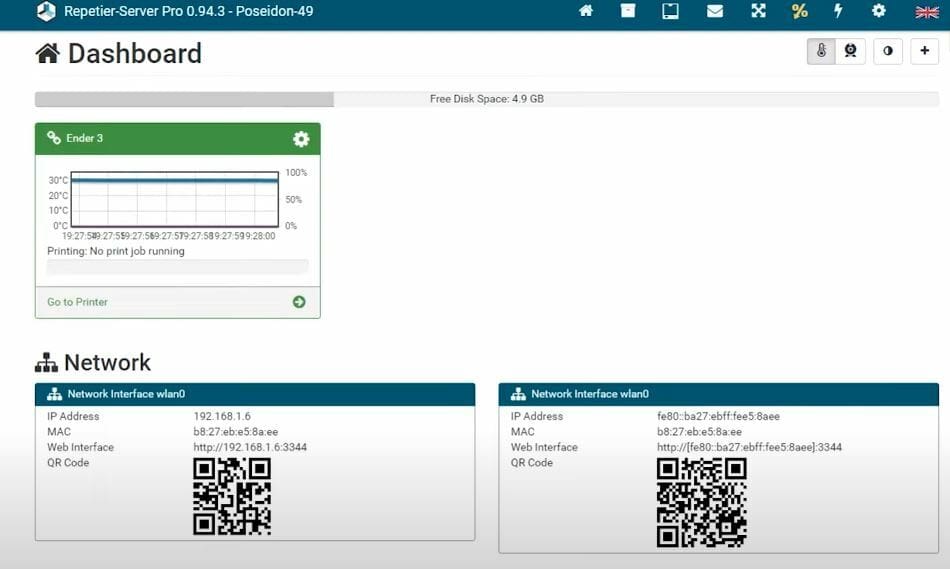
- Click “Finish”. After this, you should be taken to the main menu of your Repetier Server interface, where you’ll see a section for your new connected printer.
And that’s it! You’ve now successfully set up Repetier Server and connected it to your 3D printer! We’ll explain more about how you can use the online Repetier Server interface in the next section.
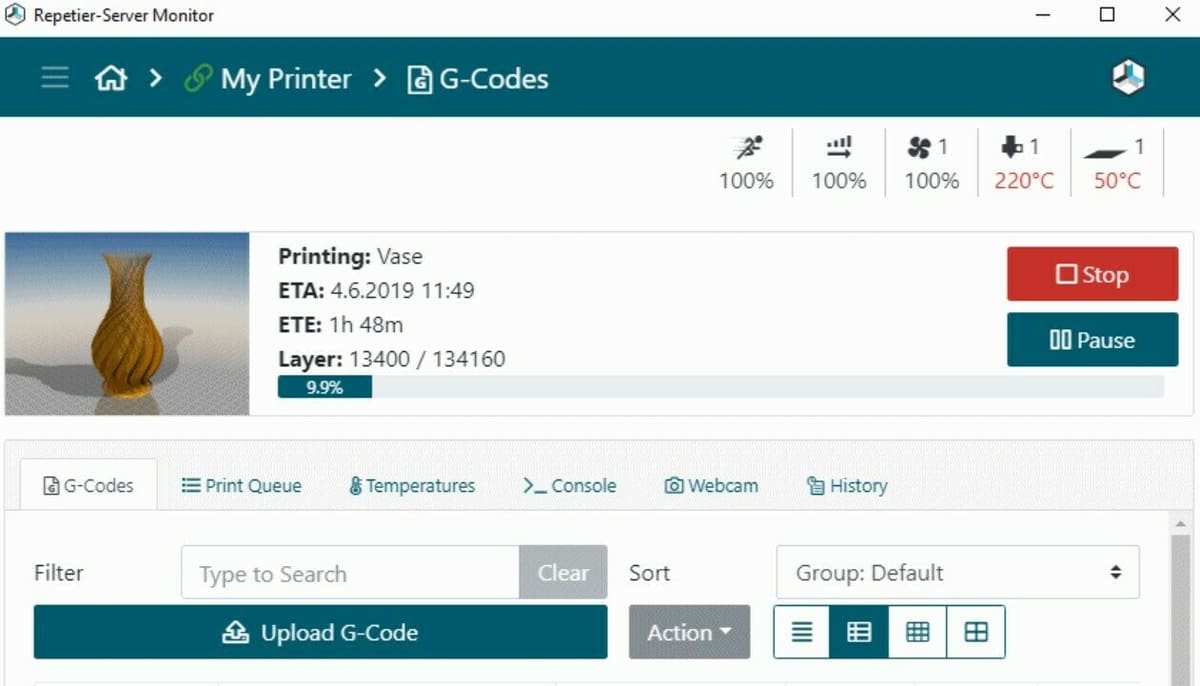
Using Repetier Server
Now that we’ve configured and connected your server, you’re probably wondering how you can use it. Controlling your printer through the Repetier Server is done through the online interface, which you can access by going to http://RepetierServer.local or the specific IP address of your server.
Once you’re in, you’ll see a tab for each of your connected printers, displaying the current temperature and any ongoing print jobs for the machine. Click on the tab to open up the full control panel for the printer. At the top of the interface, you’ll see the following labels:
- General: In this tab, you’ll find some general information about your 3D printer(s), including the name, firmware flavor, connection settings, and more. If you make any relevant changes to your printer, make sure to update the information in this section accordingly. At the bottom of the “General” section are also the default acceleration and jerk values, which you can change if you want.
- Tools: This tab covers everything that has to do with the heating components on your printer, such as the hot end, heated bed, and if applicable, heated chamber. Here, you can set the maximum temperatures as well as predefined temperatures. You can even PID tune heater components by clicking the “Start Wizard” button.
- Printer Shape: This tab covers the dimensions of the print space and gives you a nice visualization of your print bed. If you ever change the dimensions of your printer (e.g. Ender Extender kit), make sure to adjust the dimensions in this tab.
- Webcam: If you want to connect or already have connected a webcam, make sure to check out this tab. To add a camera, click “Add Webcam”, input the specifications of your camera, then click “Assign”. Also, make sure to click the “Save Configuration” button at the top right of the interface to save any changes you make.
- G-Codes: This tab features a G-code terminal where you can manually send G-code commands to your printer. You can use the available features to make “Quick Commands”, too, so you don’t have to type in the same command every time.
- Rescue: Finally, this tab features tools related to power-loss recovery on your printer. By default, it’s turned off, so if you’re worried about losing power to your printer mid-print, consider turning “Enable Rescue Module” on.
Setup Issues
Lastly, if you had any issues during the setup process, the following are a couple of common issues:
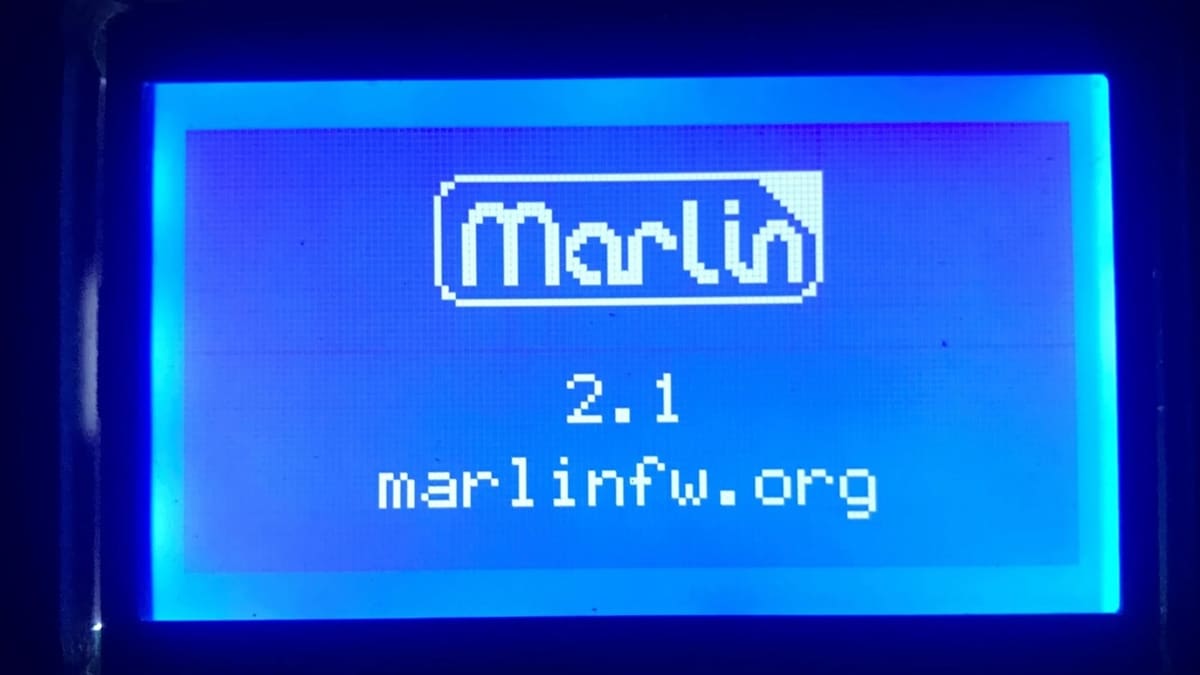
- Firmware flavor: If you’re not sure what firmware your 3D printing is, it’s a pretty solid guess to go with Marlin. That’s because most 3D printers, even if they don’t use official Marlin firmware, use Marlin-based firmware. So, if you don’t know what firmware you’re printer is running, guessing Marlin is likely to work.
- Inputting bed dimensions: Note that you should list the dimensions of the bed using just the “X right” and “Y rear” boxes. For example, if your printer has bed dimensions of 235 x 235 mm, set the “X left” and “Y front” boxes to 0 mm, and set the “X right” and “Y rear” boxes to 235 mm.
License: The text of "Repetier Server: How to Set One Up" by All3DP is licensed under a Creative Commons Attribution 4.0 International License.