DIY Self Driving Car Projects with Arduino, Raspberry Pi, & More

Arduino, Jetson Nano, and Raspberry Pi self-driving cars are here! Discover the projects that are accelerating this road to the future.
On the threshold of a new automotive era, the road to the future is no longer paved with asphalt alone, but also with the promise of artificial intelligence (AI) and groundbreaking creativity.
Driving in a real-world environment can be challenging because all sorts of unforeseen events can occur. For this reason, making a truly safe autonomous car is much more than simply “building an advanced robot” with lots of programming rules; it requires that the machine “learn” to deal with the unexpected.
This is something that is still far from perfect, but it’s made possible by continuous advances in AI, which allow the development of deep neural networks and sophisticated algorithms. These systems are capable of learning from large volumes of data, identifying complex patterns, and making decisions in real time, bringing the processing capacity of autonomous vehicles ever closer to the level of perception and reaction of a human being.
In this list, we’re including some great DIY self-driving car projects based on a variety of boards. They have different levels of difficulty, so that you don’t feel intimidated to explore or develop your skills by building your first autonomous vehicle or learning about a new project.
But first, let’s look at some important things to know about automation and what you might want to keep in mind before taking on any of these challenges. Ready, set, go!

Additional Information

Since we’re talking about projects that try to adapt to real environments, it’s useful to know that there are different levels of automation according to the Society of Automotive Engineers (SAE). These are:
- Level 0 – no automation: The vehicle has no automation. The driver is responsible for all driving functions, including steering, acceleration, braking, and decision-making.
- Level 1 – driver assistance: The car may have a driver assistance system, such as adaptive cruise control or lane keeping assist. However, the driver must always be alert and ready to take control.
- Level 2 – partial automation: The vehicle can simultaneously control steering and acceleration and braking, as in an advanced driver assistance system. However, the driver must keep their hands on the steering wheel and be prepared to take control at any time.
- Level 3 – conditional automation: The vehicle can operate autonomously in certain conditions or environments (e.g. on highways). The driver must be available to take control when requested by the system, but may be diverted from driving-related activities while the system is operating.
- Level 4 – high automation: The vehicle can operate autonomously in a variety of conditions and scenarios, such as within a geographically defined area (e.g. in urban areas or car-sharing zones). The driver does not need to be present at all times, and the system can handle driving in complex scenarios without human intervention.
- Level 5 – full automation: The vehicle is fully autonomous and requires no driver intervention. There is no need for a steering wheel, pedals, or manual controls, and the vehicle can operate in any conditions without the presence of a human driver.
After the overview of the different automation levels, let’s take a look at what you might want to consider before selecting a project to dive into.
Considerations
If you’re thinking about venturing into the world of self-driving cars and want to replicate a project that involves toy cars or robotics kits, it’s essential to take a well-planned and informed approach. While the ideas listed in this article may seem straightforward at first glance, they offer a unique opportunity to explore advanced concepts in AI and robotics.
Here are some important considerations to help you get started and maximize the success of your project:
- Define your goals clearly: Before you begin, it’s crucial to define what you hope to achieve with your project. Are you interested in learning about the basics of autonomous navigation? Do you want to develop a more complex system with advanced capabilities like object recognition and route planning? Having a clear vision will help guide your hardware and software choices.
- Choosing the right kit or car: Selecting the right robotics kit or toy car is a crucial step. Make sure that the model you choose is compatible with the tools and components you intend to use. Robotics kits with good documentation and community support can be extremely helpful for beginners, while modified toy cars offer a more personalized and experimental approach.
- Invest in quality components: To achieve satisfactory results, choose quality components that ensure reliable performance. Peripherals such as cameras, lidar, and ultrasonic sensors, as well as actuators and controllers, play crucial roles in building an effective autonomous system. The accuracy of sensors and the robustness of actuators will impact the vehicle’s ability to navigate accurately.
- Learn and experiment with AI algorithms: Implementing AI algorithms is the heart of any self-driving car project. Familiarize yourself with techniques like machine learning, image processing, and path planning algorithms. Use popular libraries and frameworks like TensorFlow, OpenCV, and Robot Operating System (ROS) to make integration and experimentation easier.
- Develop and test iteratively: Start with a basic prototype and test it in controlled environments before moving on to more complex scenarios. Collecting data during testing is essential to fine-tune and improve the algorithms and performance of the vehicle. Review and modify your approaches as needed.
- Engage with the community: Participating in online forums related to robotics and self-driving cars can provide valuable insights and support. Sharing your experience can help you solve problems, get suggestions, and stay up to date with the latest trends and technologies.
- Consider ethical and safety issues: Even for small projects, it’s important to think about ethical and safety implications. Make sure your project not only functions properly, but also operates in a safe and responsible manner. Be mindful of issues such as the privacy of data collected by sensors and the operational safety of the vehicle.
By following these guidelines and taking a meticulous approach, you’ll be well-positioned to create an innovative and effective self-driving car project. Remember that the development journey is both a challenge and a learning opportunity – use each step to expand your skills and explore new possibilities.
Arduino Self-Driving Car
If you’ve ever had any experience with Arduino and are looking for something simple to start with, you can’t miss this project. The kit used allows you to build robots for specific functions like tracking light, following a line, or avoiding obstacles using different sensors. However, in this particular project, the various sensors will be used to give the car autonomy based on these principles.
This project doesn’t use the advanced AI that many more ambitious and complex projects adopt, but it’s a great opportunity to better understand the algorithms and how they control the car in specific conditions using sensors and programming logic. This is how the student will learn to teach the car to react autonomously with the help of sensors and programming.
The most important aspect of this project is the hands-on learning about how autonomous vehicles perceive and interact with their surroundings. By programming the car to react to different scenarios, participants not only learn about sensors and control logic but also develop problem-solving skills.
Besides the robotics and electronics kits, you will need to build a road using stationery materials – just make sure to keep the track as flat as possible and use colors that offer high contrast so the sensors can perform well. And of course, you can get creative and add as many obstacles and curves as you want.
- Difficulty: Beginner
- Designer: Ben Finio, PhD, Analog Devices
- Project page: Science Buddies
- Core components: Arduino Uno, ultrasonic sensor, 5x LED bulbs, breadboard, robot chassis kit, stationery materials for the track, toys, miscellaneous objects to be used as obstacles

Wheelson

CircuitMess’ Wheelson is an exciting DIY kit for those who want to explore the world of self-driving cars and programming in a hands-on and educational way.
It’s designed for users ages 11 and up to easily build their first self-driving car, assembling each electronic component in detail with step-by-step instructions (PDF). Not only does Wheelson make it easy to learn about electronic components, it also introduces advanced concepts like computer vision and object recognition algorithms, which are used for autonomous driving.
Bluetooth and Wi-Fi integration allow the car to connect to other wireless devices, while its LCD display provides a real-time view of what the robot “sees”. This project offers a hands-on approach to STEM education by allowing users to program the robot for autonomous navigation either on screen or with Python and Circuit Blocks (similar to Scratch), which offers a visual and educational approach.
The kit is available for purchase through CircuitMess via a 1-year STEM subscription, and it’s also available from the Arduino Store for ~$95, as well as from other resellers.
- Difficulty: Beginner
- Designer: Circuit Mess
- Project pages: CircuitMess, CircuitMess (build guide), GitHub (firmware)
- Core components: Main circuit board, camera and headlights board, display board, 4x electromotors, 4x wheels, plastic chassis
JetAuto ROS Robot
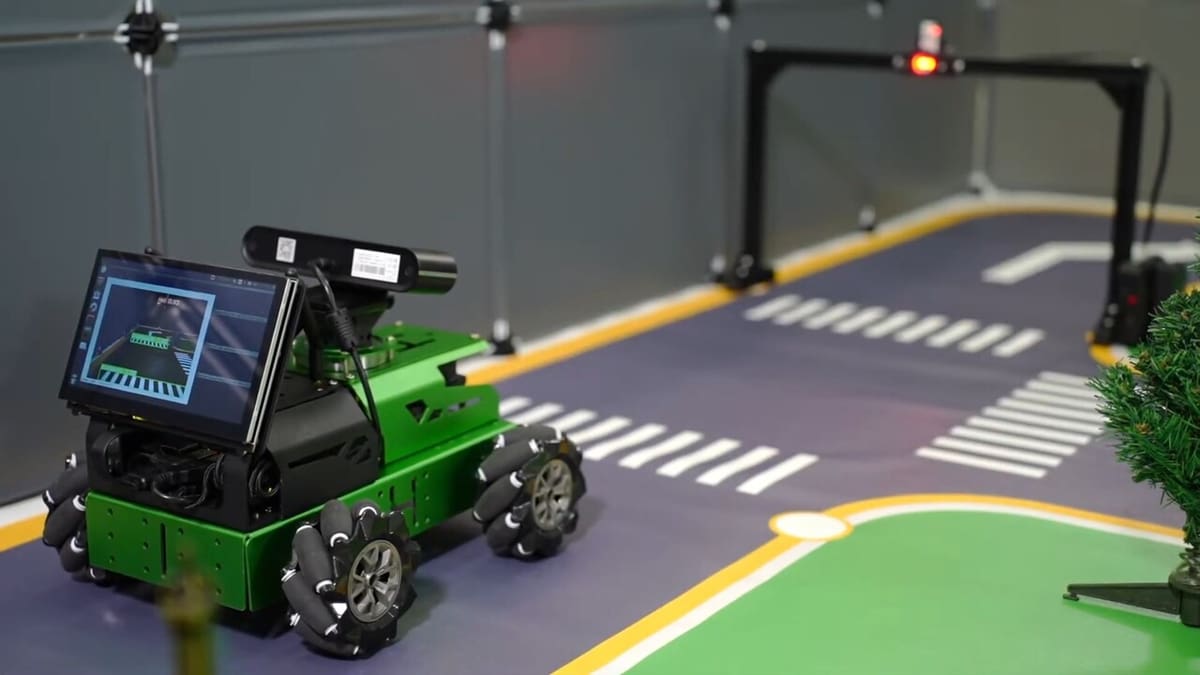
The clear and educational tutorials provided also make the JetAuto accessible to beginners, while providing a sophisticated robotics platform powered by the Jetson Nano.
With support for Robot Operating System (ROS), users can pre-check motion algorithms, avoid costly errors, and visualize the entire navigation process through rviz, a virtual environment that accurately replicates the real world while testing the robot’s programming and behavior.
The integration with lidar and a depth camera is especially noteworthy. With these, JetAuto is capable of quickly and accurately performing simultaneous localization and mapping (SLAM). This means that, even in unfamiliar environments, the robot masterfully plans its path, avoiding obstacles and adjusting its route in real time to drive autonomously and overcome unforeseen circumstances.
Thanks to the large number of advanced features, it’s possible to learn a lot from this platform, which can also, among other things, interact, recognize gestures, receive voice commands, and even recognize facial expressions.
Starting at ~$400, this platform is a great choice as a base for educational AI projects because it can also be used with other boards, such as the Jetson Orin Nano or Raspberry Pi 5 – just be sure to specify which board you’ll be working with to select the right kit.
- Difficulty: Beginner
- Designer: Hiwonder
- Project pages: JetAuto ROS Robot, GitHub, Hackster (review)
- Core components: SBC (Raspberry Pi 5, Jetson Nano, Jetson Orin Nano), intelligent servo, lidar, 4x wheel, anodized metal bracket, 3D depth camera, 7-inch LCD screen (optional)
Deep PiCar
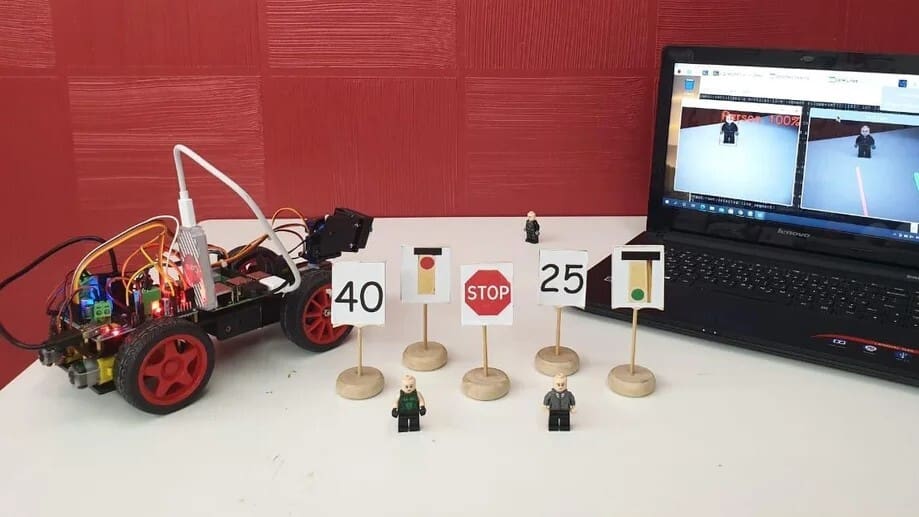
Deep PiCar is a small-scale replica of a self-driving car, using the Raspberry Pi as a foundation for testing and developing autonomous driving technologies.
Inspired by Nvidia’s DAVE-2, Deep PiCar employs deep neural networks to perform real-time perception and control tasks. The vehicle is equipped with a wide-angle USB camera and a Google Edge TPU accelerator, which enables fast processing of machine learning inferences, essential for autonomous navigation.
The goal of this project is to explore the capabilities of the Raspberry Pi to support autonomous vehicle control through deep learning. The project involves assembling a robotics kit, installing software such as OpenCV and TensorFlow, and configuring electronic components and motors.
The car is trained to recognize traffic signs, detect pedestrians, and respond to specific road conditions, such as stopping at traffic lights or adjusting speed based on signs.
The kit has been updated and the latest iteration, PiCar-X, is available at ~$90. This new kit is compatible with Raspberry Pi Zero, 3B, 3B+, 4, and 5 and there are several tutorials.
- Difficulty: Intermediate
- Designer: SunFounder
- Project pages: Instructables, GitHub
- Core components: Raspberry Pi (Zero W, Zero 2 W, 3B, 3B+, 4, or 5), Google Edge TPU coprocessor, USB camera, HDMI adapter
Autonomous Driving Car V2
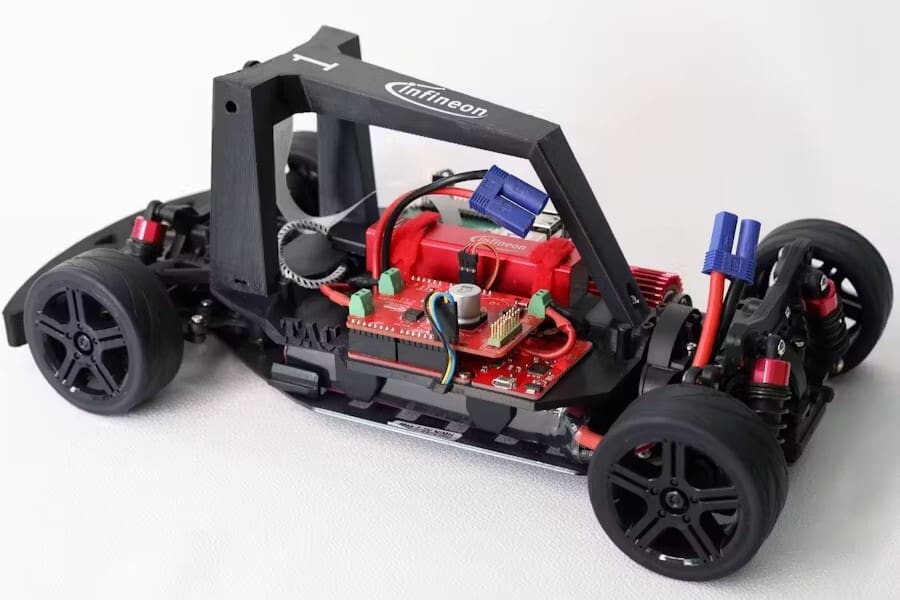
The Infineon Team’s “Autonomous Driving Car V2” provides a hands-on learning opportunity for autonomous driving, AI, and neural networks.
Using a Raspberry Pi to make decisions and a camera to capture the environment, the car is controlled by an XMC microcontroller board, which manages steering and speed. Using the open-source Donkey Car platform, users can train and deploy machine learning models on affordable hardware like the Raspberry Pi, advancing the development of self-driving cars in a practical and educational way.
The project highlights the integration between the Raspberry Pi and the XMC microcontroller, using I2C communication to coordinate the car’s movements. Motors and servomotors are controlled through PWM signals, while the trained neural network processes the images captured by the camera to decide the vehicle’s next actions.
The project’s code configuration includes tools and libraries such as DCShield and MotorControl, allowing enthusiasts and professionals to explore autonomous vehicle technology in a practical and educational way. It’s important to note that the training requires an external computer to be carried out, which can be further read about under “Now to the Autonomous part“.
- Difficulty: Advanced
- Designer: Infineon Team
- Project page: Hackster
- Core components: Infineon Boot Kit XMC1100, Infineon DC-shield, chassis, 4x wheels, Raspberry Pi 4, Raspberry Pi Camera Module, servo
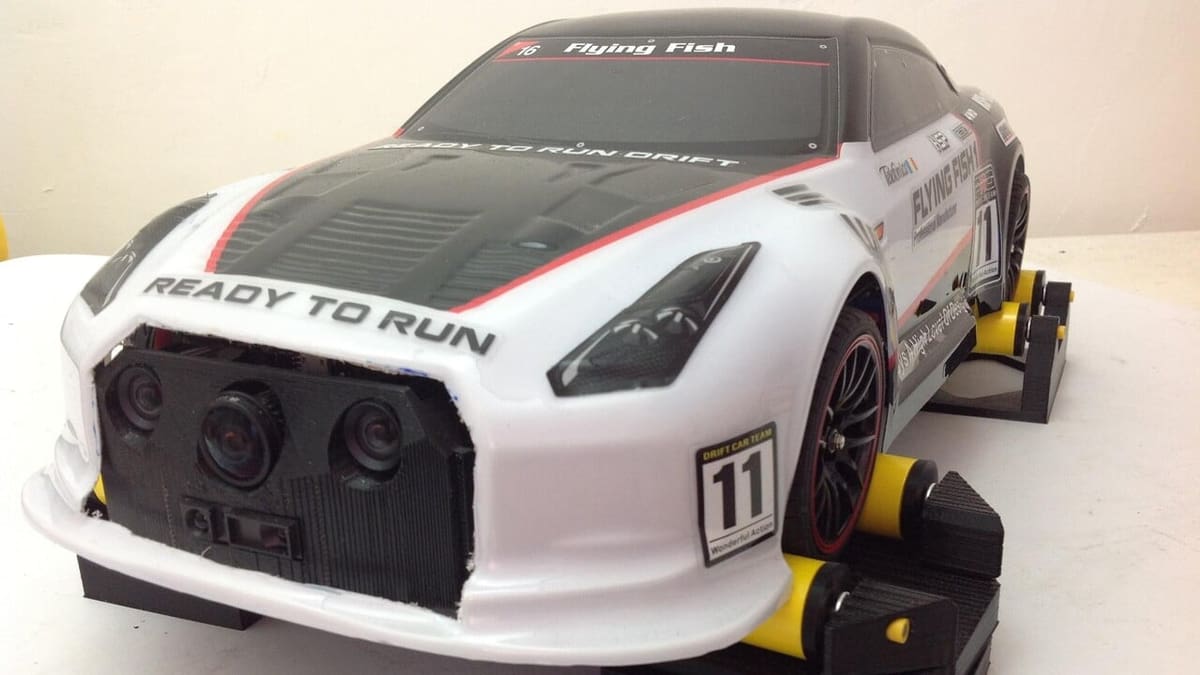
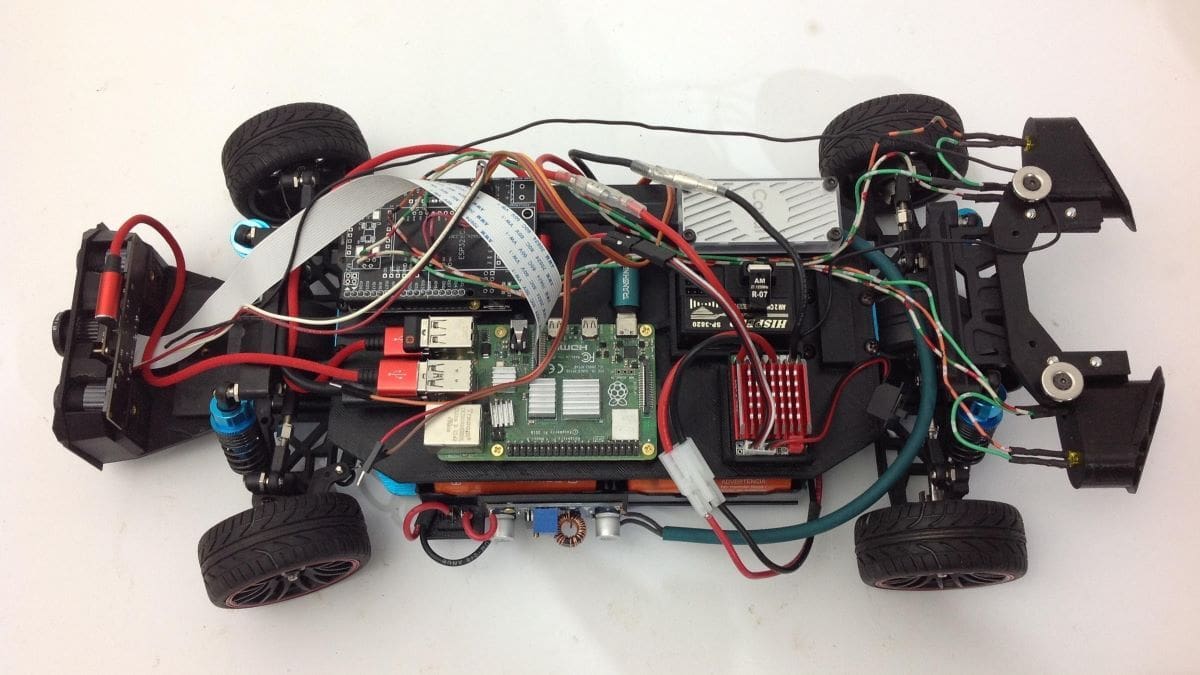
DIY AI Self-Driving Car
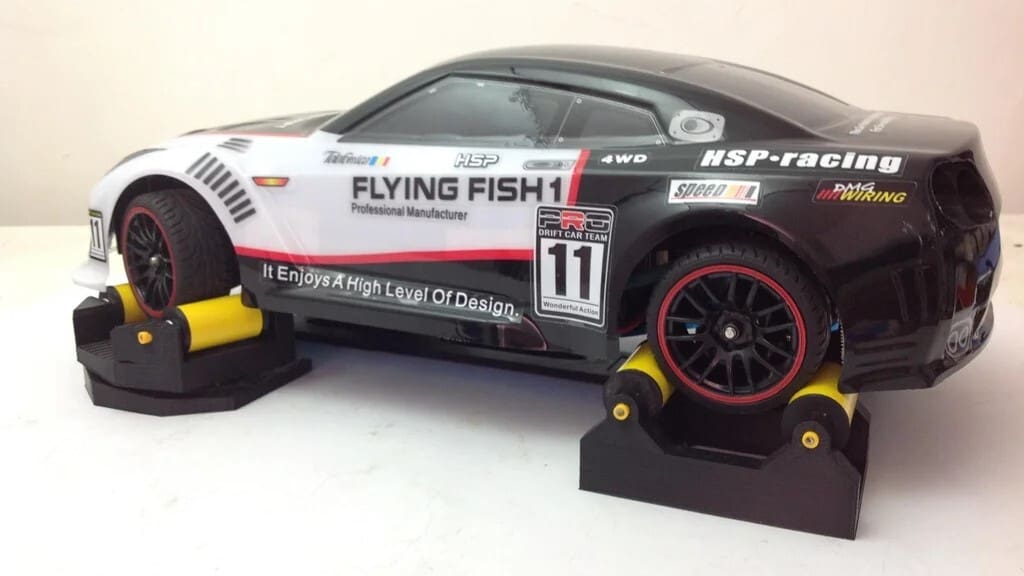
This is a project that’s still in progress, but it could be interesting if you’re looking for a more daring adventure of bringing autonomous driving to a scale model while figuring out your way with the algorithms.
The car includes two cameras: A 1.2-Megapixel camera equipped with a wide-angle lens, and a stereoscopic camera that can determine other objects’ distance. It also has distance sensors – either a Sharp infrared sensor or a VL53L0 laser-ranging module.
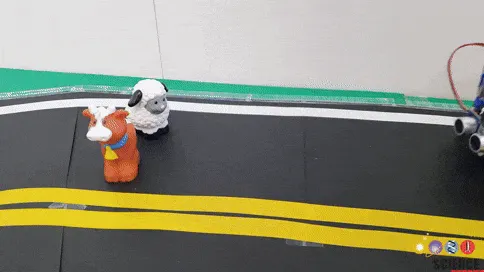
To avoid having to test the car outdoors, the designer created a treadmill that allows for control and navigation testing.
The designer also includes plenty of designing and 3D printing tips for the relevant parts. Should your printer not be up to task, Craftcloud can be worth considering. In any case, there are plenty STL files to be replicated, with a suggestion to opt for ABS, PETG, or nylon if more strength is required than PLA can provide.
At the moment, only the scope of the hardware part of the project has been shared. In step 64 (yes, it’s a very thorough tutorial), the author explains that instead of using lidar as in other models, he chose to use cameras combined with the Google Coral unit to detect lane lines, traffic signs, traffic lights and other objects at high speed, similar to Tesla’s approach. This is just one of several aspects mentioned that can help makers further develop the software side of this project.
- Difficulty: Expert
- Designer: jmoreno555
- Project pages: Instructables, GitHub
- Core components: HSP 94123 kit, Raspberry Pi 4, Wemos D1 R32, Google Coral USB, 1.2-Megapixel camera, stereoscopic camera, Sharp infrared sensor or VL53L0 laser
License: The text of "DIY Self Driving Car Projects with Arduino, Raspberry Pi, & More" by All3DP is licensed under a Creative Commons Attribution 4.0 International License.