
SketchUp & Animation: How to Create Animated Scenes

SketchUp animation is great for model showcasing. Find out how to create SketchUp animations, using both native tools and extensions.
Exploring Your Model
SketchUp is known for being a free and easy 3D modeling program, versatile for hobbyists, students, and professionals alike. It’s available as a web application or a standalone program for Windows or Mac.
It has various offerings, including several annual subscriptions (free or paid) and a one-time purchase for a full license. The completely free version was discontinued in 2017, but it’s still available for download.
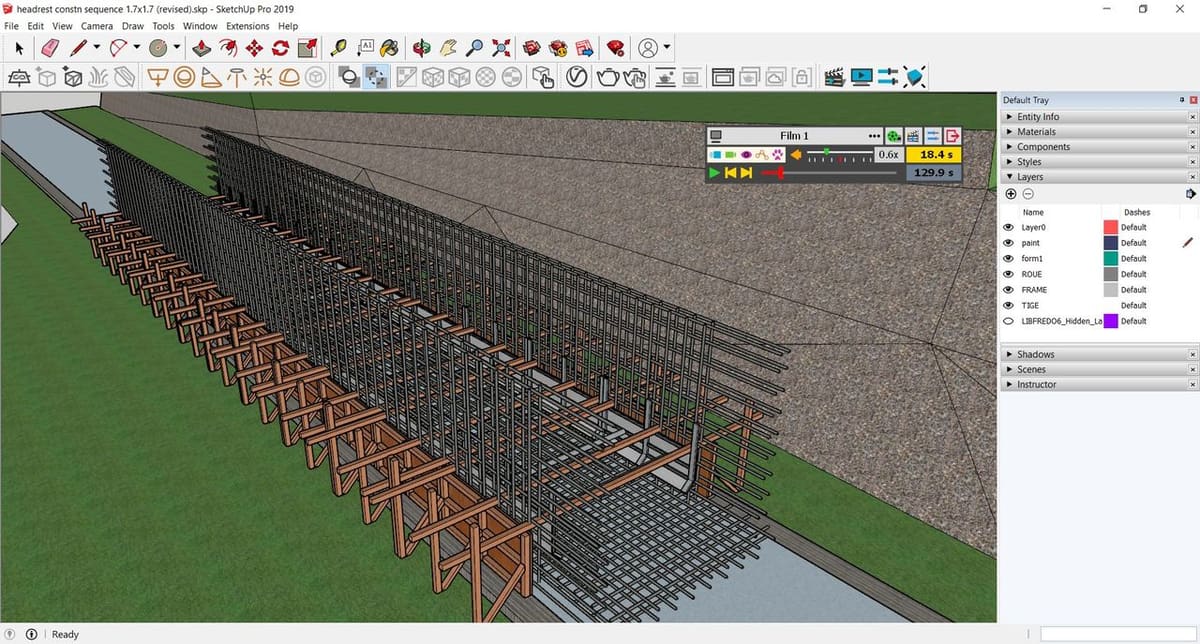
Aside from being a generic tool for CAD, SketchUp is also capable of creating basic flythrough-style animations. Additionally, thanks to plug-ins, the program can become even more powerful, allowing you to animate individual objects with independent motions.
In this article, we’ll be discussing how to use the native animation tools within SketchUp and then dive into the use of the extension Animator. This is the main tool that lets you animate your objects individually, allowing you to work on your models in a timelined movie-maker-like interface.
SketchUp: Basic Animation
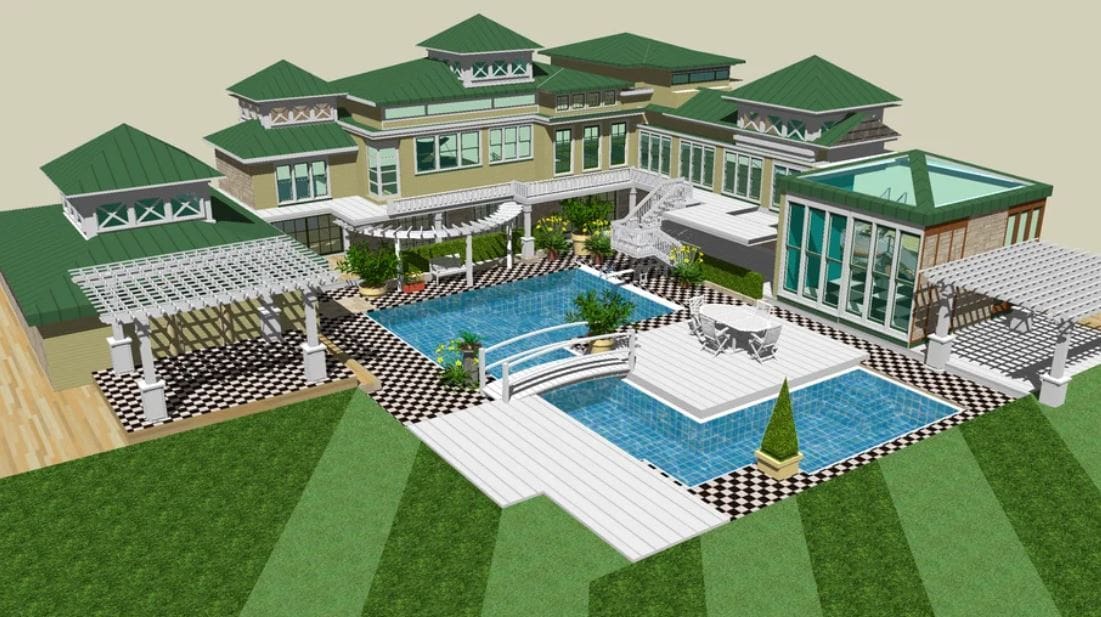
SketchUp’s native animation mimics the effect of moving a video camera through a space. This is best for animating a walkthrough or flythrough of a static model, which is perfectly appropriate for showcasing architectural designs, landscapes, and detailed interiors and exteriors of building models.
Creating an animation with this tool is simple: Capture the key scenes you want the animation to show, and then arrange them in an order that’s to your liking. You don’t need to capture every frame for your animation; SketchUp will calculate the smoothest path to transition from one scene to the next.
Steps for a Walkthrough Animation
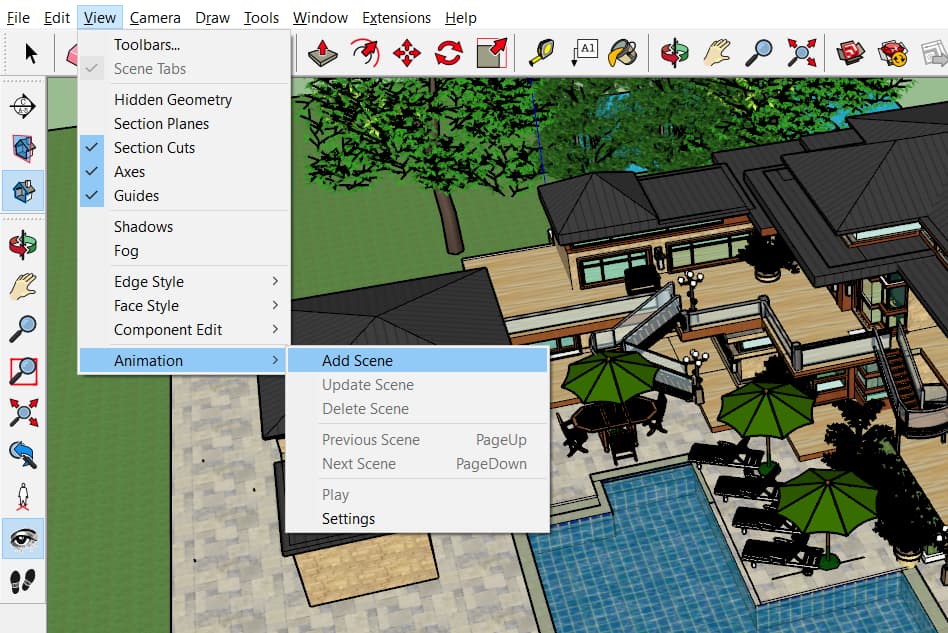
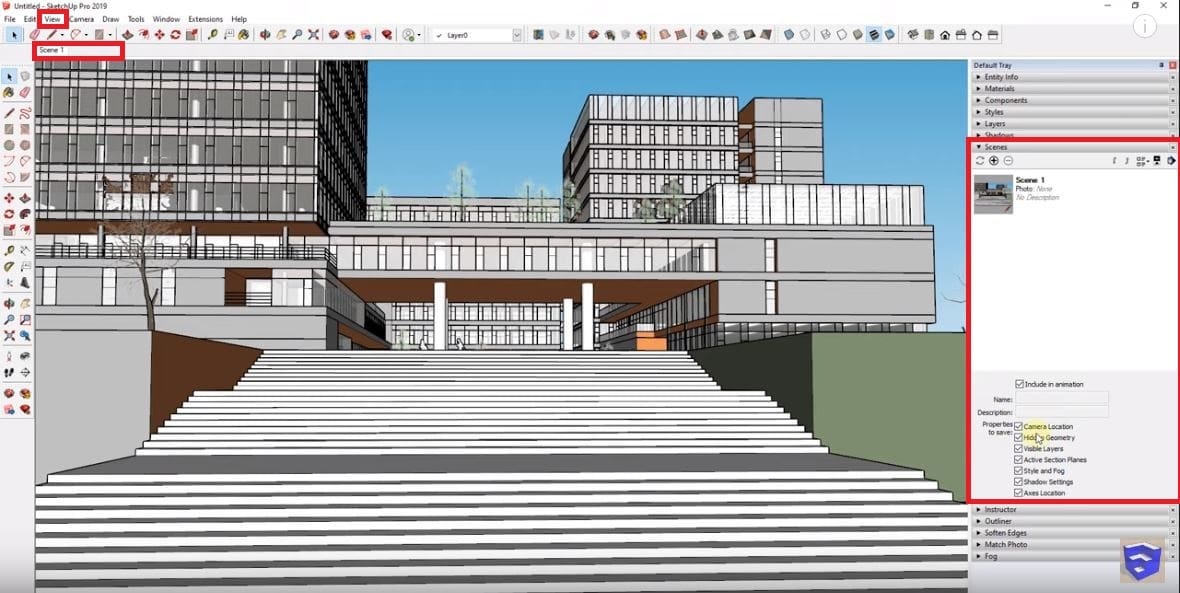
- Create and capture the first scene you would like to have in your animation. You can capture a scene by clicking “View > Animation > Add Scene”.
- Navigate through your model and choose the next positions. For each desired scene, repeat the first step.
- You can use various camera tools like orbiting – clicking the middle mouse button – and panning – Shift + middle mouse button. These can also be activated in the camera toolbar.
- To show the camera toolbar, click “View > Toolbars > Camera”. Activating commands in the toolbar will let you navigate through the model using the left mouse button instead of the middle mouse button.
- Organize your scenes into the desired order by right-clicking the scenes in the scenes bar and moving them left or right. Moreover, in “Scenes Dialog”, you can rename each scene.
- To access the scene transition and delay settings, navigate to “View > Animation > Settings”. Scene transition is the time for the camera to travel to the next scene, while scene delay is the time allotted for a pause in each scene. For smooth animation, the scene delay should be set to 0 seconds.
- Once you’ve arranged your scenes, see how each scene transitions to the next by selecting the next scene on the scenes bar. To play the entire animation, click on “View > Animation > Play”.
- Export your finished animation as a video file by going to “File > Export > Animation > Video” and choosing your desired file format.
Improving Transitions
You may have created an animation successfully, but perhaps the transitions don’t seem quite right. In these cases, you can try and add additional scenes in between to make transitions natural. A common example is SketchUp generating a transition that moves through a wall. Here, adding a scene in the appropriate doorway will likely help.
Smoothing Animation
When you find your animation a bit shaky and with unnaturally abrupt camera movements, you can edit your scenes by using the tools in the Camera toolbar. The most helpful tools in refining your scenes are “Look Around” and “Walk”. Look Around lets you change the angle of the camera without changing its position. Walk changes the position but keeps the camera at the same angle.
SketchUp: Animation Using Section Cuts
Another method of animating in SketchUp utilizes section cuts. With this method, you can make objects appear and disappear during scene transitions. This can be combined with the previous method of animation for flythrough scenes.
This also works with the native animation tool of SketchUp. Note that, for the following, you’ll need at least two sections in your model. Let’s go through it:
- As before, capture your first scene using “View > Animation > Add Scene”.
- To create the first section, go to “Tools > Section Plane”. Then, place the first section at a starting position, for example, the left side or bottom of the scene. This will make the objects in your model disappear. After this, right-click on your first scene and click update. This will replace your first scene (with the model) with the new (blank) scene.
- To create the second section, repeat the second step but place the section opposite the first – on the right or above the model. The new section will automatically become the active one, showing the objects in your model. Creating a second scene while this second section is active will make your model appear in the animation.
- Play your animation by switching between the scenes to see whether the objects are appearing correctly.
- Export your animation in the same way as for the first animation technique. Click “File > Export > Animation > Video” and select your format of choice.
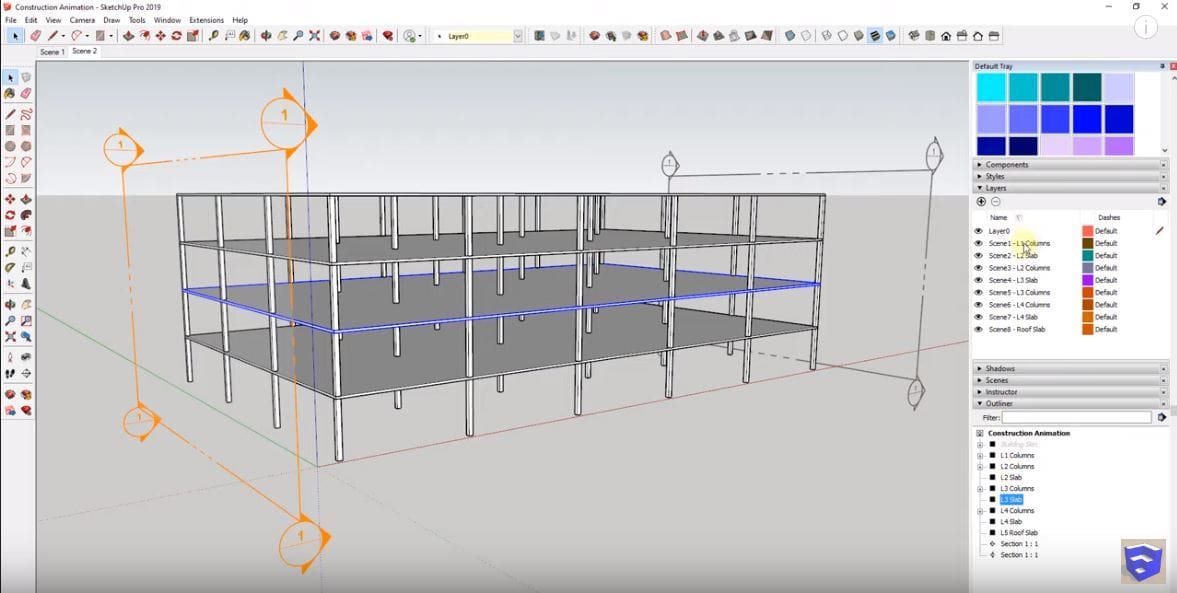
Outliners & Layers
With the use of tools such as layers and outliners, you can organize objects and parts in order to section them individually. You can create sections within a group so that the section cut will only affect specific parts of your model. You can check out more about how this works in this video by YouTuber TheSketchupEssentials.
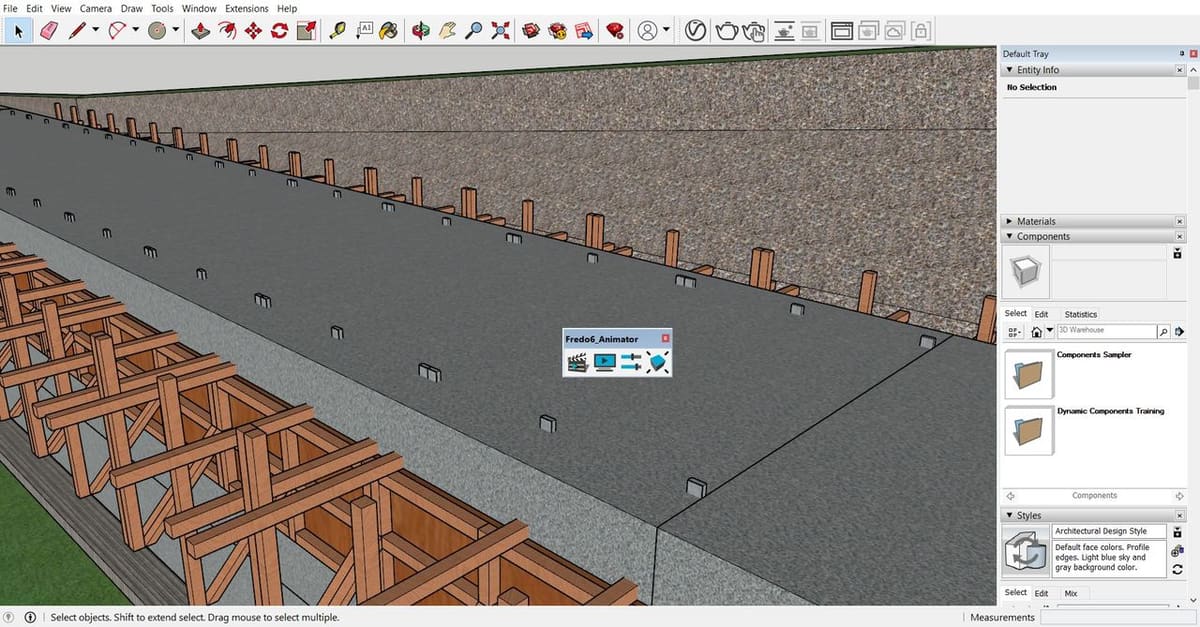
Extension: Animator
Animator is a powerful tool for SketchUp. With it, one can create “actual” animations, which are easily manipulated with an intuitive interface. Created by Fredo6, the extension can individually animate objects in SketchUp in various ways.
Unlike other animation programs such as Blender, Autodesk 3DS Max, or Maya, the Animator lacks features and versatility when it comes to creating beefy and movie-grade animations. However, for simple and quick presentation-style animations to showcase assemblies and mechanisms, Animator is a good choice. In comparison to the previously mentioned programs, it’s much closer to engineering-related CAD animators, such as the animation tool included in SolidWorks.
The Animator extension works with SketchUp 6 and above but not in the web-based application.
Setting Up Animator
Downloads
Before starting with Animator, you’ll have to install it. The first step is to download the following:
- Libfredo6: A shared plug-in library required necessary for any Libfredo extensions, including Animator.
- Animator: The main extension used for animations.
- FFmpeg: a program to export your animation into a video file, instead of individual frames. Make sure to carefully follow the installation instructions on the website.
For the plug-ins, you’ll likely need an account on SketchUcation. (Signing up is free.)
Installation
- Once you’ve downloaded the files, open SketchUp and locate the “Extension Manager” icon. You can also click “Windows > Extension Manager”. A window will pop up showing the currently installed extensions.
- To install Libfredo6 and the Animator extension, click “Install Extension”, and locate your downloaded files. Install Libfredo6 first, then do the same for the Animator extension.
First Steps
Once installed, the Animator toolbar shows up, with three essential tools for animating:
- Clip Editor: This is the main tool, where you can add and edit your object animations, adjust your camera scenes, and arrange your animation in your desired sequences.
- Clip Player: This shows the preview of your full animation within SketchUp.
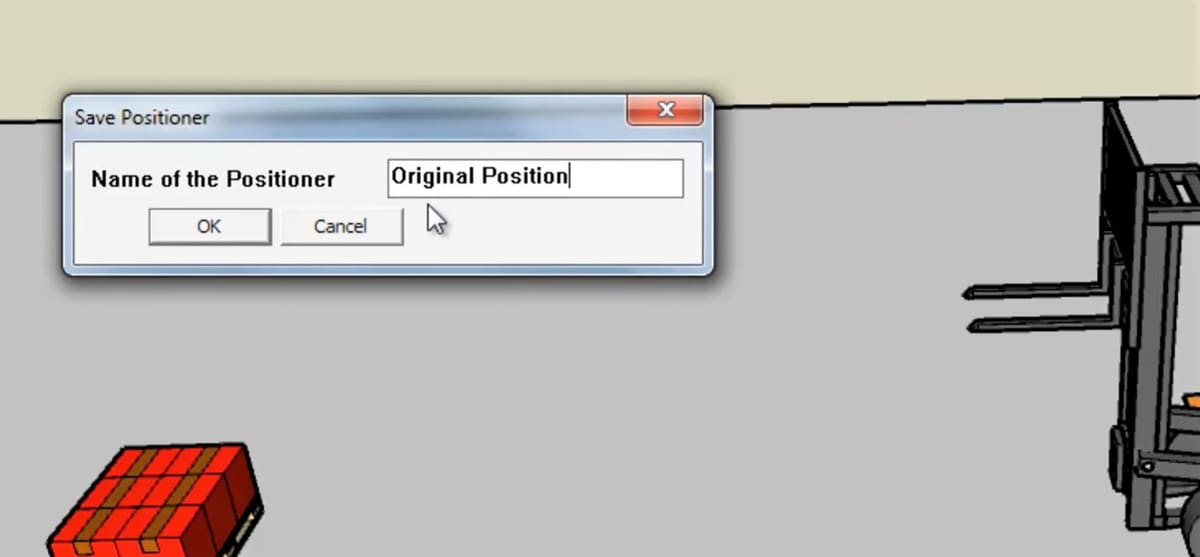
- Positioner: When creating your animation, the objects in the model will move in space and will create a permanent change in your model. With the positioner, you can save the original position of objects before you start messing with animations.
Basic Guide to Animator
Configuring Your Objects
To make your objects easier to animate, your model has to be prepared:
- Before creating movements, place your objects in their initial positions for animation.
- Click the positioner tool, click “Save current position as..” and name your position “Original Position”. This will save your current setting, which will serve as the starting positions of all objects
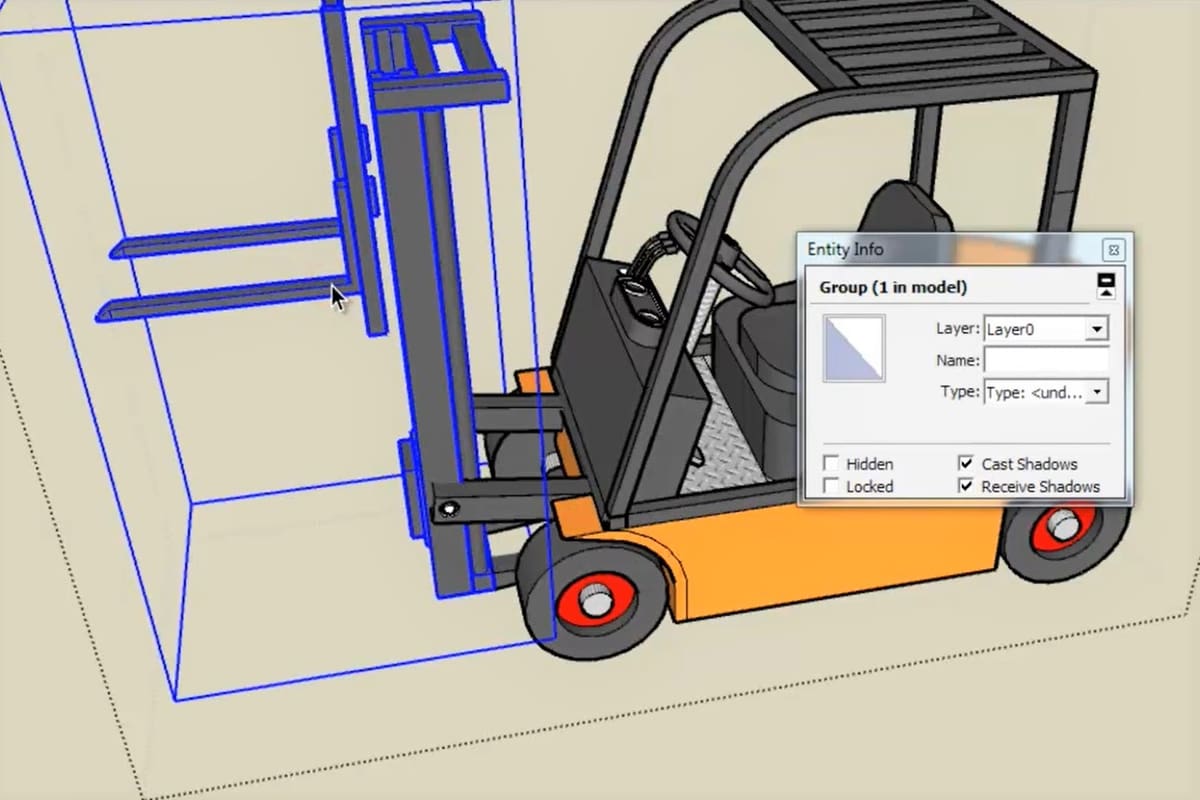
Having your objects grouped according to its movable parts will also make animating easier. As an example, you can see in YouTuber Fredosix’s video how the forklift parts were prepared and grouped as separate components.
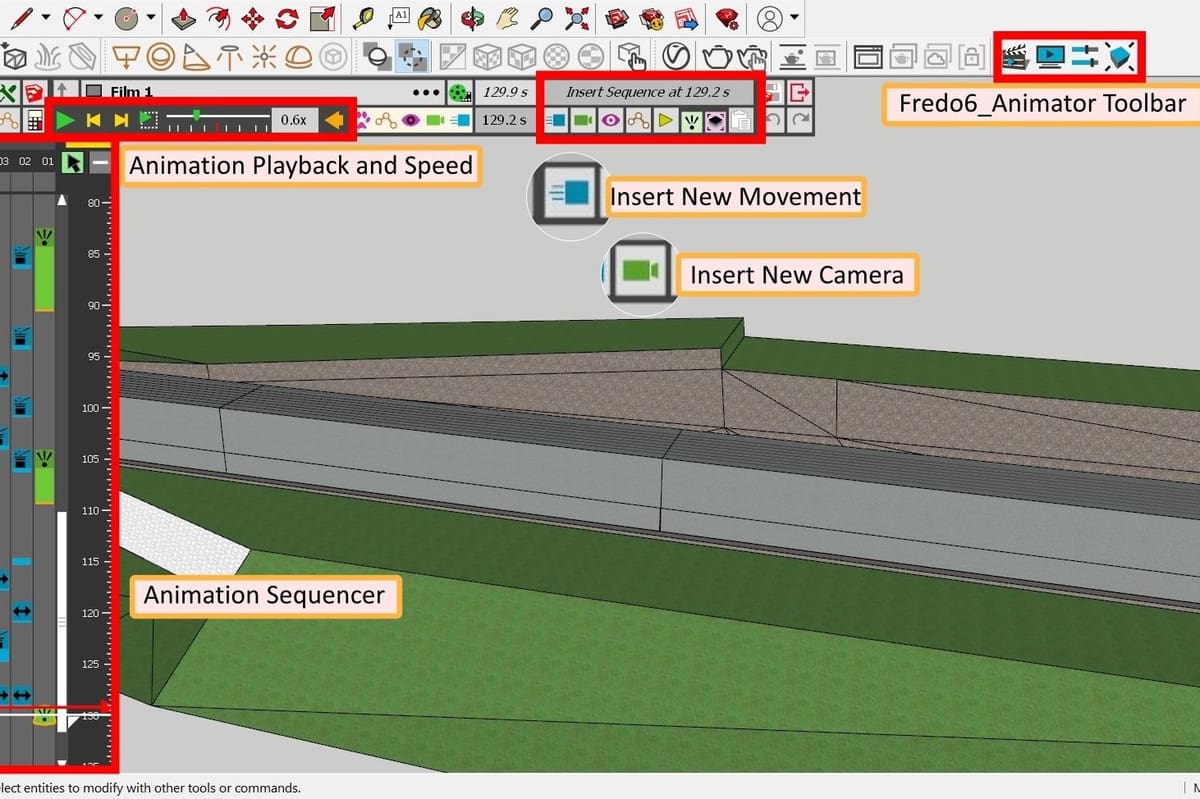
Clip Editor
The clip editor is where most of your animation work will be done. Opening the clip editor brings you to its interface, which is composed of the following:
- Sequencer: Located by default on the left side of the screen, this is the timeline that shows your animation at a specific point in time. This works similarly to a movie editor’s timeline, where you can drag and lengthen elements. Instead of clips of video and sound, the elements you’ll move are the animations, camera, visual effects, and other settings as they change through the timeline.
- Insert Sequence: This contains all the elements you may need, such as animation, camera positions, and visual effects.
- Speed Adjustment: This is where you can speed up or slow down your animation by a set factor.
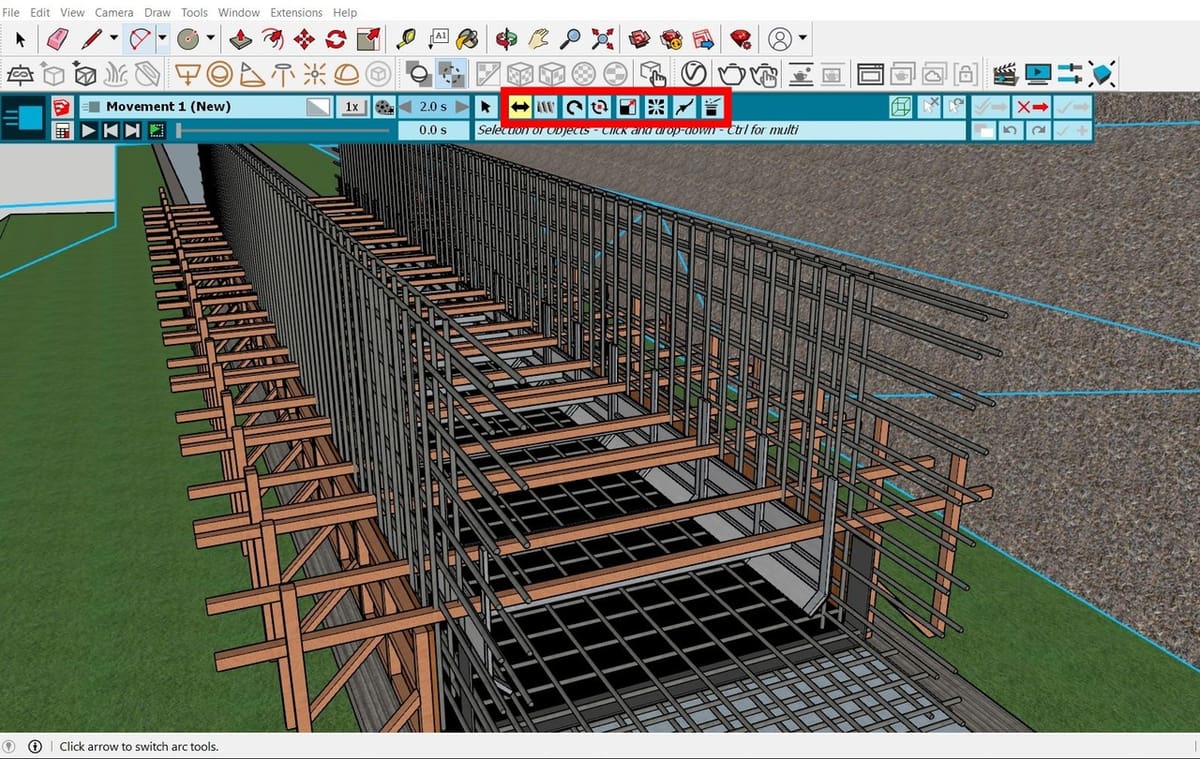
Creating an Animation
Once the clip editor is open, you can begin creating animations for an object:
- Click the icon for inserting new movement, then select “New Movement”.
- Click the objects you want to animate. Once selected, a list of grouped objects will show. Select the group you want to be animated as a single unit.
- Name your groups. This is important, as it will make selecting them easier. You can see the objects in a group by hovering over the name, highlighting which objects belong to that group.
A list of possible animations will appear once you have a group selected:
- Translation: Linear movement in a single axis
- Rotation: Circular movement about a selected pivot point and axis
- Spin: Rotation of an object on its center point, along a selected axis
- Screw: A combination of translation and spin
- Scale: Change the size of an object along an axis
- Explosion: Move objects away from a center point or plane
- Path: Move an object along a sketched path
- Apparition: Make an object appear or disappear
For every animation, there are several settings you can adjust, such as the axis of movement, the distance it will move, and the speed of the movement.
After animating, click the check icon to save the animation, make sure to name it so that you can find it more easily in the Sequencer. The timeline can get messy as you progress through your project, naming things helps you find and change them later if needed.
Camera Configuration
Just like the native walkthrough animation in SketchUp, you can also configure various scenes with your camera:
- Click the icon for inserting a camera in the timeline, then “New Camera”. The timeline will be hidden, showing you a clear view of what you want the camera to capture.
- Navigate around your scene to capture what you want to be included in the animation. Once you’re set, click “Capture Current View Camera”, and then save it by clicking the check icon. You can also rename this for later identification.
You can have various camera angles in your animation. Similar to the native animation tool in SketchUp, the software also finds the easiest way to move from one scene to the next.
Using the Timeline
The sequencer timeline lets you arrange and edit every animation, camera movement, and effect so that you can organize them and even make them play simultaneously:
- To move a camera movement or animation, click and drag it to the desired location.
- You can also shorten and lengthen the animations by dragging the edges of the animation elements to stretch or compress them.
- To make multiple animations play simultaneously, you can drag such that they overlap, creating a parallel section of the timeline.
- Right-clicking on the timeline provides you with tools for arranging elements in the sequencer, such as cut, copy, insert spaces, and select elements.
- The clip editor includes a player for the animation, and you can drag the red arrow across the timeline to preview the animations.
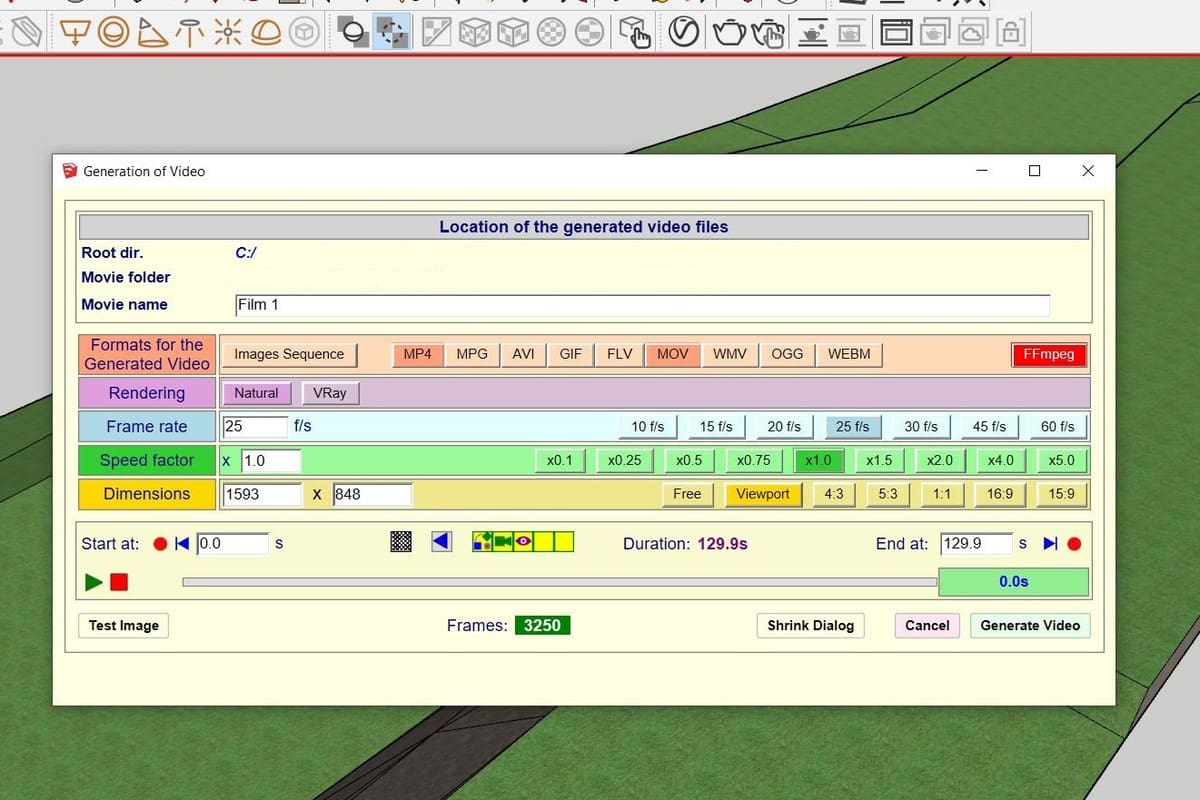
Exporting Video
After creating and arranging all your elements for animation, you can test playing it in the clip player.
To export your animation into a video, click the “Generate Video” button, which is located both on the clip player and in the clip editor.
Make sure you’ve installed FFMPEG in order to export your animation as a video. If it’s not yet installed, Animator will be only able to export images for each frame, to be assembled in another program as a video.
While generating the video, you can set which file format you want the video to be exported as well as set the frame rate, speed, and resolution. As an additional option, you can also use Vray for SketchUp to export your animation, as explained by SketchUpEssentials.
Going Further

These are just the basics for starting to animate with SketchUp. The native animation tools may be simple, but they’re more than good enough for their intended purpose.
For the Animator extension, there’s more to learn as you advance your skills. For tutorials and explanations, you can browse SketchUcation or check out TheSketchUpEssentials on YouTube.
(Lead image source: TheSketchUpEssentials via YouTube)
License: The text of "SketchUp & Animation: How to Create Animated Scenes" by All3DP Pro is licensed under a Creative Commons Attribution 4.0 International License.