Spline 3D Tutorial: How to Design with Spline

Design, create, animate, and more with this easy-to-follow Spline 3D tutorial. Read on to create 3D models step-by-step in Spline.
Spline, a web-based design software, has gained popularity among users looking for a friendly experience when creating 3D models. With its clean interface and intuitive features, it caters to both beginners and experienced designers, allowing them to create in 3D with ease.
Since its launch in 2020, Spline has attracted over a million users, including graphic designers, animators, product designers, game developers, and other creative individuals. With Spline, you can access various tools and features to bring your ideas to life, whether starting from scratch or using pre-made models from the library.
In this Spline 3D tutorial, we will explore the features the program has to offer by creating a 3D model through a step-by-step process. However, before we begin, let’s learn more about Spline and how to get started.
About Spline
Spline offers an extensive integrated library, which includes a wide range of pre-built shapes, objects, and materials, providing a solid resource for designers to start their projects. Moreover, the Spline community enables a collaborative environment where users can share their creations, exchange ideas, and seek inspiration from fellow designers.
Real-time collaboration makes it easy for multiple users to work on a project together, allowing for seamless access by multiple editors. Spline also provides video tutorials, detailed documentation, and a viewer to explore its capabilities. Moreover, it offers a range of export options, including sharing a public URL, codes for websites, or exporting files in 3D formats like STL, depending on the subscription chosen.
Spline’s simplicity and ease of use make it a great option to understand and learn about design functions and capabilities. Plus, its browser-based accessibility eliminates the need for a powerful machine to turn your ideas into a 3D model. However, it’s worth noting that it’s less specialized than Blender or SketchUp regarding advanced features. Such professional-grade 3D software provides much more intricate and complex functionalities that meet the specific requirements of experienced designers and professionals in the industry.
Now that you know more about Spline and who it’s intended for, let’s explore how you can begin using it.
Getting Started
To use Spline, all you require is a computer with a compatible browser. While you can work on files offline, an active internet connection is recommended. And any changes made offline are indicated by a gray circular dot in the Tab Bar, which disappears when files are synced. An active internet connection enables synchronization of your local cached files to cloud servers, whether you’re creating a model, saving your work, or exporting your designs. Also, you have the option to download and install Spline on your Mac or Windows PC, but the experience remains the same.
The free version of Spline is everything a beginner would need, but it only includes GLT and GLBF file format exports. To unlock STL and USDZ exports, Spline Super (~$10 per month) is the way to go. It also unlocks an extended library, AI-powered tools, personal folder creations, and video imports, and it removes logos from publicly shared URLs and code exports.
User Interface
Upon signing up for Spline, you’ll see the default landing page, “Home”. It provides access to various elements such as recent files, account information, tutorials, an extensive library of resources, archives, and more. The user-friendly interface ensures that you can navigate through the various features effortlessly.
When you’re ready to dive into the creative process, you can start from scratch or explore the vast collection of designs available in the library. Open any design, and you’ll see the editor, which provides a comprehensive set of tools to bring your ideas to life. The possibilities are endless, from creating new shapes and designs to fine-tuning and animating them.
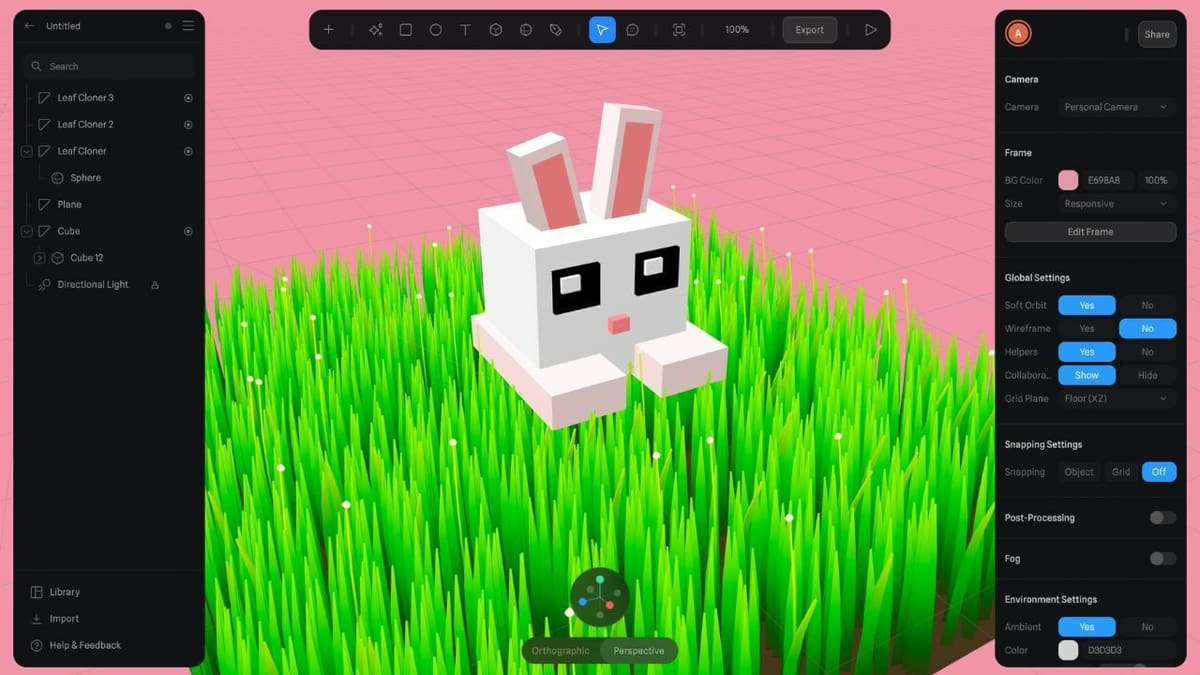
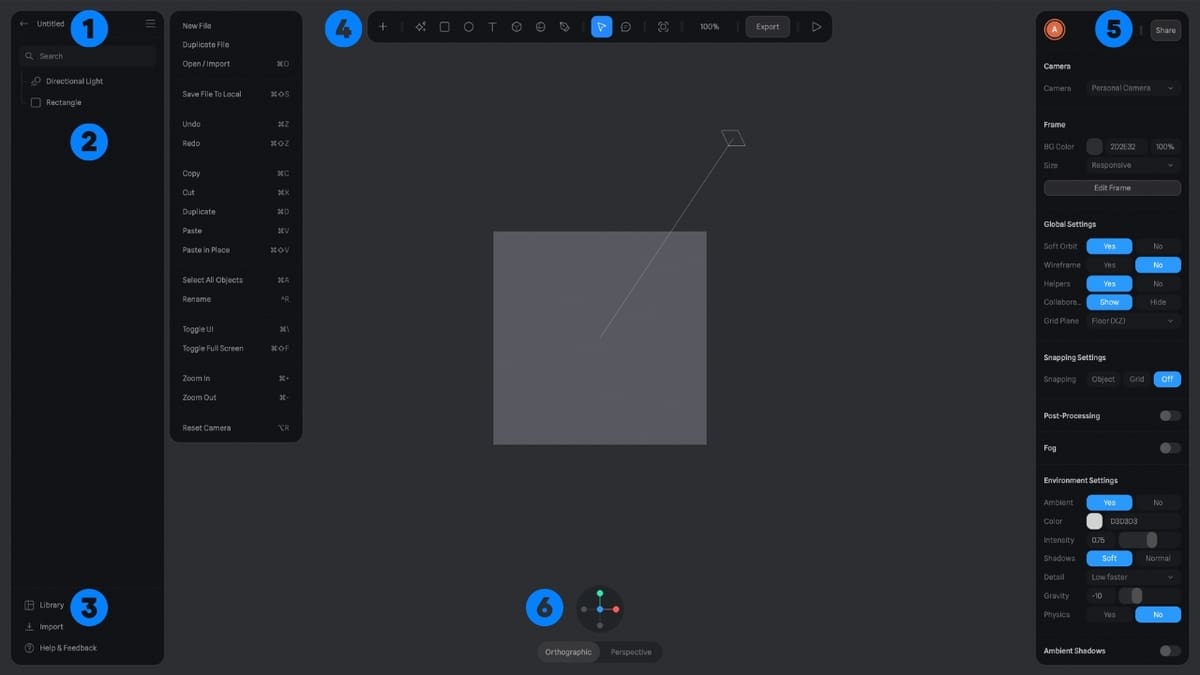
The Spline editor comprises a Tab bar (1) that allows you to create new files, import, rename, toggle the UI, and more. Below it, the Left Sidebar or Outliner (2) offers convenient control over scene layers, allowing you to manipulate and arrange elements. At the bottom of the left sidebar, you can access the Library (3), which includes a collection of free 3D models that are available for commercial use. This includes not only objects but also scenes that are fully built on Spline. You can customize anything you select from the library, be it colors, materials, or geometry.
The Toolbar (4) at the top gives you quick access to commonly used objects and tools to add elements, transform them, or export them. On the Right Sidebar (5), you’ll find property panels that provide detailed control over the properties of your objects (when any object is selected) or the entire scene, such as Camera, Frame, Global Settings, Environment Settings, Assets, and more. Lastly, at the bottom (6) you can find quick view switches and navigation options, enabling you to toggle between different perspectives.
Next, let’s take a look at the navigation.
Navigation & Configuration
In the Spline 3D editor, primary navigation (zooming, panning, orbiting) is done through a combination of mouse movements and keyboard inputs. And at the bottom, the navigation gizmo helps you choose various angles to view your design, providing a helpful visual aid. Although copy, paste, delete, and many other commonly used keyboard shortcuts will work as default in different operating systems, Spline provides a Keyboard Shortcuts page that provides users with a comprehensive list of these and other commonly used actions.
To select objects and change their properties, simply use the left sidebar. For example, you can click on the default “Directional Light” and turn “Shadows” off in the right sidebar. To enhance the realism of your image, you can choose to keep the shadows and adjust other settings such as resolution, size, and blur. Also, to remove the “Default Rectangle” object, left-click on it in the scene or use the left sidebar, and press the “Delete” key on your keyboard. To access other operations like duplicate or lock, right-click on any object to open a drop-down menu.
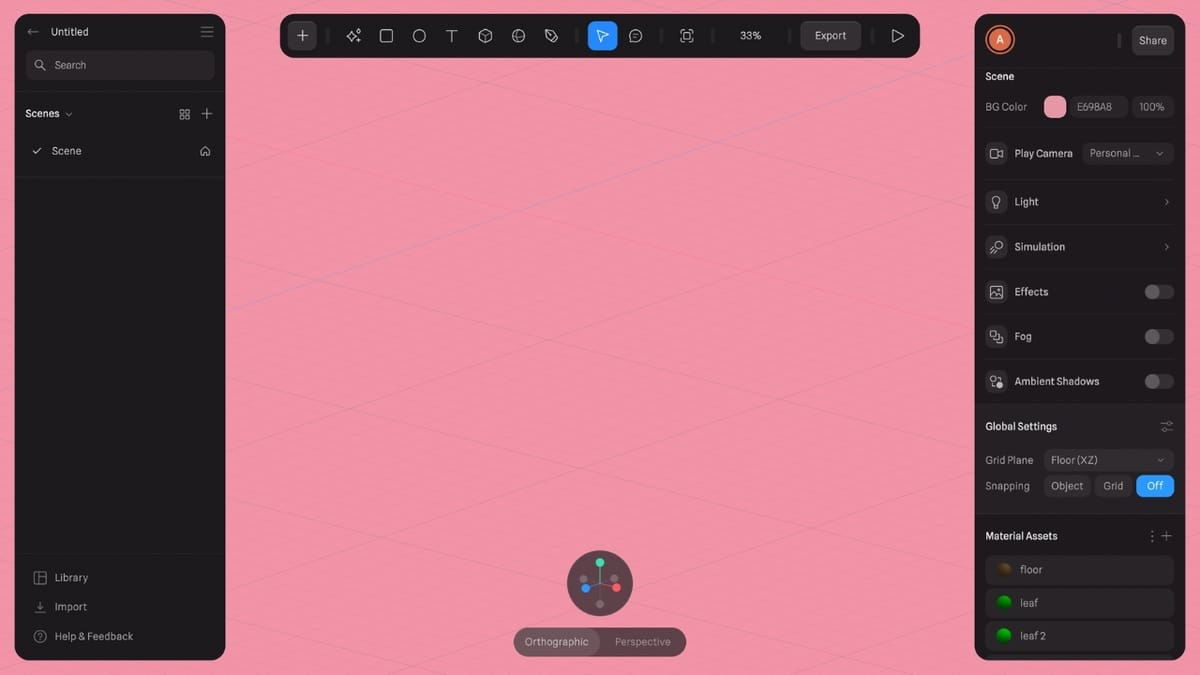
For Global Settings, click on an empty space in the background to ensure no objects are selected. Under Global Settings, you will find “Wireframe,” and turning this on will give you the outlines of the object’s basic structure. There are also options to select a suitable “Grid Plane” for your projects. Furthermore, when no objects are selected, you will find additional configurations in the right sidebar, such as Ambient Shadows, Fog, Effects, and more. To customize the scene further, you can modify the background color. You can now choose a grayish shade of pink (E698A8) to align the background with this tutorial.
In addition to the Global Settings, the right sidebar also provides options related to “Camera settings” and “Environment settings,” allowing you to fully fine-tune the scenes. Toggling each setting and experimenting with different configurations will enable you to create a customized scene that aligns with your creative vision and project requirements.
Tools & Operations
Before delving into the tutorial, let’s familiarize ourselves with the essential tools and operations useful in your design journey. To create a new object, click the “+” icon in the top bar. You can add various objects to the scene, from basic 2D and 3D objects to cameras and lights.
Once an object is added, you can use the modeling tools to edit geometries. Left-clicking on an object reveals the transformation tools that let you manipulate your design’s position, rotation, and scaling. Use the arrows to change the position within a specific axis and the arcs for rotation. Click and hold the central nodes or the object to move it anywhere. Whereas the colored, corner, edge, and side nodes can be used for extrusion and other manipulations. Furthermore, the right sidebar presents coordinates that can be used for exact modifications, ensuring precise transformations.
Spline also includes two highly useful modifiers: Boolean and Subdivision. The Boolean modifier allows us to perform operations like union, subtraction, and intersection, enabling the creation of complex shapes by combining or subtracting objects. On the other hand, the Subdivision modifier enhances the smoothness and level of detail in your designs, giving them a refined and polished appearance.
3D Design Tutorial

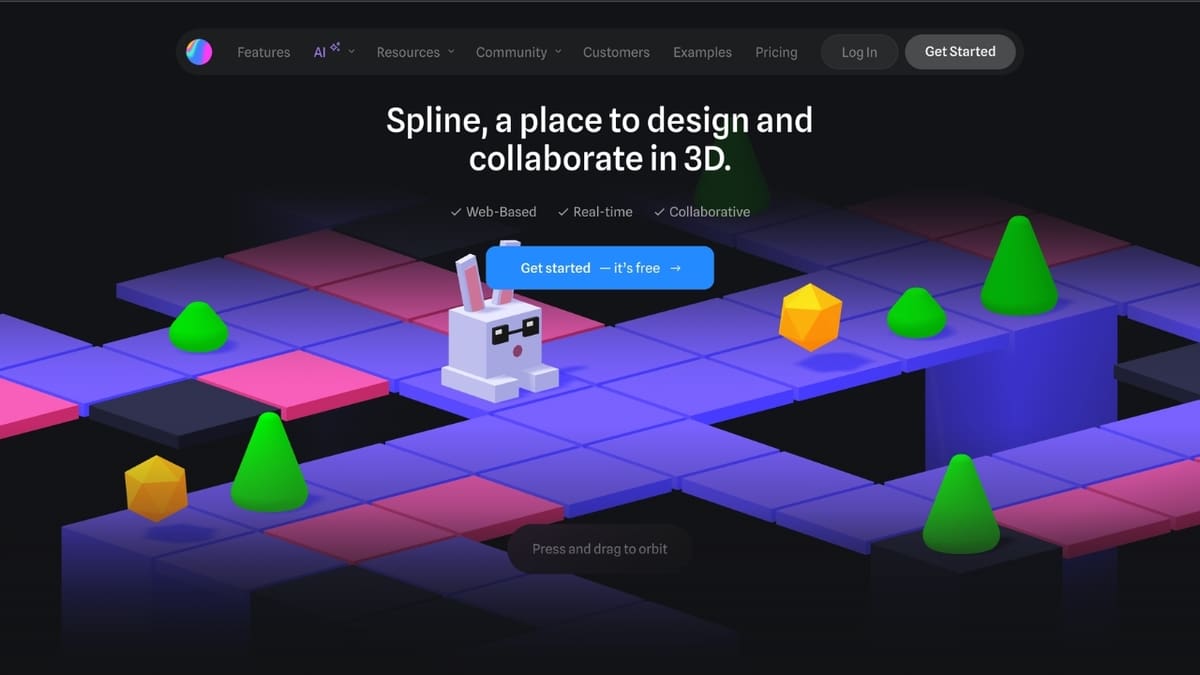
This tutorial aims to bridge any knowledge gaps and equip you with the necessary information to bring your ideas to life in Spline. Our effort will revolve around crafting a cute 3D cartoon character named “Squabbit.” Drawing inspiration from the current homepage of Spline, we’ll infuse our Square-rabbit with personality and charm.
But that’s not all – this tutorial goes a little bit beyond designs. We’ll delve into animation, breathing life into our Squabbit creation with simple movements. Furthermore, we’ll touch upon the integration of Spline designs into websites.
Let’s get started!
Step 1: Creating the Base Shape
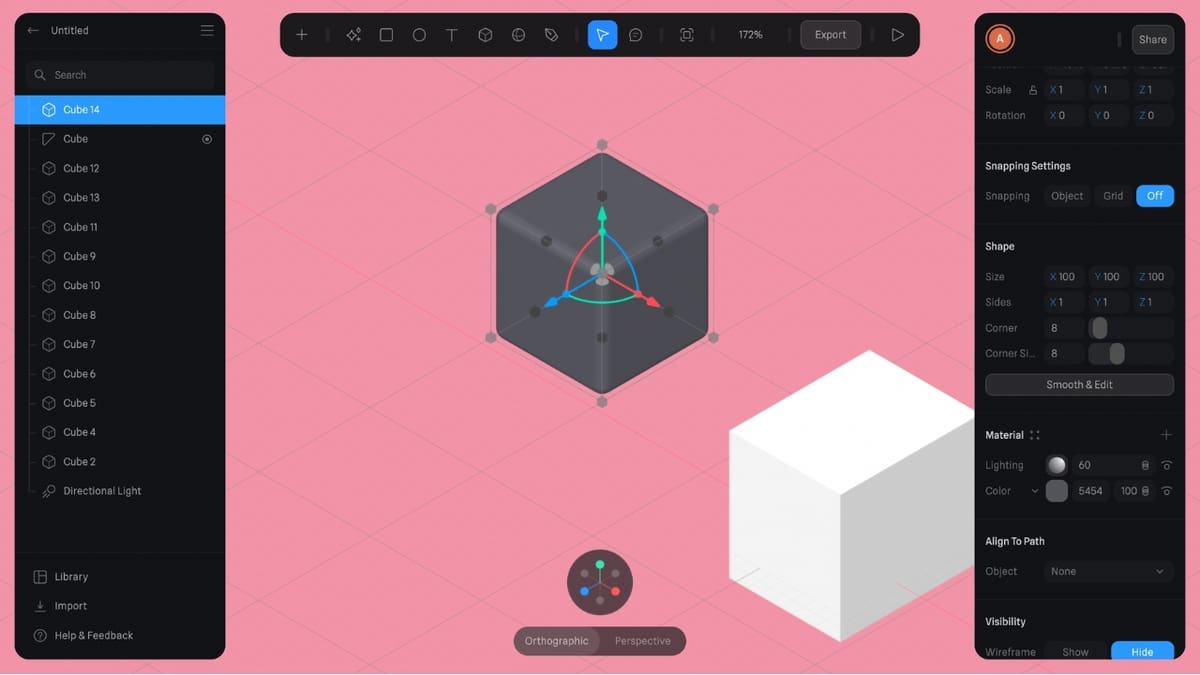
Let’s kick off our Spline 3D tutorial by establishing the foundation of our design – the base shape. Navigate to the top bar and click the “+” icon, revealing a menu of available objects. Scroll down, select “Cube,” and position your cursor where you desire the cube to appear.
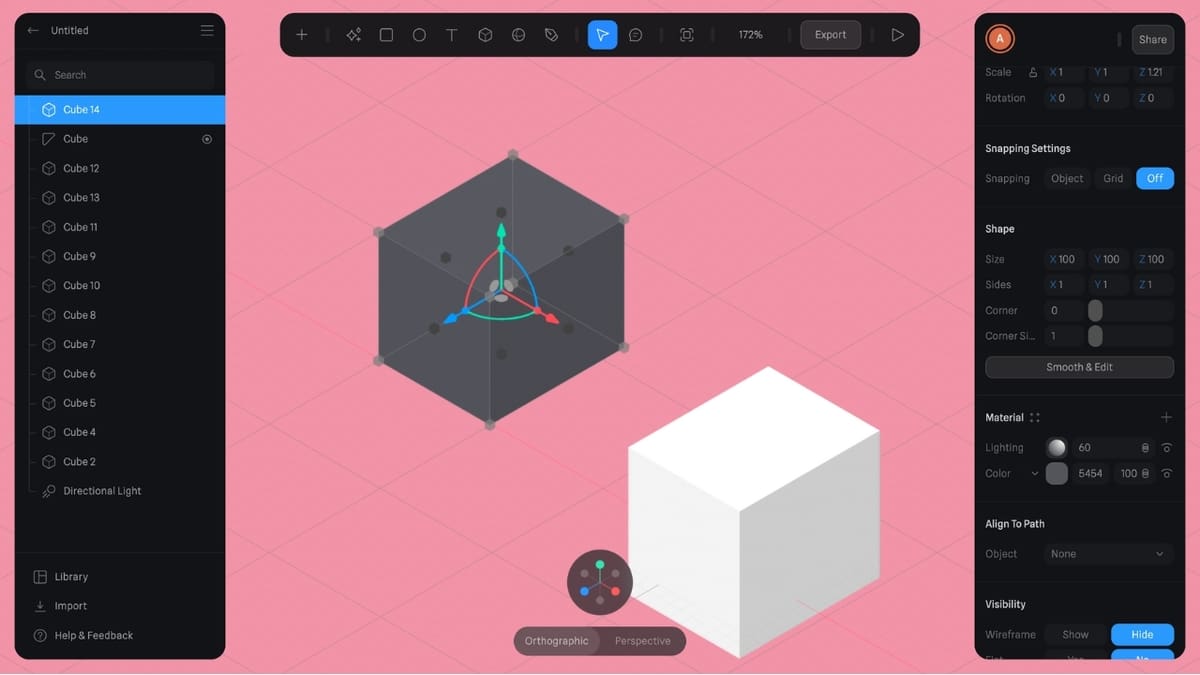
You’ll notice the default with smooth corners and a grayish hue upon its creation. To modify its appearance, select the cube and navigate to the “Shape” section in the right sidebar. Adjust the “Corner” value to “0” for sharp edges and set “Corner Sides” to 1. This modification will give our cube a distinct form that aligns with our vision.
Now, let’s infuse our base shape with a touch of personalization. Scroll down to the “Material” section to fine-tune the cube’s color and lighting. Select “White” (FFFFFF) as the desired color and set the “Lighting” value to “100” to achieve the desired aesthetic.
To further refine the proportions of our base shape in a particular axis, select the cube with a left click and then hold and drag the respective colored node located between the arcs and arrows. As you drag your cursor outward, you’ll see the cube expanding in width. Feel free to explore other settings, toggle them on or off, or experiment with different colors to bring your Squabbit to life with a personalized touch.
Step 2: Adding Details
Let’s take our Squabbit design to the next level by infusing it with details. We’ll focus on adding the eyes, ears, nose, and legs to bring our creation to life. Rather than starting from scratch, we’ll duplicate and transform the existing cube.
Let’s begin with the legs. Copy and paste the existing cube by navigating to the left sidebar, right-click on the cube, and select the “Copy” option from the menu. Repeat this action and choose “Paste” to generate a duplicate cube. Alternatively, you can utilize keyboard shortcuts (usually “Ctrl + C”, “Ctrl + P”). As you glance at the left sidebar, you’ll notice the presence of “Cube 2.” Select this newly created cube and utilize the arrow tool to move it accordingly.
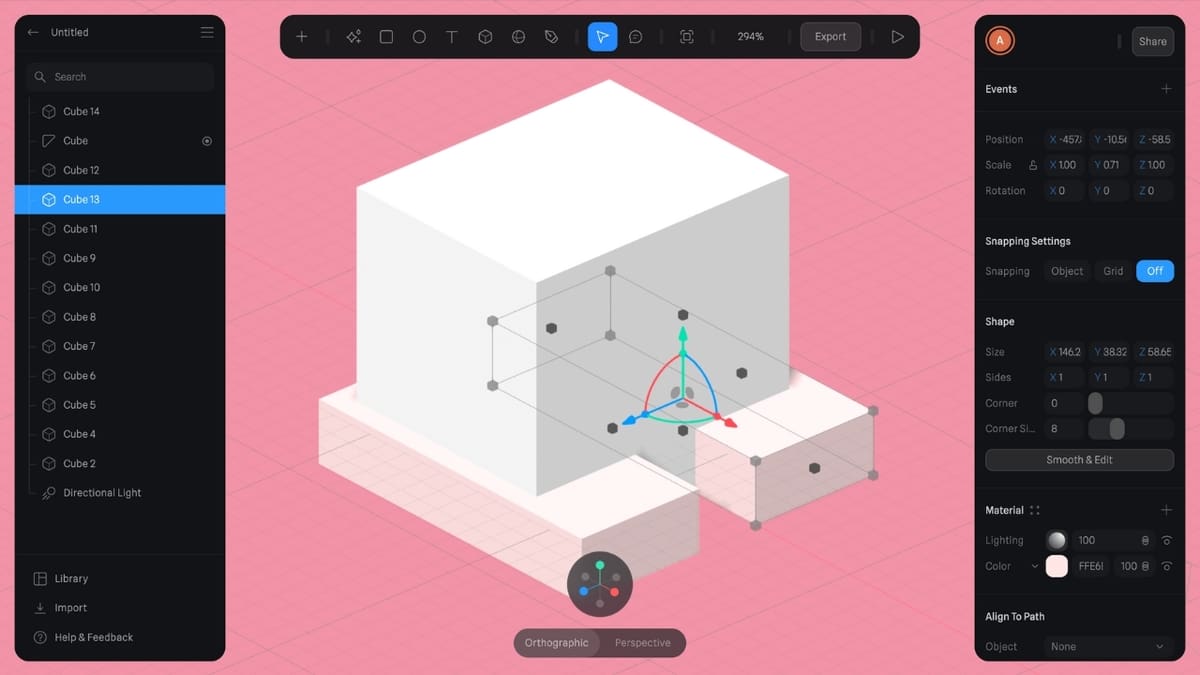
Utilizing the nodes, we can quickly scale the cube to achieve the desired size, transforming it into the “Left Leg” of our Squabbit. Alternatively, under “Shape” in the right sidebar, you can change the size to 146 (X), 38 (Y), 58 (Z) and set the scale to 1 (X), 0.71 (Y), 1 (Z). While the rotation values are at 0, the position values will depend upon where the leg is in the 3D space. Apply a subtle touch of customization by adjusting the color to a soft, very light pink hue (FFE6E6). For the right leg, we can swiftly replicate the process of copying, pasting, and moving the replicated leg.
Let’s focus on the eyes to breathe life into our Squabbit’s expressive gaze. Begin by duplicating any cube, scaling it down to a suitable size, and adjusting the color to a striking black shade. To further enhance the level of detail, consider duplicating the eye once more, reducing its scale, and transforming it into a captivating white shade, bringing a sense of liveliness to our Squabbit’s expression.
Once the eye parts are done, you can group the objects (something that will come in handy with various design parts) to easily move them (or alter them) together.
Adding a group is as simple as clicking the “+” icon in the top bar and positioning it in the left sidebar. Once a group is created, you can drag and drop objects into their respective groups, ensuring a tidy and structured workflow. Also, when you are grouping objects, pay attention to the adjacent lines that denote their hierarchy in the group. Click and hold and move it left or right to change the hierarchy, or use move it up or down to change the order. To further improve the organization, you can rename each group by double-clicking on it in the left sidebar.
So, with one eye being a group of objects, you can easily copy and paste it to replicate it identically, then it’s a matter of moving each to the correct location.
Moving on to the nose, let’s add a touch of vibrancy by assigning it a darker shade of pink (FF9494).
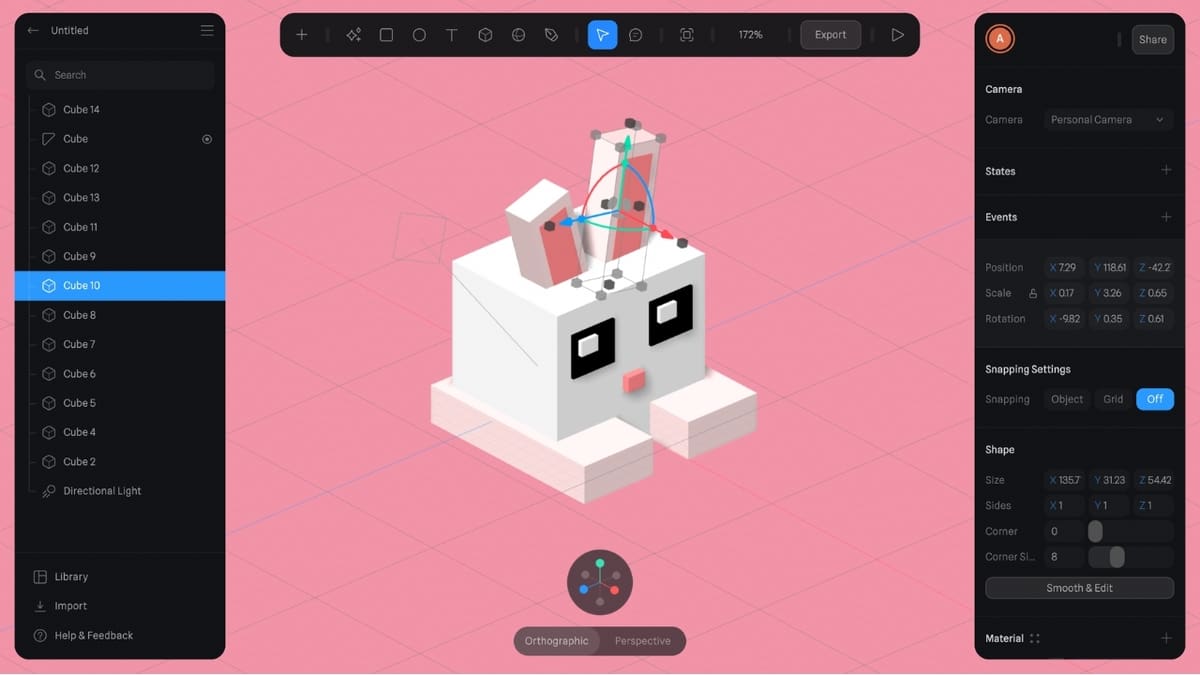
With the eyes and nose ready, it’s time for the ears to add even more cuteness. Similar to each eye, both ears have an outer (color FFE6E6) and inner (color FF9494) part; as such, grouping them will make it easier to manipulate them. For example, giving the ears a subtle angle gives our Squabbit a delightful hint of playfulness. Here, instead of manually adjusting the angle, you can also use the grouping feature.
Click on the new group that you created for each ear and use the red arc or input -10 (X) under rotation in the right sidebar, assuming your Squabbit is in the direction of the positive X axis (bright red in the navigation gizmo).
Step 3: Editing the Mesh
Finally! Our Squabbit is here. But we won’t stop at a static scene. We will infuse our creation with a touch of magic by animating our design.
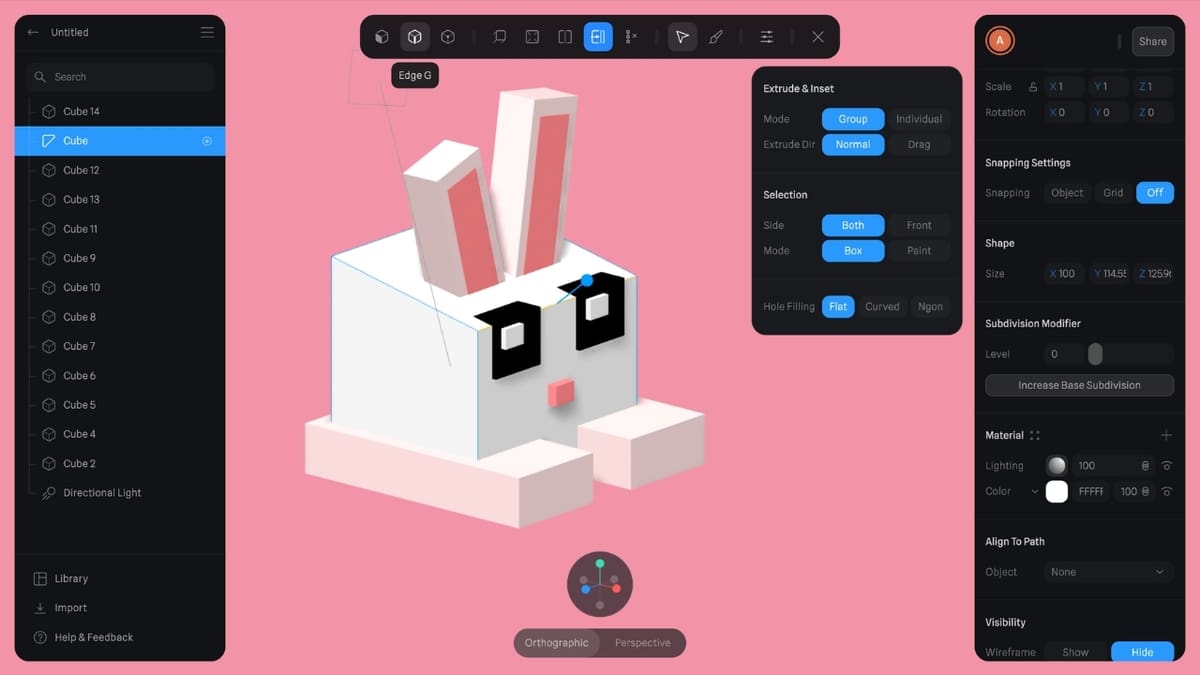
But before that, let’s look at Spline’s range of mesh editing capabilities. Select any object and navigate to the “Smooth & Edit” option under the “Shape” section in the right sidebar. Upon clicking this, this object will be converted into a subdivision surface which enables the mesh editing mode. You will now notice a transformation in the tools available within the top bar.
These tools are tailored to mesh editing and sculpting. From extruding and insets to filling holes and generating edge loops, the options at your disposal add intricate details to your model. You can modify and dissolve vertices (points), faces (polygons), or edges (lines). This level of granular control allows for precise adjustments, enabling you to fine-tune detailed aspects of your design.
Later on, if you select the same object and wish to further edit the mesh, you will see “Edit Mesh” under shape, as the object is already subdivided. Additionally, Spline includes a “Sculpt Tool” that works as if you were sculpting the object with your hands. Equipped with a set of brushes, you can mold, add, or shape your model.
Step 4: Adding Background
With our Squabbit model coming together beautifully, it’s time to focus on adding those extra details and refining the overall design for a more polished result. Paying attention to elements such as backgrounds, lights, colors, textures, and grouping objects in a systematic order will elevate our creation to the next level.
Since you may have already grouped some objects together, you can create primary or secondary groups and use the same drag-and-drop in the left sidebar to create a personalized hierarchy. Because we want the whole Squabbit to move together in the animation (and not leave behind the ears, for example), group everything together.
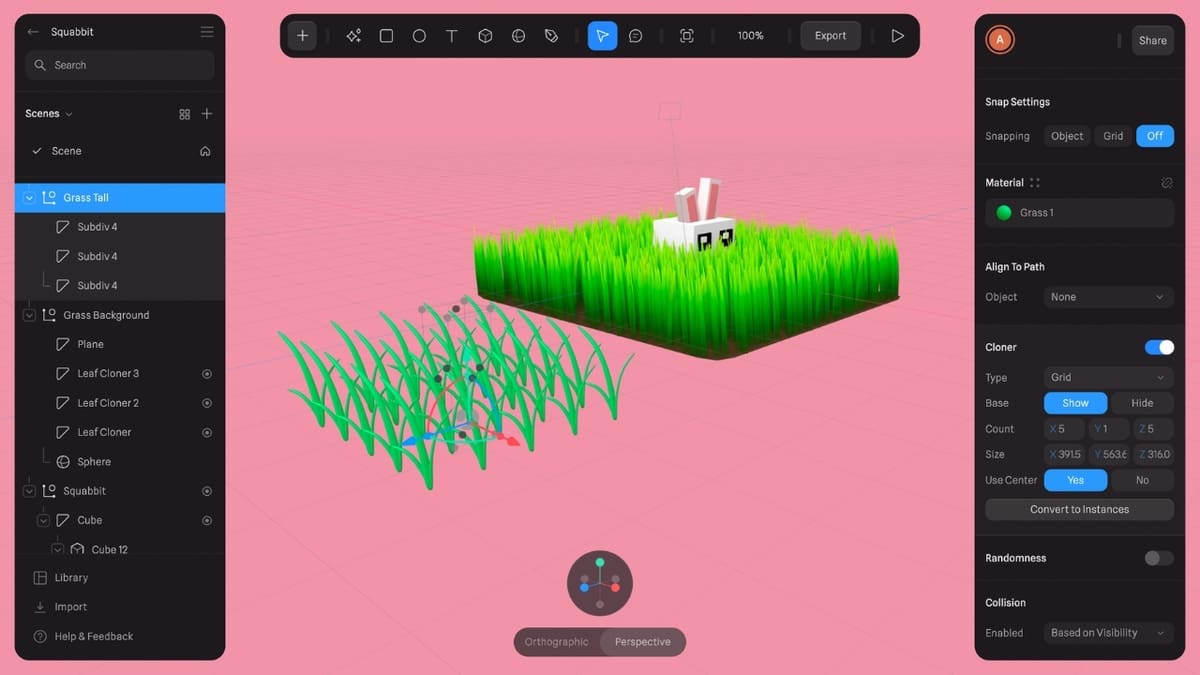
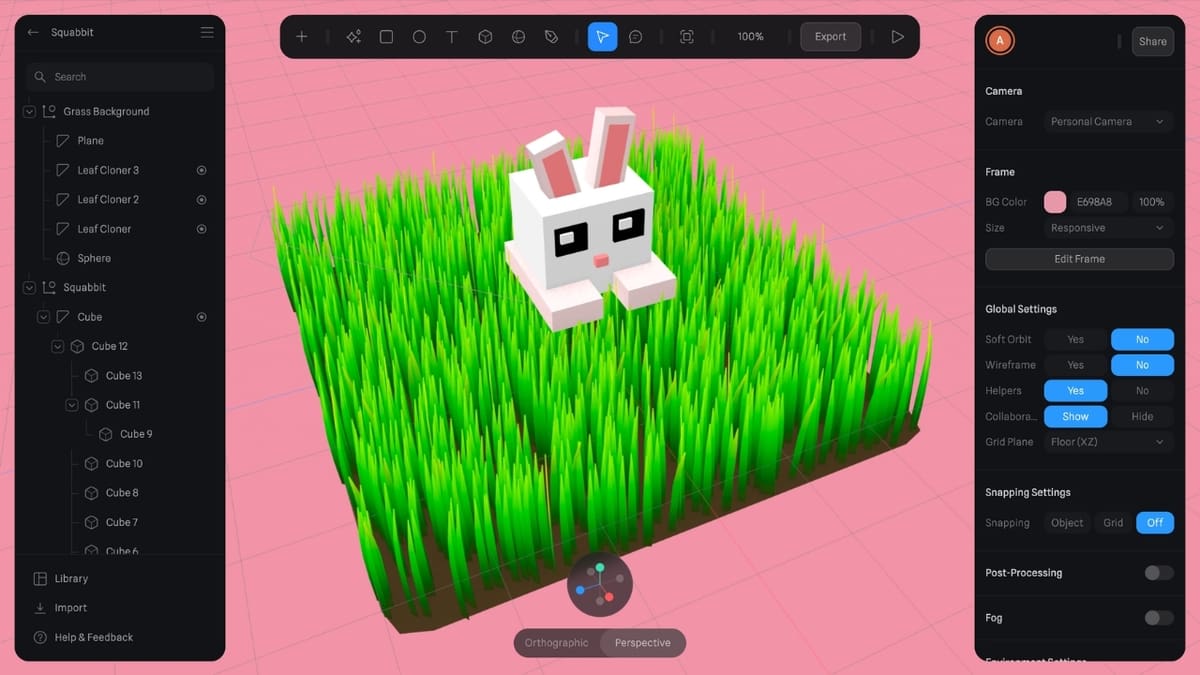
Now, let’s enhance the background of our scene by incorporating some lush greenery. While you can build and sculpt the background as well as its elements from scratch, Spline offers a library of pre-made objects that provide a quicker alternative. To use the Library, click on it from the bottom of the left sidebar, search for your desired object, or browse by category, then drag and drop to bring it to your scene.
For example, search for “Grass.” Now drag and drop the one you like into the scene. Not enough grass and the manual duplication would take time? Time to use the “Cloner.” Select the grass and scroll down in the right sidebar to find the cloner. Turn it on and select the “Grid” type. Now use the same “Count” for X as well as Z and 1 for Y to create a square field. And to scale or move them, click on the central grass from the 3D scene or select it from the Outliner (left sidebar).
If you want to add greenery to your scene more quickly, you can use objects from our Squabbit. Open it, click “Remix,” and copy the “Grass Background Group” from our design. Then, you can paste it into your own scene and instantly have a beautiful foliage backdrop.
Bonus: Animation
Our Squabbit model and the vibrant background have come together beautifully, but why stop there? Let’s add some simple animation to our creation. In Spline, the animation is achieved through the use of “States” and “Events,” allowing us to define and control the movement and behavior of our objects.
When creating states for your Squabbit animation, it’s important to keep in mind that they represent different positions or transformations that your character can assume. These states combined will help bring our character to life and make it look as if it is dynamically jumping. If you haven’t already, create a group to encompass all the Squabbit-related objects. This grouping ensures that our animation affects the entire character as a cohesive unit.
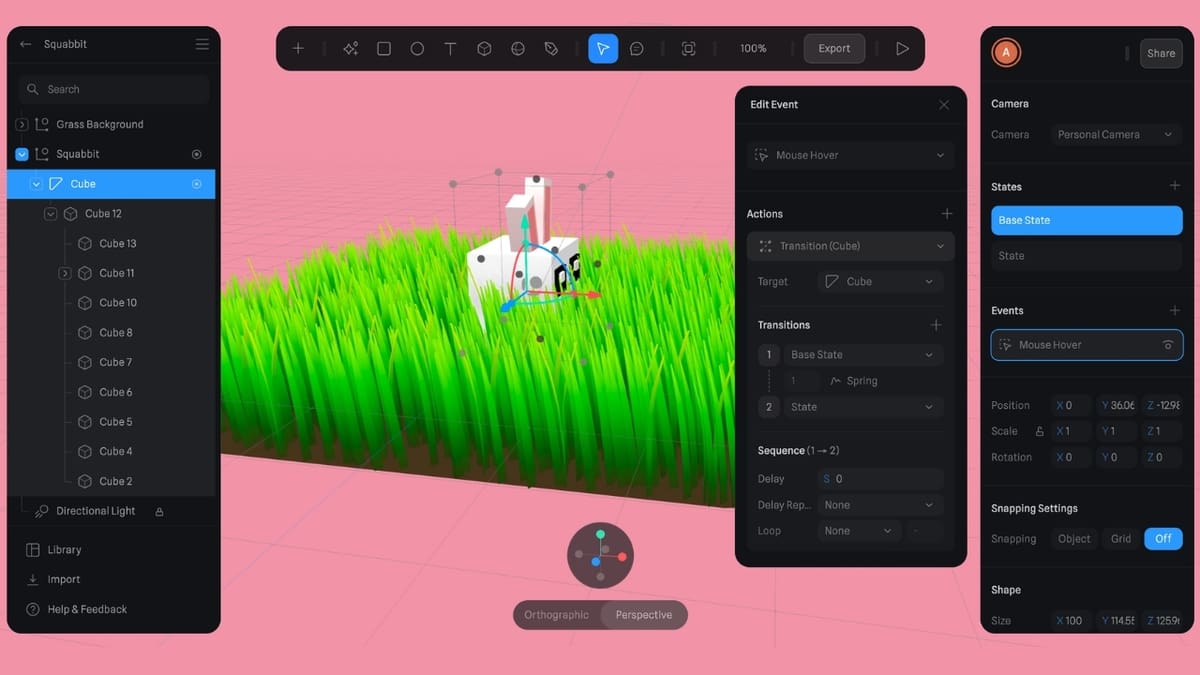
With the group selected, we can easily add states from the right sidebar. For example, you may want to create a state where the Squabbit is hiding in the grass and another where it is above the grass. With the states in place, we can create fluid animation by simply adjusting the properties of each state. Select the second state and modify the position, rotation, or scale of the Squabbit. If you click back on the other state, you should see that the Squabbit returns to its original… state.
To trigger our animation, we’ll utilize “Events.” In the Events section, we can define when and how our animation starts. After clicking on “+” and adding an event, click on “Start” to open a drop-down menu. Now select your preferred event that will trigger the animation. Below the event you will see “Actions,” here you can choose what happens when an event is performed. From transitions, object destructions, and camera switches, to entire scene transitions, you can do anything. Chose any action and click on the arrow on its right to open a menu with more options related to that action.
Viewing the Animation
For instance, we set the animation to “Transition (Jump)” menu when the “Mouse Hover” action is performed over the Squabbit (which you can select instead of “Start”). This interactive element adds an engaging touch to our design, allowing viewers to interact with and experience the animation firsthand.
Now that we have animated our Squabbit through the use of states and events, how about we take a look at the animation? To view the animation you just added, make sure you can perform the event that will trigger the animation.
All you need to do now is click on “Play” on the Toolbar to enable the play mode. If you have set “Mouse Hover” as the event, then simply hover your mouse on top of Squabbit to see it in action.
Exporting & Sharing the Model
After completing our Squabbit model and making final adjustments, we can use Spline’s export and sharing features to display our creation to the world. This includes the ability to share through 3D printing, online platforms, interactive apps, and collaboration with other creators.
Spline enables designers to export their 3D designs for printing in the STL format if you’ve subscribed to one of the paid versions. If you’re working on the free version of the program, you can export it in GLTF format and import it to Blender, for example. However, before 3D printing it, we need to ensure that the design is suitable for it by making some minor adjustments, such as making it watertight.
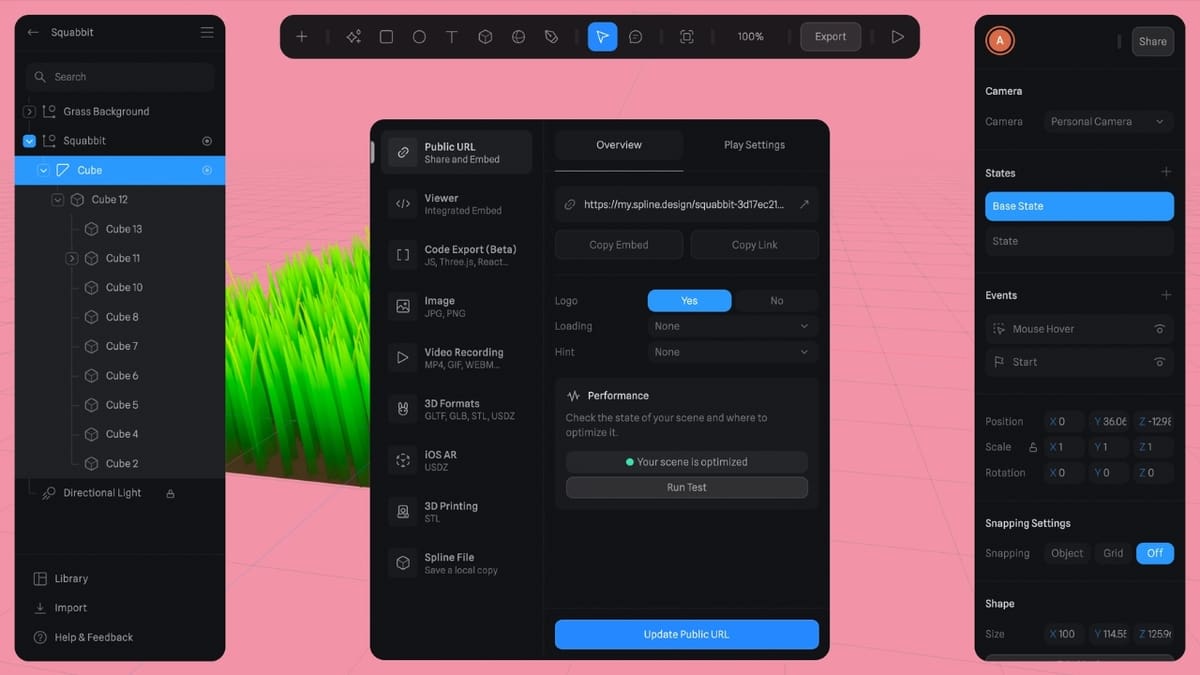
In addition to 3D printing, Spline offers various other export options that cater to different purposes. Designs can be shared as a public URL, or they can be exported as viewer files for those who prefer to embed their design into websites or games. Furthermore, Spline provides export options for generating code, images, frame video recordings, and GLTF and USDZ formats. To ensure the safety of the designs, Spline’s autosave feature saves the progress in the cloud. And for local copies, Spline allows for saving designs as native .spline files.
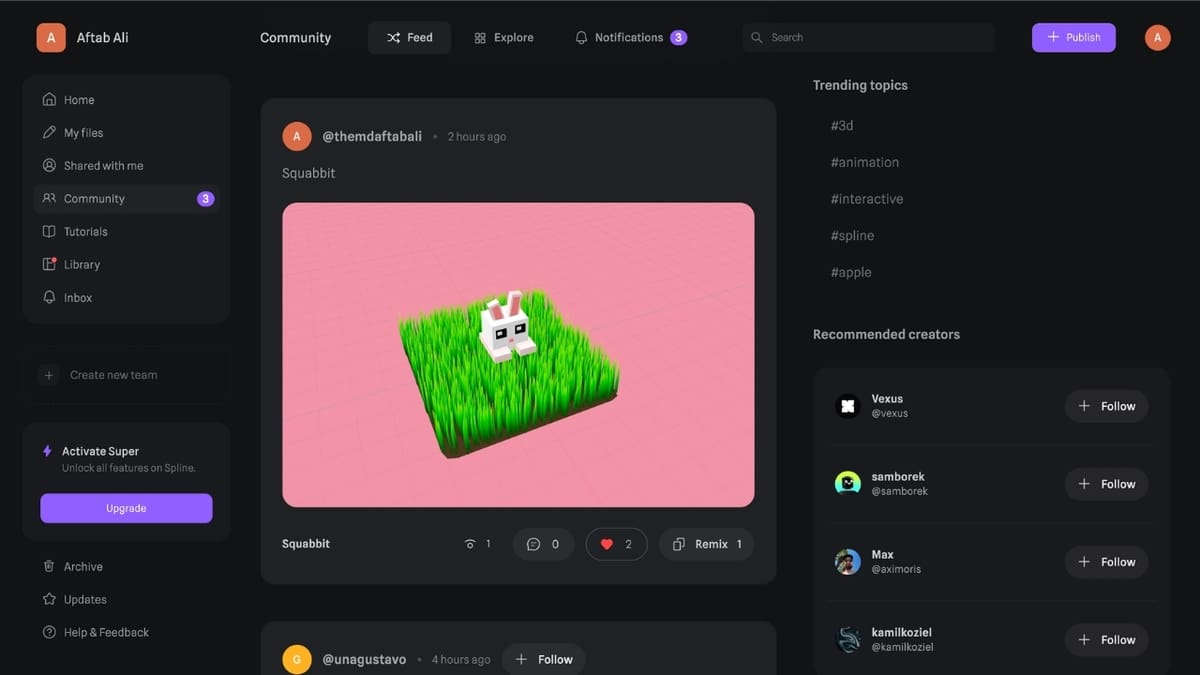
Also, sharing designs with the community and collaborating with others is made easy through Spline’s sharing options. Publishing designs to the Spline community allows for fellow creators and enthusiasts to discover and appreciate everyone’s work. Additionally, the collaboration feature enables seamless teamwork, facilitating joint projects and enhancing the creative process.
License: The text of "Spline 3D Tutorial: How to Design with Spline" by All3DP is licensed under a Creative Commons Attribution 4.0 International License.