
10 STEM Project Ideas for Elementary Students

Interactive projects are great for engaging kids in the learning process. Check out these awesome STEM project ideas for elementary students!
In recent years, science education has become increasingly important for the development of children. Learning scientific concepts from an early age helps in understanding the world around us and can also inspire and motivate future careers in important fields.
3D printing has a lot to offer in this regard, and there are also many simple projects that can be done even if you don’t have a printer. Join us to discover some of the most inspiring projects for your little ones.
In this article, we’ve compiled some cool STEM-based projects for kids, ranging from ages 5 to 12. All of the projects can be done with the help of a 3D printer or with common materials that you can easily find. Some projects are simple enough for kids to do (mostly) on their own, but adult supervision is always recommended. We’ve arranged the list in order of increasing project difficulty and targeted age.
Let’s get started!

3D Bubble Wand
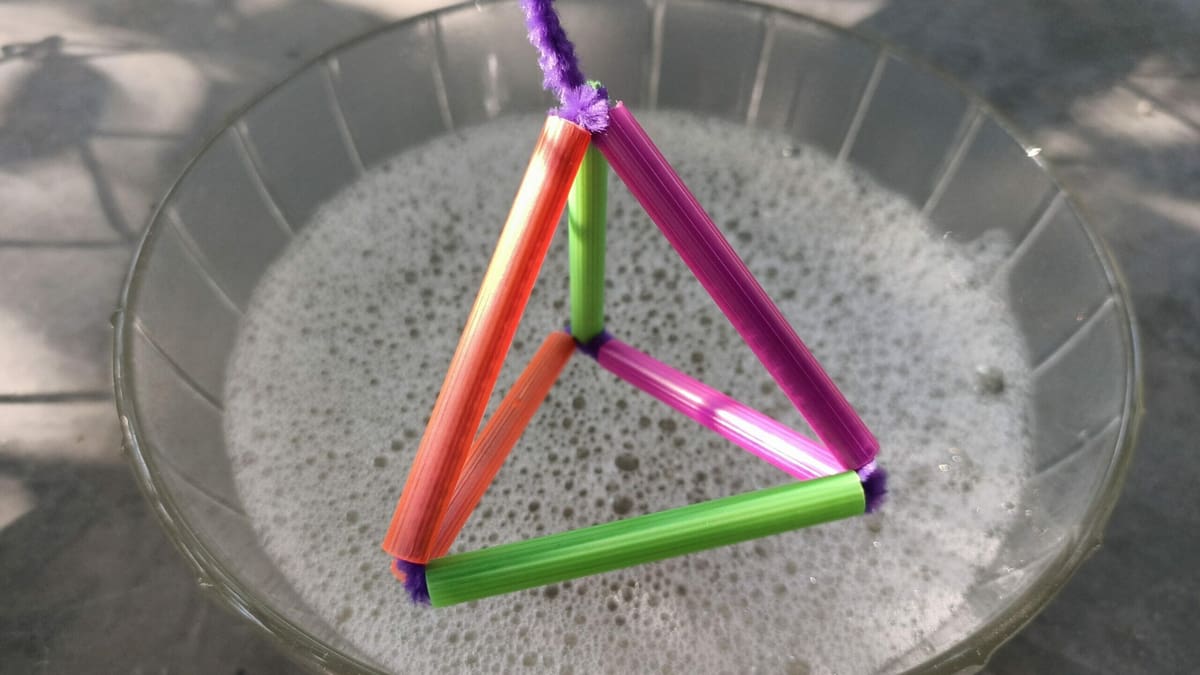
Playing with soap bubbles is a lot of fun, but it also has its scientific and educational side. Water has surface tension that keeps it together at the surface, causing it to behave like an elastic film and form droplets. When soap is added to water, it reduces the surface tension, allowing the water film to stretch and, when air is blown through it, form bubbles.
To set up this experiment, you will need some simple materials, such as pipe cleaners and pieces of straw. The experimentation comes into play by constructing bubble wands of various shapes and sizes and watching how different bubbles form. Which wand shape makes the biggest bubbles?
- Designer: 7skyies
- Difficulty: Easy
- Core components: Plastic straws, pipe cleaners, bubble solution
- Project page: Instructables
Tornado-in-a-Bottle
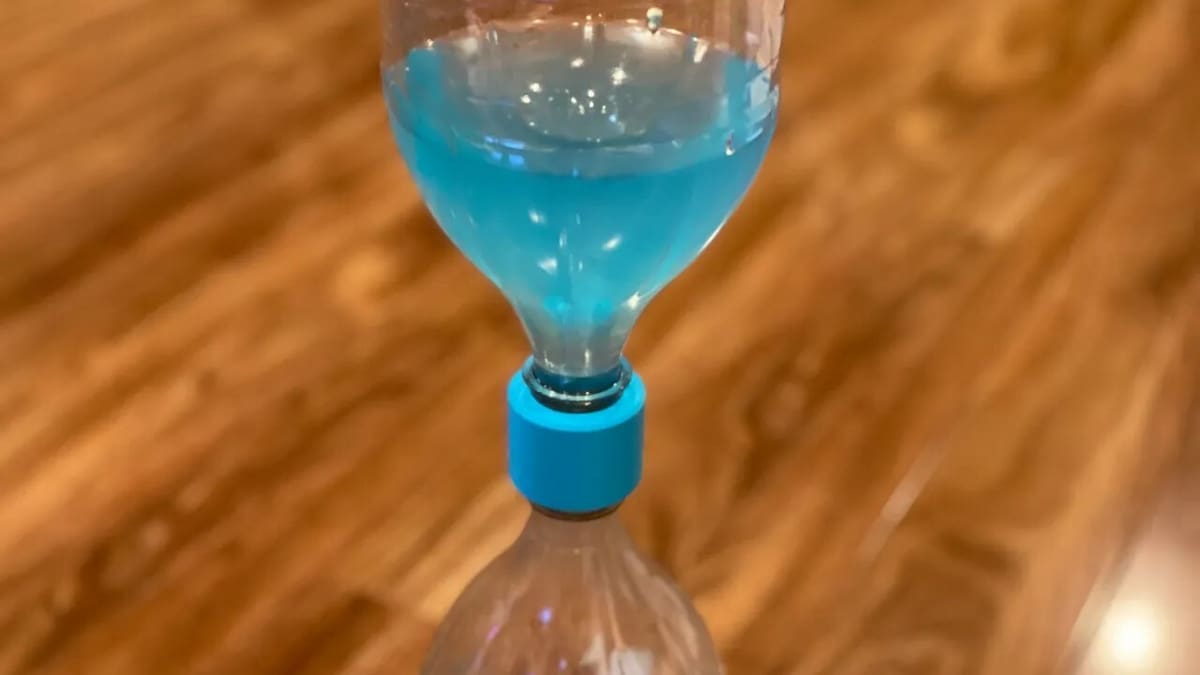
A tornado is a fascinating phenomenon where currents of warm and cold air meet and begin to spin into a powerful dance in the sky. Its powerful winds can be quite destructive, making it too dangerous for little ones to observe up close. However, that doesn’t mean they can’t create their own mini tornado in a bottle to get a glimpse into this powerful natural phenomenon.
To create your own personal tornado, two bottles are connected at the openings, and colored water is used to simulate the effects of wind. Add sparkles to the water for a cool-looking effect. For a leak-proof tornado, both bottles can be screwed into a 3D printed coupler. Just flip the connected bottles upside down, give it a little swirl, then watch the liquid inside spinning as it empties into the other bottle, creating a beautiful vortex.
As a perfect rainy-day project, this experiment can be done in various ways using bottles of different sizes. Larger bottles with smaller openings produce a longer-lasting show. The 3D printed coupler is a simple and easy print, just make sure your tolerances are tight enough to print accurate threads.
- Designer: Adam
- Difficulty: Easy
- Core components: 3D printed parts, bottles
- Project page: Printables
Crystal Pick
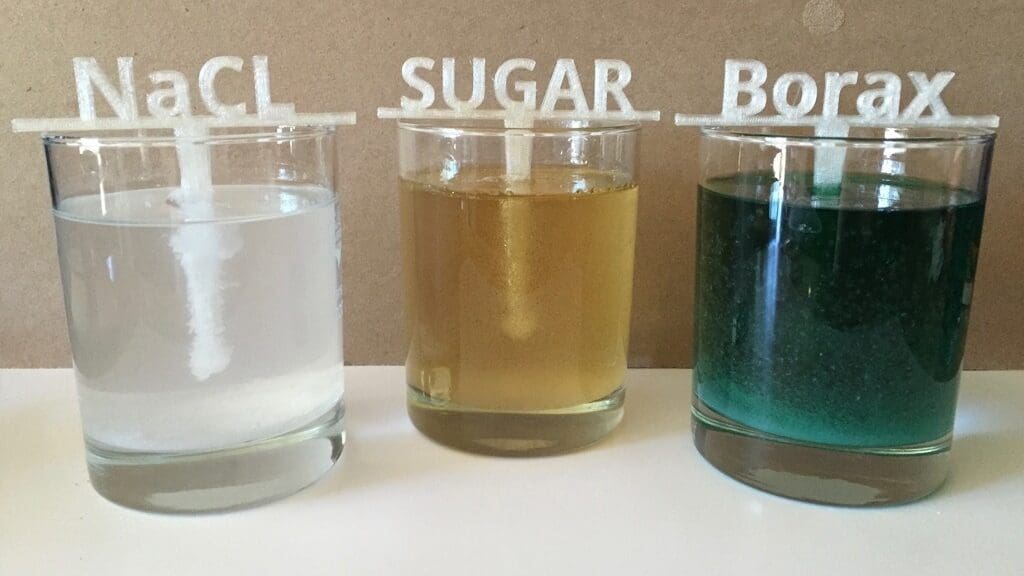
When you dissolve a large amount of salt in hot water and let the solution cool down slowly, something magical happens over the next few days. Tiny salt particles will begin to join together, forming incredible crystals. You can observe these crystals grow over time and create fascinating shapes like stars or cubes. It’s a magical experience to witness the growth of these beautiful crystals!
This same procedure can also happen with concentrated sugar water or borax. Although, the latter is not recommended as it can cause skin and eye irritation. To give a place for these crystals to hang onto, you’ll need to fasten a stick into the concentrated solution. These are easy to 3D print yourself, or just see what you have around the house.
The amount of time you need for crystals to form will depend on the liquid concentration and type of material. Generally, it’ll take a few days to get big crystals, and in the case of sugar, it can even take more than a week.
- Designer: devansic
- Difficulty: Easy
- Core components: 3D printed parts, transparent cups, salt, sugar
- Project page: Thingiverse
Rubber Band Car
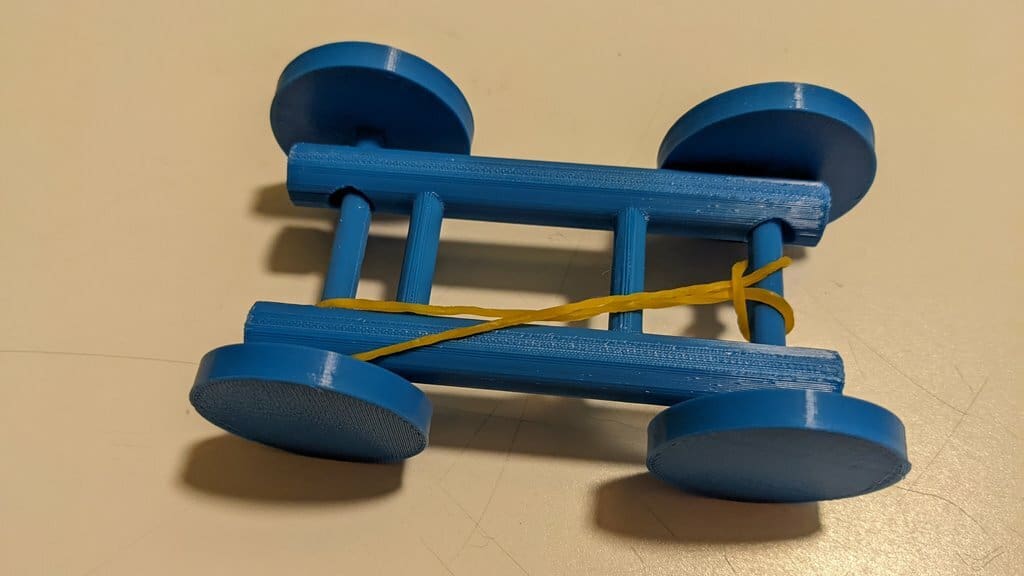
By combining 3D printing technology and physics, you can create an amazing rubber band car. In this particular project, the design features a simple cart designed in Tinkercad that consists only of wheels and a chassis. After printing, assembly is easy, and the only additional part you’ll need is a rubber band.
To get this car moving, twist the rubber band by turning the wheel, storing it full of potential energy. When you release the cart, the elastic will be unleashed and the car will be propelled forward. What a fun way to explore the principles of physics and engineering!
This project offers many opportunities for experimentation and improvement. You can adjust the size and tension of the rubber bands to optimize the speed and distance traveled by the cart. You can also experiment with different wheel or chassis designs in Tinkercad to see how the driving behavior changes. The combination of 3D printing and 3D design creates an engaging and hands-on educational experience that encourages creativity and critical thinking.
- Designer: garylewandowski
- Difficulty: Easy
- Core components: 3D printed parts, rubber bands
- Project page: Thingiverse
STEAM Boats
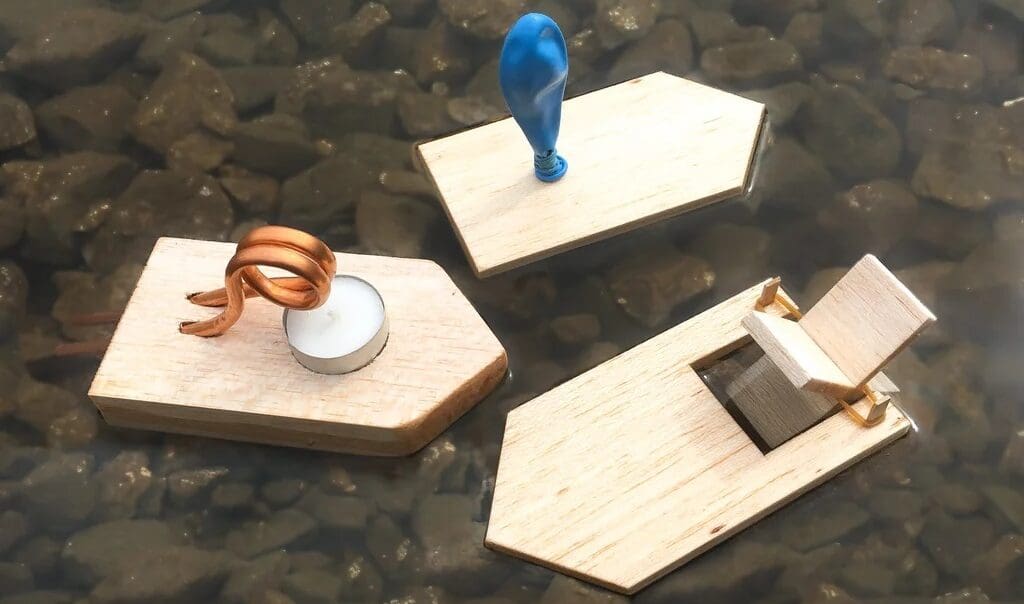
We already have racing cars, but how about a boat race with three different mechanisms? The project creator made the boats using lightweight balsa wood. It’s so soft that it can even be cut with a utility knife, although don’t let your child attempt it alone.
Alternatively, if you find working with wood too dangerous or complicated, you can try reproducing the boat models with a program like Tinkercad and 3D printing them. Then all you need is the engine (i.e. a balloon or rubber band).
The steam-powered boat using copper wire and a candle is the most challenging to build because you’ll need some extra tools to properly make the copper coil and to make some modifications to the boat structure. Not to worry because the instructions provided by the maker are very detailed!
- Designer: wold630
- Difficulty: Medium
- Core components: 3D printed parts or balsa wood, rubber band, balloons, tea candle, copper wire
- Project page: Instructables
Scribbling Doodle Bot
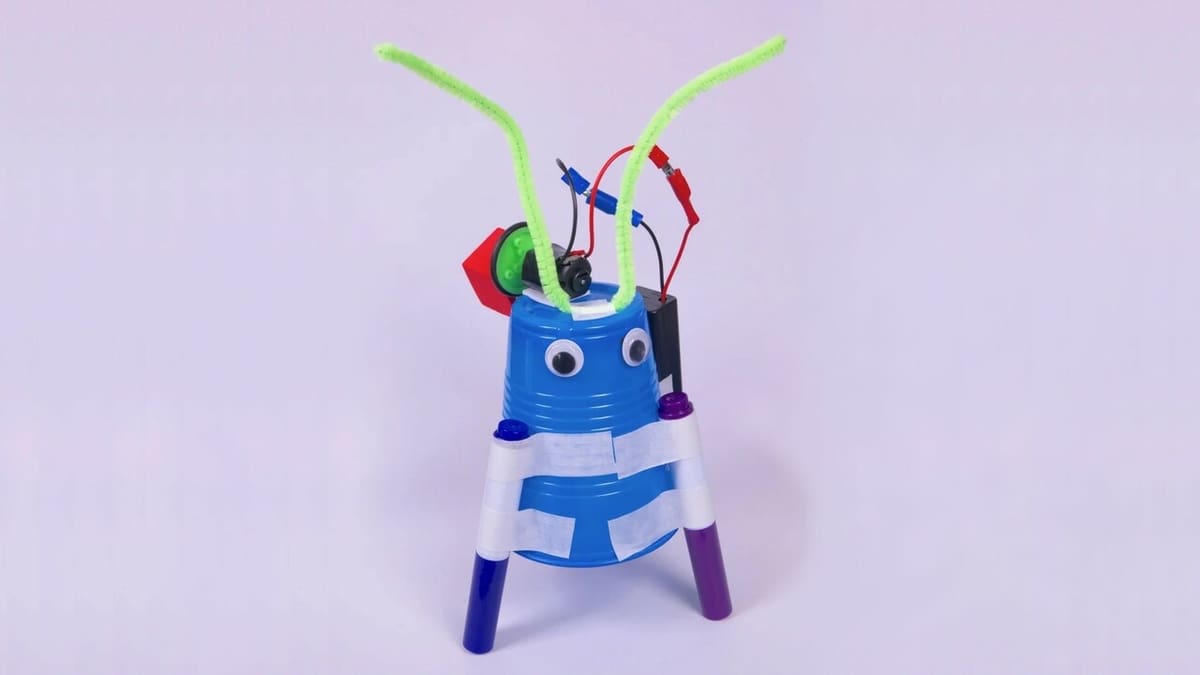
How about making an art robot? This fun guy is a great starter robot to learn about simple electronics and mechanics! There’s nothing too complicated here (and definitely no programming required). You only need a few common and colorful materials like a motor, tape, some wires, and batteries to start creating works of art with your little robot.
While the project page uses a plastic cup and some colorful art supplies, you could also opt to 3D print a hollow figure to really have some fun. However, googly eyes are non-negotiable.
Some important things to consider are that your robot needs sturdy legs, so good tape will make all the difference. It’ll also be nice if the battery holder has an on/off switch to easily control your robot. Finally, if you 3D print a cube and attach it to the motor wheel, you can test different drawing effects by securing it in different positions.
- Designer: LanceMakes
- Difficulty: Medium
- Core components: 3D printed parts or plastic cup, electric motor, AA battery holder, markers, craft supplies
- Project page: Instructables
Archimedes Screw
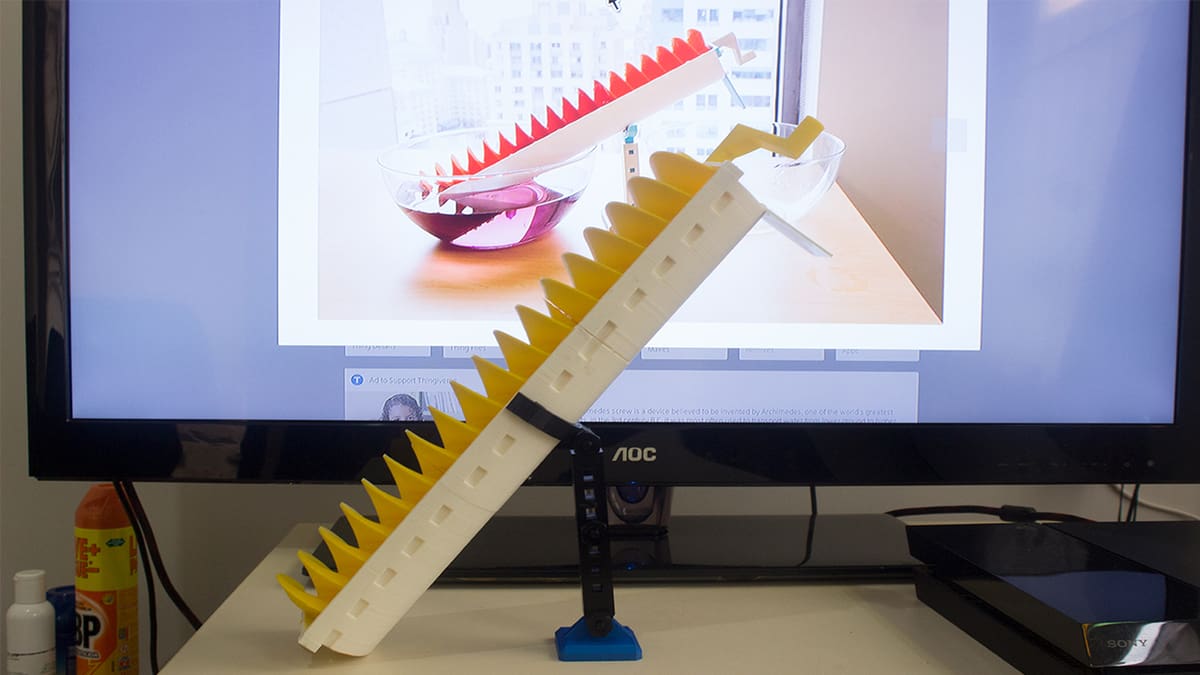
The Archimedes screw is an invention attributed to the Greek scientist and mathematician Archimedes, who lived in the third century BC. It’s a clever device used to move liquids, and even some solids, from lower to higher levels. The mechanism consists of a helix-shaped screw, usually inserted inside a cylindrical tube. When it rotates, the screw pushes the liquid or solid upward along the tube.
Little ones will be amazed by this simple device that transports water upwards. To streamline this project, the author suggests using a PVC pipe along with 3D printed parts, although there are files available for printing the entire device. There are also helpful videos and detailed instructions available on the project’s page.
- Designer: MakerBotLearning
- Difficulty: Medium
- Core components: 3D printed parts
- Project page: Thingiverse
Easy Hydraulic Lift
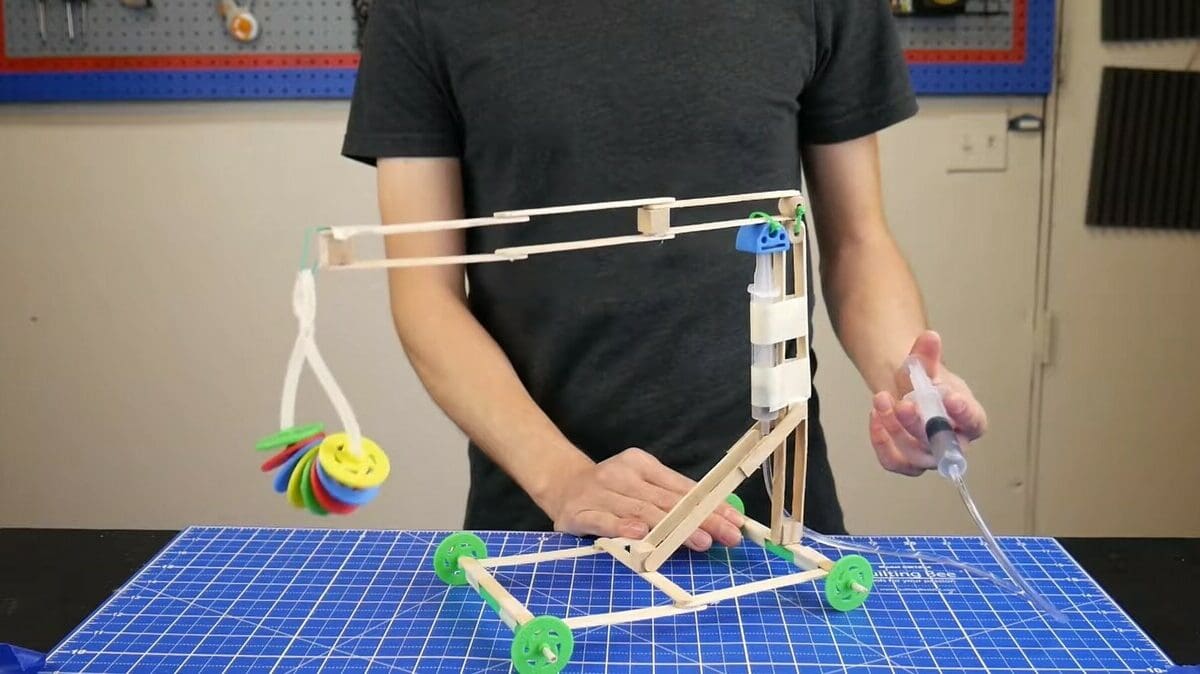
Among so many cool STEM project ideas, your first hydraulic machine is a particularly unique and fun choice that creates many opportunities to experiment and play. In this experience, the little ones will learn some physics without even realizing it! The hydraulics here run on the simple principle of air being easier to compress than water. Pull and press on your syringe pump to see how much your machine can lift!
Building this pump doesn’t require you to spend much on expensive materials, you’ll only need simple things like tape, some hoses, syringes, and some popsicle sticks, or you can 3D print the frame yourself! There are many other related projects on the project page that use the same principle, like this judo-fighting robot. Surprise your kids with the power of hydraulic force!
- Designer: STEM Inventions
- Difficulty: Hard
- Core components: 3D printed parts or wooden craft sticks, syringe, tubing
- Project page: STEM Inventions
Printable Microscope
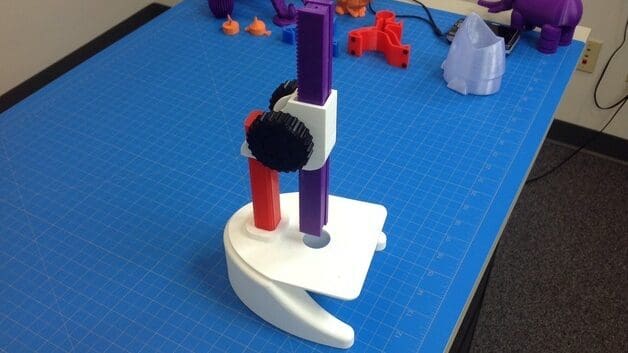
There is a world full of fascinating things constantly surrounding us, but we can’t perceive it all without the help of some powerful lenses. Luckily, this 3D printed microscope can help young learners discover what they can’t see with their eyes! While assembling the microscope will require help from an adult, once completed it’ll surely keep inquisitive minds engaged for hours.
The designer reported an approximate magnification of around 74x with the materials they used. Of course, this microscope is not totally printable. You’ll also need a few things, including lenses and some lighting components. On the model page, there are plenty of assembly instructions for 3D printing and a full list of the additional components and where to find them.
- Designer: kwalus
- Difficulty: Hard
- Core components: 3D printed parts, some lenses, LEDs
- Project page: Thingiverse
Grand Prix
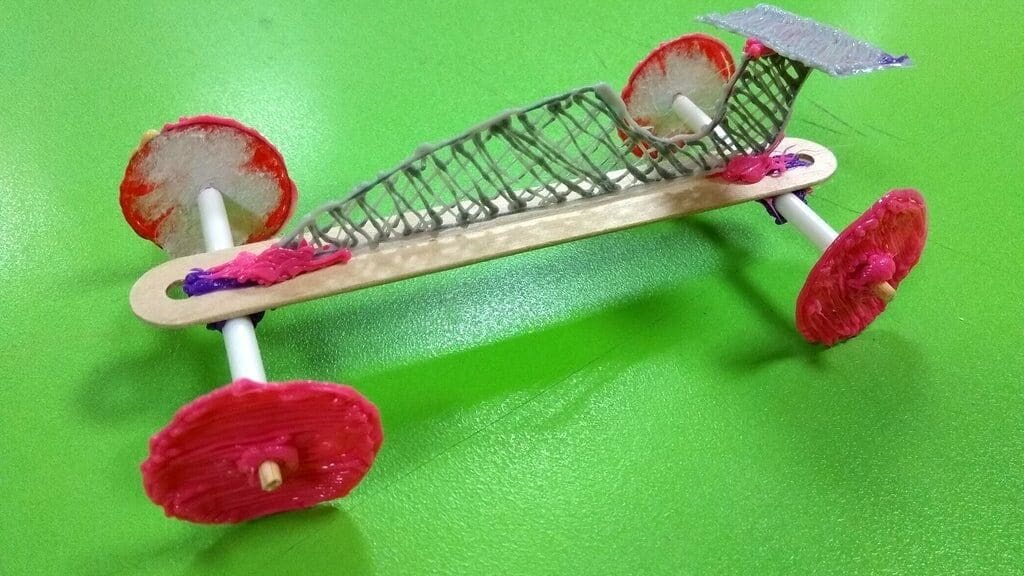
If you still think that all science fairs are boring, think again! In this project, you will not only build your own racing cars but also have the option to put them on an advanced track to compete against each other for milliseconds, just like in a professional race. Go ahead and start a championship season with this race track!
What makes this project special is that the cars are built using a 3D pen, and that’s where things get really cool. Kids can design any car they want, as long as it fits on the track and rolls smoothly. Giving kids the freedom to independently design their own car is great for developing problem-solving skills. The designer does include a template to help the design process, though.
Creating your own car is just one part of this project. If you are looking for something even more immersive, the designer includes his plans to make a track equipped with sensors to precisely time the race!
- Designer: M.C. Langer
- Difficulty: Hard
- Core components: 3D pens and filament, glue, craft sticks, and more for the track
- Project page: Instructables
License: The text of "10 STEM Project Ideas for Elementary Students" by All3DP is licensed under a Creative Commons Attribution 4.0 International License.