How to Convert STL Files to G-code

STL is a common file format for 3D models. Most manufacturing systems, however, require G-code. Find out how to convert STL to G-code!
STL is a 3D file protocol developed in 1986 by Chuck Hull of 3D Systems. Though no one quite knows what it stands for, STL has since been given the backronyms “Standard Triangle Language” and “Standard Tessellation Language”. In short, it’s a means of describing a 3D object in mathematical terms. STL files are typically employed as the 3D output of a CAD system.
These descriptions store and transfer data about the model in the form of tiny geometric shapes, which join together to form the object’s surface. While STLs have become the de facto standard file format for 3D printing, few 3D printers actually interpret STLs directly.
Instead, the STL file must first be sliced into layers as G-code, the positioning language of all CNC machines (which 3D printers technically are). This is the job of a slicer (more on this process later).
In this article, we’ll go over how to get from STL files to G-code. Let’s get started!
Model Slicing
To understand the need for slicing, it’s important to take a step back and look at the 3D printing process. Once a model is finished in the chosen CAD program (or just downloaded from a 3D model repository), it needs to be saved as an STL and then prepped for printing by being sliced into layers.
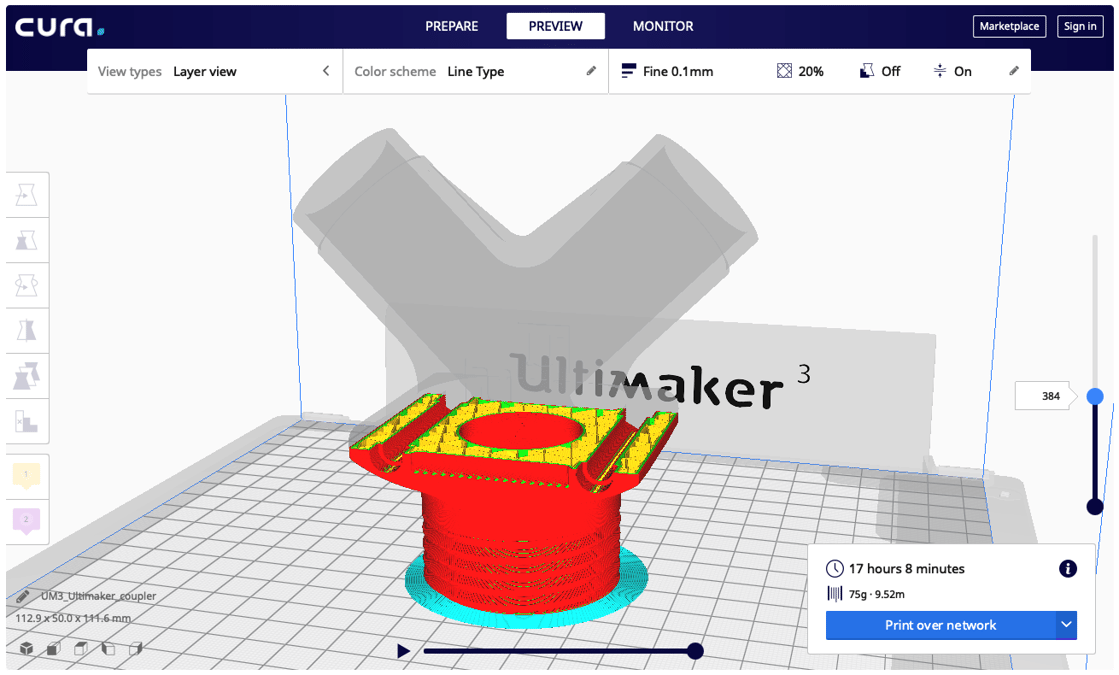
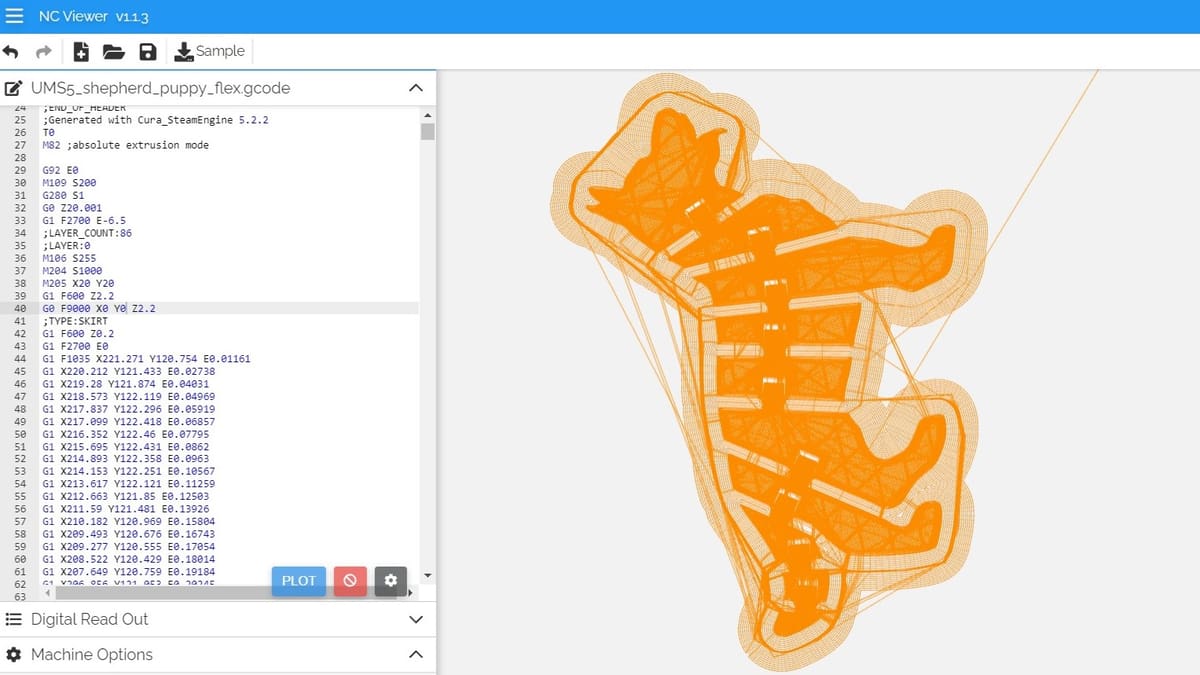
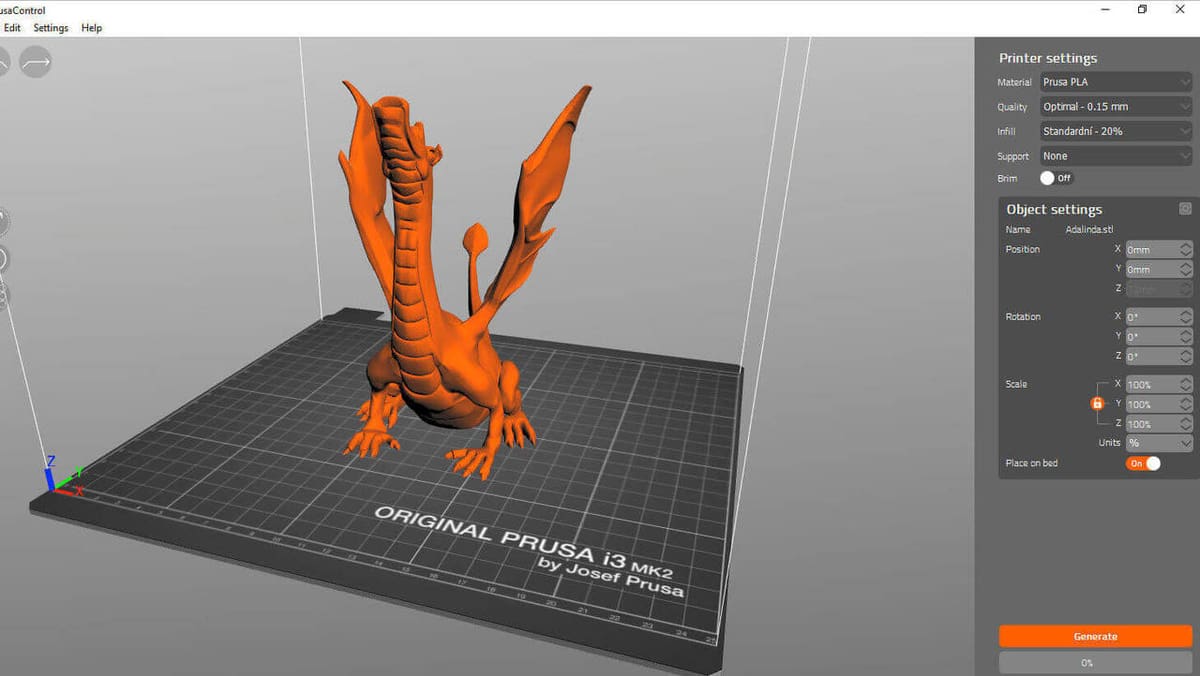
To start slicing, open your STL file in a slicer, adjust the settings and scale to suit your needs, hit “Slice”, and voilà, a custom G-code file for your model is ready!
In the resulting G-code, model layers are defined from bottom to top. Each layer is a 2D definition of the model’s geometry on the XY-plane at a particular height in the model. Slicers define this process when converting a model to G-code, so it’s the parameters you set in the slicer that define how your model will be printed.
Once you have the G-code, it’s time to print. The layer thickness is up to the user’s discretion but typically runs from 0.1 to 0.4 millimeters for FDM and 0.01 to 0.05 millimeters for resin. Each layer is added onto the 3D printer’s build surface, one atop the other. At the end of this, you get your model printed in 3D.
Slicing Considerations
As we now know, slicers are the programs that analyze a model and break it down into the proper machine code. The actual conversion process from STL to G-code is as simple as pressing the “slice” button in your slicer, but it’s the part that comes before that decides how your model is printed. Some things that affect slicing an STL file include:
- 3D printer model: The tuning is generally left up to the user, though many slicers come with prefilled settings for specific printer models.
- Material type: The bed and nozzle temperature, and speed are the most critical parameters in FDM that must be individually adjusted to the printing material you’re using, be it PLA, ABS, or PETG. Similarly for resin printing, parameters like exposure time and lifting speed will depend on the type and viscosity of your resin.
- Desired quality: Layer height, print speed, infill percentage, support settings, and wall thickness play a huge part in the printed model’s quality and presentation.
The purpose of the model will play a part in defining many slicer parameters. If you’re drafting, you may consider the “draft mode” to save on material and time (larger layer height, faster print speed, etc.).
If you’re printing a piece to show off, you may consider a slower print speed and smaller layer height to have a nicer finish. All of these factors are under the control of the slicer, and are communicated to your printer as part of the G-code created when you hit “slice”.
How to Choose a Slicer
So, with all the slicers that are available, how do you choose the best one for you? As a rule of thumb, start with the one that comes with (or is recommended for) your 3D printer. These “standard issue” slicers will come with good support and a wide user base, making them a great place to start.
For FDM printing, PrusaSlicer for Prusa printers, Creality Slicer or Creality Print for Creality printers, or Cura for UltiMaker printers (though Cura is also one of the most popular slicers for all FDM printers!).
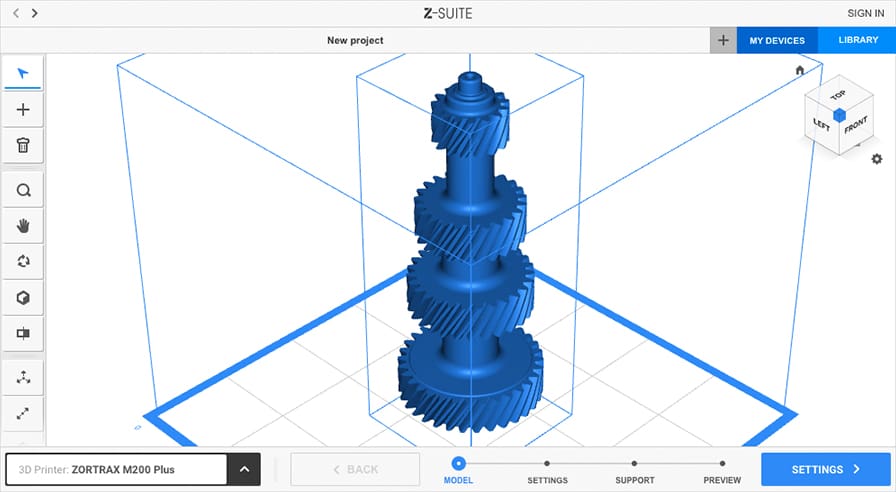
If you’re working with resin printing, PrusaSlicer is again a great option for Prusa printers, Photon Workshop for the Anycubic Photon series, or Z-Suite for the printers from Zortrax. That said, the third-party ChiTuBox slicer is a crowd favorite and the recommended software for the Elegoo Mars series.
All slicers have a similar user interface that offers mostly the same parametric adjustment capability. However, the efficiency of the actual G-code that is generated, the way details are transported from conceptual to actual, and the overall ease of use vary greatly from program to program.
Lastly, you may want to join a user group for your 3D printer. If you outgrow the default slicer, or your prints tend to lean more toward the exotic, find out what others are doing to meet similar challenges.
License: The text of "How to Convert STL Files to G-code" by All3DP is licensed under a Creative Commons Attribution 4.0 International License.