Thingiverse Customizer: What Is It & How Does It Work?

Thingiverse's Customizer app allows you to adjust the features and dimensions of compatible models to fit your needs. Read on to learn more!
Make It Yours
Thingiverse is a public 3D model file repository run by MakerBot, a company that makes high-end 3D printers like the MakerBot Replicator. Thingiverse was the first major platform for 3D printable models designed and shared by the community.
While there are tons of models available for free on Thingiverse and other sites, sometimes you need parts tailored exactly to your needs. Whether this means custom dimensions or special features, it’s clear that one-size-fits-all doesn’t always work. And if you’re not fluent in computer-aided design (CAD) programs, even making a small change or adjustment to someone else’s design can be tricky and time-consuming.
Luckily, there’s a better way to get the right part for you on Thingiverse: Thingiverse Customizer! The Customizer app was developed by MakerBot and lets creators make OpenSCAD models with customizable parameters. This could mean setting dimensions, activating specific patterns, defining the number of pegs on a model, and similar features.
Designers can write in OpenSCAD’s unique programming language to make certain features and dimensions of base models customizable. Once the model is published on Thingiverse (including the SCAD file), creators can activate the Thingiverse Customizer app, and anyone can adapt the model based on set parameters.
In this article, we’ll be going over the Thingiverse Customizer app, reviewing when and how to use it. Additionally, because the integrated Customizer app can be a bit unreliable, we’ll also go over a method to customize SCAD files outside the Thingiverse platform.
When To Use It
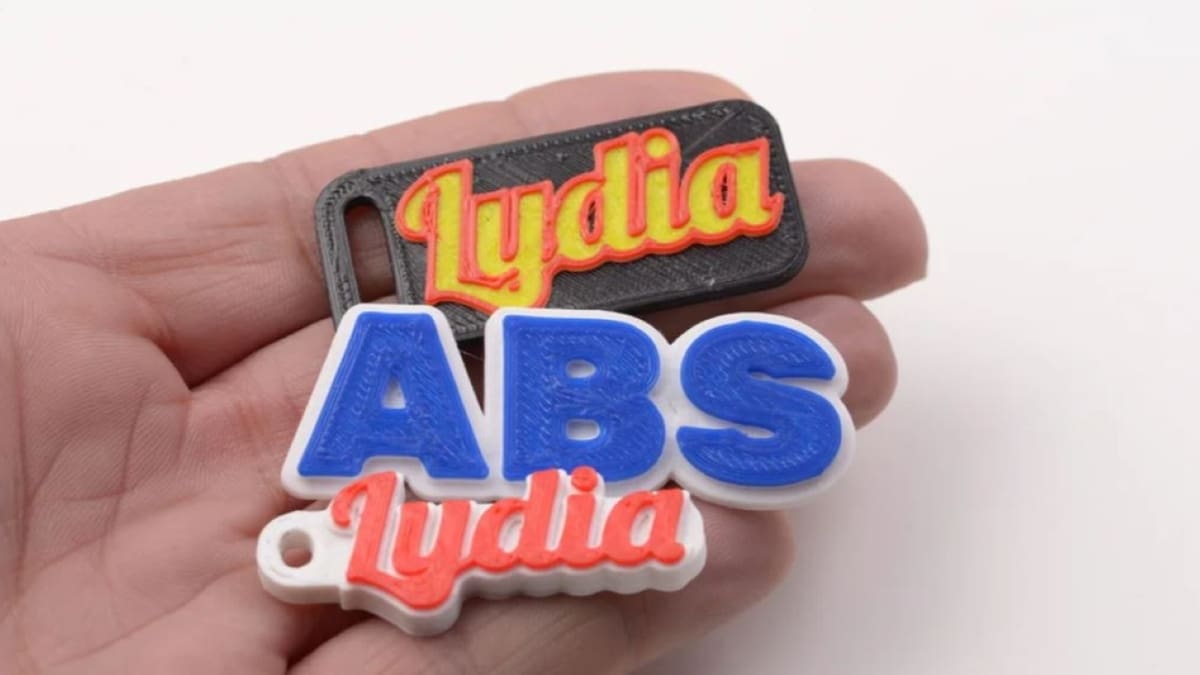
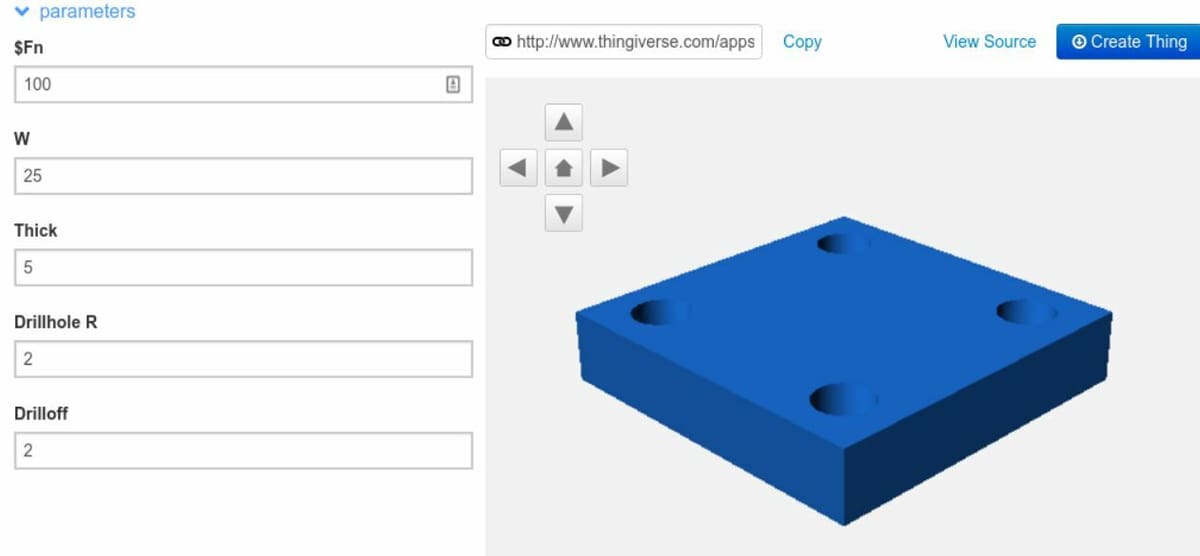
When you can get it to load, the Customizer app is free and very useful for making quick modifications to models on Thingiverse. It’s great for adapting functional parts to your specific needs, or even just to personalize some text, like adding your own name to a keychain.
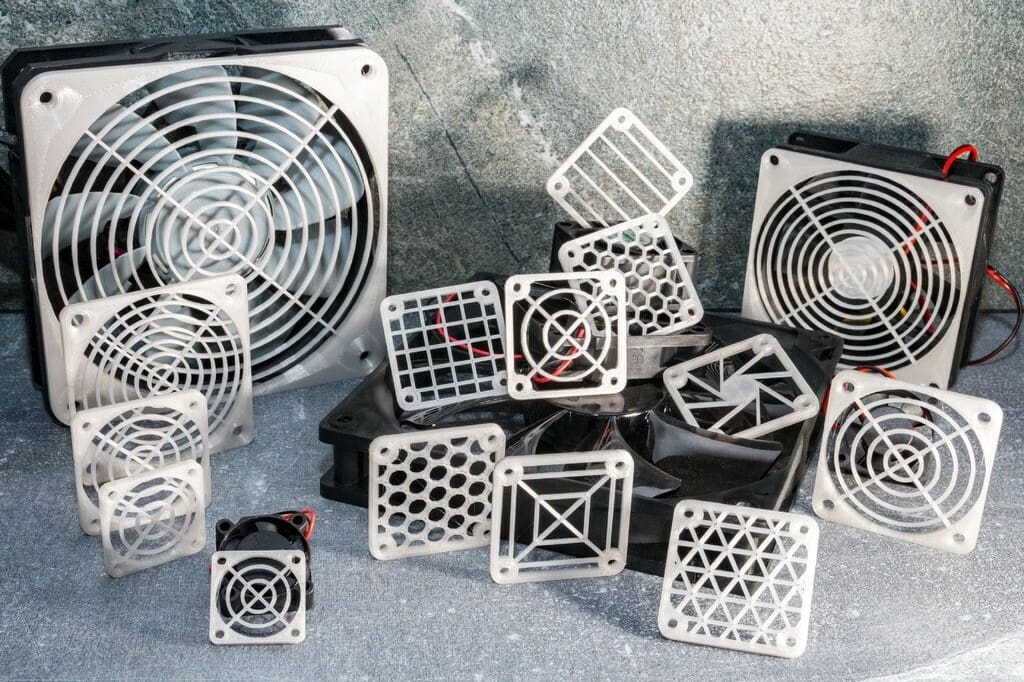
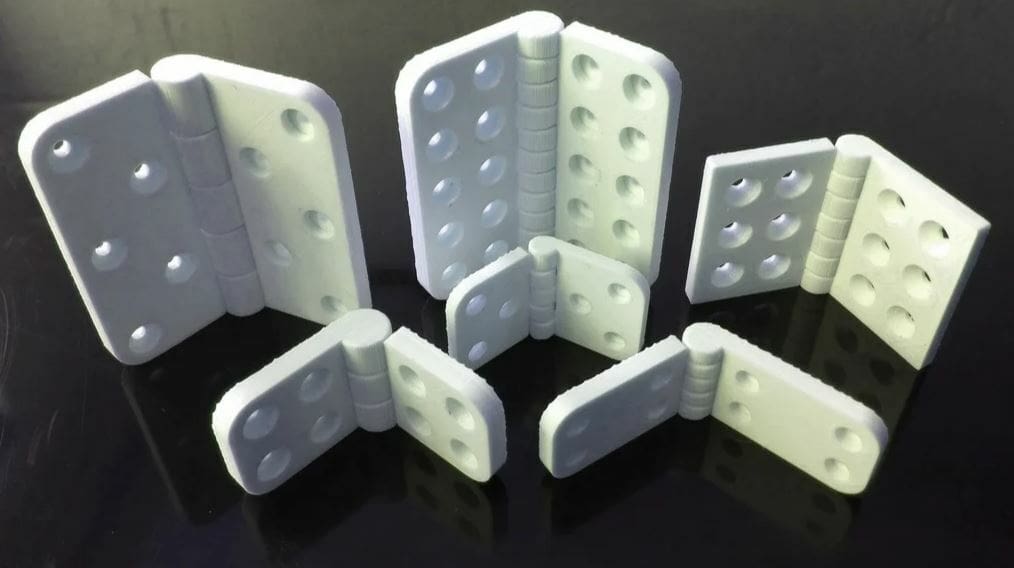
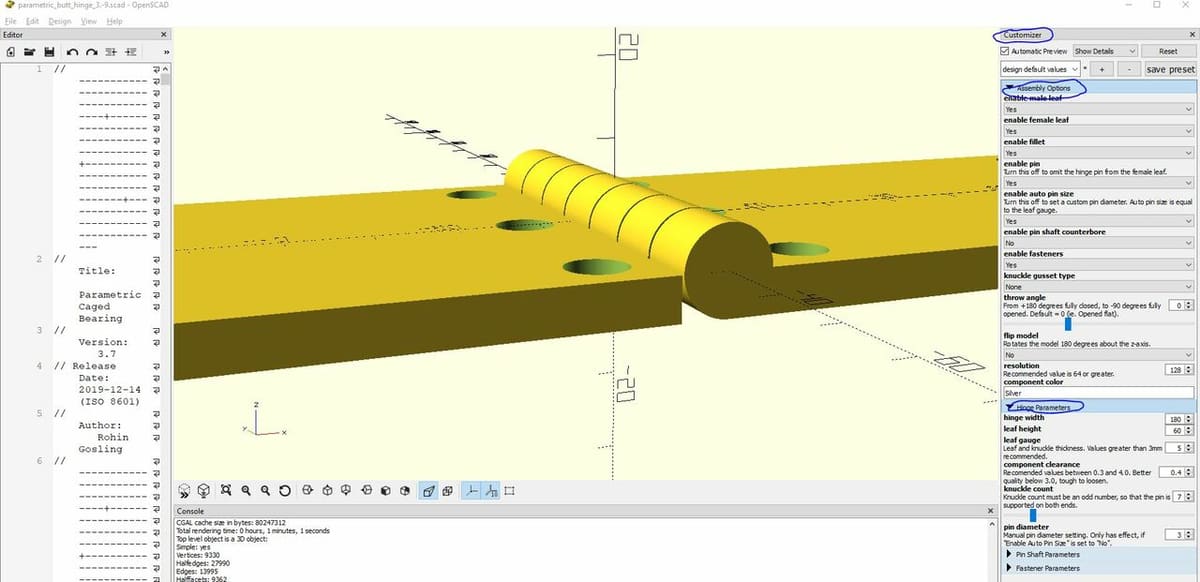
One excellent example of a customizable model is rohingosling‘s parametric hinge, where you can adjust the hinge width, knuckle count, pin diameter, and more. Other SCAD customizable designs on Thingiverse include name plates and fan grills; the possibilities are endless!
You can find Customizable designs on Thingiverse by activating the “Customizer” filter in the search options. Once you adjust the model to your liking, you’ll need to generate and then download it.
While the Customizer app should work with any SCAD file, unfortunately only a relatively small number of designs on Thingiverse are compatible with it. This is because of the complexities of designing SCAD files with adjustable parameters. The more commonly shared file type on Thingiverse is STL.
Issues
If you’re a regular Thingiverse user, you may have noticed the occasional server failures, lags, and other issues with the platform. Sadly, Customizer isn’t any different as it’s integrated into Thingiverse, and many users have experienced app failures that prevent you from opening or using the app.
Even if the app does work, after customizing a model, your new design can be slow to generate. While normally this process should take at most a few minutes, some users have commented that they were waiting days, even months, for their Customizer model to generate. In fact, in our own testing of the app, we’ve also at times experienced issues concerning the platform and usability.
But in spite of its issues, the app is still super handy, so let’s look at how to use it!
How To Use It
When it’s working, using Thingiverse Customizer is super easy, and we’ll walk you through the steps below:
- Open Thingiverse.
- Navigate to the model you’d like to customize.
- Click “Apps” and make sure you see the “Customizer” app.
- Click “Launch App” on the “Customizer” app.
- Change any adjustable text boxes, sliders, or feature options to modify the model to your required specifications.
- Click “Create Thing” in the top right corner.
- Wait for the model to generate and then download the STL file from your Customizer queue.
That’s it! Now you can upload the STL to a slicer to 3D print it yourself, or to a 3D printing service to have it printed professionally, or do whatever else you like with your newly customized model.
Alternative Method
As we’ve mentioned, Thingiverse in general, but more specifically Customizer, has been known to be quite fragile. Luckily, there’s another way to edit SCAD files without relying on Thingiverse: You can use the OpenSCAD software directly to adjust the parameters of a design and export the customized model.
While this method is slightly less convenient than using the integrated app, it’s still not very laborious and is a lot more reliable. Furthermore, using OpenSCAD means that you’re not limited to Thingiverse models, and you can edit any SCAD model regardless of what repository it’s from.
Follow the instructions below to customize a SCAD model:
- Download OpenSCAD.
- On Thingiverse or another 3D model repository, find and download the SCAD file of a model that you want to customize. In Thingiverse, click on “Thing Files” and download the file ending in “.scad”.
- Open OpenSCAD.
- Click “File > Open File” (or just “Open” if this is your first time using OpenSCAD), select the SCAD file you want to modify, and click “Open”.
- The right-hand side of your window should show the customizer pane. If it doesn’t, click “Window” and uncheck “Hide Customizer”. Then, click the arrow icon in the customizer pane to reveal the adjustable parameters for your model.
- Adjust these inputs so to meet your needs. The preview of the model should update as you change the entries.
- Click “Design > Render” (hotkey F6) to render the model so that it can be exported.
- Click “File > Export” and choose your desired file format and save location. (The hotkey F7 will automatically export to STL.)
Now you can use the model however you like, whether that’s uploading it into a slicer or moving across to a CAD program for more design work!
Lead image source: wstein via Thingiverse
License: The text of "Thingiverse Customizer: What Is It & How Does It Work?" by All3DP is licensed under a Creative Commons Attribution 4.0 International License.