Voron 2.4 3D Printer Kit: Specs, Price, Release & Reviews

The Voron 2.4 R2 is an exciting open-source CoreXY 3D printer sold as a DIY kit. Read on to learn more about this impressive machine!
Back in 2015, Maks Zolin wanted to buy an UltiMaker 2 but thought it was overpriced and figured he could make a better, cheaper version of the printer himself. With this idea in mind, he created Voron: production quality, open-source 3D printer designs that can be assembled in your kitchen.
Driven by the desire to make the ultimate DIY 3D printer at an affordable price, impassioned engineers and a vibrant community have teamed together to continuously improve each design. The Voron 2.4 R2 is the most popular of their five official designs (all CoreXY or CoreXZ) and is known for its reliability, high performance, and impressive visual appeal.
In this article, we’ll walk through everything you need to know about the Voron 2.4 R2. We’ll go over its unique features, summarize the build, and compare it to two similar machines. Let’s dive in!
Features
The Voron 2.4 is chock full of features that any melted plastic enthusiast should get excited about. It starts with the big things – like the sturdy frame and clever printhead – and spreads to the little details, like drag chains and an air filtration system. However, the kicker is the vast Voron support community you might not expect to find for an open-source design.
Frame & Motion
The Voron 2.4 R2 uses a CoreXY Cartesian motion system. Two belts are routed across the gantry to control X and Y motion, driven by two stepper motors. Translating the tension of the belts are two MGN9 linear rails for the Y-axis and one beefier MGN12 linear rail for the X-axis. The gantry moves along the Z-axis via four independent belts, each with their own stepper and MGN9 rail. All six of the belts have their own tensioners that can be precisely tuned using an Allen key.
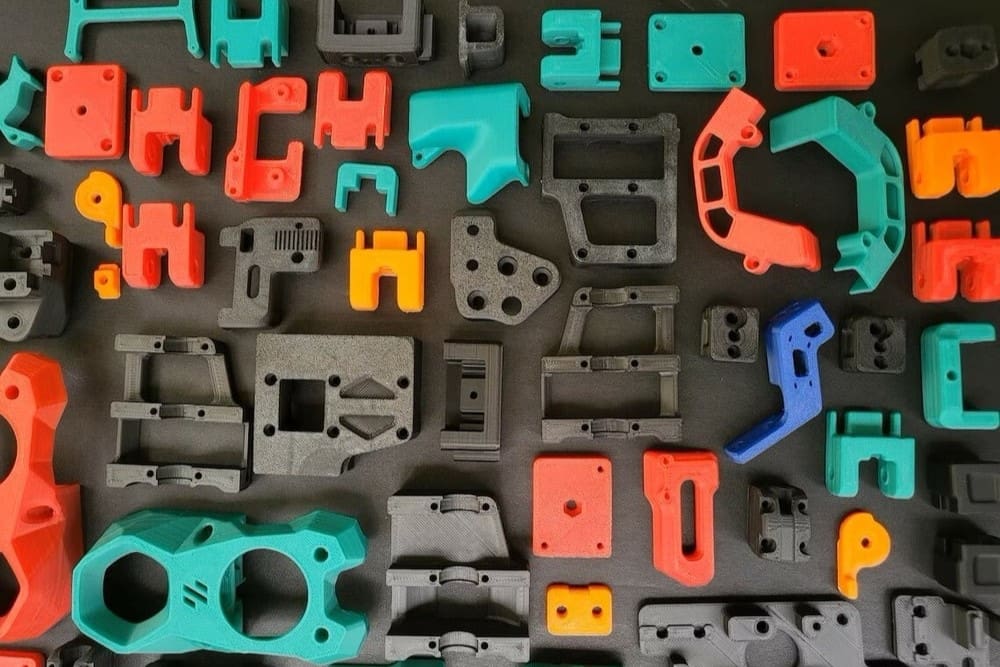
The frame and gantry of the Voron 2.4, like most DIY 3D printers these days, is a mix of aluminum V-slot extrusions and 3D printed components. Printed parts are an integral part of the build. Each component follows a common design language. They’ve been designed with additive manufacturing in mind, requiring little to no supports. There are around 200 printed parts. A Prusa i3 MK3 took about 205 hours to print them all and required approximately 2 kg of ABS.
The printer’s exterior features clear acrylic panels, creating an insulated chamber that allows the user to use high-temperature filaments, like ABS. Each panel’s perimeter is lined with foam tape to improve the seal and dampen vibration. They’re attached using a few printed parts with fasteners to the aluminum extrusions. The panels can be removed quickly when printing with materials where a maintained chamber temperature is undesirable (PLA). The printer also has a magnetic hinged door for easy access to the chamber when the panels are on.
The 2.4 uses a stationary print bed, recommended to be made of cast aluminum, which is known to be flat and resistant to temperature warping. Voron includes information on how to add an exhaust and filtration system, which can be mounted to the frame beneath the bed. This is useful for mitigating the amount of harmful particles put out, especially when printing materials like ABS.
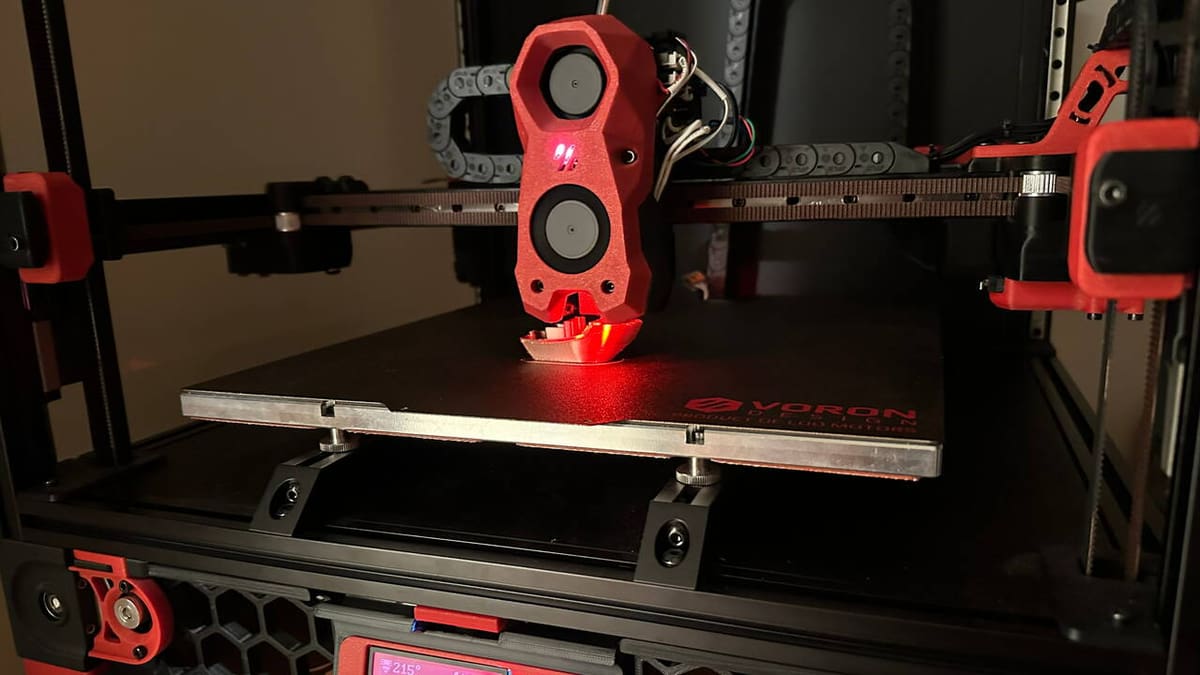
Unique Printhead
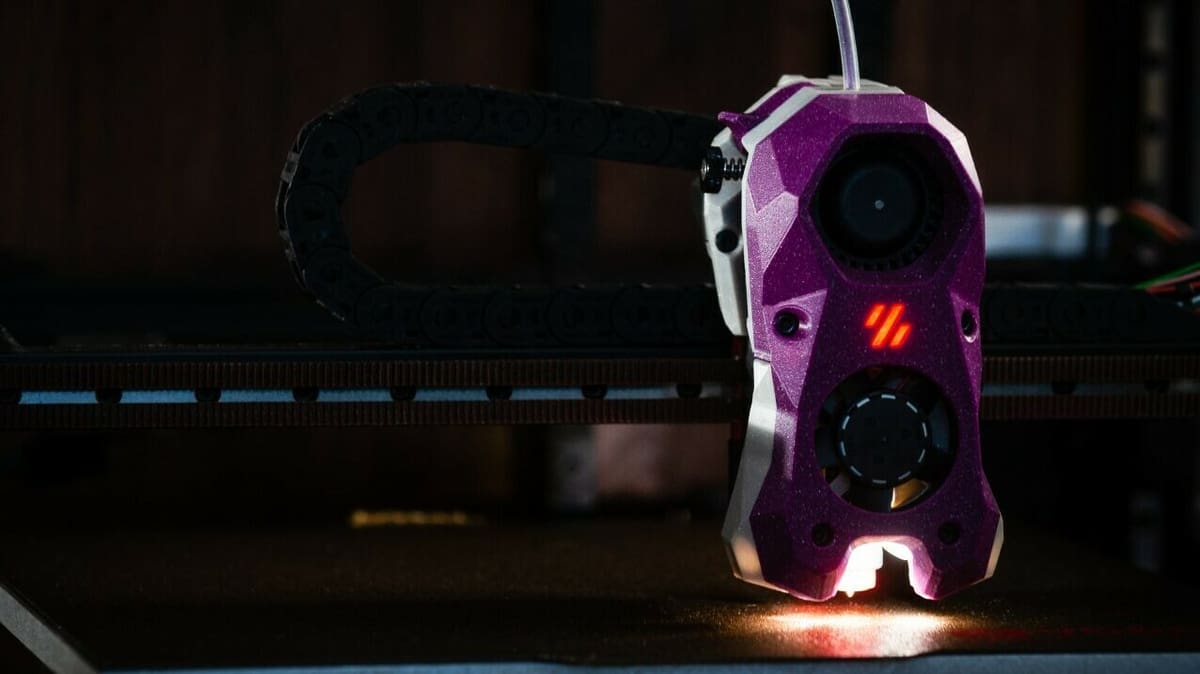
The 2.4’s printhead, driven by the X- and Y-axes belts and rails along the gantry, houses the hot end. It has a pancake stepper motor that feeds a direct extrusion system that can comfortably print at 120 mm/s. There are multiple printhead designs available, some community-based and others official Voron designs, but the most popular is the Voron Stealthburner. The Stealthburner’s printed body allows it to be compatible with almost any hot end while also sporting an adjustable extruder tension knob for fine-tuning flow.
A PCB (printed circuit board) is an optional but common add-on to the printhead. A PCB mounted on the side of the printhead greatly simplifies wiring and enables the use of break-out cables running to the control board beneath the printer. These break-out cables, along with any other wiring above deck, are neatly secured into three drag chains that protect the wires and their connections during motion.
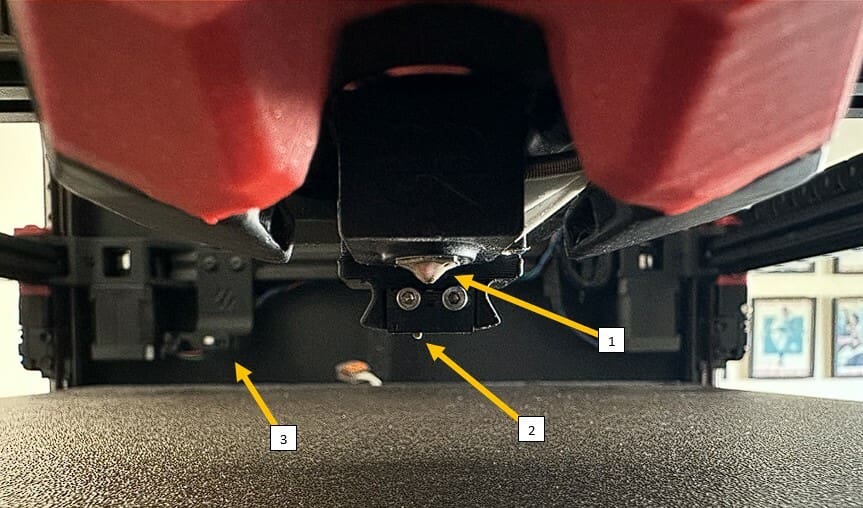
Voron kits typically come with an inductive probe, but some users report heat drift issues or even the probe outright melting. Several popular mods have sprung up to replace the inductive probe:
- Klicky is a community-created probing system that uses a combination of magnets, printed parts, and a microswitch to physically probe the bed. It detaches using a macro in the G-code to a dock attached to the gantry after probing is completed.
- Tap is a mod created by the Voron team. It uses the nozzle to physically probe the bed, which moves the entire toolhead upwards, triggering an optical sensor. Tap is the most accurate of the bunch and claims accuracy up to a single microstep or .0004 mm. A full Tap kit – or simply the printed parts for it – are available from retailers.
Electronics
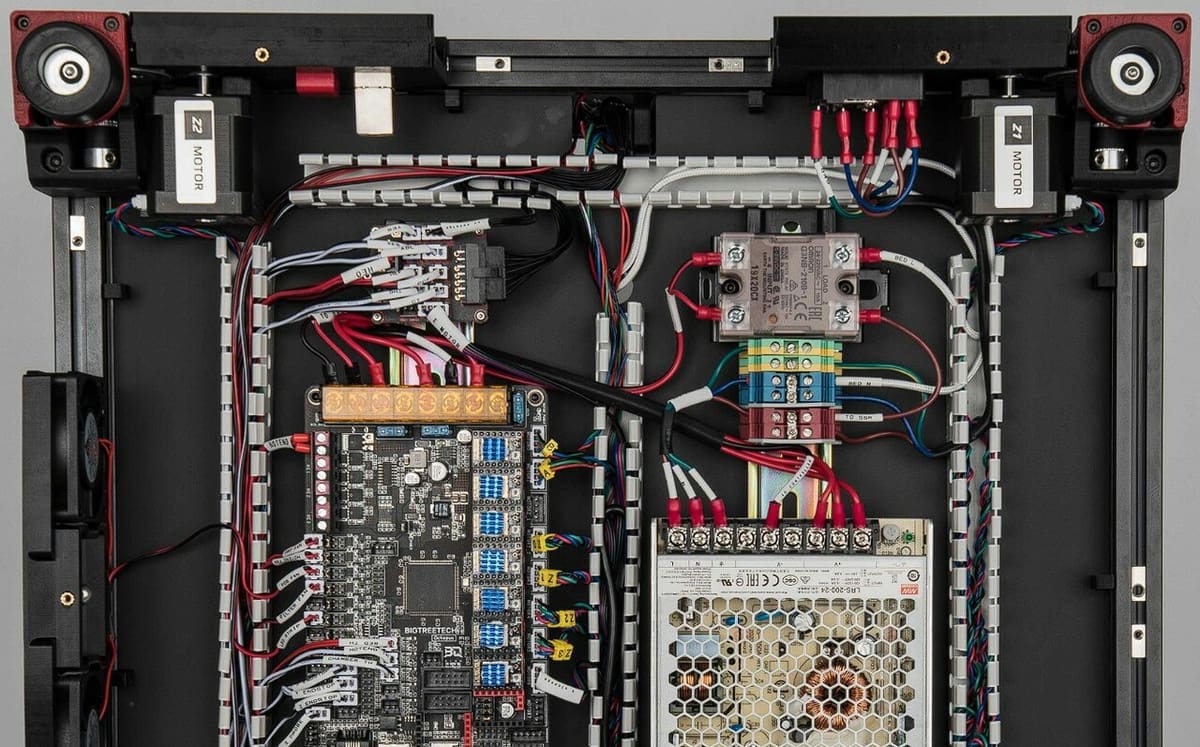
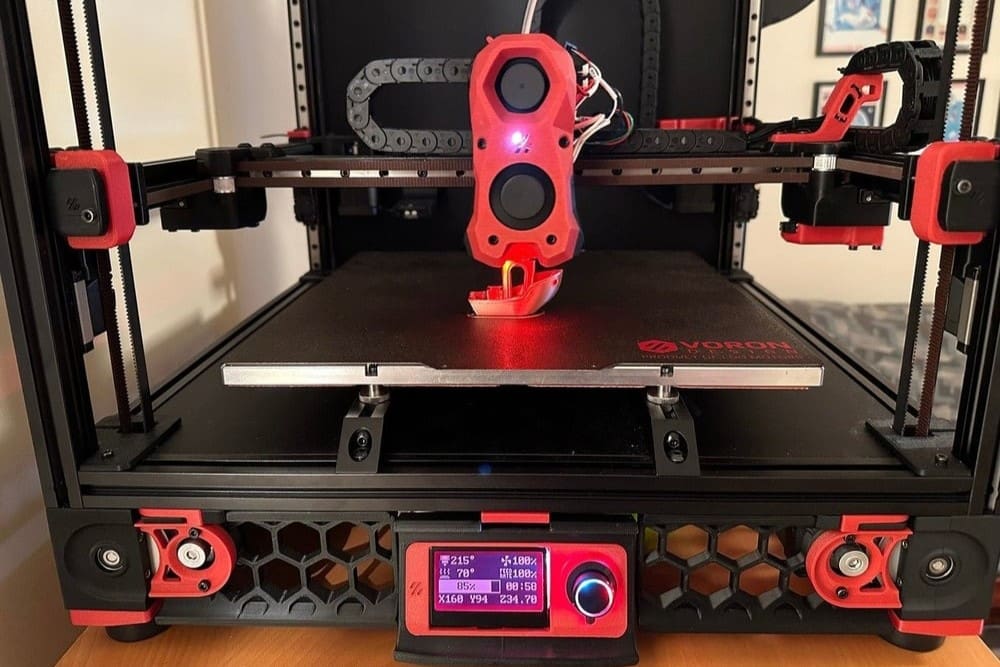
The electronics area is where the magic happens. Like much of Voron, the electronics area is highly customizable, and the 2.4’s most popular configuration features a BigTreeTech Octopus V1.1, a Raspberry Pi, and a 24-V power supply unit (PSU). The electronics area is located out of sight beneath the printer.
The 2.4 R2 has come a long way in terms of cable management compared to the original release. Situated out of sight beneath the printer, the electronic hardware is powerful and needs to accommodate the seven stepper motors, three endstops, five fans for cooling and filtration, hot end, mini-display, bed heater, and leveling probe. Two of the fans are used to keep all of the electronics at the proper temperature, including another PCB board, which is connected to the PCB attached to the toolhead, and any other electronics running above deck.
The Octopus V1.1 control board has seven of its eight ports occupied by the stepper motor’s TMC 2209 drivers while also having all of the electronic components plugged into it. Most 3D printers would have the mainboard control all of the electronics while also doing the G-code calculations. But the Voron 2.4 R2 isn’t like most 3D printers.
It uses an external computer, a Raspberry Pi flashed with Klipper firmware, to relieve the mainboard of its G-code computing responsibilities. This way, the mainboard is focused solely on controlling the connected electronics, allowing the printer to print at very high speeds. Klipper is usually downloaded with a remote printer control program such as Mainsail, Fluid, or OctoPrint, giving the user a desktop overview of their 2.4.
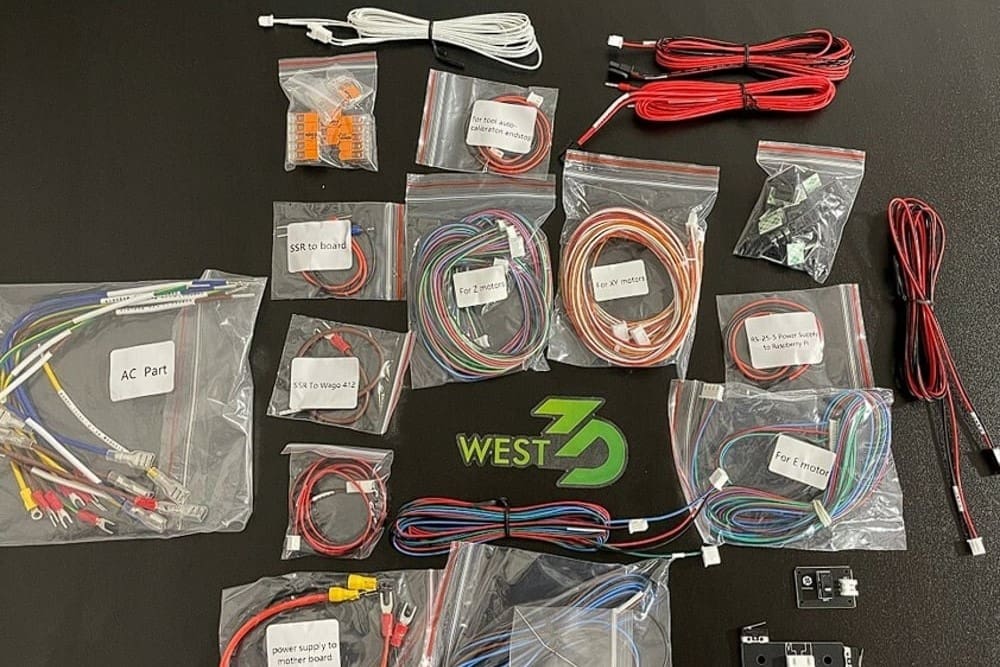
Given the sheer quantity of components, wiring a 2.4 R2 is a fairly involved process. If it’s your first DIY build or you aren’t an expert wirer, it’s strongly recommended that even if you don’t plan to buy a kit, you buy the cables from a kit supplier. We mention two popular kit suppliers in the Price section below, but you can also find the cable kits at Amazon or other small online retailers, such as West3D.
Having all the cables pre-cut and crimped will save tons of time and frustration as well as shield you from the bevy of tools required. When looking for wire connectors, consider paying a bit more for Wago wire lever nuts. They don’t require crimping or any connectors, just a pair of wire strippers.
Support
There are plenty of DIY printers out there, but so much of what makes Voron unique is the amount of support available. This support is vital because the Voron 2.4 R2 is an incredibly powerful printer that’s also considered quite challenging to build.
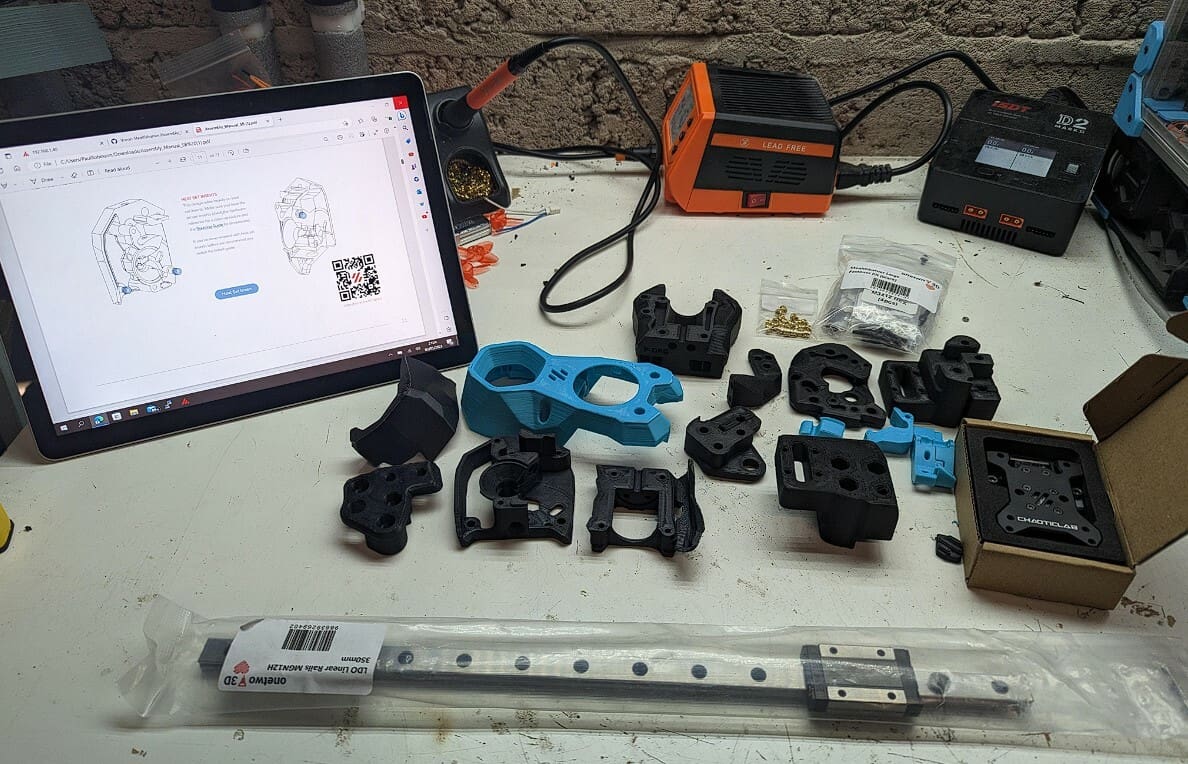
The Voron team has created an incredibly detailed 300-page manual for the 2.4 R2. The more intricate steps have links to YouTube videos of experts doing the exact step you’re on. There’s a separate manual for the toolhead you decide to create.
After the physical building and wiring of the printer is complete, Voron also has an extensive guide for setting up the firmware and properly tuning the printer once it’s running. Most kits also have their own wiring guide.
If there’s a component or assembly you just can’t seem to figure out from the manuals, Voron also offers a complete, downloadable CAD model of the entire 2.4. The model can be downloaded for free and is available on Fusion 360, which offers a somewhat limited personal use license for free. Regardless of platform, the downloadable model is so detailed that it even shows the placement of washers!

As if all that wasn’t enough, there are also several YouTubers who offer complete series on building an entire Voron 2.4 from scratch. The videos are often 3 or more hours long, and they give viewers the opportunity to see an expert go through everything step by step. Some of the more popular series include Nero 3D, Steve Builds, Thomas Sanladerer, and Scot Corn.
There’s a huge, impassioned Voron community out there not only on YouTube but on platforms like Discord or Reddit, where people are happy to help with any issues you might encounter. Scrolling through any of the Voron pages, you’ll be blown away by some of the mods people have created, and they’re often eager to share how you can add the same to your printer.
The support and community surrounding Voron make building “the ultimate DIY printer” much more approachable for even the least experienced DIY 3D printing enthusiast.
Reviews
For many, the Voron 2.4 R2 is seen as the ultimate DIY printer on the market. It’s highly customizable, and the design is a great jumping-off point for making your own mods or using community-created mods. Many prominent YouTubers like Thomas Sanladerer, Nero 3D, and CNC Kitchen have plenty of videos full of rave reviews on the printer.
The level of skill required for this build, the mechanical assembly, wiring, and firmware installation should not be underestimated. It takes anywhere from 25-100+ hours to complete, depending on your skill level. While it might come easier to someone with a good hands-on or engineering background, the Voron communities’ support for this printer is so strong that even someone with no DIY experience can do this build. It will just take a bit more time and patience to figure out.
Specifications

Voron 2.4 R2’s are highly customizable, but here are the specifications for a typical build:
- Style: CoreXY Cartesian
- Frame: Aluminum extrusions with 3D printed parts
- Build volume: 250 x 250 x 250 mm, 300 x 300 x 300 mm, or 350 x 350 x 350 mm
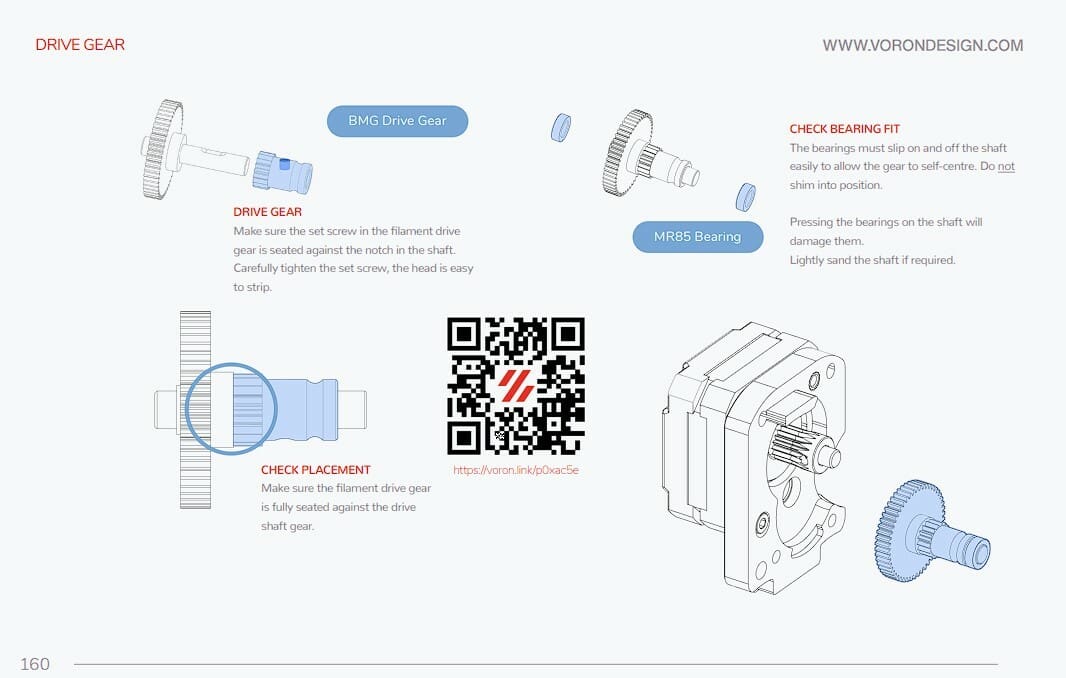
- Extruder configuration: Direct
- Extruder: Bondtech BMG extruder (3:1 gear ratio)
- Hot end: V6, Revo, Phaetus Rapido, Phaetus Dragon, or Mosquito
- Motion system: Belts and linear rails for all axes
- Bed leveling: Automatic leveling using inductive probe or mods such as Klicky and Tap
- Stepper motors: 7x NEMA 17s (4 for the Z-axis, 2 for the X- and Y-axes, 1 for the extruder)
- Voltage: 24 V (with Meanwell PSU)
- Mainboard: BigTreeTech Octopus V1.1 with TMC2209 stepper motor drivers
- Bed: Cast aluminum bed with magnetic PEI sheet
- Enclosure: Detachable clear acrylic panels with a hinged door
- Firmware: Klipper
- Computer: Raspberry Pi 4 (to work with Klipper firmware)
Price
Sticking to the fundamentals of the RepRap project, the Voron 2.4 is a DIY build that’s completely open source and customizable. You can build the printer with any parts you like, but it’s recommended that you stick closely to the official bill of materials to ensure part compatibility.
As for acquiring the parts for a build, you can buy different kits for popular Voron builds or purchase each component individually, if you prefer more control. Alternatively, you can also plug in your preferred specs into Voron Design’s online configurator tool, and it will automatically generate a full bill of materials. The BOM is huge, but a good kit will come with everything well-organized.
Two of the most popular kits are Formbot and LDO. For the 300-mm build volume, Formbot is about $1,000, and LDO is around $1,500. The Formbot kit is more of a budget option in terms of hardware, and it also doesn’t come with as many upgrades as LDO – but for many, the Formbot kit is more than adequate.
Both require you to source your own Raspberry Pi and give you the option of choosing your hot end. The Formbot kit is available from their website, while the LDO kit can be purchased from various retailers, including MatterHackers.
Printed Parts
You’ll also need to self-source around 200 ABS printed parts. You could print all of the parts yourself, have them professionally printed through services like Craftcloud, or purchase a parts kit. R2 part kits are available from various retailers on platforms like AliExpress and even Etsy.
Alternatively, Voron offers their Print it Forward (PIF) program for those who cannot print the parts themselves. For a complete set, it takes a few weeks of lead time and costs about $150. The PIF program is known for its stringent vetting process of its suppliers and in turn the high quality of the printed parts they produce.
Similar Printers
Although highly praised, there are other popular DIY 3D printers out there besides the 2.4 R2. For one, Voron has four other models, all of which offer slightly different features and a smaller build volume than the 2.4.
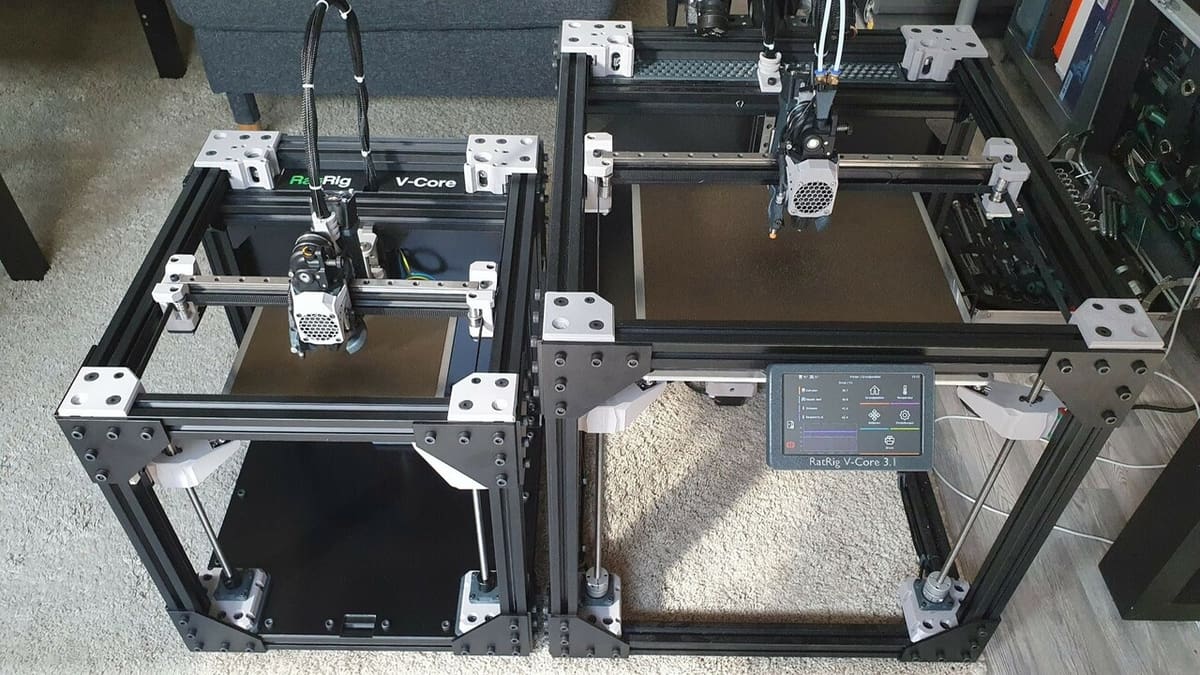
Rat Rig V-Core 3.1
The most comparable non-Voron DIY printer on the market is the Rat Rig V-Core 3, our upgrade pick for the best DIY 3D printer kits of 2023. Similar to Voron, Rat Rig has an open-source, customizable, CoreXY Cartesian design. Its frame is a cube made of aluminum V-extrusions, and the build relies heavily on printed parts.
It uses linear rails for the X- and Y-axes but uses three lead screws for the Z-axis. The printer moves only the bed along the Z-axis, using the lead screws. Although there are plenty of options up for customization, a good V-Core 3 kit will cost right around $1,500 – same as the 2.4 R2.
Bambu Lab X1 Carbon
If you’re looking for a similarly powerful 3D printer but don’t want to go the DIY route, the Bambu Lab X1 Carbon is probably the way to go. It’s our top pick for the best CoreXY 3D printers of 2023.
Coming in at around $1,200, the X1 Carbon is less expensive than the Voron 2.4 R2, and it comes fully assembled and functions at a high level out of the box. Its specs are high quality, and it boasts a print speed just as fast or possibly even faster than that of the 2.4 R2.
One big leg up it has is its multi-material or multi-color printing. It can hold four filament spools at once and use them interchangeably. The stock Voron 2.4 R2 doesn’t have multi-material printing, but it can be upgraded to do so with the popular Enraged Rabbit Feeder mod, which costs about $150. The kit allows the use of six different filament spools with the ability to be upgraded all the way up to 18.
License: The text of "Voron 2.4 3D Printer Kit: Specs, Price, Release & Reviews" by All3DP is licensed under a Creative Commons Attribution 4.0 International License.
CERTAIN CONTENT THAT APPEARS ON THIS SITE COMES FROM AMAZON. THIS CONTENT IS PROVIDED ‘AS IS’ AND IS SUBJECT TO CHANGE OR REMOVAL AT ANY TIME.