Shoji Lamp
A while back, Instructables user Thexadow designed and built a complex Shoji Lamp using a variety of filaments and non-printed components. The lamp featured kumiko panels, and while it looked stunning, the creator of the project was the first to admit that assembling this lamp was a trying task.
Recently, the maker decided to redesign and simplify the lamp to make it easier to assemble. The entire step-by-step process has been shared on the DIY-centric website Instructables.
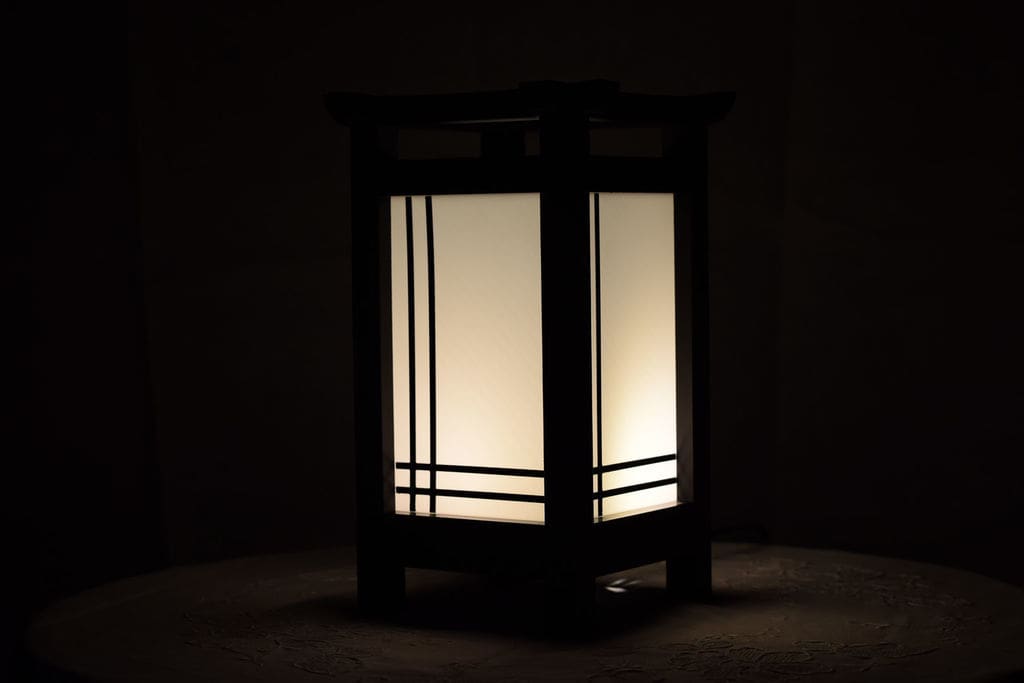
For those who don’t know, a shōji is a window, door, or room divider that is made of translucent paper and held together with latticework wooden frame. Designed to slide open with minimalistic style and grace, this style is commonly found within traditional Japanese architecture.
The typical Shoji lamp is made using rice paper shade panels, evoking the Japanese aesthetic and providing a softened zen-like light through the panels.
Want to harness your own slice of Japanese-themed light? Let’s look at how you can create your own 3D Printed Shoji Lamp.
Shoji Lamp: What You Need
The STL files for the lamp are available to download via the designer’s Instructables project post. Thexadow recommends printing the parts in PLA filament, using a 0.3mm layer height and 20% infill.
Aside from your 3D printer, filament, and the STL files, here’s what else you need to complete this project:
What You Need
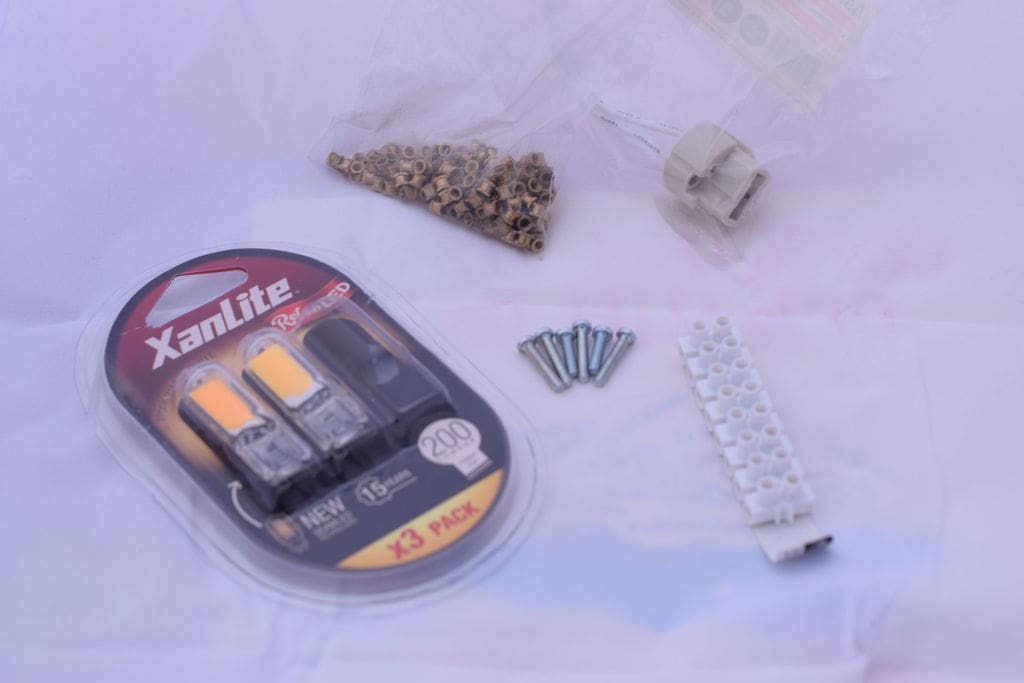
- G9 light holder
- G9 light bulb (You can use any G9 bulb, but ensure it is a LED one. Otherwise, you will get excess heat that can melt the printed part)
- Terminal blocks
- Power cable with a switch
- Threaded M3 brass inserts
- M3 Screws
- Cable ties
Additional Tools
Shoji Lamp: Modelling and Printing
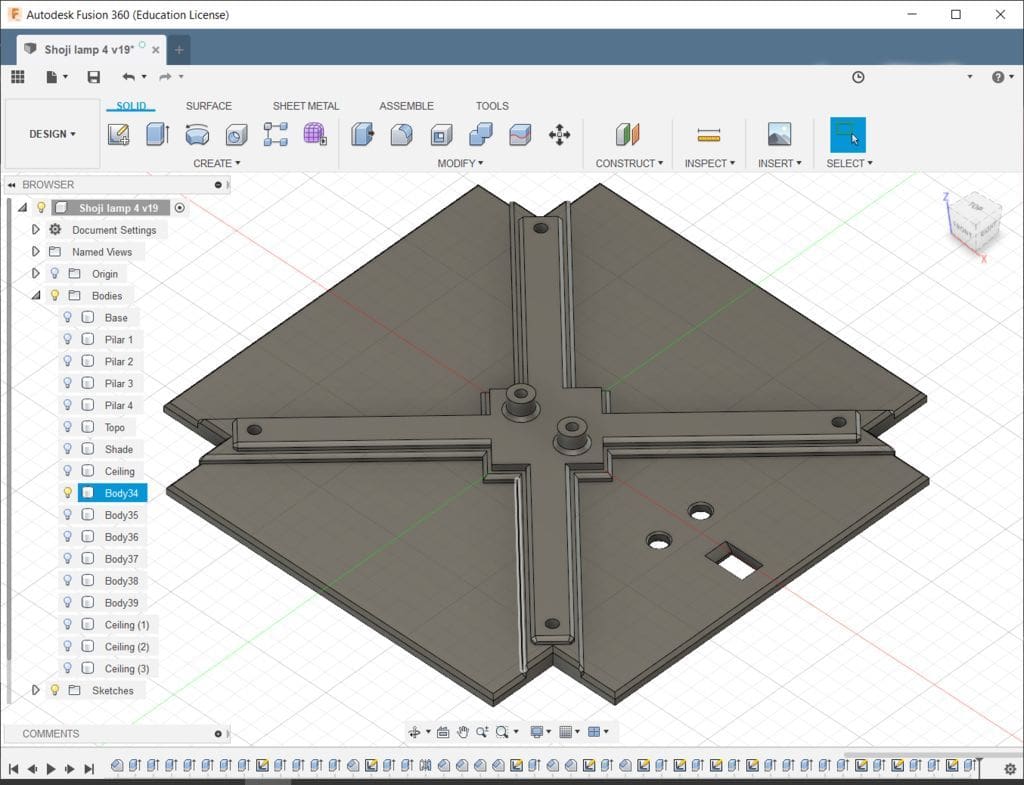
Thexadow used Fusion 360 for modeling, and also provides insight into the new design process used to simplify the assembly of the lamp.
Design Process
- The hobbyist added a center cross rib, several chamfers and channels on the bottom cover to prevent sagging. There was a need to eliminate the use of supports.
- The bottom cover has three holes. The bigger hole, which has chamfers, is for the lamp’s cable while the two small holes will be used for strain relief. The cable tie will go through the small holes to hold the lamp cable in place and stop it from moving.
- The bottom cover has a center support where screws will go. This is the only part in the design where plastic parts will take screws directly. Thexadow seems to have forgotten about this part, but you can modify it to accommodate brass inserts.
- The designer added slots to the top panels so they could fit into other parts with a screw.
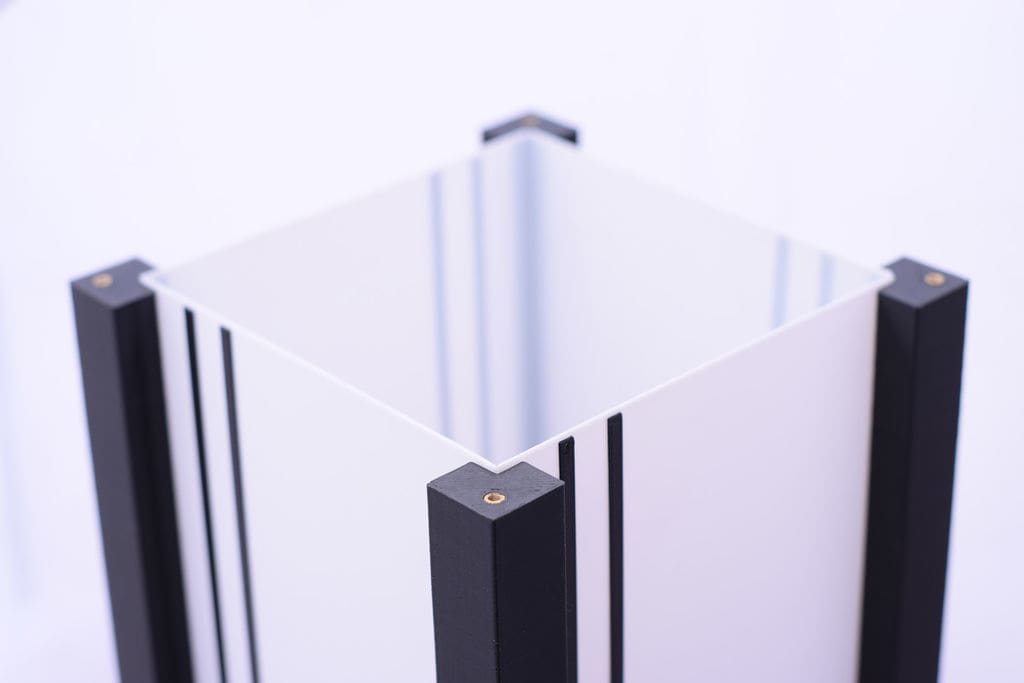
- The side panels are single pieces and need to be printed in translucid/transparent filament like PETG or natural PLA. Thexadow used white PLA filament for the side panels but points out that you need to initiate a filament swap at a given height. To print the side panels as required, thexadow advises that will be required to replace the panel filament of your choosing – at the 0,8mm height – with a darker filament. The M600 gcode should help you achieve this.
All the other parts are straightforward, and the STL files are provided on the Instructables page. In the end, you should end up with four pillars, four side panels, one top, one toplight, one base, one bottom cover, and four pieces for the ceiling.
Shoji Lamp: Assembly
Assembly Process
- Use a soldering iron to drive brass inserts into the correct holes. Place an insert on top of the right hole then place the soldering iron tip on top of the brass. You need to be careful as heat transfers through the inserts The base needs for brass inserts that will hold the bottom cover and the lamp holder
- The power cable will go through the bigger hole on the bottom cover before you pass a cable tie through the smaller holes to hold the lamp cable in place
- Screw the G9 lamp holder and the power cable to the terminal block. You can use electric tape to prevent the terminal block from moving. Then screw the lamp holder to the holes on the bottom cover where the M3 screws will go directly into the printed plastic
- The bottom cover should go in the correct slots on the base, and you should screw it using four M3 screws
- Insert the light bulb into the holder and test if it is lighting
- If your bulb is working, continue with the assembly by inserting the brass inserts on both sides of your pillars. You will need eight brass inserts for this. Add pillars to the bottom part and screw them in place using M3 screws. The screws go under the base legs. The pillars need to be correctly aligned as the side panels will go into their channels
- Slide the side panels on the pillar channels. These panels have chamfers on the edges for easy The side panels should slightly peek through the top of the pillars
- For the top piece, you will require four brass inserts that need to go to the inner holes before you can insert the toplight part onto its channel in the top piece. The toplight should press fit, but if it doesn’t use glue
- Place this top part over the other assembled piece. The side panels should smoothly slide on the correct channels on the top part before this top part and the assembled portion are screwed together using M3 screws
- The ceiling is made up of four different pieces that fit into each other using slots. These pieces have a slight taper and need to be placed correctly
- The ceiling part will be screwed to the assembled lamp using M3 screws on the four holes. The screws go into the brass inserts of the top part.
And voila, you now have your very own 3D printed Shoji Lamp!
Additional Notes
If you’re looking for a more custom look, the designer has also provided extra panels on the Instructables page. The maker also added a blank panel in case you want to personalize the design even further.
If you are going to use an E14/E27 bulb (that is if you get the bulb holder), you are better off printing the modified bottom cover provided on the last section (on the Instructables page). You may also need to print an M10 bolt. The STL for that is also available on the Instructables page.
License: The text of " Get Your Zen on With This 3D Printed Shoji Lamp" by All3DP is licensed under a Creative Commons Attribution 4.0 International License.