![Featured image of [Project] 3D Printer Bed Leveling Assistance Tool](https://i.stageall3dp.com/workers/images/fit=scale-down,w=1200,h=675,quality=79,gravity=0.5x0.5,format=auto/wp-content/uploads/2019/07/03140337/the-bed-leveler-in-action-gibetto-instructables-190628.jpg)
[Project] 3D Printer Bed Leveling Assistance Tool

Does your printer not have automatic bed leveling? Don't despair! In this Weekend Project, we look at how to make a simple bed leveling assistance tool!
No More Paper!
Most tinkerers dream of a well-calibrated print bed, as this translates to successful and accurate prints. Well, you’re lucky if you have auto bed-leveling, because if you don’t, you have to face the daunting task of manually leveling your bed. Typically, this involves configuring the bed every few prints by sliding a paper under the nozzle and manually adjusting the bed height until you can “feel” the right amount of friction.
It’s demanding, and worse, you may still get it wrong. It’s an especially huge gamble if you’re just starting to use 3D printers.
Sadly, many budget printers on the market lack an auto bed-leveling feature, which means DIYers have to do a bit of extra work to get accurate prints. gibetto, from Instructables, is one such DIYer, but gibetto wanted to change things.
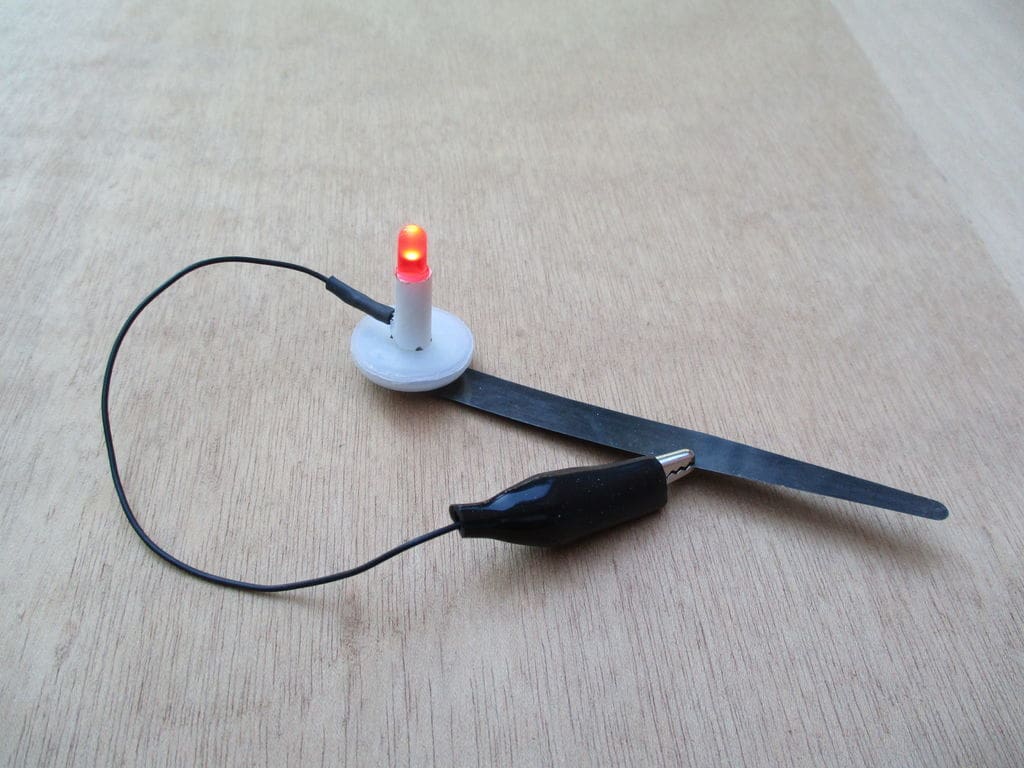
Thanks to their motivation, the rest of us can benefit from a handy bed leveling assistance tool. The concept is simple: An LED circuit uses the touch of the nozzle as the “switch”, indicating whether or not the bed is leveled. It’s a straightforward tool that gives repeatable results.
Let’s get into how to make it!
What You Need
If you’re a frequent tinkerer, hopefully, you’ll already have some of the necessary supplies and equipment available. If not, here are the complete lists.
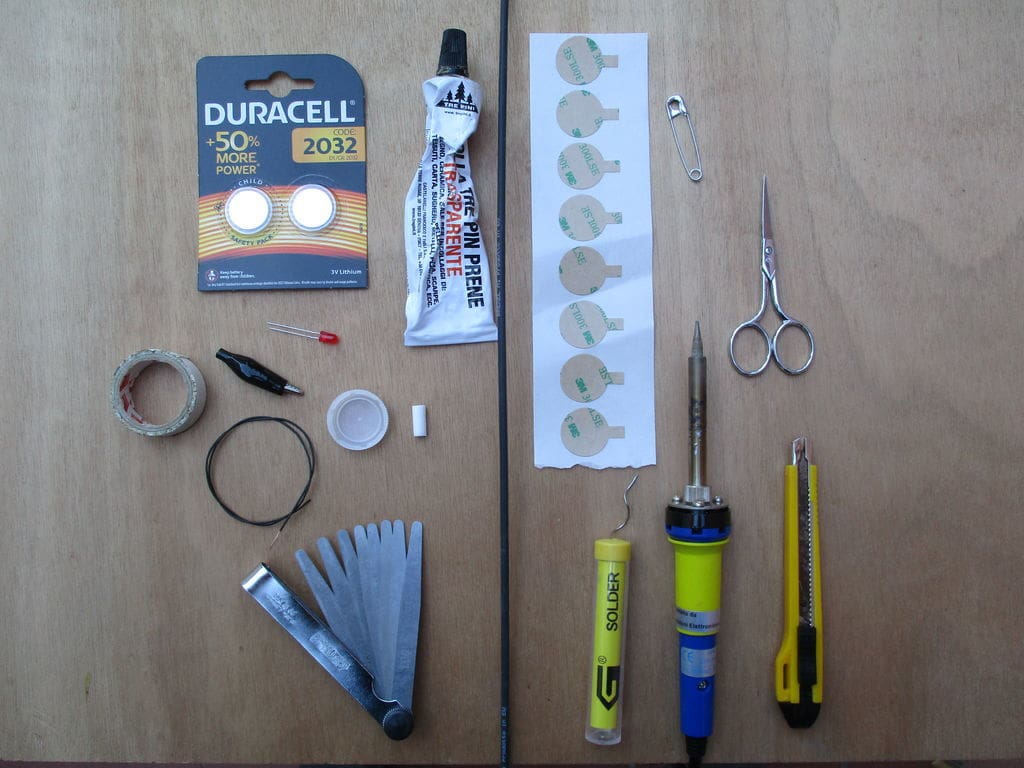
Parts
- 3V lithium coin battery
- Light-emitting diode
- Thin silicon wire
- Alligator clips
- Round neodymium magnets
- Plastic PET bottle screw caps
- Double-sided tape
- Gorilla Super Glue Gel
- Heat-shrink tubing (or electrical tape)
- Cigarette filter
The cigarette filter can simply be cut out of a cigarette.
Tools
- Scissors
- Utility knife
- Soldering iron
- Feeler gauge with removable blades
- Soldering tin
- Safety pin
Making the Holders

Here and in the next section, we present some quick assembly instructions. For more information, refer to the original guide.
Coin Cell Holder
- Your coin battery needs to fit in the inner ring under the bottle cap. Trim the rest of the cap, leaving the raised edge.
- Cut a circular piece of double-sided adhesive tape that fits in the cap. The adhesive will be used to hold the battery in place. Make a hole in around the center of the cap using the safety pin.
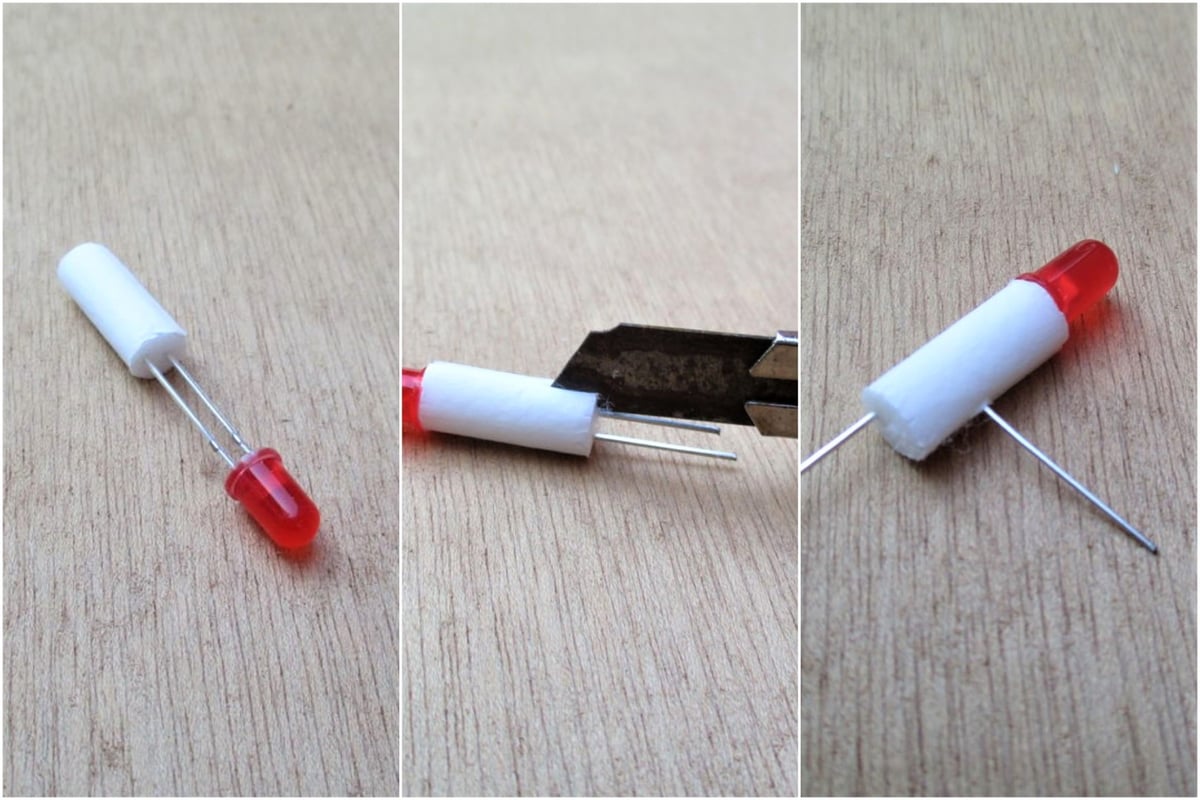
LED Diode Holder
- Push the “legs” of the LED through the cigarette filter. Then, make a cut in the filter, ensuring that it aligns to the shorter leg of the LED, which is usually the negative end.
- Bend the short leg at 90 degrees through the cut. You can wrap the filter using the electrical tape, but this is optional.
Assembly
Main Body
- The longer leg (positive) of the diode goes into the hole you made in the cap. Insert it, then glue the filter to the top of the cap.
- “Inside” the cap, bend the positive leg at 90 degrees and insert the coin battery such that it makes contact with the bent positive leg. When adding the battery, make sure the positive side is up and press it in until it is held firmly by the inner edge.
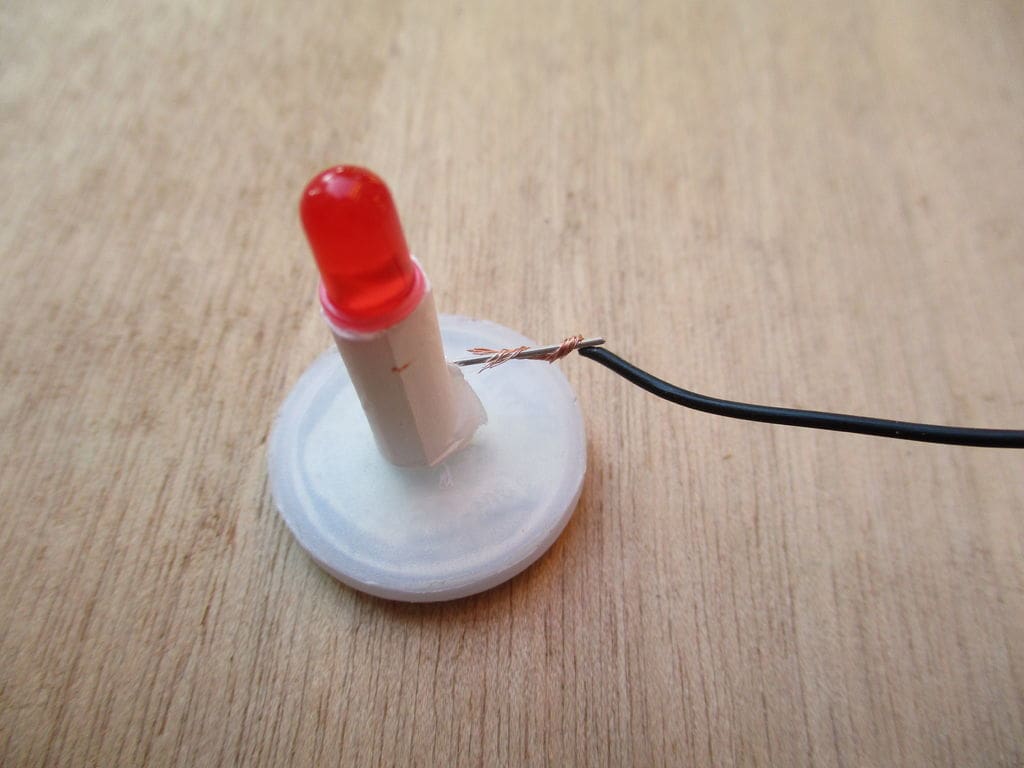
- Strip one end of the thin, flexible wire and solder it to the bent negative leg of the LED.
- Insulate the soldered wire using the heat-sink tubing or electrical tape, then solder the other end of the wire to the alligator clip.
Final Steps
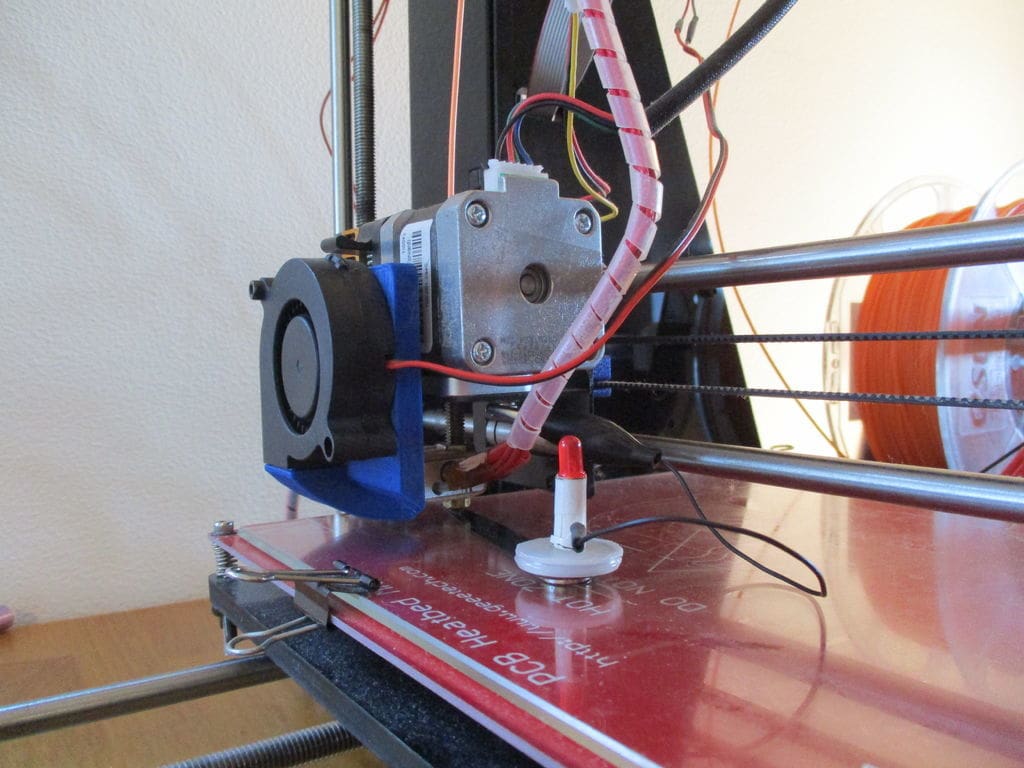
- Use the feeler gauge of your choice, depending on the thickness you want. Gibetto used a 0.05-mm blade, but you could go for something even thicker. Position the flat magnet on one end of your blade of choice. (The magnet should be on top of the blade.)
- Place the main body (with diode, plastic cap, cigarette filter, and coin battery) on top of the magnet and close the circuit to test it. This is done by attaching the clip to the blade. The diode light should turn, indicating your connection is fine.
Your leveling assistance tool is now ready!
How to Use It
Now that your tool is ready to go, the next thing is to start using it:
- Attach the alligator clip to any metal part of your printer next to the nozzle. (It could be the screw, the extruder, or the barrel.)
- Go through the steps of leveling a bed with a paper:
- Move the print head to one corner and ensure the blade is directly under your nozzle.
- Make adjustments to the screws around the bed (thumbscrews or hex bolts) until the diode lights up to indicate that the nozzle tip has made contact with the blade. These screws are usually paired with springs that support the print bed.
- Repeat this for the other corners until you get the right calibration.
Gibetto highly recommends that you wipe your printer nozzle to remove any plastic insulation.
Feature image source: gibetto / Instructables