![Featured image of [Project] Build a Claw for Your Drone](https://i.stageall3dp.com/workers/images/fit=scale-down,w=1200,h=675,quality=79,gravity=0.5x0.5,format=auto/wp-content/uploads/2018/07/26140515/the-dji-mavic-pro-accepts-a-package-adafruit-industries-youtube-180725.jpg)
[Project] Build a Claw for Your Drone

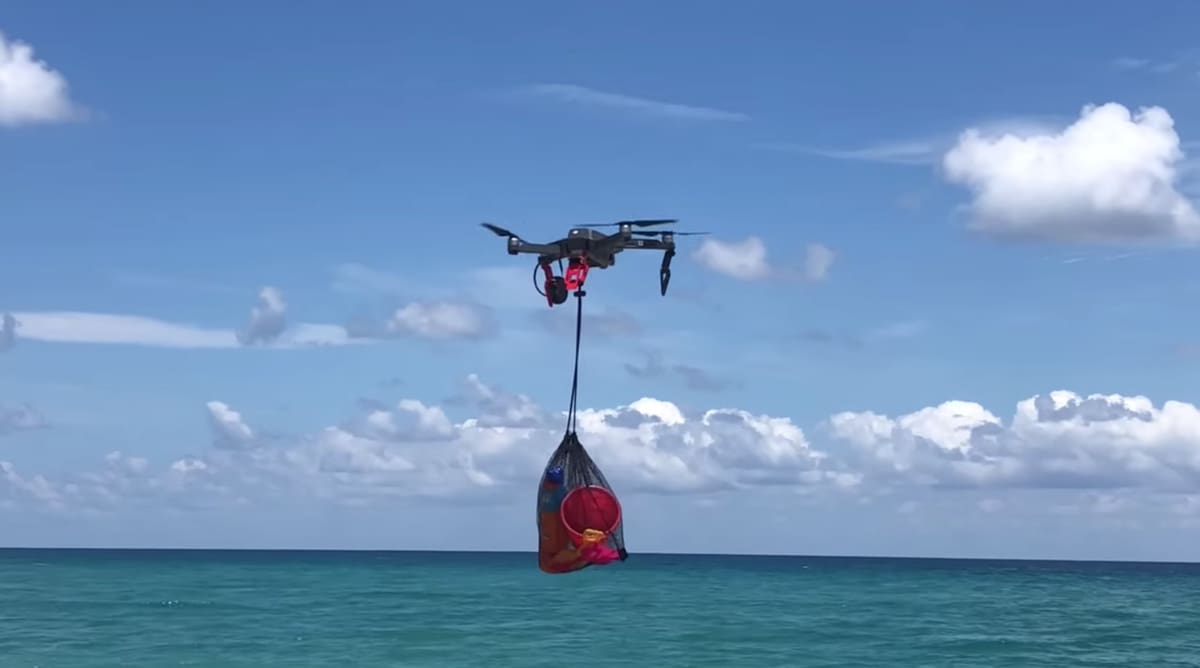
Ever wanted to grab things from afar? Thanks to the Ruiz Brothers from Adafruit, you can! With this weekend project, we'll put together a working drone claw and attach it to the DJI Mavic Pro.
The Drone Claw

Though amazing pieces of technology, drones are typically limited to just two functions: flying around and capturing footage. The DJI Mavic Pro is no exception. But thanks to this 3D printed claw, design by the Ruiz Brothers at Adafruit, your drone can actually interact with the environment. How awesome is that?
When complete, the drone can carry up to 2 pounds or 990 grams of weight. Sadly, that’s not quite enough to carry your groceries for you, but it’s definitely enough to hoist lighter items such as buckets, toys, or secret notes…
The claw opens and closes when the circuit playground detects light from the drone’s LED. Once you’ve mapped one of the controller’s buttons to turn the LED on and off, you’ll have your drone grasping in no time.
This project does require electronic assembly and light programming, so be sure to read the instructions carefully. Having said that, most of the work is already done for you — all that’s left is putting it together!
What You'll Need
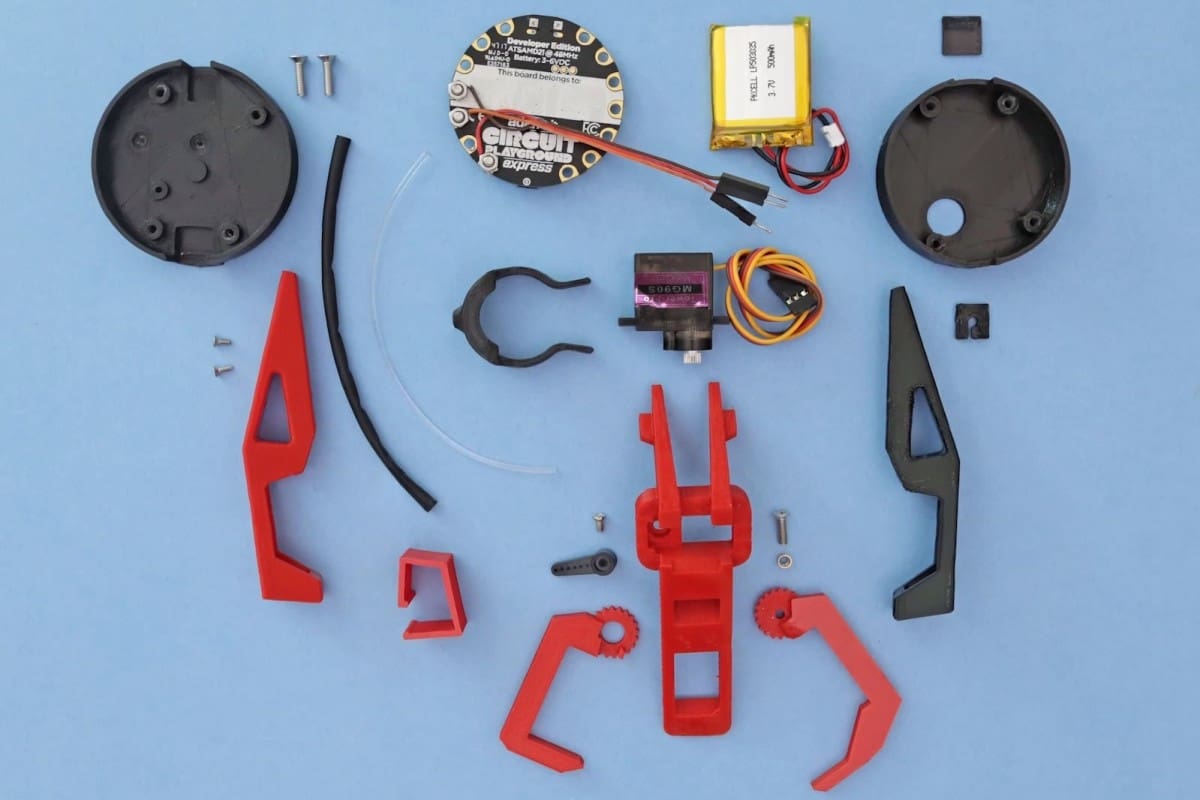
Electronics
- Adafruit Circuit Playground Express
- MG90S micro servo
- Jumper wires
- Lithium 3.7v battery
- 130mm long heat shrink
- 130mm piece of 1.75mm Taulman T-Glase Clear Filament
Nuts and Bolts
- 1 x M3x6mm + nuts
- 2 x M2x5mm
- 4 x M3x16mm
- 1 x M3x10mm
- 1 x M3x3mm female thread brass knurled
- 1 x M2.5x5mm
Other
- Access to a 3D printer and filament
- A DJI Mavic Pro
Prep: 3D Printing
The first step is pretty simple: Print all the parts!
The files are available on Thingiverse as well as other 3D printing sites. The creators also shared the Fusion 360 files, so you could potentially modify the parts to your liking.
The circular case parts for the circuit playground must be printed in black, so that as little outside light enters as possible. This is important as our claw movements will be triggered by a light sensor inside the case.
There’s more than ten different parts, some of which require supports depending on how good your printer is. The top part of the case has a pretty big overhang, so the brothers recommend using soluble supports with those, if possible.
You’ll also need to print the JST, USB, and reset button extensions in flexible filament. These parts fit around the ports of the case and block out any light from those areas.
If you don’t own a 3D printer that can print all of this, worry not! It’s super easy to order the parts through the many professional printing services available — use All3DP’s Price Comparison Service to find the best offers and get it done.
Prep: Code
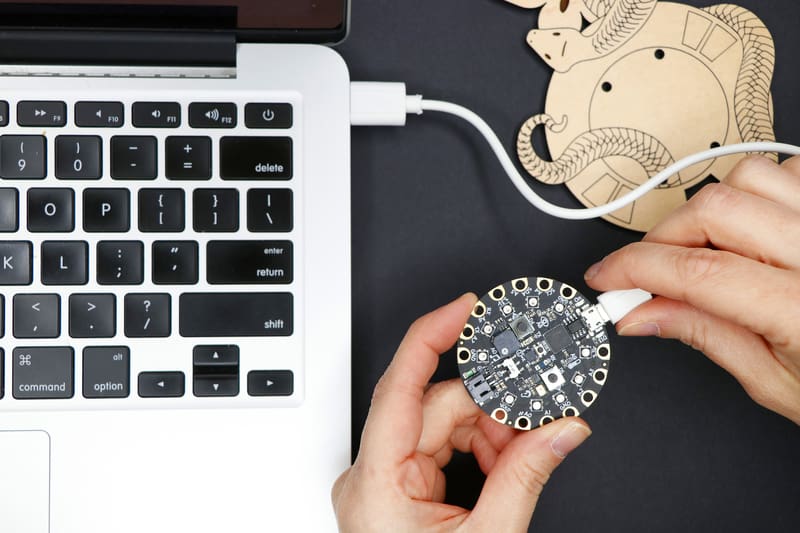
We need to load some code (found here) onto our Circuit Playground Express to make everything work. Very simply, this snippet turns the servo (which opens and closes the claw) when the board detects light.
The easiest way to do this is through MakeCode. Connect your Playground to your computer via USB and make sure it’s in bootloader mode by pressing the reset button. You should see ‘CPLAYBOOT’ as a removable drive on your computer and the LEDs on the board flash green. Then, simply download the linked code and drop the .uf2 file into the drive. That’s it!
For more information on using MakeCode, click here.
Prep: Controller LED
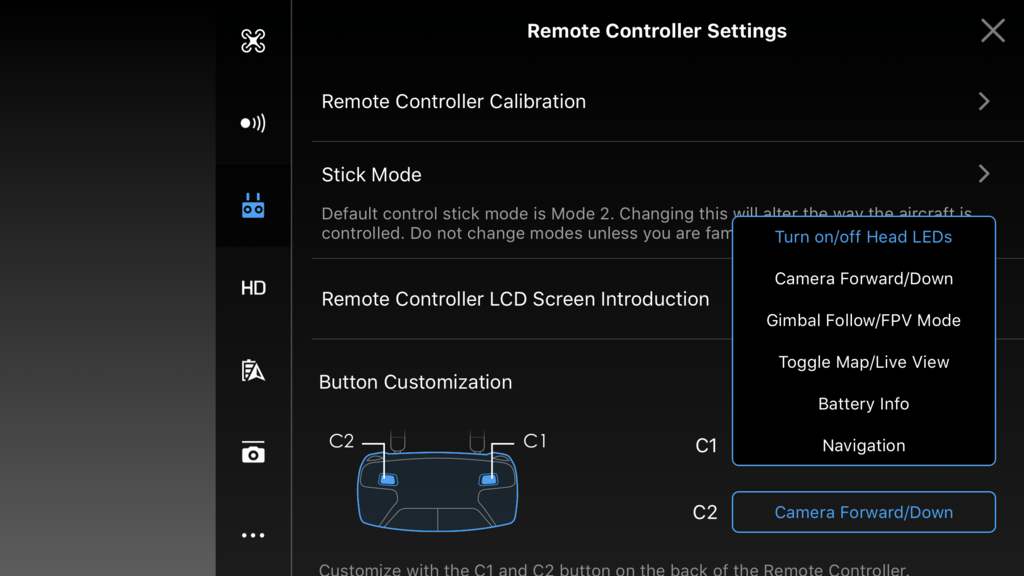
Don’t forget to map the customization button to the drone’s LED! This let’s you trigger the claw with your controller.
To do this, simply connect your device to the controller and go to ‘remote controller settings’, as seen in the picture. Select “Turn on/off Head LEDs” for either C1 or C2, which are found on the bottom of the controller.
Assembly
With all the parts gathered and the electronics ready to go, it’s time to put everything together! If you get lost, refer to the assembly page for more detailed instructions and pictures.
- Connect wires to the Playground’s VOUT, A1, and GND. These jumper wires will connect the Playground and the claw’s motor. Use the M3x6mm and nuts to secure the wires to the board.
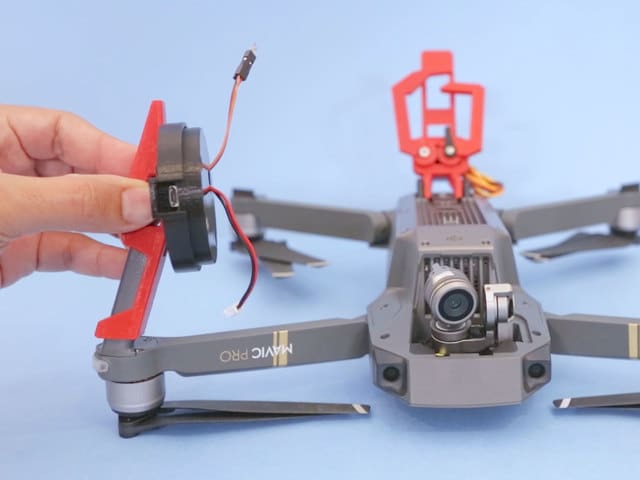
- Assemble the case and left leg. Fit the battery and circuit board in the bottom case. The top case must first be screwed to the left leg, then the rest of the case.
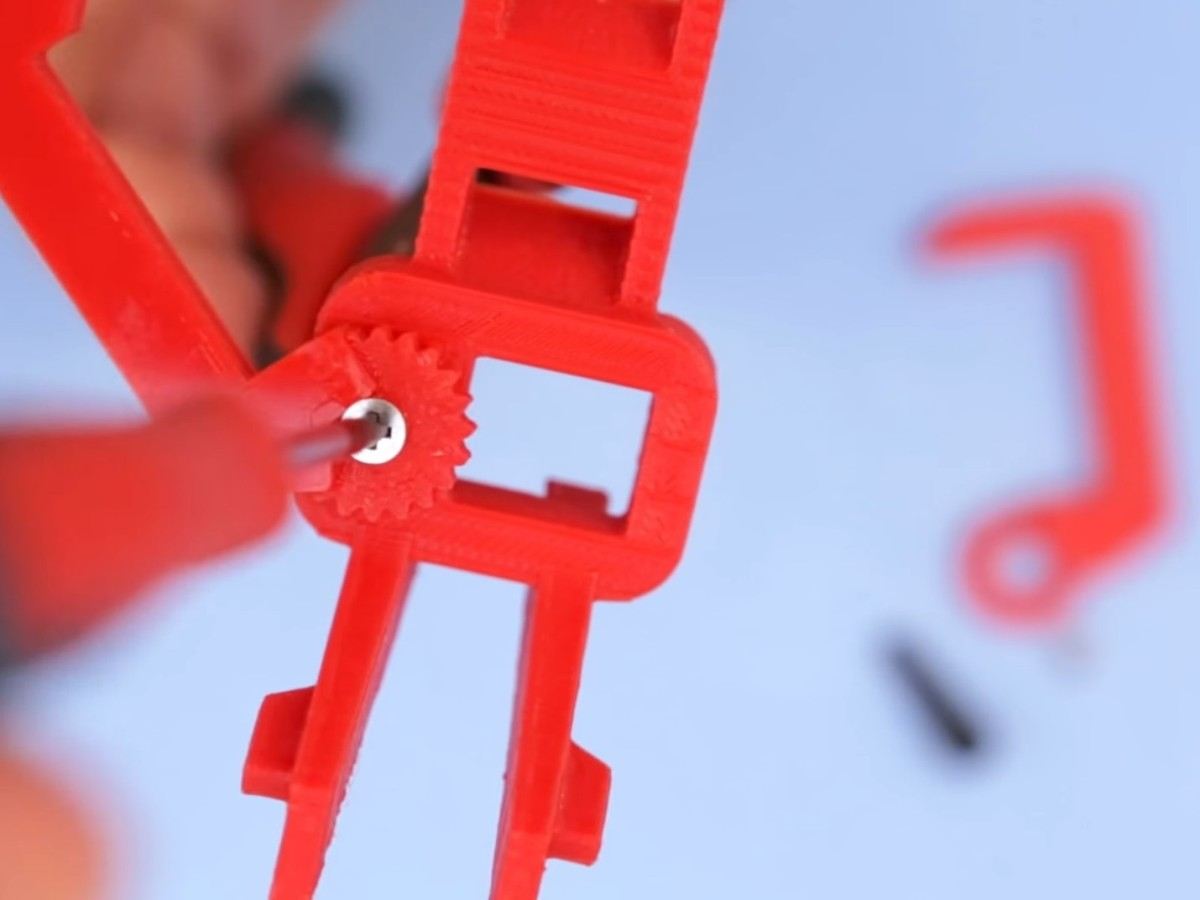
- Put the claw together. The whole claw can be screwed together using a threaded insert to make sure the claw’s rotation won’t loosen the screws. Don’t forget to put the servo in!
- Prepare the clear filament. This 130mm piece will act as a light pipe, so you’ll want to either paint the middle in black or cover it with the heat shrink.
- Fit the parts onto the drone. The two tabs on the claw fit inside the bottom of the Mavic, and the front legs (plus case) slot right onto the front.
- Plug everything together. Connect the Playground wires to the servo, and the light pipe (with its cover) from the drone’s LED to the black case. Slide the port covers on as well to minimize light.
Take Off!
And with that, we’re done! If all goes well, your drone claw should be fully operational. Simply turn on the drone and trigger its LED button (as previously customized) and the claw will open and close.
The drone is ready to embark on new missions and explore further horizons. Who knows what the future holds?
License: The text of " Build a Claw for Your Drone" by All3DP is licensed under a Creative Commons Attribution 4.0 International License.