![Featured image of [Project] Cell Phone Etch-A-Sketch](https://i.stageall3dp.com/workers/images/fit=scale-down,w=1200,h=675,quality=79,gravity=0.5x0.5,format=auto/wp-content/uploads/2019/01/17150443/alis-cell-phone-etch-a-sketch-potent-printables-youtube-190117.jpg)
[Project] Cell Phone Etch-A-Sketch

Revisiting a classic, we create a digital version of the Etch-A-Sketch. Learn how to convert your cellphone into a digital plotting toy using 3D printing technology.
Good Toys Die Hard
In this age of technology, entertainment is an easy thing to come by. Films, series, and games are as limitless as the platforms they’re displayed on. Yet, we still have to respect — and once in a while enjoy — the classics.
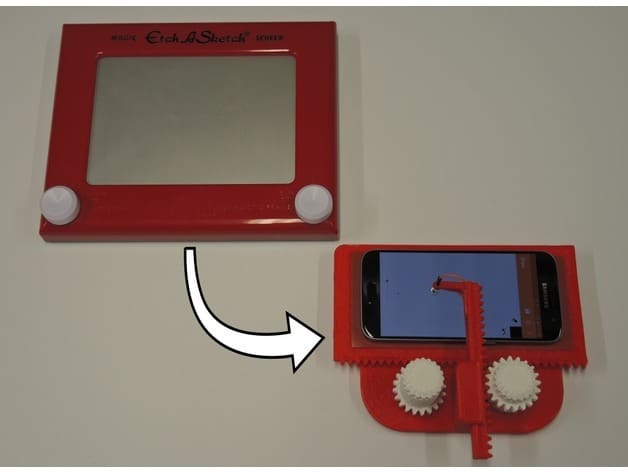
In this Weekend Project, we’ll be making a digital version of the classic Etch-A-Sketch using some 3D printed parts and a smartphone. Towards that end, we’ll be following the design from Ali Aslam (YouTube username Potent Printables).
The Classic Version
The original Etch-A-Sketch works thanks to grey aluminum powder under the glass screen. This non-toxic substance is mixed with plastic beads to help it evenly redistribute across the glass whenever you shake the toy to resett the drawing area.
Drawing is aided by two knobs, which are connected to a wire and pulley system. The knobs initiate X-Y movements, and whenever you turn them, a brass stylus etches the aluminum powder from the screen in very thin lines.
The Digital Version
The Cell Phone Etch-A-Sketch makes use of a conductive stylus mounted atop a 3D printed apparatus holding a smartphone executing a drawing app. This digital Etch-A-Sketch is interesting in a number of ways:
- It can easily save and reload sketches, which makes mistakes “less deadly”…
- It can draw in different colors.
- A user can lift the spring-loaded stylus to change location on the screen and to accommodate the different heights of different phones.
- It’s possible to clear the entire screen with only a push of a button.
- It’s possible to erase selected areas of the screen.
- It’s easy to adjust the pointer size.
Naturally, there are some drawbacks:
- A smartphone is required, which technically makes it more expensive than the traditional Etch-A-Sketch.
- The stylus tip partially obscures the drawing area.
- The controls are not as accurate or smooth as the classic version.
- Movements in the X direction effectively move the entire screen.
The inspiration for the Cell Phone Etch-A-Sketch comes from a printable version of the classic Etch-A-Sketch by Ferjerez.
Let’s get started!
What You Need
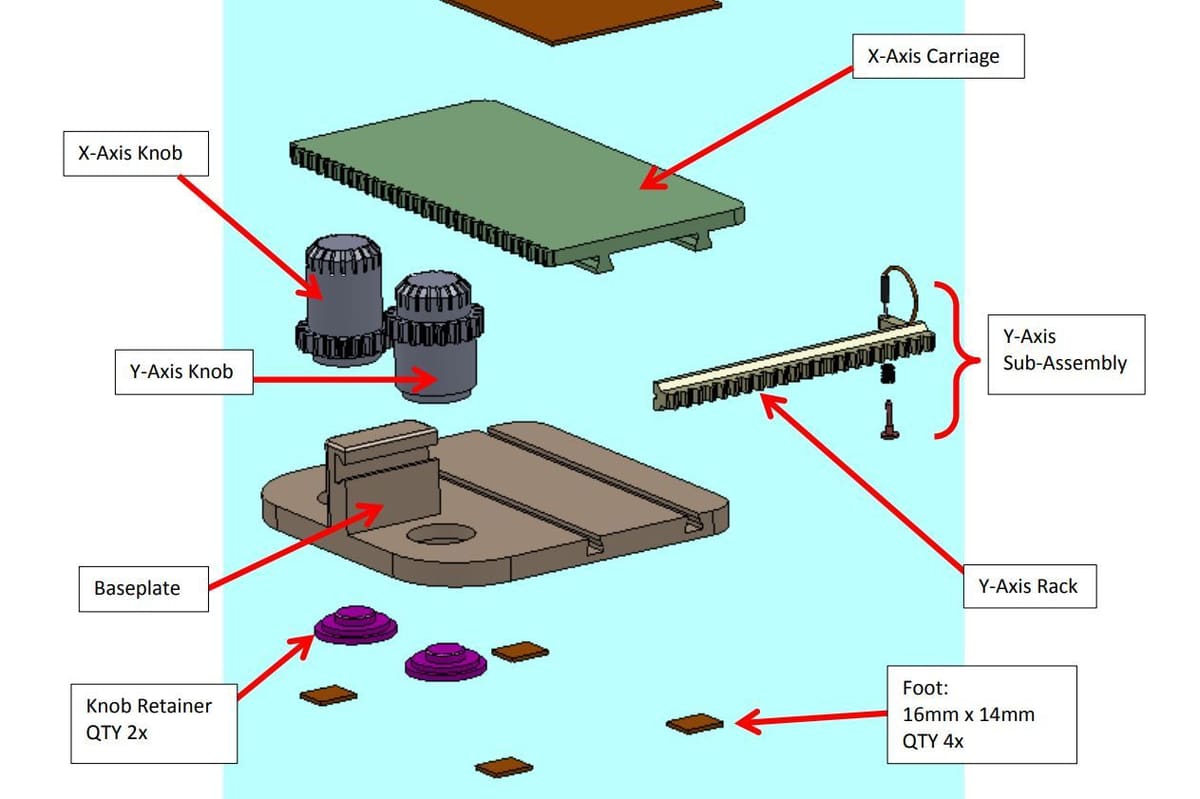
The printable parts include the knob retainer, y-axis rack, y-axis knob, x-axis carriage, x-axis knob, and the base plate. Ali provides all of the STL files and print settings on Thingiverse.
Beyond the 3D printed parts, you’re going to need the following:
- Conductive stylus (one piece)
- Pen springs (one piece; you can also use a spring from any spring-loaded pen as long as it is cut to the right size)
- Jumper wire
- J-B Weld 8270 KwikWeld (superglue or any 2-part epoxy should also work)
- Silicone sheet (12 x 12 x .063 in)
- Wrist strap (especially for Apple phones; Ali recommends buying this anyway if you want to be sure that your phone senses the stylus)
Helpful, but not necessary:
- 5/64″ (0.078″) drill bit
- Classic Etch-A-Sketch (Ali recommends one for remembrance)
Assembly
Ali found differences in the sensitivity of Android and Apple devices during the testing of different phone types. In particular, this relates to how each phone senses and responds to the stylus.
Ali provides a detailed PDF of the assembly process on Thingiverse, but we’ll still summarize the important parts.
Android Phones
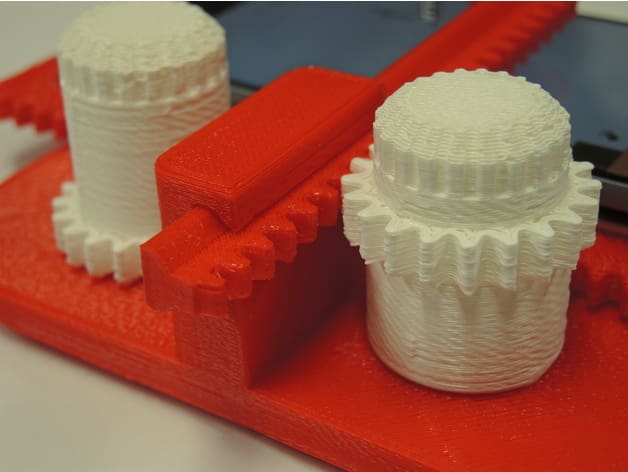
The x-axis component slides into the base plate and must interlock its “teeth” into those of the X-axis knob.
Ensure that both the x- and y-axes slide smoothly against each other, sanding where necessary. Your knobs must turn freely and smoothly once installed in the holes of the base plate.
Use the drill bit to clean the opening in the y-axis where the stylus will fit. The KwikWeld is used to join the knob retainers to the knobs. Even after bonding, your knobs should turn smoothly.
Epoxy your cut silicone sheet to the bottom of the base plate, then cut a phone mat from the silicone sheet and bond it to the x-axis carriage using epoxy.
It’s now time to assemble the y-axis sub-assembly. Use epoxy to glue the jumper wire on top of the stylus and on the groove of the y-axis. The y-axis sub-assembly will then go into the mating dovetail groove on the base plate. The y-axis rack should move smoothly through the dovetail groove.
The free drawing app that can be used on Android phones is called “Simple Draw”.
iPhones
The assembly is similar to that of Android phones, apart from adding a wrist band.
On the y-axis sub-assembly, epoxy one end of the longest jumper wire on top of the stylus and the other end on the groove of the Y-axis. The wire should extend past the end of the Y-axis rack. You will then insert the Y-axis sub-assembly into the mating dovetail groove on the base plate.
Wear a wrist strap band and use the attached alligator clip to clamp onto the needle-like metal part of the jumper wire that will be sticking out of the Y-axis rack. Ensure the metal plate on the band makes contact with your bare skin.
The free drawing app that can be used on iPhones is called “Simple Draw PW”.
How It Works
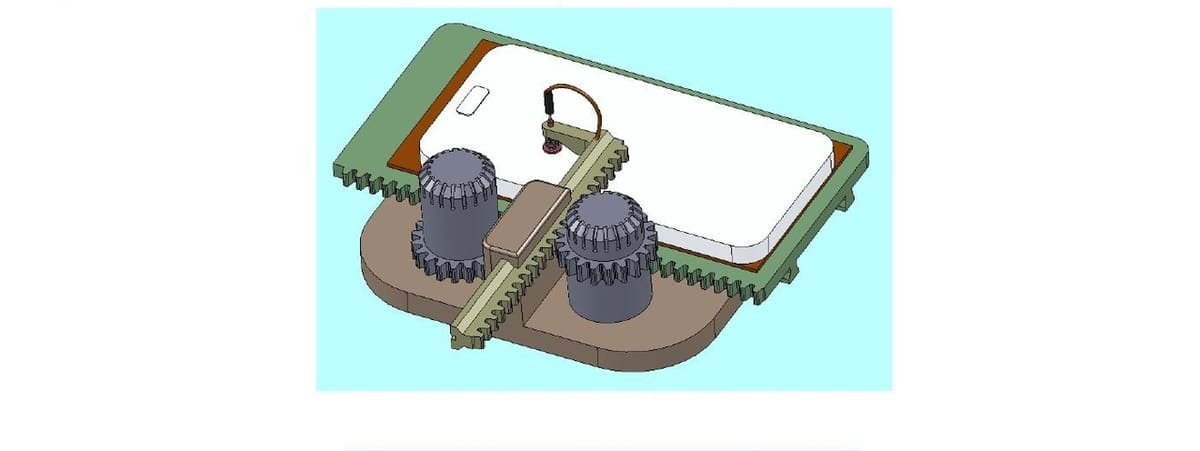
During usage, place your phone on the mat and make sure the app is running. Move the stylus over the phone and turn the knobs to control the movement of the stylus on your phone’s screen. The x-axis knob causes the stylus to move in a horizontal direction while the y-axis knob causes the stylus to move in a vertical direction, or at 90° to the horizontal direction.
For iPhone users: After you’ve placed the iPhone on the mat and the stylus is over it, wear the wrist strap band and ensure the alligator clip is clamped on the metal part of the jumper wire sticking out of the y-axis rack. The metal on the wrist strap band must make contact with your bare skin to trick the iPhone into “thinking” that your finger is touching it.
Helpful Tips:
- Before placing your phone on the mat, take it out of any protective casing.
- The stylus will be reset by either pushing it down or pulling it up. This is in case it stops “writing”.
- The y-axis knob shouldn’t feel too tight, but if that is the case, cut a coil or two from the spring to reduce the upward push on the y-axis rack.
- Clean the phone mat or silicone feet if you notice there is no grip.
- Screen protectors will change how the stylus is sensed.
- Familiarize yourself with the drawing app you are going to use to get a better understanding of how it works.
- If your Android device is unable to detect the stylus, use the wrist strap.
- Ali has reported a bug when clearing the drawing screen on an Android phone. The way around this problem is to pull up the stylus while simultaneously hitting the clear screen button.
License: The text of " Cell Phone Etch-A-Sketch" by All3DP is licensed under a Creative Commons Attribution 4.0 International License.