![Featured image of [Project] Make Your Own Filament Sensor](https://i.stageall3dp.com/workers/images/fit=scale-down,w=1200,h=675,quality=79,gravity=0.5x0.5,format=auto/wp-content/uploads/2018/07/26141801/chucks-partially-completed-filament-sensor-chep-filament-friday-youtube-180713.jpg)
[Project] Make Your Own Filament Sensor

To avoid occasional printing errors, you're better off with a sensor that lets you know whenever your filament breaks, runs out, or gets tangled on the spool. Read on to learn how to make your own.
What Does a Filament Sensor Do?
Filament anxiety is never fun and neither is having to manually keep track of your filament usage because you lack a filament runout sensor.
If you’ve been 3D printing long enough, you’ll understand the disappointment of running out of filament. You leave a long print running only to discover after 10 hours that your printer is “printing air”. There’s no systematically built print, just an extruder flailing around some inches above a useless lump of plastic.
It’s demoralizing, but it happens. Popular YouTuber Thomas Sanladerer considers “filament tangled on the spool” to be the main filament problem behind failed prints.
Make Your Own Filament Sensor
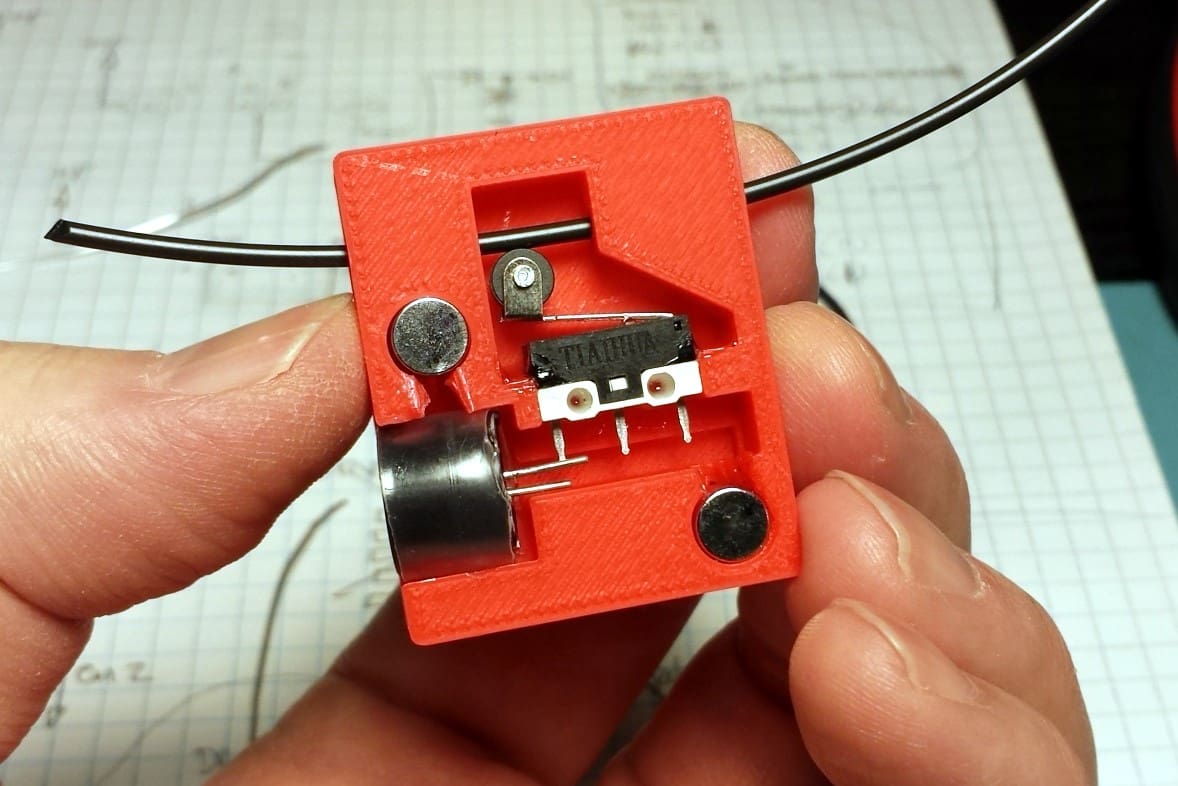
Filament Friday’s Chuck Hellebuyck knows that filaments can be a nightmare, and so he went ahead to create a YouTube video where he makes a simple switch-based filament runout sensor for his 3D printer. The design was inspired by Thingiverse user bookmake.
The idea behind a filament sensor is simple. During printing, filament needs to be running through it constantly; otherwise, it will trigger a buzzer to let you know that your filament has run out or is broken, and needs replacement. In cases where you have the right firmware, it’s even possible to pause the printing process by programming your sensor to detect when your filament is about to end.
Once you have installed a filament sensor, the endstop should detect the end of the filament and trigger the firmware. Your printer will then
- notify you with a beeping sound,
- pause printing (if you have the right firmware), and
- unload the remaining filament.
What You Need

The Sensor
There are several different types of sensors to choose from. You can opt for either an endstop or an optical sensor. While optical sensors are a better choice, they’re hard to setup and design. On the other hand, endstops are both cheaper and easier to set up. Chuck recommends this sensor.
The Case
Where you keep your sensor is not important since the only requirement is that a filament go through it. In Chuck’s video, he has trouble designing cases that can accommodate his switch. But he pulls it off eventually. While it’s optional to leave components open, its always better to have your filament sensor covered.
You”ll need to 3D print a casing for your switch. You can custom-make a case or make use of either bookmate’s design or Chuck’s design, both of which are available on Thingiverse.
The Rest
Apart from a sensor and a case, you’ll need the following:
- Soldering iron
- Buzzer/beeper (Chuck recommends this buzzer.)
- Shrink tubing
- Thin insulated wires
- Hot air gun
- Battery source (enough to power the buzzer and the switch)
- 3D printer (for printing a case for your switch)
- Snap-action switch. Probably one with a small roller. (Chuck recommends this switch, but there are many to choose from.)
- Filament (either PLA or ABS)
- Zip tie or screws to lock your switch into position
- Soldering wire
Putting it Together

Once you have your cover ready, its time to get to work. The steps are relatively straightforward:
- Solder the copper wires to the proper pins on the switch.
- Solder the other ends of your copper wires to your battery source and to your buzzer.
- Use another copper wire to connect your battery source to your buzzer.
- Ensure all the soldered joints are well insulated using shrink tubing with the assistance of a hot air gun.
When soldering, make sure you know which ends of the battery are positive and negative in order to connect them properly to the switch and the buzzer.
How It Works

Your filament needs to go over the roller to press the switch. When this happens, your connection is open, and the buzzer won’t make a sound. However, when you remove your filament, the switch is released, and the connection closes. This causes the buzzer to produce a sound. The sound will be your alert.
If you have the right firmware, like the latest version of the Marlin firmware, it’s possible to pause or stop your printer by connecting your sensor to the correct pins on your controller board. This will require a bit of programming because you want your printer to recognize the closing of the switch as a fault.
Test your filament sensor several times before attaching it to your printer and make sure it goes between the extruder and the spool. Once you’re satisfied that your sensor is working correctly, find a way to attach it to your printer using either glue, screws, a zip tie or whatever you find suitable.
Now that you have a filament runout sensor, it’s time to utilize all your nearly-empty spools!