![Featured image of [Project] Set Sail in This 3D Printed RC Airboat](https://i.stageall3dp.com/workers/images/fit=scale-down,w=1200,h=675,quality=79,gravity=0.5x0.5,format=auto/wp-content/uploads/2018/08/26133144/youtubecom-180824.jpg)
[Project] Set Sail in This 3D Printed RC Airboat

For today's Weekend Project, we're looking at a 3D printed RC Airboat by maker Simon Sörensen. After some trial and error, the 3D printing enthusiast was able to create a functional boat design – and you can too!
Watertight RC Airboat
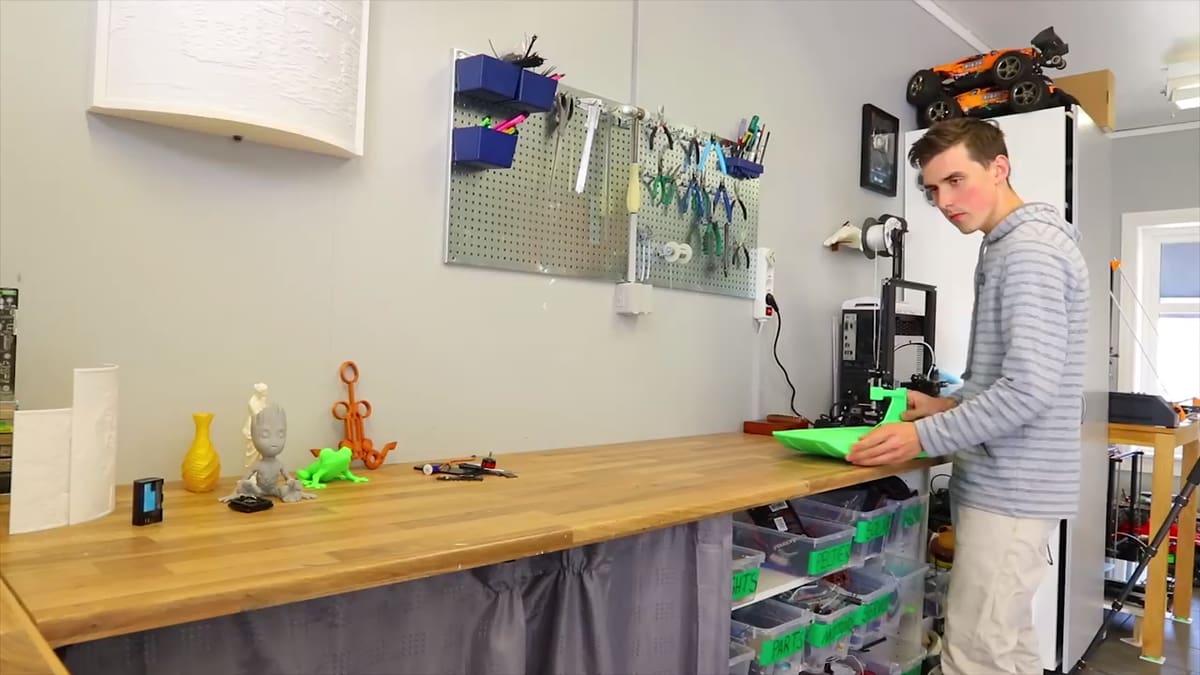
Sometime in June 2018, Sweden-based 3D printing hobbyist Simon Sörensen posted a video for one of his many 3D printing projects: a 3D Printed RC Speed Boat. Unfortunately, after testing it for the first time, he noticed several major flaws, one of which was leaking.
The boat was 3D printed in five body sections (with three extra hatch sections) using the Creality CR-10S printer. Simon joined the units using epoxy and set out to experiment his DIY project only to discover water was creeping through the PLA.
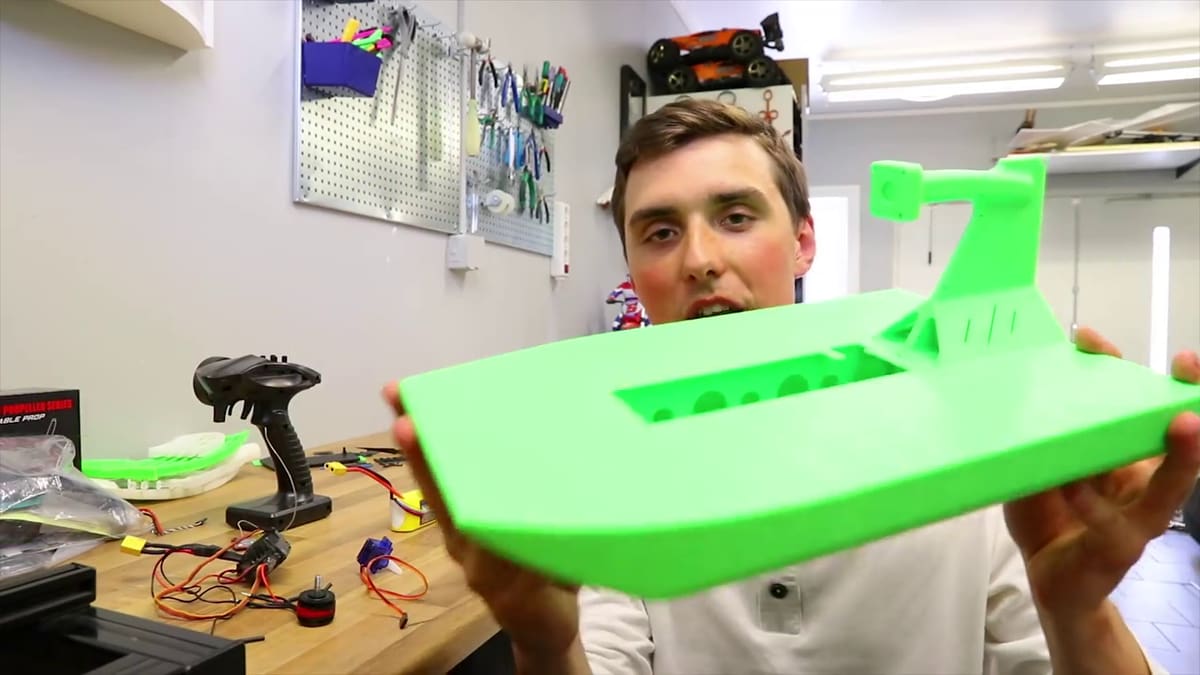
Now, in a bid to stop his project from sinking, Simon went on a second mission to 3D print an RC airboat and posted the video on his RCLifeOn YouTube channel. This time around, he decided not to print the boat in parts, and he used the Creality CR-10 3D printer. The RC airboat was printed in one go using a 0.5mm nozzle at 0.3 mm layer height and took 40 hours to finish. In addition to the base of the boat, you also need to 3D print four hinges and a rudder.
The new RC boat is four perimeters thick and watertight. Simon dismisses the need to use flex seal because he wanted to create a waterproof 3D print. For reference on how to make waterproof prints, you can use one of All3DP’s weekend projects: how to 3D print watertight containers.
Now, let’s take a deeper dive into what you need and how to build this 3D printed RC Boat.
3D Printed RC Airboat: Requirements
The RC boat is simple, and you only need a couple of components outside of your 3D printer and the STL files, which are freely available via Thingiverse. Here’s what else you need:
- Transmitter and receiver
- 9g servo
- Lithium polymer battery
- Charger
- Brushless motor
- RC speed control
- Cable ties
- Propeller
- Steel rod
These are the main parts you are going to need to buy before assembling your RC Boat. You’ll also need an array of basic working tools, namely pliers, a drill, and a screwdriver. The boat is printed with 20 percent infill and does not need any supports. Simon recommends using higher temperatures to increase bond strength.
3D Printed RC Airboat: Integrating Parts
Once your print is ready, you will need to put the parts together. Here’s an overview of the assembly process:
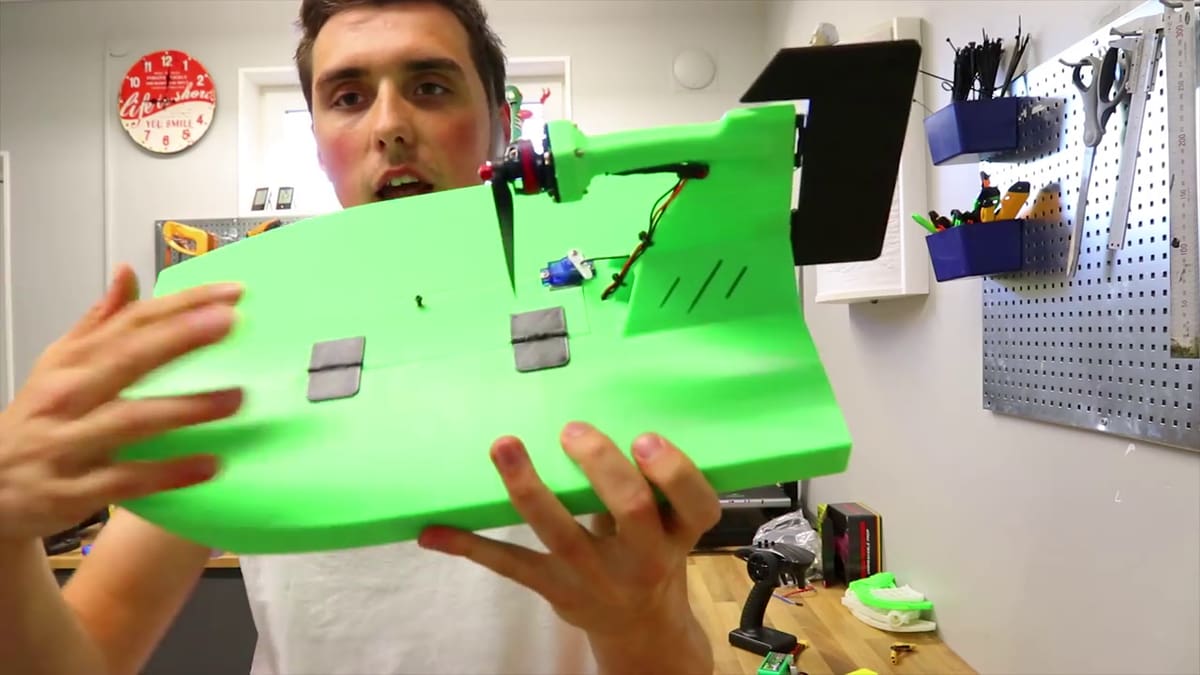
- Fix the propeller to the motor and attach the motor on the ‘wing’ of the boat.
- Screw the servo in place at the far end of the boat; near the wing.
- Attach the rudder to the end of the wing – using the hinges – and ensure it is movable.
- The rudder is connected to the servo via a steel rod that will go through one of the reinforcement brackets.
- The speed controller goes inside the boat. It has three ports that will be connected to the receiver, battery, and motor. The receiver will be communicating with the transmitter to help you control the boat. Typically, the receiver will be getting ‘communication’ from the transmitter. It (receiver) will then tell the speed control what to do – whether its changing speed or direction
- The battery also goes inside the boat and is connected to the speed controller.
- Zip tie your cables to prevent them from interfering with the propeller.
Your project is now ready for testing. If you want to learn Happy Sailing!
Additional notes to keep in mind:
- Simon experienced an issue where his airboat was only stable at low and medium speeds. However, when he tried to navigate at high speed, one end of the boat would lift causing it to spin out. This has to do with the placement of the inside weight (battery, speed control) in relation to the center of gravity. Simon rectified this by lowering the battery and changing the propeller. This is a problem that you may experience, and you can only identify it by testing your boat at both high and low speeds. Correcting it may mean having to tilt your motor to change its thrust line or having to replace the propeller altogether. You may also want to ensure the inside weight is well distributed across the length of the boat to prevent it from toppling.
- Carry some backup batteries with you in case your battery runs out.
- Protect electronic components like the receiver from contacting water. Simon uses a silicone sealant.
License: The text of " Set Sail in This 3D Printed RC Airboat" by All3DP is licensed under a Creative Commons Attribution 4.0 International License.