What Is G-code? – All You Need to Know

Do you want to know what G-code is? Read all about the different types, how they compare, and how to work with them!
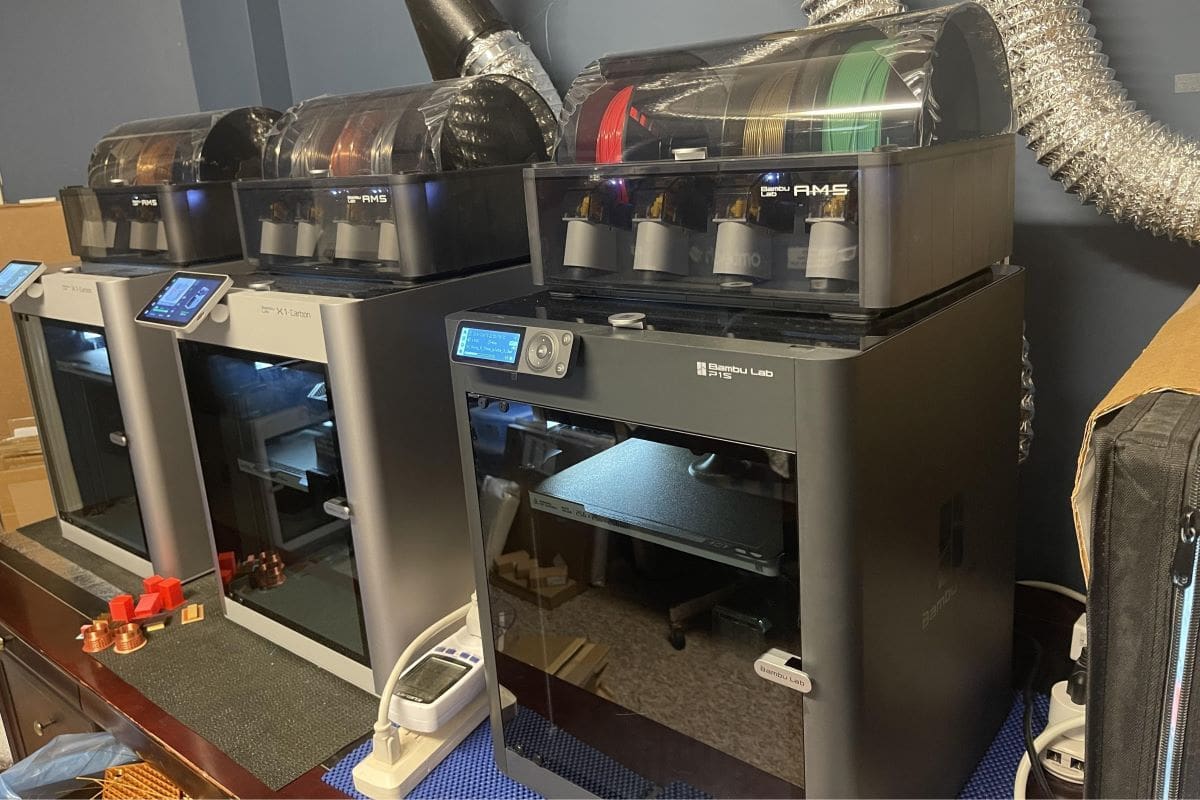
G-code is the secret magic behind all computer numerical control (CNC) machines, like 3D printers, laser cutters, and of course, CNC mills. It serves as the link between digital designs and physical manufacturing, translating those designs into precise instructions that machines can execute to bring them to life.
In this article, we’ll be learning about the fundamentals of G-code and how it works in different applications like fused deposition modeling (FDM) 3D printing, resin-based 3D printing, and CNC milling. Additionally, we’ll explore some useful G-code skills, such as editing .gcode files manually, understanding how they differ from machine to machine, and how to adapt G-code for different firmware.
Without further ado, let’s get started!
What Is G-code?
G-code stands for “Geometric code”, which is a programming language used to control computer numerical control (CNC) machines.
You may wonder, why do we need a programming language for CNC machines?
If we want to cut one cube out of wood with our CNC milling machine, it may not take too long to do it by controlling the machine manually. However, if we want to cut 50 cubes – or something more complex – we can simply make a set of commands written in G-code that’ll allow us to automate the control process and save a lot of time. That’s why G-code plays a vital part in any modern CNC machine, which also includes your 3D printer!
Developed initially in the 1950s as a part of the automation revolution, it shortly became the backbone for controlling machining tools like lathes, mills, and later, 3D printers and other manufacturing equipment. But what is it made of?
Basic Structure of G-code
G-code instructions are composed of simple, human-readable commands that tell a machine how to behave. Each line, known as a “block”, represents a single instruction or command that consists of:
- A command code (e.g. G01, M104)
- Parameters specifying coordinates or settings (e.g.
X10 Y20 Z5for position, orF1500for feed rate)
In G-code, there are two kinds of commands. One is ‘G’, which controls the movements in the machine like G28 (home all axes). The other one is ‘M’, and it handles non-movement functions such as setting temperatures (M104) or changing tools (M06).
Technologies in a Nutshell
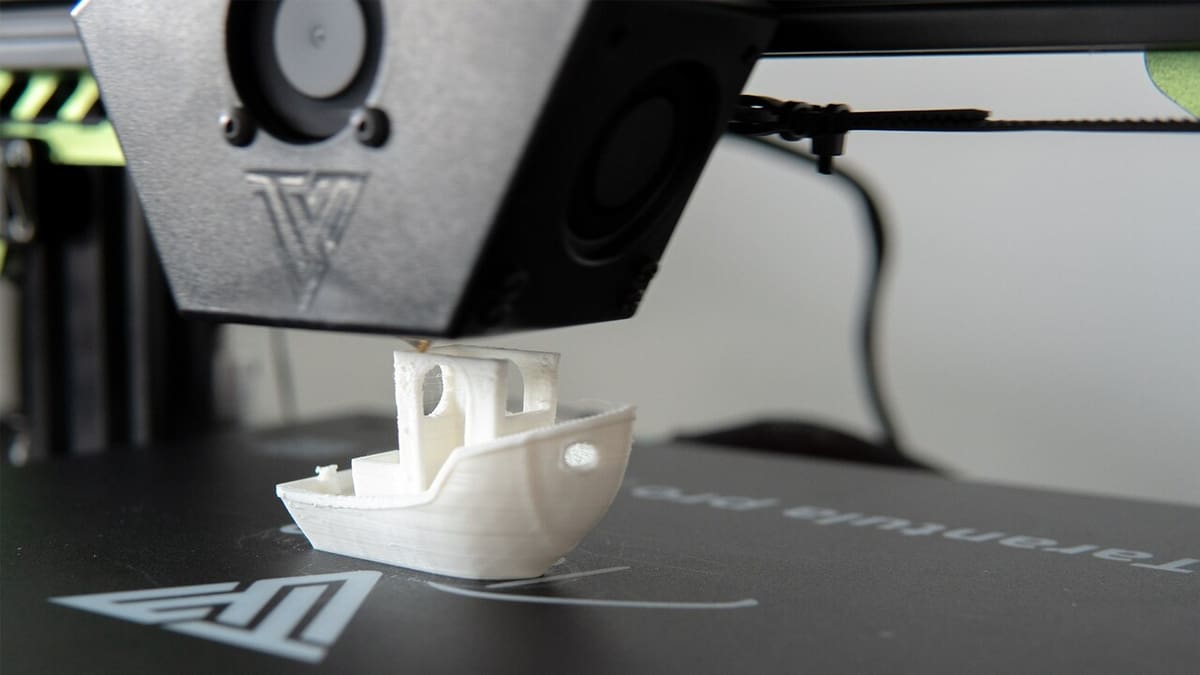
Fused deposition modeling (FDM) is a 3D printing method that builds objects layer by layer by extruding molten filament. While it can’t print small details as well as a resin-based 3D printer, it’s still a popular choice among hobbyists for its simplicity and accessible pricing. G-code is specific to each printer model and to the print itself, as different printers have different sizes, movements (e.g. different motion systems), and more.
In contrast to FDM 3D printers, CNC milling involves subtracting material from an existing piece. So, instead of instructions on how to add material in a determined way, the G-code for CNC milling is based on precise subtractive manufacturing practices.
Resin-based 3D printing, such as stereolithography (SLA) and digital light processing (DLP), operates differently from FDM 3D printing. The concept of FDM is based on extrusion of molten filament through a nozzle to build an object layer by layer – like icing on a cake. On the other hand, resin-based printing uses a photosensitive resin that is cured (hardened) by exposing it to controlled light, one layer at a time. For that, the control system mainly revolves around the Z-axis’ movements and exposure settings, as there’s no nozzle extruding filament.
Although G-code is used in FDM 3D printers, CNC milling machines, and resin-based 3D printers, the specific commands and functions vary significantly due to their differences. Let’s take a closer look at them.
In FDM 3D Printing
FDM 3D printing relies on G-code that manages the movement of the toolhead, as well as the precise control of extrusion. Common commands include:
- Movement and positioning: G01 is used for controlled linear movement, specifying X, Y, and Z coordinates, as well as the feed rate (the movement speed of the toolhead), F. For example,
G01 X50 Y25 Z0.3 F1200moves the toolhead to X=50 mm, Y=25 mm, Z=0.3 mm at a feed rate of 1,200 mm/min. - Extrusion: The E parameter is used with G01 to extrude or retract filament. For example,
G01 X60 Y25 E5 F1500moves to X=60 mm and Y=25 mm while extruding 5 mm of filament at a feed rate of 1,500 mm/min. Retraction can be done withG01 E-1 F1800, which retracts 1 mm of filament at a feed rate of 1,800 mm/min. - Temperature settings: Commands like M104 set the nozzle temperature, while M140 is used for the heated bed. For example,
M104 S200sets the nozzle temperature to 200 °C, andM140 S60sets the bed temperature to 60 °C. - Fan control: M106 turns the fan on and sets its speed, and M107 turns the fan off. For example:
M106 S128sets the fan to 50% speed (S128 out of a maximum of S255).
FDM-specific G-code often includes parameters to manage print speed, retraction settings, and other print-specific actions like pausing (M0) or changing filament (M600). Since FDM printers work by adding materials to the build area, the G-code is focused on additive manufacturing methods.
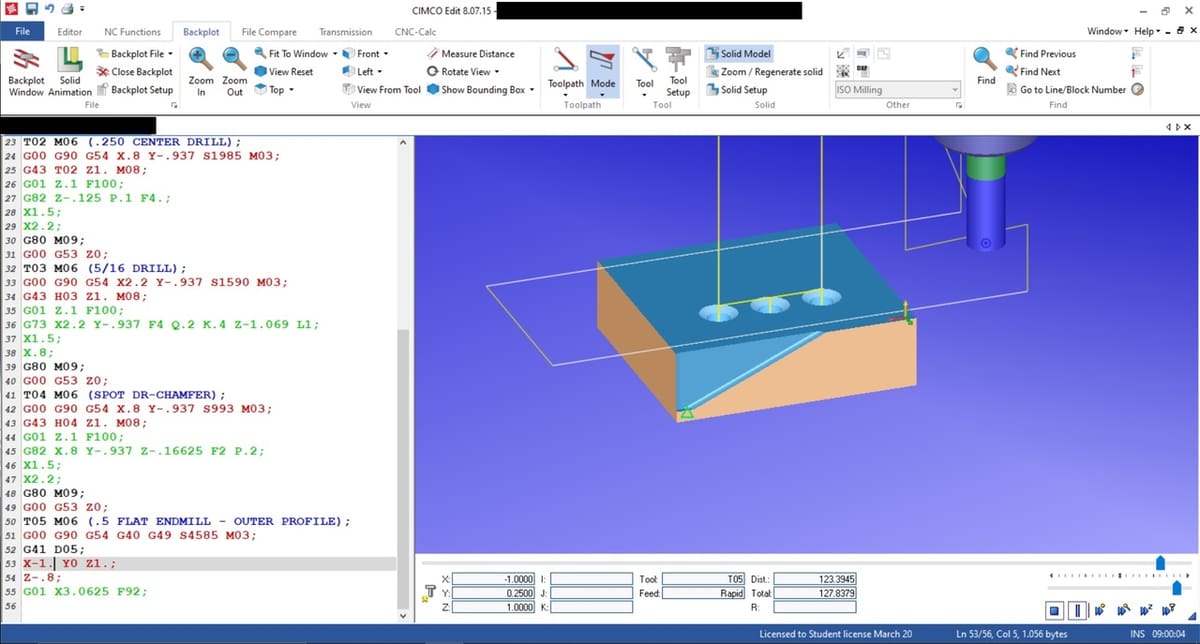
In CNC Milling
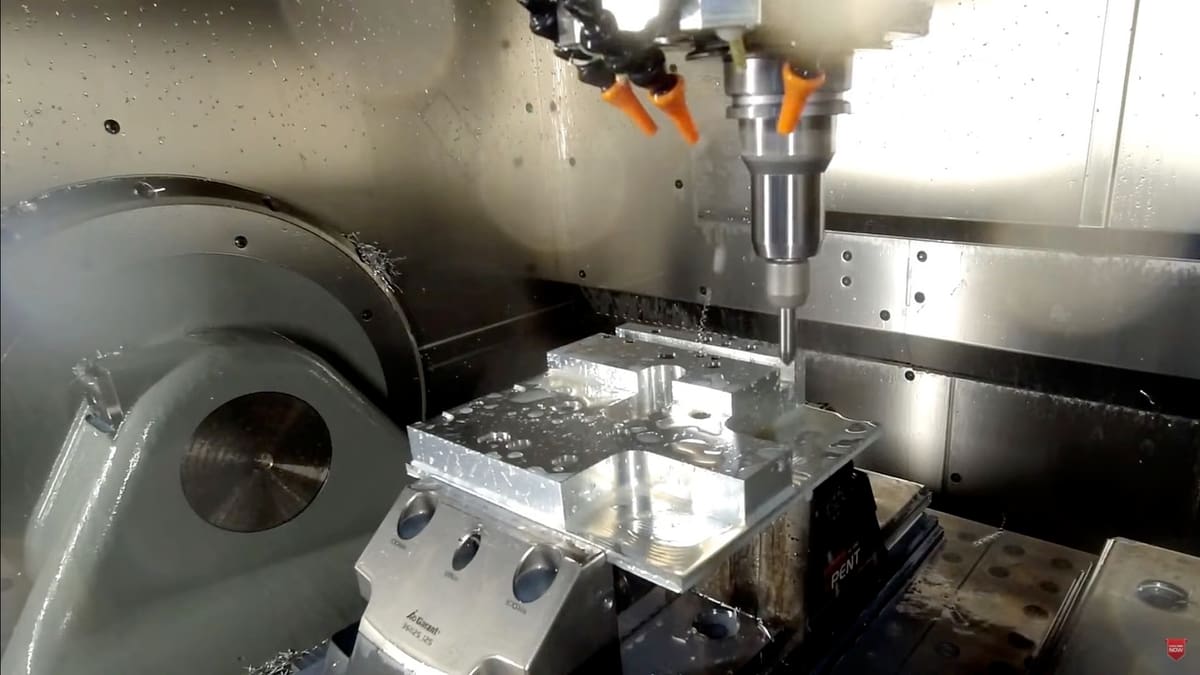
When it comes to CNC milling, as mentioned, the movements have to do with removing material from a workpiece. For example:
- Tool path control: Commands like G17, G18, and G19 select the working plane. G17 sets the XY-plane, G18 sets the XZ plane, and G19 sets the YZ-plane, ensuring precise orientation for the cutting tool.
- Feed rate and cutting depth: The F parameter specifies the feed rate, while S sets the spindle speed (rotation speed of the cutting tool). For example,
F1000sets the feed rate to 1,000 mm/min, andS1200sets the spindle speed to 1,200 RPM. These parameters are crucial for controlling the speed and depth of cuts. - Advanced operations: Commands like G02 and G03 control circular interpolation. G02 specifies clockwise arcs, while G03 specifies counterclockwise arcs. Cutter compensation is handled by G41 and G42, where G41 offsets the tool to the left of the cutting path and G42 offsets it to the right, allowing for precise adjustments based on tool size.

In Resin-Based 3D Printing

We’ve already learned about what typical G-code operations look like for FDM printing. Resin printers usually use G-code as follows:
- Z-axis movement: These only need to move the build platform along the Z-axis between layers, which simplifies the G-code structure compared to FDM, as X- and Y-axis are not needed. For example,
G1 Z1.2 F150moves the build platform to Z=1.2 mm at a speed of 150 mm/min. - Layer curing: Commands include a variety of exposure time settings, which control how long the resin is cured by UV light to create each layer, with different options for initial and later layers, for example. For example,
M106 S255 P10turns on the UV light for 10 seconds. - Peel and lift operations: Resin printers may include specific G-code commands for peeling or lifting between layers to reduce suction and prepare for the next layer. For example,
G1 Z1.5 F100lifts the platform slightly to Z=1.5 mm to peel the layer.
As can be imagined, the G-code for FDM is usually more detailed, given that it contains commands for temperatures, extrusion, and movements in all three axes. On the other hand, the G-code for resin 3D printing primarily includes Z-axis positioning commands and exposure settings. Given that there’s no filament extrusion, there are no extrusion or retraction-related commands.
How It's Made
If you’re wondering if you need to learn all the G-code commands to be able to print or mill a model, you needn’t worry.
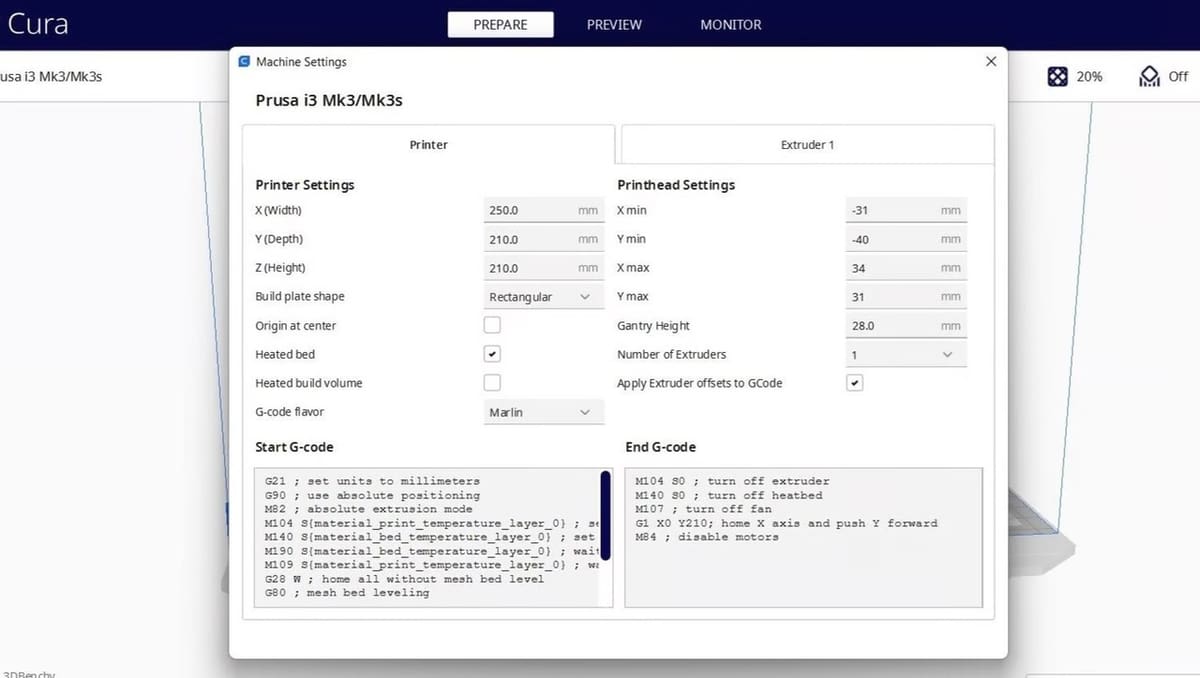
G-code for both FDM and resin-based printing is generated by slicing software, where you can import your models, specify your 3D printing settings, and convert (a.k.a. slice!) the process into G-code for your printer.
For FDM, popular programs include Cura and PrusaSlicer, both of which are open source and support plenty of printers in the market. Resin-based printing uses their own slicers like Chitubox and Lychee Slicer. As mentioned, there are many settings for FDM prints to look at, and while resin-based 3D printing doesn’t have as many, there are still quite a few to look into.
For CNC milling machines, computer-aided machining (CAM) software can help prepare appropriate G-code from the design. Autodesk Fusion includes both CAD and CAM features, making it a top option for CNC projects. As expected, there are many other options, with plenty of free ones to check out.
Whether you’re preparing G-code for CNC machines or 3D printers, it’s something that’s usually done automatically with the software mentioned above. That said, learning how to edit G-code manually can be a valuable skill. Let’s take a closer look at this.
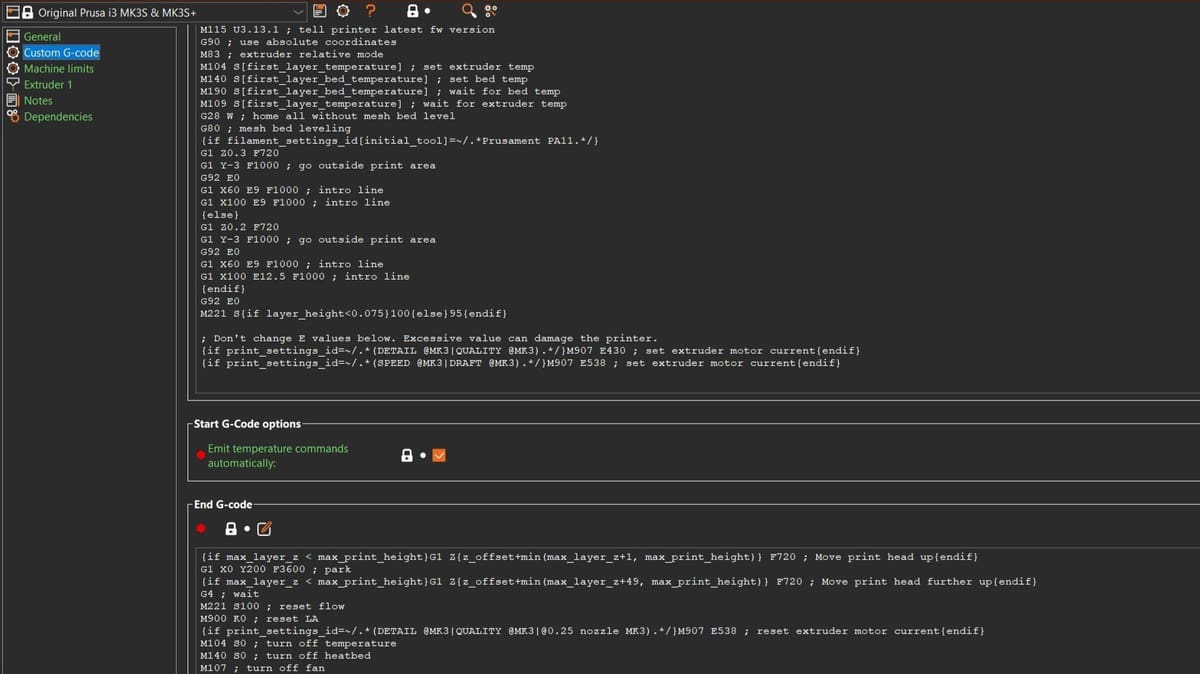
Editing G-code Manually
As mentioned, editing G-code can be a useful skill to develop. This is because it allows you to customize printing or machining operations further than what the slicing or CAM software allows you to do, and you can also adjust settings on the fly or troubleshoot any issues.
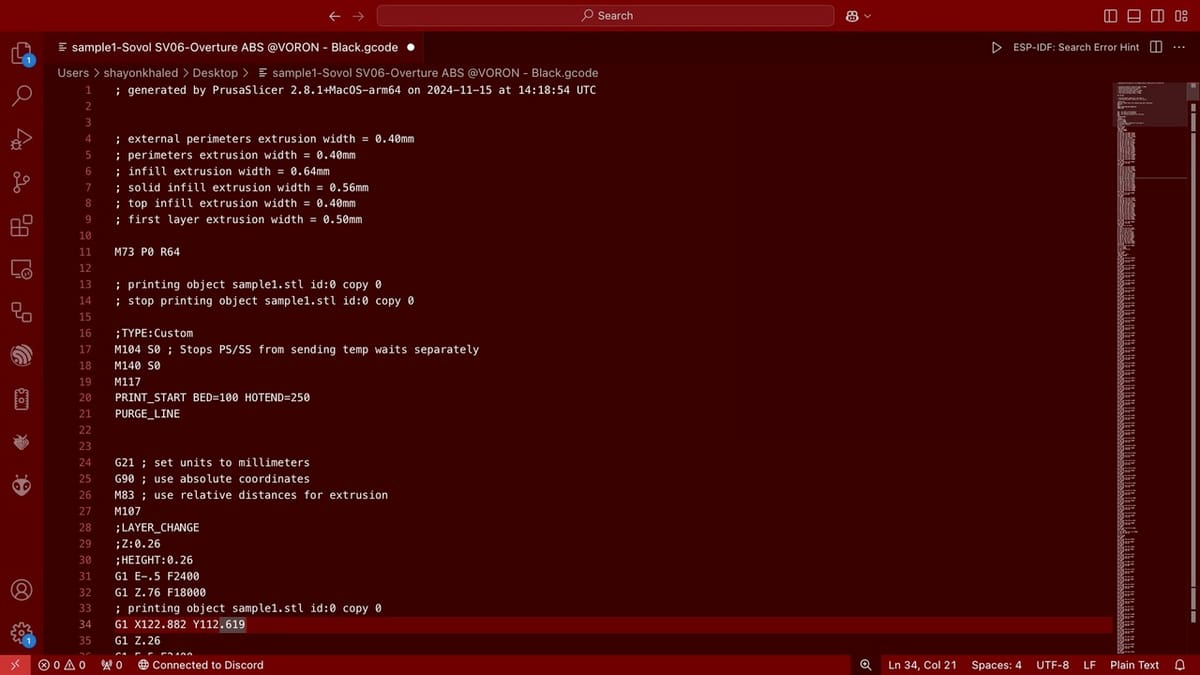
Editing G-code can be pretty easy, as usually any text editor that supports plain text work fine for opening .gcode files. You can use Notepad++, Visual Studio Code, or any other text editor of your choice. However, if you’re doing something beyond simple changes, using a specialized G-code editor such as Repetier-Host or PrusaSlicer would be better. They offer nifty features, such as syntax highlighting and automatic error detection, so complex modifications can be done safely and easily.
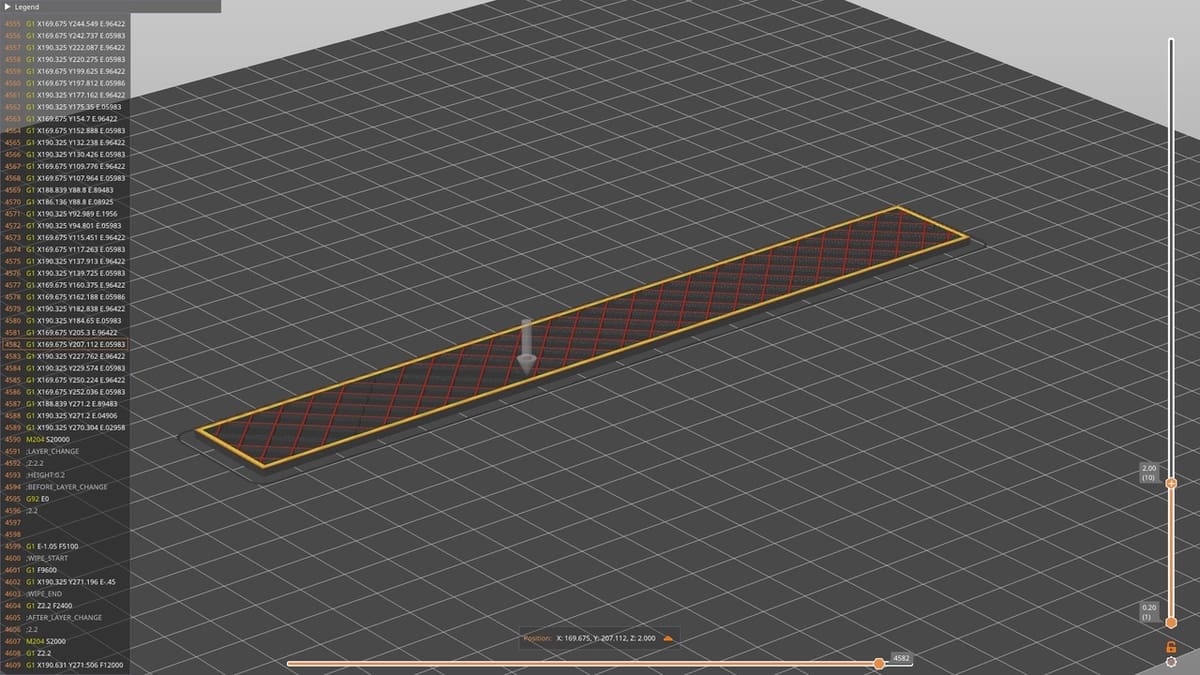
After making your changes, you should also run the G-code through a visualizer to make sure there are no mistakes. For example, a simple missed digit in toolhead movement commands can make it crash into something and cause expensive damages. Most slicers and CAM tools these days come with their own G-code viewer. If you want to use a separate viewer, OctoPrint’s G-code viewer or Repetier-Host will come handy.
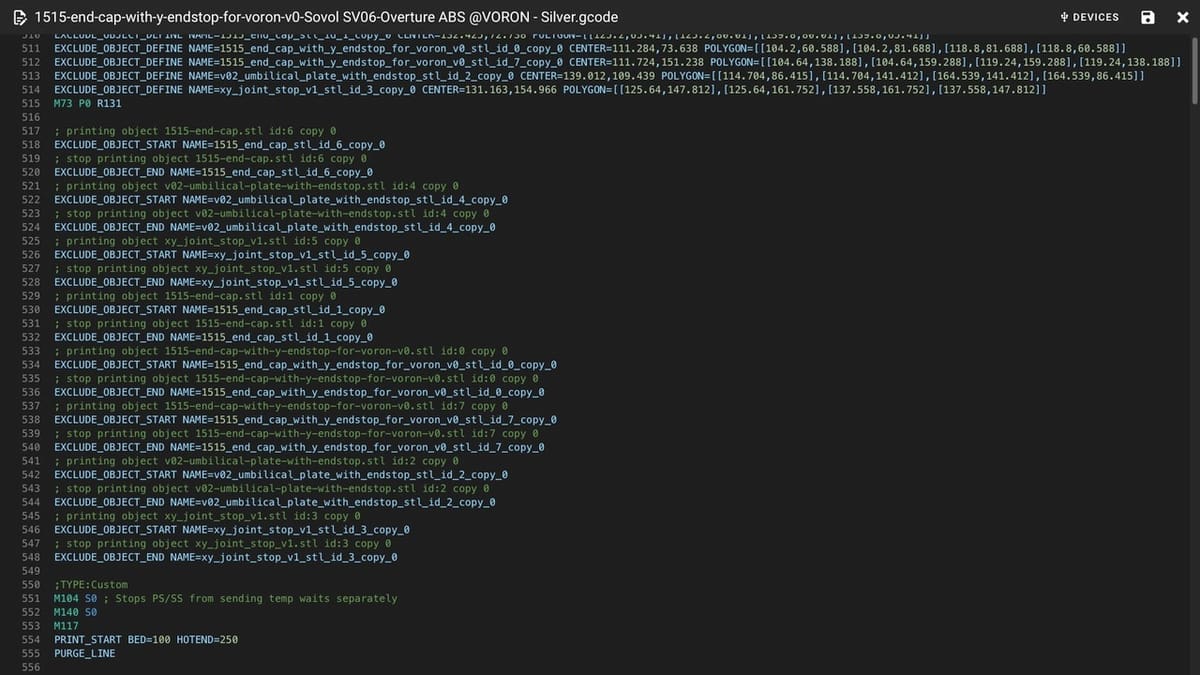
Why Every G-code File Is Unique
As mentioned, every G-code file is unique because it is customized to the specific machine, material, and settings for which it was created. If you try to run it on a machine different than the one it was made for, at the very least it may cause a malfunction – worst case scenario, it can damage the machine or the toolhead, requiring lengthy and expensive repairs.
Here are some usual differences found in G-code files created for different FDM machines:
- Machine-specific parameters: These often include unique settings like build plate size, axis limits, and tool offsets, all of which can vary from model to model.
- Firmware differences: Different firmware (e.g. Marlin, Klipper, GRBL) interpret and support various G-code commands differently (or not at all), affecting compatibility.
- Material requirements: G-code includes temperature and speed settings specific to the material being used (e.g. PLA vs. ABS). A different material may not work well or at all due to improper settings.
- Printer features: Machines with features like dual-extrusion or auto-bed leveling require distinct commands in their G-code.
Adapting G-code to another machine requires adjusting these parameters to match the new setup, and it’s usually not worth the hassle of modifying a G-code file manually. If you want to print on a different machine, it’s easier to recreate the G-code in the slicer software and select the correct 3D printer or simply slice the model all over.
Different Flavors (FDM)
As mentioned, even specifically for FDM 3D printers, there’s no universal G-code that works on all machines (size and material use notwithstanding). Each machine runs determined firmware (which can be changed). Firmware “translates” the G-code instructions for the machine to carry them out. Different types of firmware require distinct “flavors” of G-code, which are basically tailored to specific features of said firmware. Let’s look at the three most common firmware options.
Widely used in consumer-grade 3D printers, Marlin supports extensive commands related to extrusion, temperature control, and movement, such as M600 for filament changes and G92 for setting the position. It’s known for its flexibility and large community support.
Klipper is modern firmware that improves performance by offloading complex calculations to a computer (e.g. a Raspberry Pi) instead of relying on the 3D printer’s controller board. It supports advanced features like pressure advance and input shaping, modifying the G-code structure with extended commands to allow more control over the printer. It’s primarily focused towards high-speed printing.
Originally developed for the RepRap 3D printer project, RepRap firmware supports similar commands to Marlin and is popular among DIY and custom builds for its adaptability. That said, it’s considered a little outdated compared to Marlin and Klipper.
How & Why G-code Flavors Differ
The differences arise because each firmware is designed to meet specific needs. For instance, Marlin and RepRap are optimized for regular 3D printing where users aren’t much keen on customizing their printers, so typical G-code commands are sufficient. However, Klipper offers significantly more customizability, such as executing complex macros inside G-code files, and also extended G-code commands to control even more aspects of the printer.
Due to the differences in limitations, Marlin, Reprap, and Klipper G-code files are usually not compatible with each other. That said, basic commands are usually the same in all firmware.
Converting Between Flavors
If you’ve got G-code that’s meant for a 3D printer running Klipper, for example, but you also want to use it on a machine that’s got Marlin, there are a couple of ways you can go about it.
- Re-slicing the file: If you have the original model, it’s always best to select your desired flavor in the slicer and slice the file again to ensure there will be no issues with the G-code.
- Manual edits: This involves opening the G-code in a text editor, identifying firmware-specific G-code commands, and modifying or removing unsupported commands as needed. For example, if there’s a callout for a macro implemented in Klipper, you should try to find the specific G-code of the macro and add that separately instead for Marlin. Likewise, extended G-code of Klipper should be replaced with standard G-code of Marlin.
License: The text of "What Is G-code? – All You Need to Know" by All3DP is licensed under a Creative Commons Attribution 4.0 International License.