What Is Slic3r? – Simply Explained

Slic3r is an influential part of hobby 3D printing and a big player in the pool of slicing programs. Let's take a look at some of its main features and settings!
A slicing software (commonly referred to as a slicer) does exactly what its name suggests: It cuts a 3D model into “slices”, which in essence are all the layers that will eventually be 3D printed. After slicing (and before 3D printing), the software converts each layer into a special language (called G-code) that your printer uses to determine tool head positioning and other settings during a print.
Slic3r is one of the most known and widely-used slicing programs available, offering some powerful features to its users. It steadily ranks in the top positions of every slicing software list.
How It Works
In order for a 3D printer to work properly, the G-code needs to carry some specific information, which the slicing software is responsible for producing. For example, every layer requires some kind of coordinates, connection information to the layers before and after, the optimal route for the hot end to follow, layer height, and even temperature settings (if they need changing).
The slicing program, in this case Slic3r, is able to convert a solid 3D model into G-code by running various calculations to determine the best (or almost best) way for a printer to produce the part given a list of required settings.
Another important function of slicing software is the calculation and suggestion of infills and supports. Both of these features greatly impact the quality and mechanical endurance of the final print.
- Infill is used to fill the inner gaps with a printing pattern that will enhance the structural strength of the final print
- Supports do exactly what their name implies; they support parts of the main object that overhang too far to print well or do not have anything underneath to keep them from falling.
In this article, we’ll explore Slic3r, a software that is considered to be on the front end for experimental features and new slicing algorithms. We’ll look at function and use of various features, and a few “obscure” features will be uncovered.
Origin & Development
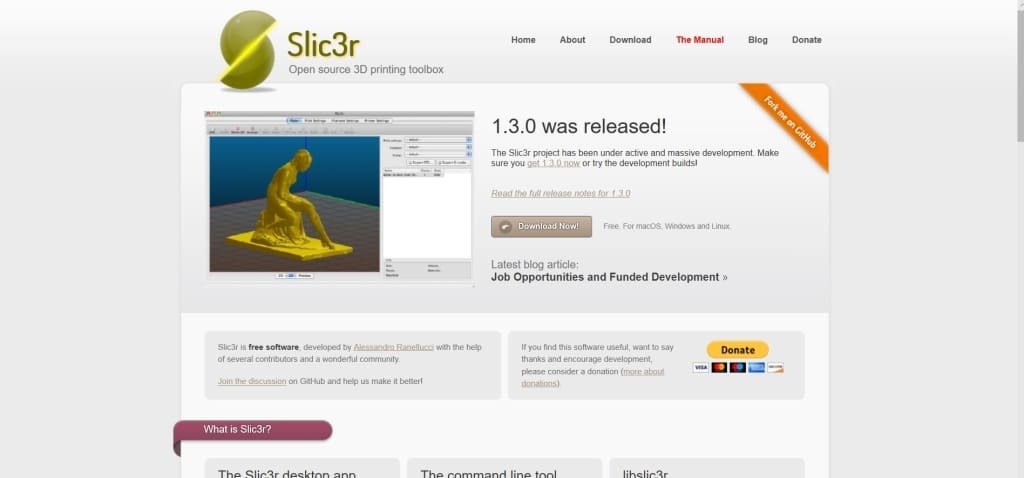
Slic3r is a great piece of open-source software which originated from the RepRap community in 2011. We owe its birth to Italian software developer Alessandro Ranellucci and its continuing development to many other contributors ever since.
Slic3r boasts 48 official releases since 2011 and is currently in Version 1.3 (which is discussed here). All previous releases are archived on Slic3r’s official page or in the GitHub repository, which is quite active. Being an open-source project, it’s free of cost.
It’s widely accepted that many cutting-edge features that currently exist in modern 3D printing software were first tested, developed, and introduced in Slic3r. And this is still true; Slic3r has a sizeable and helpful development community, which is very important in open-source projects.
Slic3r is available for Windows, Mac, and Linux, and all features and functions remain the same between platforms.
The Interface
While not as sleek as in other tools, Slic3r’s user interface (UI) is very utilitarian and wastes no time in presenting relevant features and settings, ready for quick use while slicing.
One of the stronger features of the program is that it’s fully usable through its command-line environment, making it suitable for servers or other non-Windows environments.
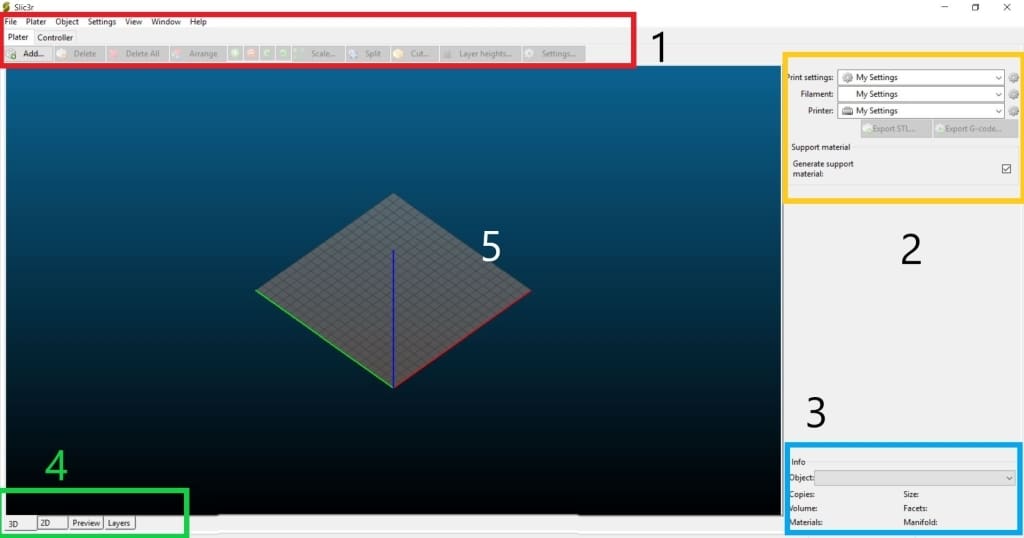
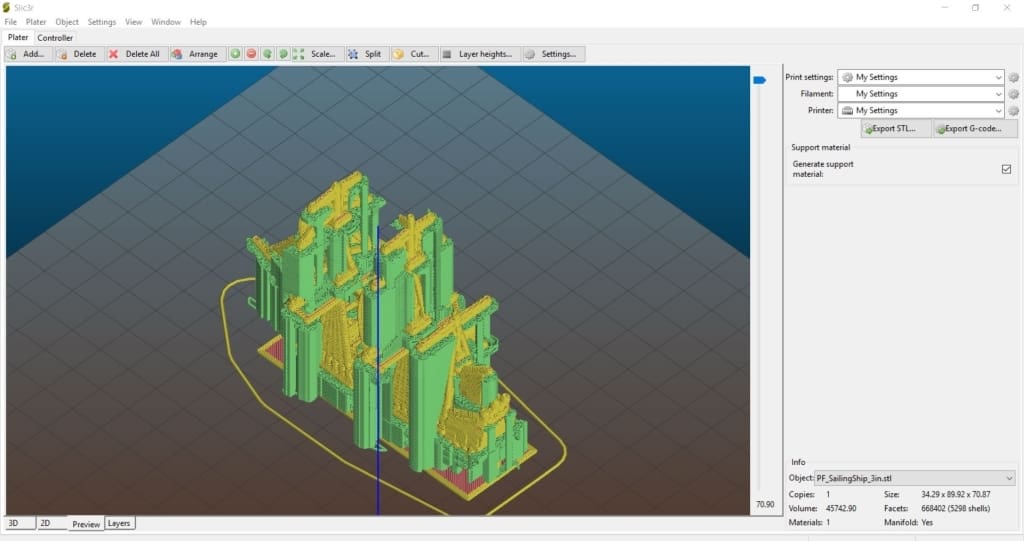
In the main screen (above) we can observe
- the menu (red),
- settings (yellow),
- an info panel (blue),
- viewpoint tabs (green), and
- the Plater (central).
A notable advantage of the Slic3r’s UI is the presence of tooltips in the interior menus. These tend to provide quick help, showing what every value or parameter is meant to do.
A disadvantage of Slic3r is the absence of a “premade” library for printers or filaments, which could at least save some configuration time for the more popular machines and materials (a problem better addressed in PrusaSlicer or Cura).
The Workshop
Ostensibly, the most amount of time spent slicing is in the Plater, or the main working area of Slic3r. Let’s have a look at some of the features found here:
- Configuration Wizard: Accessible through the “Help” menu in the upper bar, this is helpful for setting up your first printer. Through this rather straightforward guide, one can set the size of the bed, the nozzle diameter, the filament diameter, and the temperatures for your machine. Simple as that.
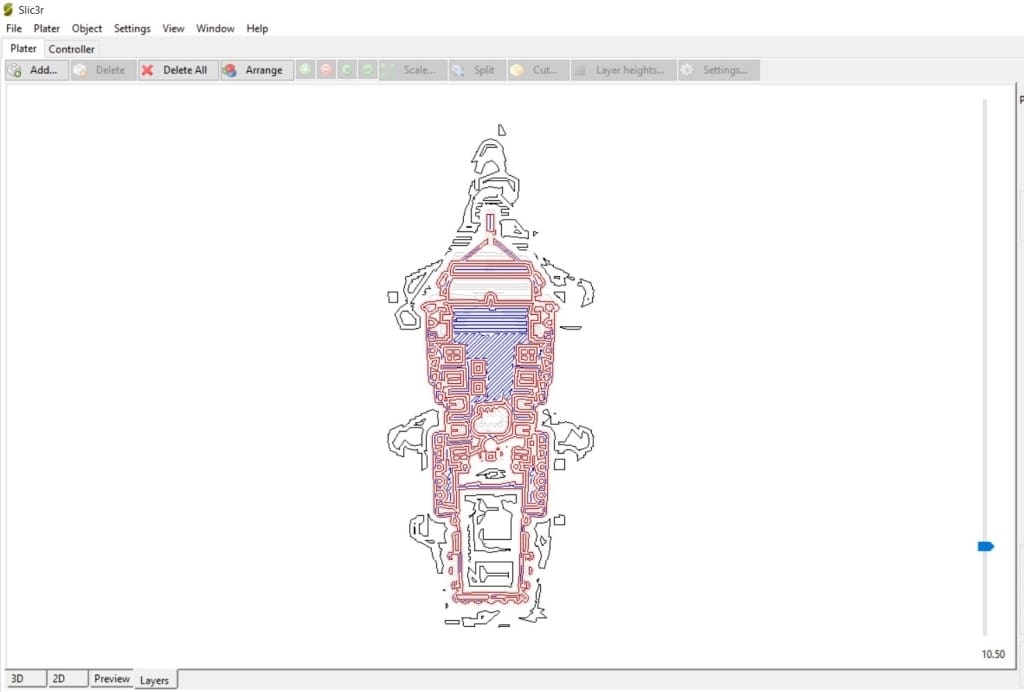
- Viewpoints: These are quite useful and easily accessible in the lower-left corner. Flipping through the tabs switches between various 2D and 3D views of the object. The Preview tab shows a real-time representation of the printed object, allowing the user to view the effects of different settings before exporting the model. Meanwhile, the Layer tab permits us to examine each layer individually to identify possible problems.
- Movements: In the Plater itself, a large number of movements can be made to examine a model from every possible angle, similar to a CAD program. Some of these functions include zooming, panning, and orbiting the “print bed”. Note that, on slower machines, there can be a lot of lag, especially with more complex models. A good mouse is recommended for using these features.
There have been some comments that Slic3r tends to require a longer time to slice complex models with large file sizes due to a lack of any program to simplify or reduce files before slicing. However, Slic3r does have a unique system to reduce the amount of time spent re-slicing when a setting is changed: rather than re-slice the entire model from scratch, Slic3r will only recalculate the parts of a model that are affected by the change. This can reduce slicing time when lots of changes are needed, but the fact remains that slicers like Cura are currently capable of faster slicing from the get-go.
Print Settings
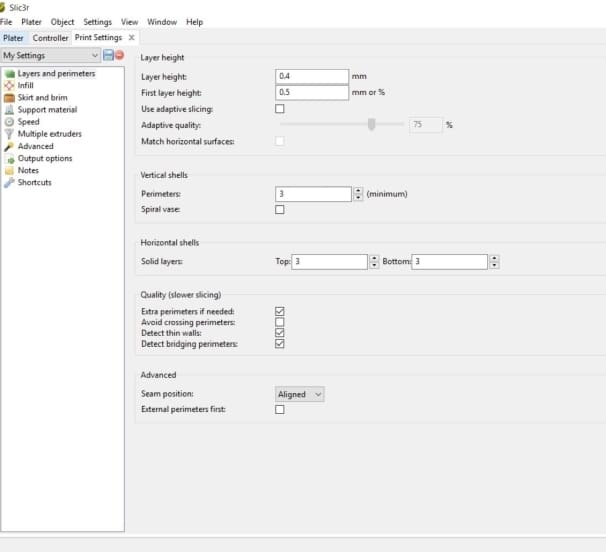
Under the tab “Print Settings” are many parameters that affect how various aspects of a print will be treated. Let’s take a closer look:
- Layers and perimeters: Here, one can set the exact layer height for the next print. The smaller the layer height, the better the print quality. However, the trade-off is a longer printing time. Perimeters are the boundaries of each layer. It can be a set value for all layers, or it can follow a more adaptive algorithm.
- Adaptive slicing: This is one of the strongest features of Slic3r, telling the printer to use a different value for layer height depending on the position of the layer. This is particularly useful in objects with curved surfaces, resulting in smoother prints.
- Skirt and brim: The skirt is a line printed around the model to “purge” the nozzle and make sure that filament is flowing through. Additionally, it can be used to make sure the bed is leveled and adhering properly. The brim setting creates an additional “pad” attached to the base of the print, which is useful to ensure that the object will stay stuck to the bed. This is especially important on objects with small surface areas on the print bed.
- Infill: Infill is the material inside the object. It acts as internal support to all surfaces and is normally added automatically by Slic3r. There are several infill patterns and settings to choose from, affecting, among other aspects, print speed, the finish of the object, and the final part strength.
- Support material: Supports are auto-generated structures that are used to support overhanging parts of the model during the print. They can be turned on or off from the Print Settings tab, and the real-time result can be observed in the Preview tab after clicking “Slice”.
- Speed: This group of parameters controls the speed of the toolhead depending on which part of the model is printed. Often it’s useful to adjust the speed of the extruder in order to micro-manage a complex part of a model. One of the more interesting features of Slic3r is “autospeed”, which adjusts the extrusion speed according to the other settings given by the user.
Filament Settings

A number of settings are related to the material you’re using. Apart from the basic parameters (e.g. diameter, color), one can also adjust temperatures, cooling, density of the filament, and its cost per unit weight. Sadly, these last two parameters are only used for statistical purposes. Slic3r notably lacks any estimates regarding the quantity and cost of material used.
- Temperature: The temperature settings for each filament are of great importance to the end result. The hot end temperature can determine the finish of a print (as it is often a range for each material), while the heated bed can affect print adhesion and warping.
- Cooling: Slic3r provides an auto-cooling algorithm that adjusts the speed of the fan based on the estimated printing time of the layer. The smaller the layer, the greater the fan speed and the slower the printing time. Users can partially influence this algorithm by setting the time thresholds.
- Additional settings: Some interface parameters can also be set for the extruder. These include retraction length and speed (helpful to reduce stringing/clogging) and Z-hop, among other things.

Printer Settings
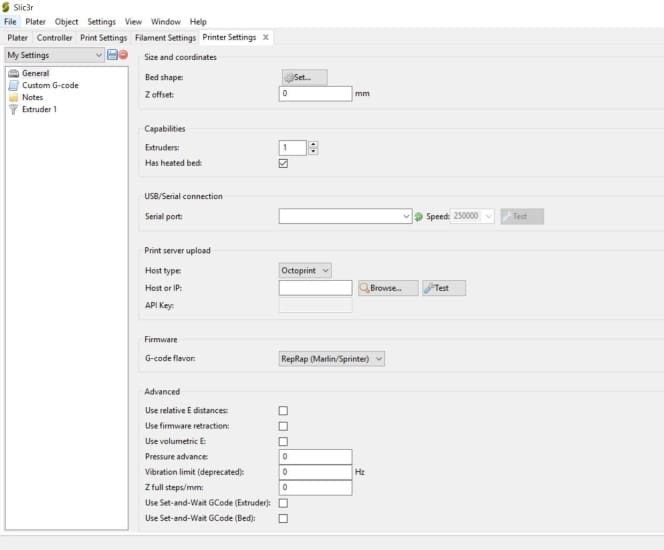
Probably some of the most advanced settings in Slic3r, these control printer-specific parameters. In essence, these are meant to act as a “bridge” between Slic3r and the firmware of the printer. Here can be found advanced calibration settings, such as the E values or the accurate calibration of the Z-axis.
- Extruders: Slic3r supports machines that use more than one extruder. Multiple extruders may be used to print different parts of a single model, different colors and materials, or different models entirely. Depending on each case, a combination of settings should be adjusted to tell Slic3r the relevant positioning of the extruders as well as the role of each extruder, among other things.
- Connectivity: In terms of connectivity, Slic3r allows the user to set up tethered printing via USB or serial port, as well as remote connectivity and cloud printing through systems like Octoprint or Duet.
More Advanced Features
The following features will be more useful as one gains experience with 3D printing and starts to seek more customizability from the slicing software:
- Command line: Slic3r enables a lot of actions to be executed through a command line with a syntax that resembles Unix-style environments. This is particularly useful when a user wishes to use it in a batch processing mode or when there’s no ability to use a GUI.
- G-code and SVG: Slic3r gives the option to extract an enriched version of the G-code with lots of comments, as well as to attach post-processing scripts to the produced G-Code. For printers that don’t rely on G-code, Slic3r can also export the printing instructions in an SVG format.
- Variable layer height: As explained earlier, this feature is one of the stronger points of Slic3r. It allows the program to automatically calculate a gradual adjustment of the layer height depending on the shape of the surface being printed.
- Modifier meshes: This is a powerful feature, where regions of a model may be defined and user-specified printing parameters can be applied uniquely in these regions. This allows different parts of a model to be printed with different settings, all in a single print.
- Conditional G-code: This feature allows a user to edit the standard G-code output and add “if” statements within the blocks of code. This, in turn, gives considerable power to the user to either add some external “logic” to the 3D printer or handle issues that might not be available in Slic3r. For example, a user might wish to add parameters to auto-level the bed or change the extruder temperature at a specific level.
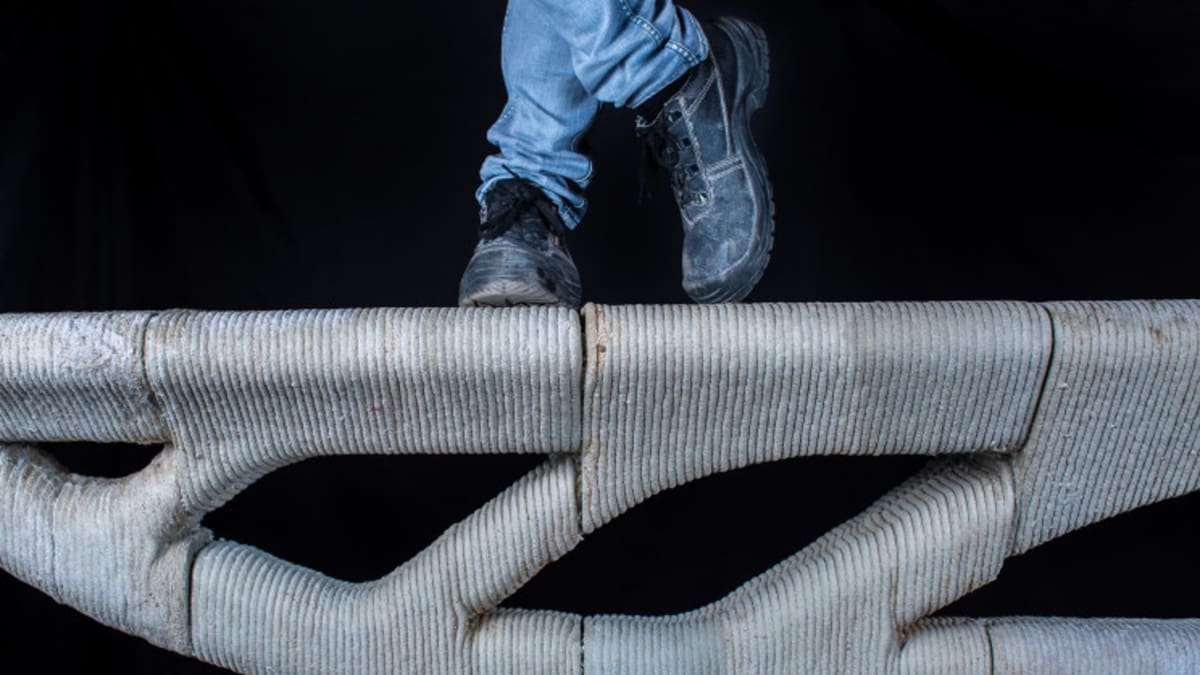
(Lead image source: Interesting Engineering)
License: The text of "What Is Slic3r? – Simply Explained" by All3DP is licensed under a Creative Commons Attribution 4.0 International License.