How to 3D Print Your Logo Using 3D Slash

You have a company logo in 2D created in a graphics software and want to turn it into a three-dimensional model for 3D printing? In this workshop you will learn how to do it in 3D Slash.
There are two ways you could turn a 2D image into a 3D model in 3D Slash: Use the 2D image to build the 3D model from scratch (the additive method) or sculpt the 3D model from a solid cube (the subtractive method that is typical for 3D Slash); in either case you use the 2D image as a starting point. In our workshop “3D Slash: How to Add Your Name in 3D to an Object“ my colleague Jonas Limburg demonstrated the additive method building a name from scratch.
For this workshop we use the sculptor’s method (or Minecraft method) as this is the way 3D Slash was designed.
Please note: The 3D logo will be 6.4cm wide – the jaggies you see on the images will be hardly noticeable in the 3D printed version.
Step 1: Create a cube and add the logo image in 3D Slash
-
Create a new model sized 64 x 64 x 64mm and switch to Expert mode.
-
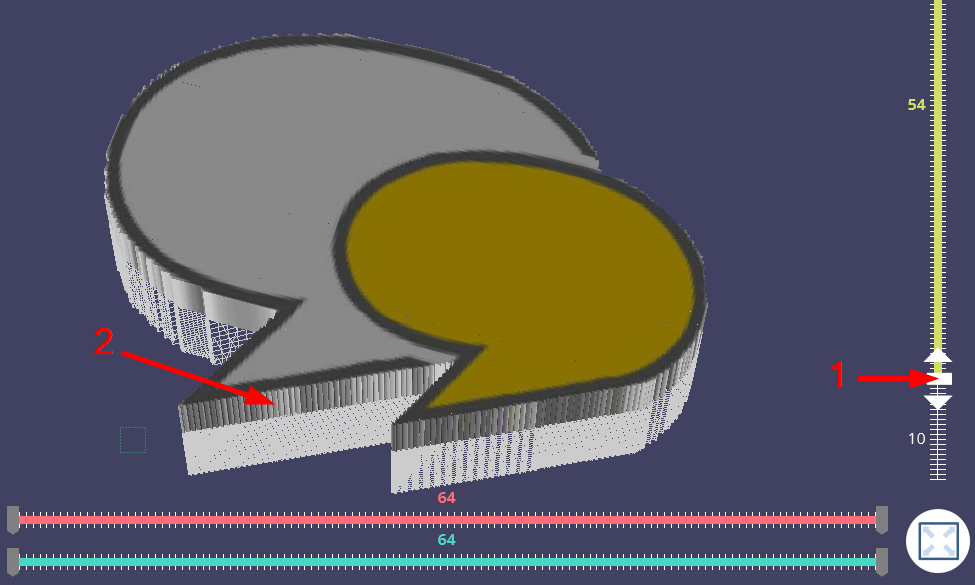
The logo will be 16mm high, so you have to remove the upper (or lower) 48mm of the cube: Use the Height ruler (1) to select the lower 16mm. Next, select the Drill tool (2) from the Tool menu and click the upper part of the the cube to remove it.
-
Then pull the slider on the Height ruler down to zero so the remaining cuboid is visible.
-
Click the Use pictures icon (3).
-
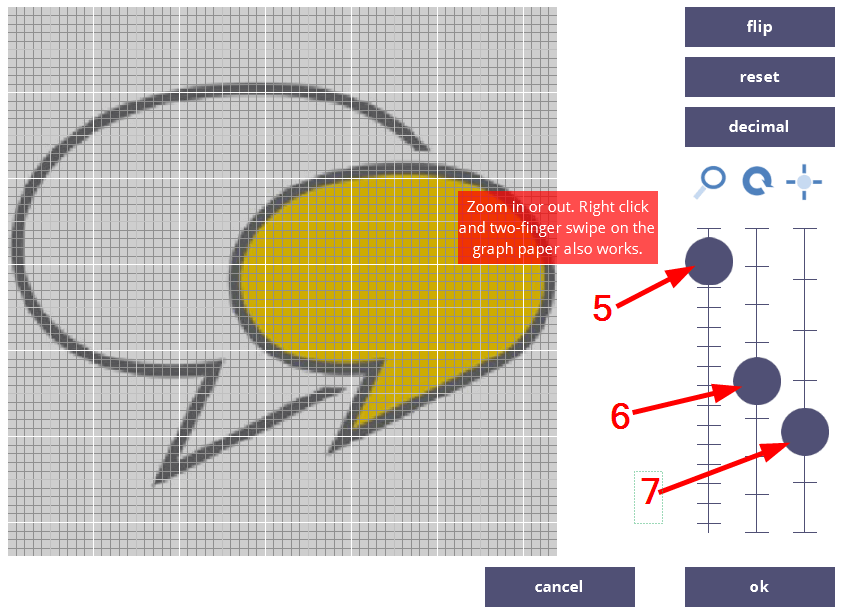
In order to place the image of the logo on the top of the cuboid, click the top-right Select picture icon (4).
-
Select Adjust.
-
Use the Zoom ruler (5) to enlarge or shrink the image; if necessary, drag the image around in the grey area to change its position.
Zoom the image in or out to adjust it to the size of the cuboid. -
You can also use the Rotate ruler (6) to turn the image, if needed. In case the image is too bright or too dark to use as a template, modify the brightness using the Brightness ruler (7).
-
Close the dialogs by clicking OK twice.
Step 2: Remove unwanted material
The creators of 3D Slash recommend you remove bigger parts of unwanted material (outside the logo) first before going deeper into detail. And that’s sound advice: We ran into problems when we tried to select the outline of our logo (using the Chisel tool) in a fine resolution (a working size of 1/4 or 1/8) and remove the material outside the logo (using the Drill tool) – 3D Slash stated that it could not handle that much detail, and crashed after three attemps.
-
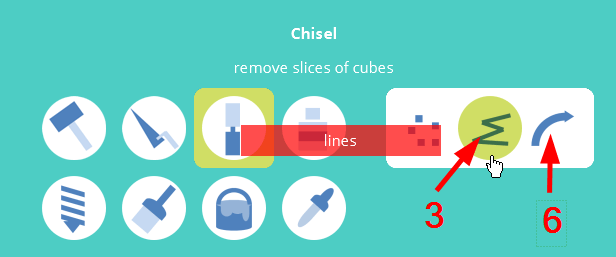
For that reason: Select the Chisel tool and a working size of 1 or 2 (1). Cut off big chunks of the cuboid (2).
-
Then use the Drill tool (3) and click on these chunks to remove them.
-
When the big chunks are removed, select a smaller working size of 1/8 or 1/4. Cut off smaller chunks using the Chisel and remove them using the Drill.
-
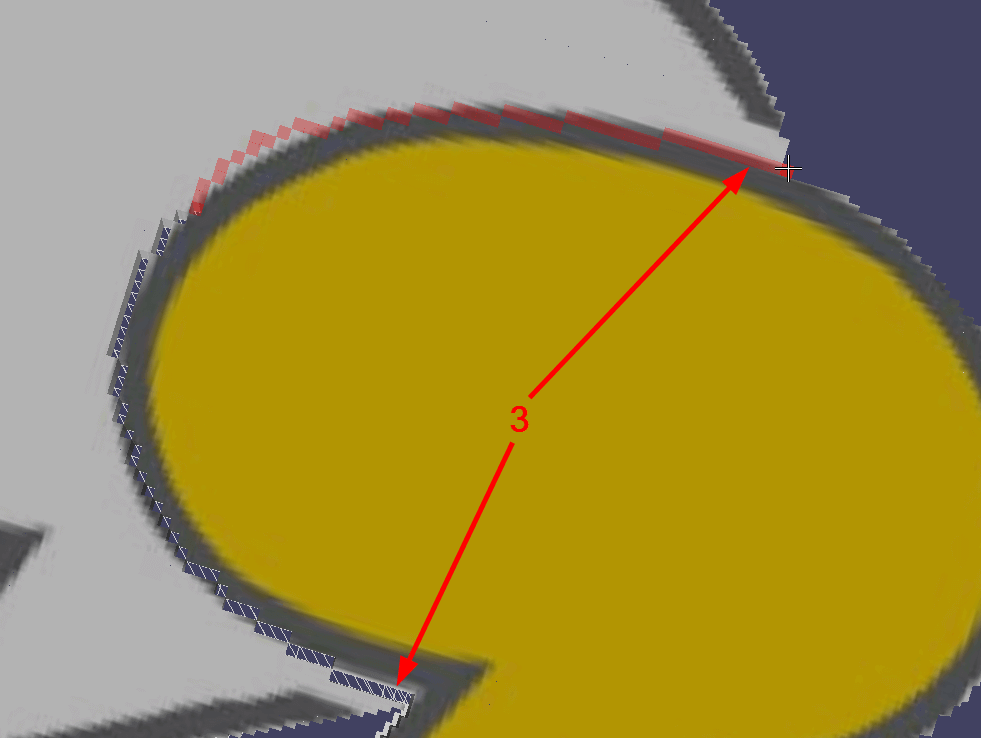
When your logo has straight lines, you may use the Lines option (3) of the Chisel to cut out parts following the contours of the logo (4). Make sure the cutouts go to the edges of the cuboid – then you can use the Drill to remove the parts between the lines (5).
Either select the Lines or the Curves option of the Chisel tool. -
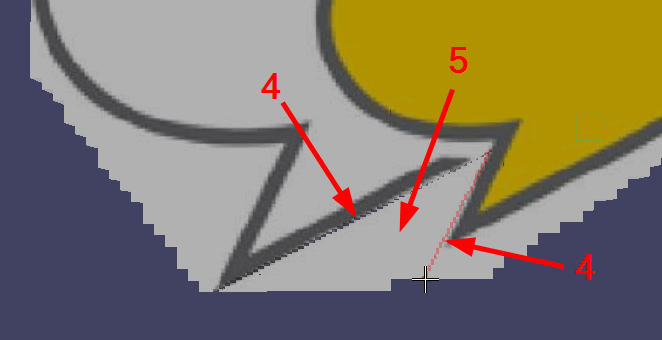
Make sure the cutout goes right to the edges – otherwise the Drill will remove the entire cuboid. For the round parts of the logo, select the Curves option (6) of the Chisel tool. Please note that curves (7) can only be created in a clockwise direction.
-
Now, refine the contours of the logo. It will take a while until most jaggies are removed – in the last step select the smallest working size. But don’t overdo it – you could spend hours refining the contours. It is less time-consuming when you print a more coarse model and remove the jaggies using files and sandpaper.
If you remove some parts accidentally, use the Undo feature or the Wood paste tool (7) that allows you to (re)builds slices of cubes.
Step 3: Add “color”
What’s distinctive about the logo in our example are the two different colors of the speech bubbles. If your 3D printer has two nozzles, you can print the bubbles in different colors (we’ll show in another lesson how to create a 2-color model of the logo in 3D Slash). If your printer can print only one color, one option to make the two bubbles visible is making one of the bubbles stand out.
Here is how you do that in in 3D Slash:
-
Use the Height ruler to select the lower 10mm (1) – this way, any action you apply to the logo from now on is only applied the upper part (2).
Use the Height ruler to confine further actions to the upper part of the model. -
No use the Chisel to cut out the part along the contour (3) of the yellow bubble.
Use the Chisel to cut out along the contours of the yellow bubble. -
Use the Drill to remove the upper part of the white bubble. This way, only the yellow bubble is visible (4) , plus – in wireframe (5) – the part of the white bubble below the 10mm limit.
In our example, there are also some leftovers (6) that we overlooked in Step 2. If there are leftovers in your model, use the Chisel to remove them.
Our model now looks like this:
License: The text of "How to 3D Print Your Logo Using 3D Slash" by All3DP is licensed under a Creative Commons Attribution 4.0 International License.