
3D Printed Stop Motion: How To Create the Perfect Faceset

3D printing is beginning to having a huge impact on animated film. Learn about the workflow of a 3D printed stop motion movie project.
3D printing is starting to having a huge impact on many businesses. When it comes to movies, it’s the animation sector and FX workshops that starts using 3D printing as a production tool, as we reported. Mostly printers are used for props (like in Star Wars VII). The other application for having a 3D printer in a workshop is stop motion.
We’ve talked to Francesco La Trofa, who runs the italian 3D software site Treddi.com. He showed us how he works with Turinbased Protocube to create awesome facesets for stop animation sequences.
3D Printed Stop Motion: The Basics
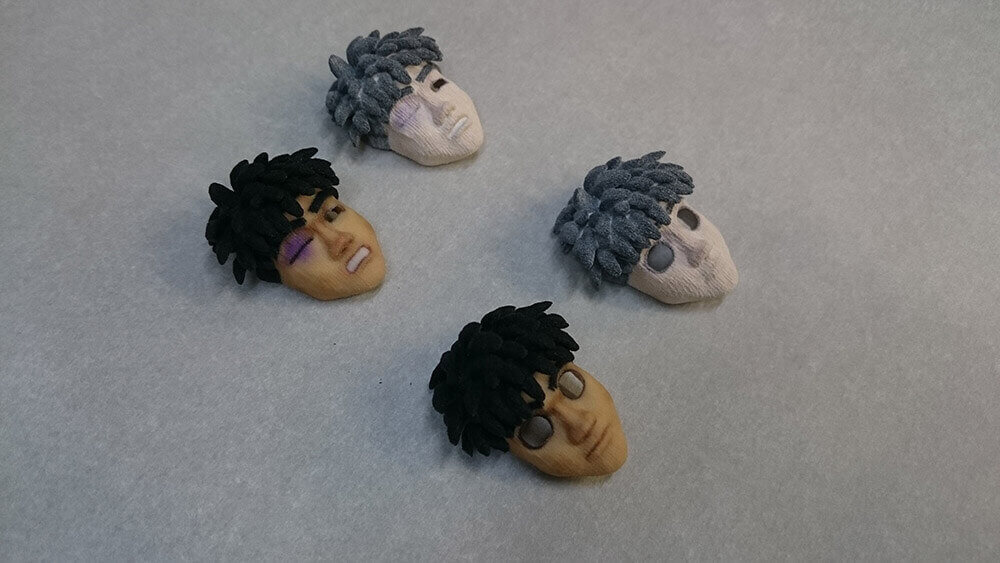
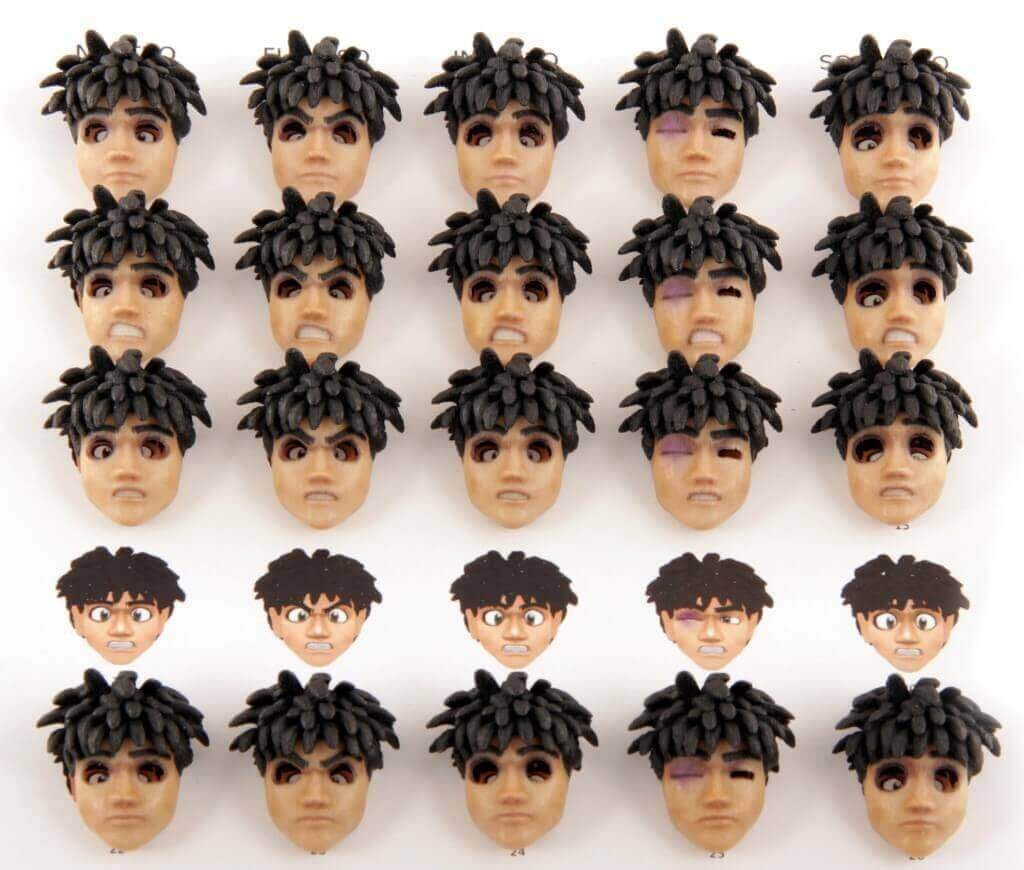
As stop motion animation is shot a frame at a time, each character needs to take hundreds of poses over time. Naturally, the facial expressions of the characters have to chance very often. Being able to 3D print hundreds of unique parts has contributed enormously to increasing the quality (and lowering the costs) of stop animation movies.
Developing innovation and 3D technology in areas that are generally very traditional is an ongoing challenge. It’s made more fascinating by the infinite expressive potential offered by the projects’ artistic dimension.
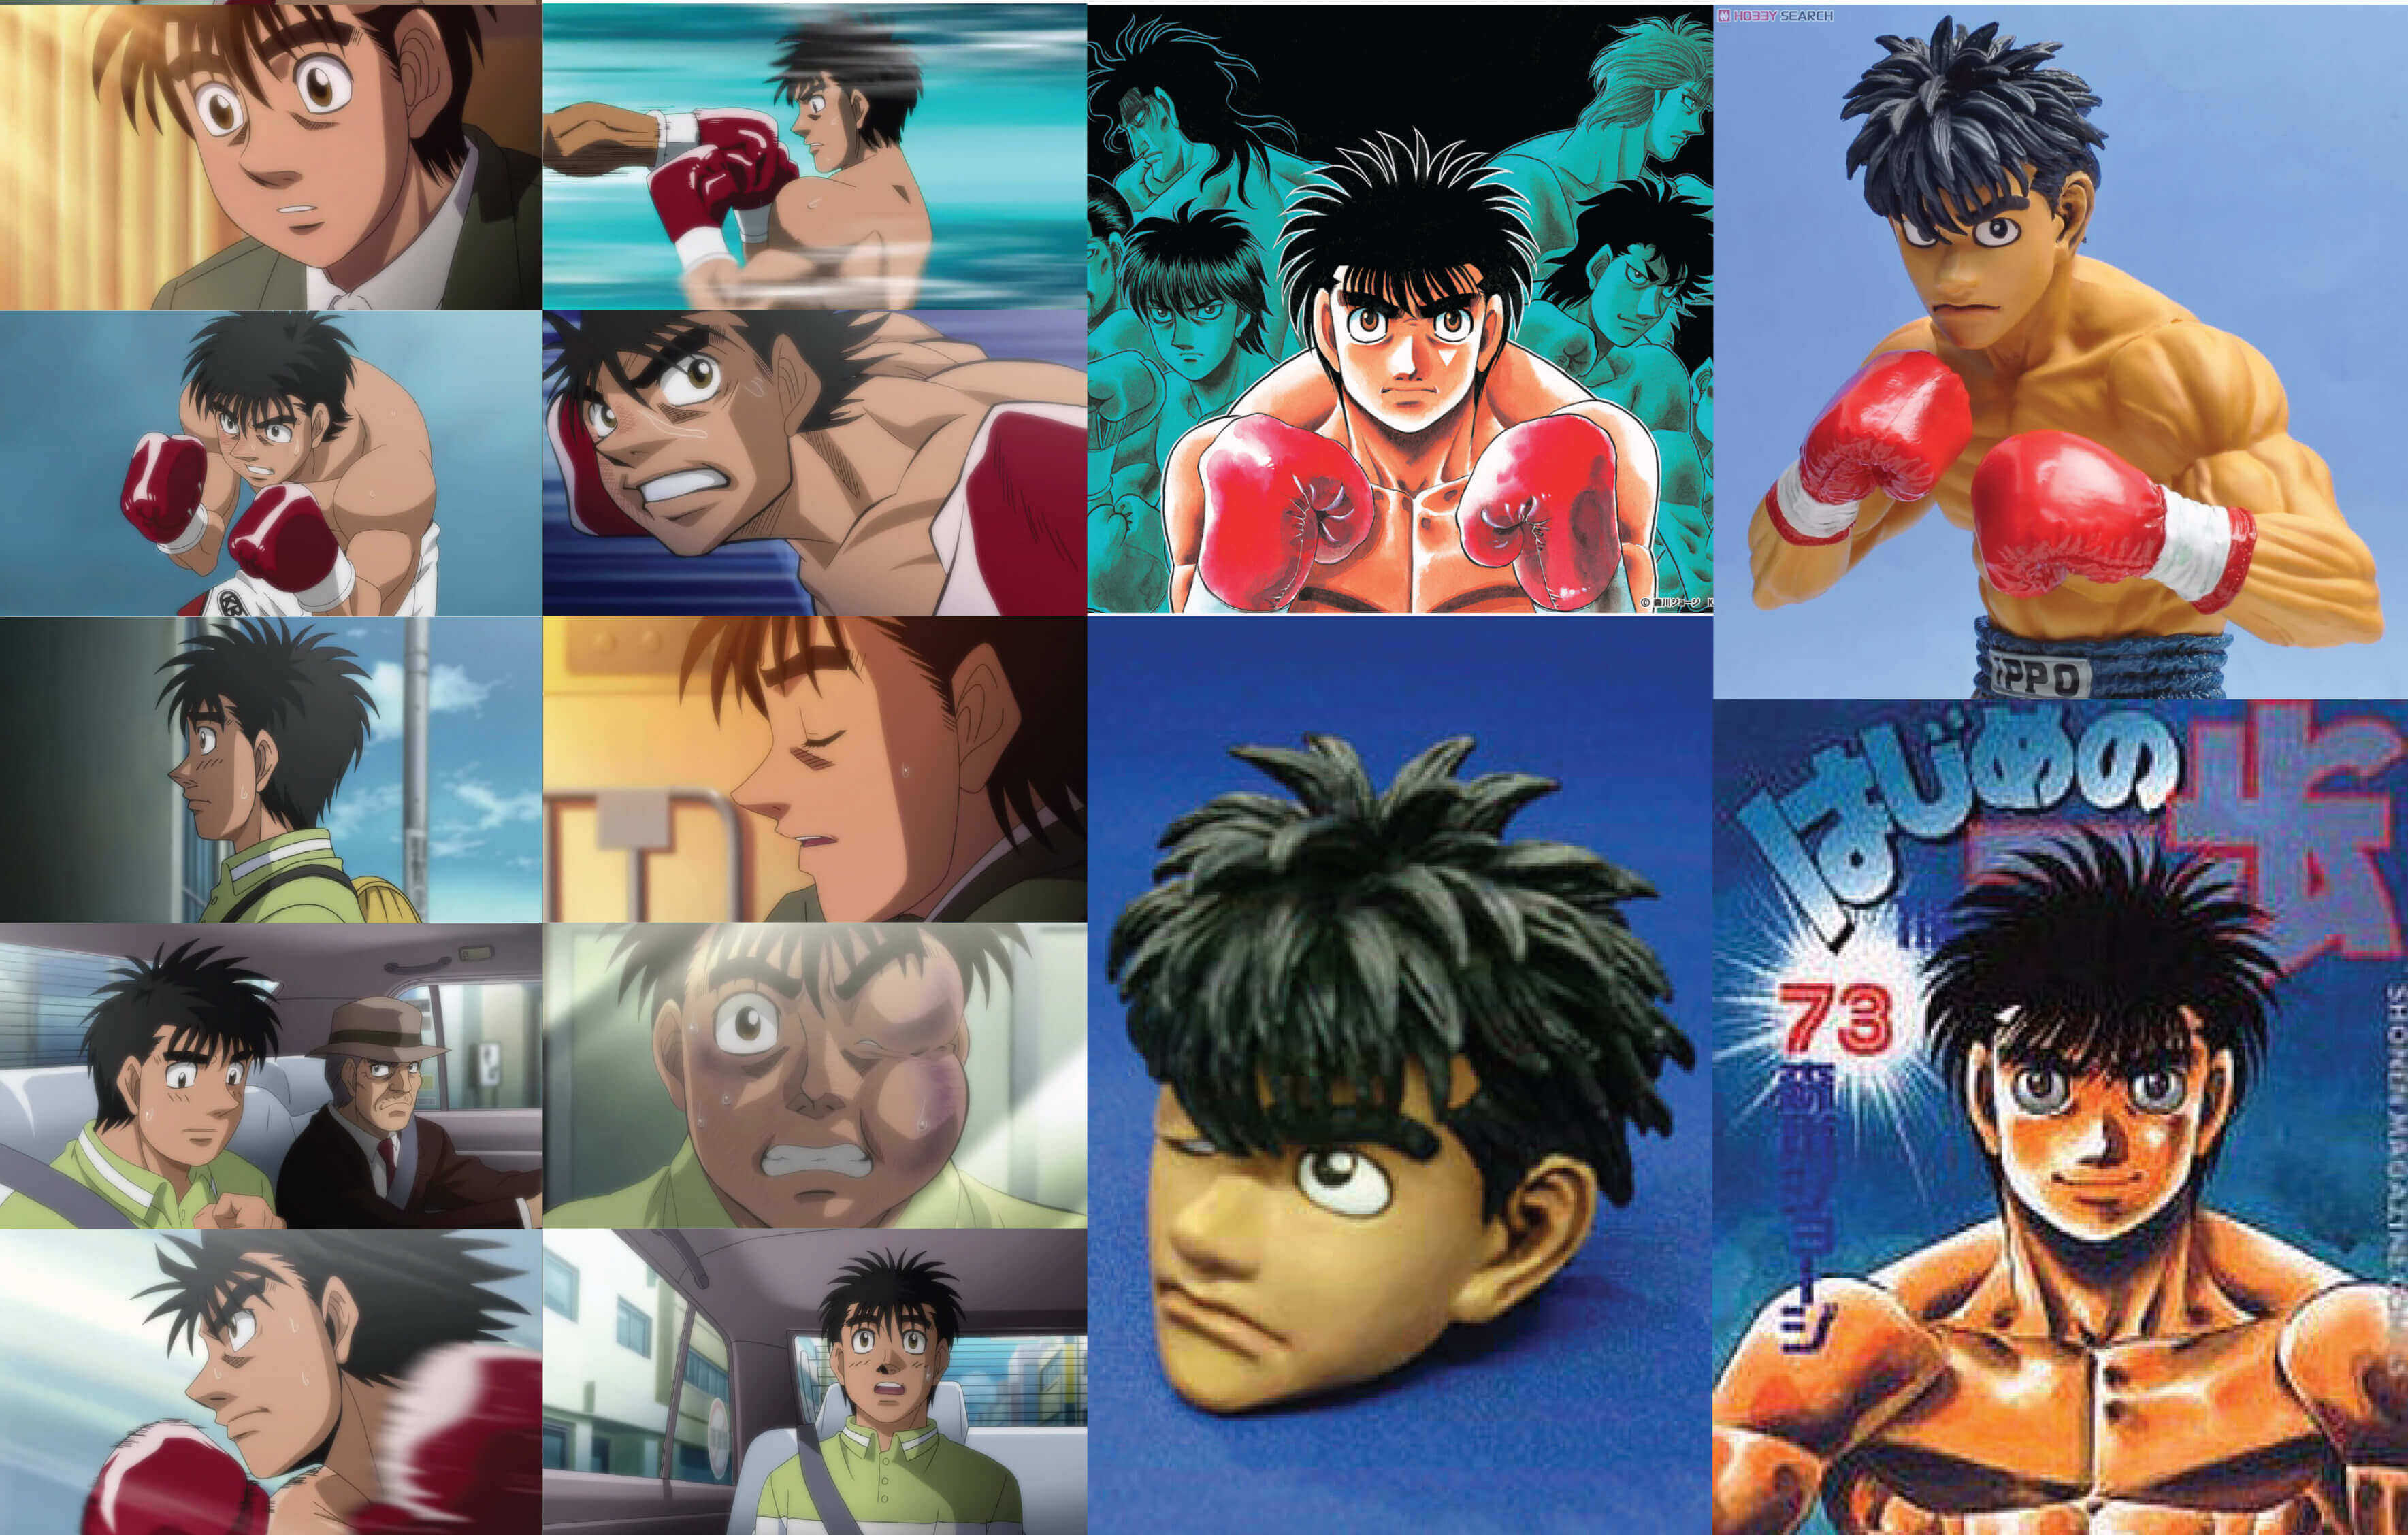
Movie masterpieces by Laika, such as Coraline, ParaNorman or the more recent The Boxtrolls, demonstrate that stop motion animation is more alive than ever. Thr artistic niche even withstood the wave of huge productions developed entirely in computer graphics.
3D Printed Stop Motion: The Workflows
Protocube has been innovating in this field for over ten years. They developed a specific workflow to ensure stop animators can rely on series of entirely 3D printed models.
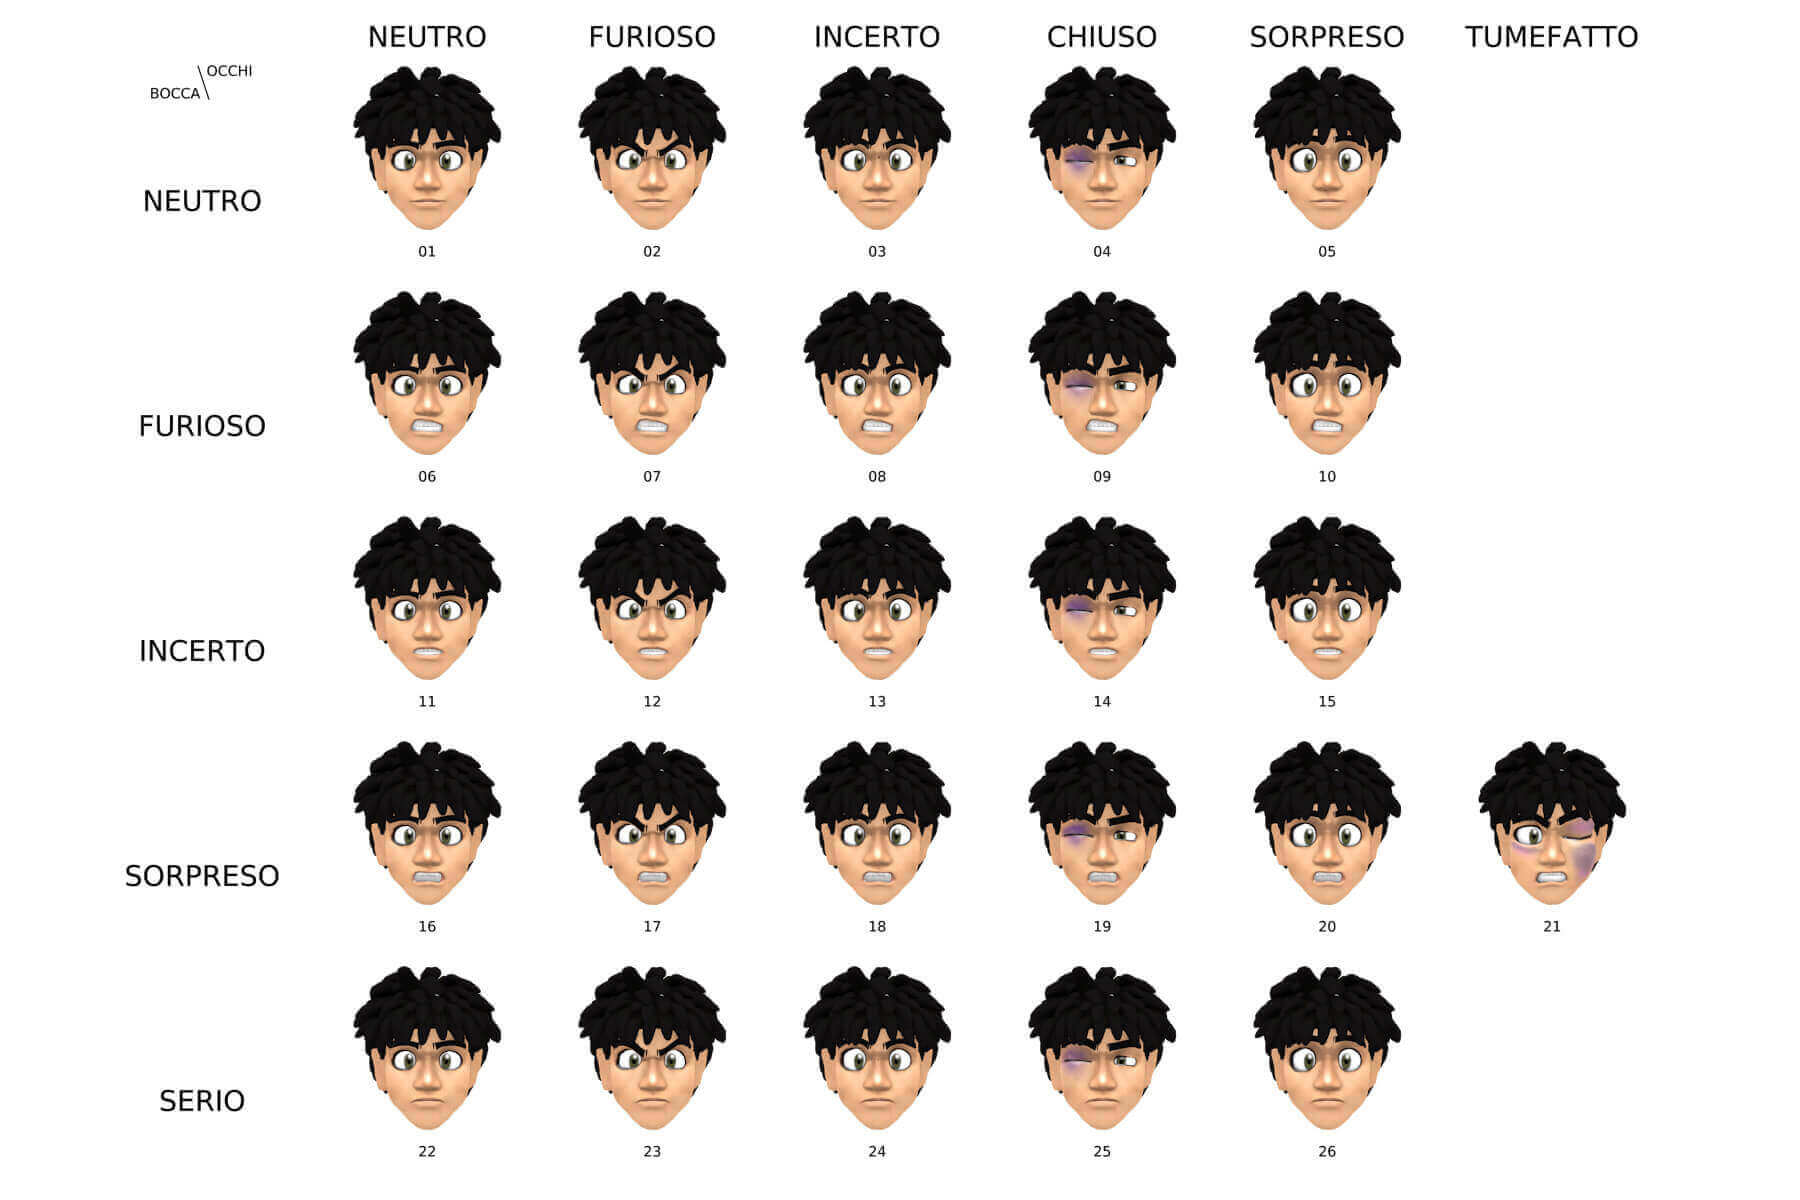
We will see in detail how to create the faceset that defines the facial expressions of the character, making its animation in any narrative context possible.
The structured workflow by Protocube is a rather complex procedure. It involves alternating creative and technical phases performed using many different 3D software. It is the result of a process of research and development that has enhanced the knowledge and know-how developed by the company in other areas.
1. Character Reference
In the faceset creation process, the phase of search and selection of the reference character is decisive, since it allows to clarify and define those characteristic traits that make a character recognizable. In the case of a character known to the public, one can not ignore the exact correspondence between the picture and its three-dimensional counterpart.
2. The Faceset Definition
A careful study of the reference and a consultation with the script’s art director can help define a matrix containing all conditions necessary for animation.
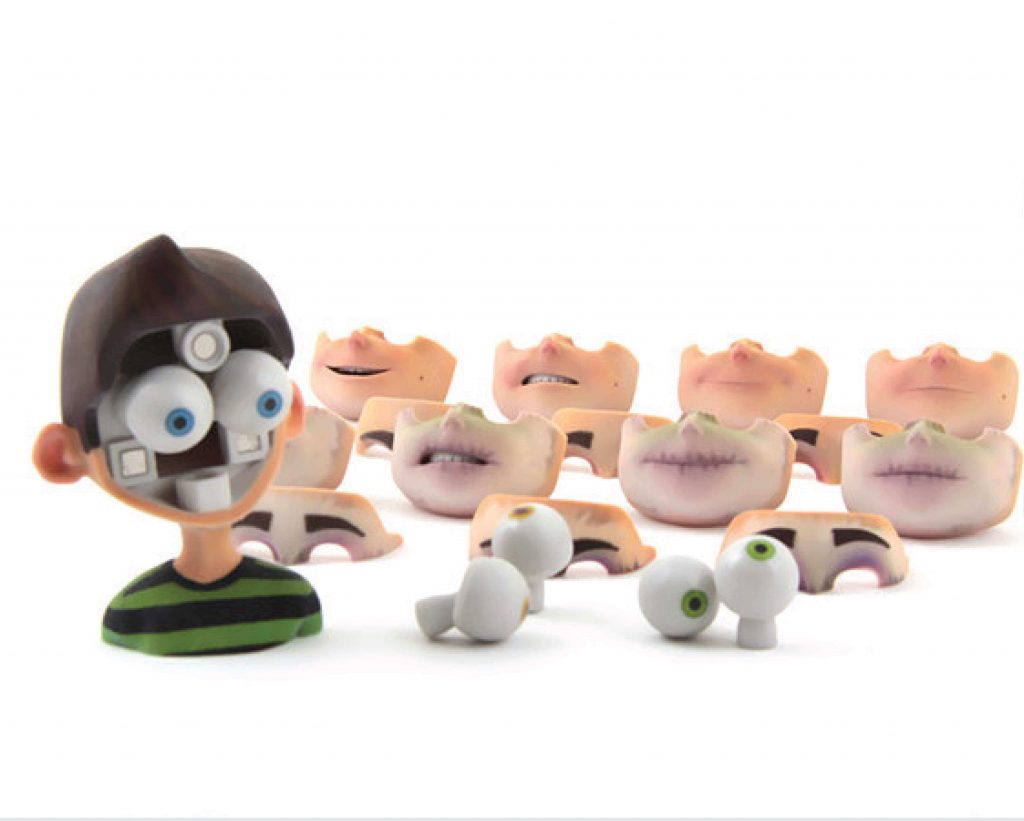
3. Designing A Modular System
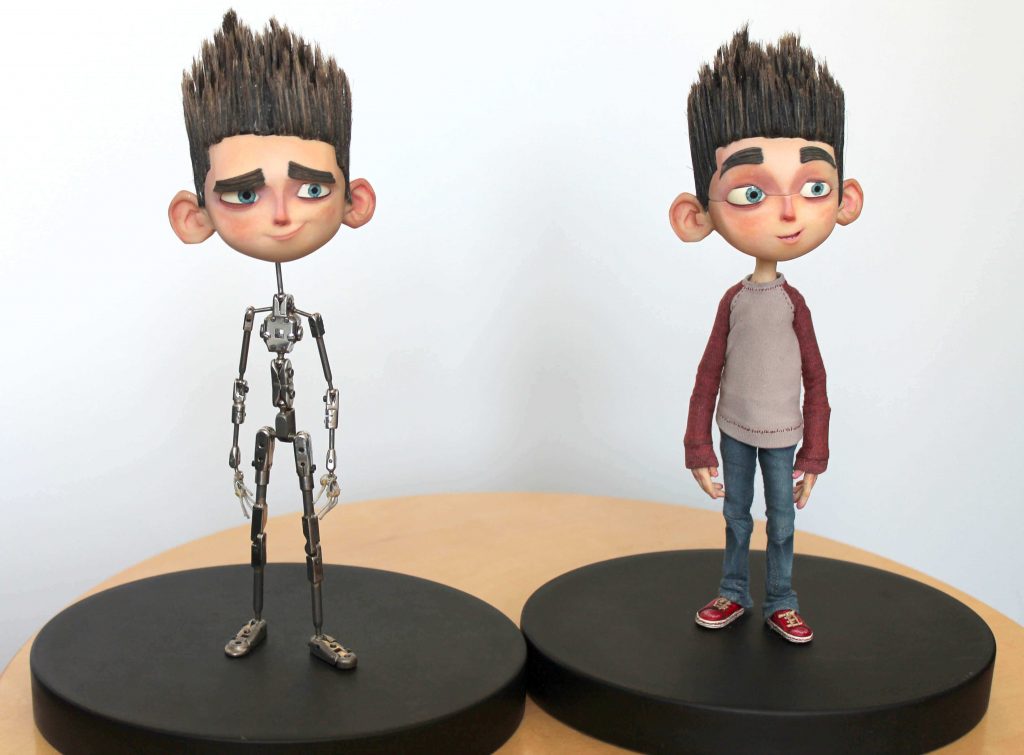
When defining the set for shooting, the character’s head is usually mounted on a skeleton while the clothing is molded manually.
This distinction is useful to clarify the main benefit from 3D printing for faceset manufacturing. While the body substantially does not change, the face is affected by such a quantity of variations that it would require a very lengthy and expensive procedure using traditional modeling techniques. With limitations on the number of expressions available.
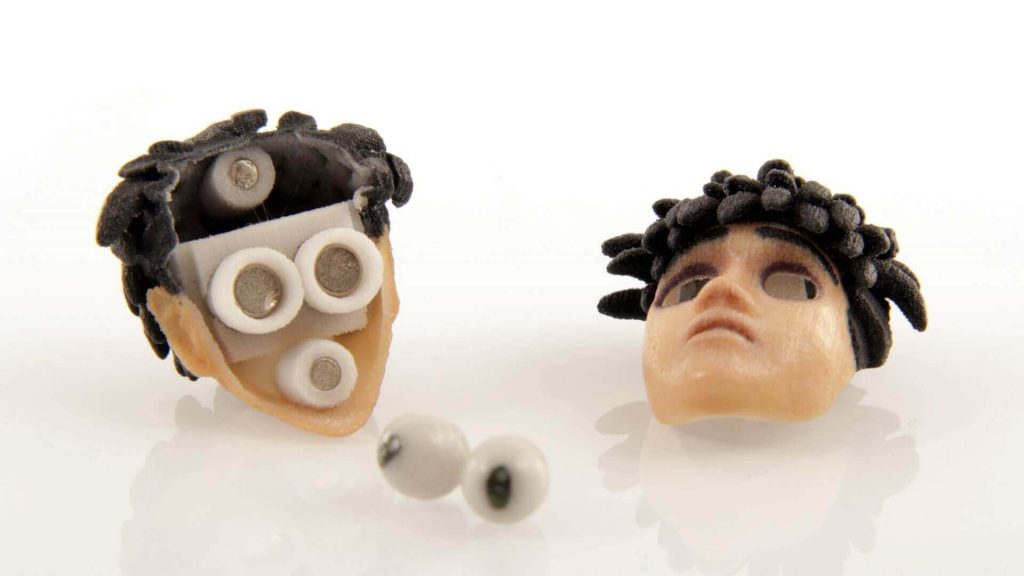
Protocube has implemented a system split into three parts, based on the specific requirements provided by the animators:
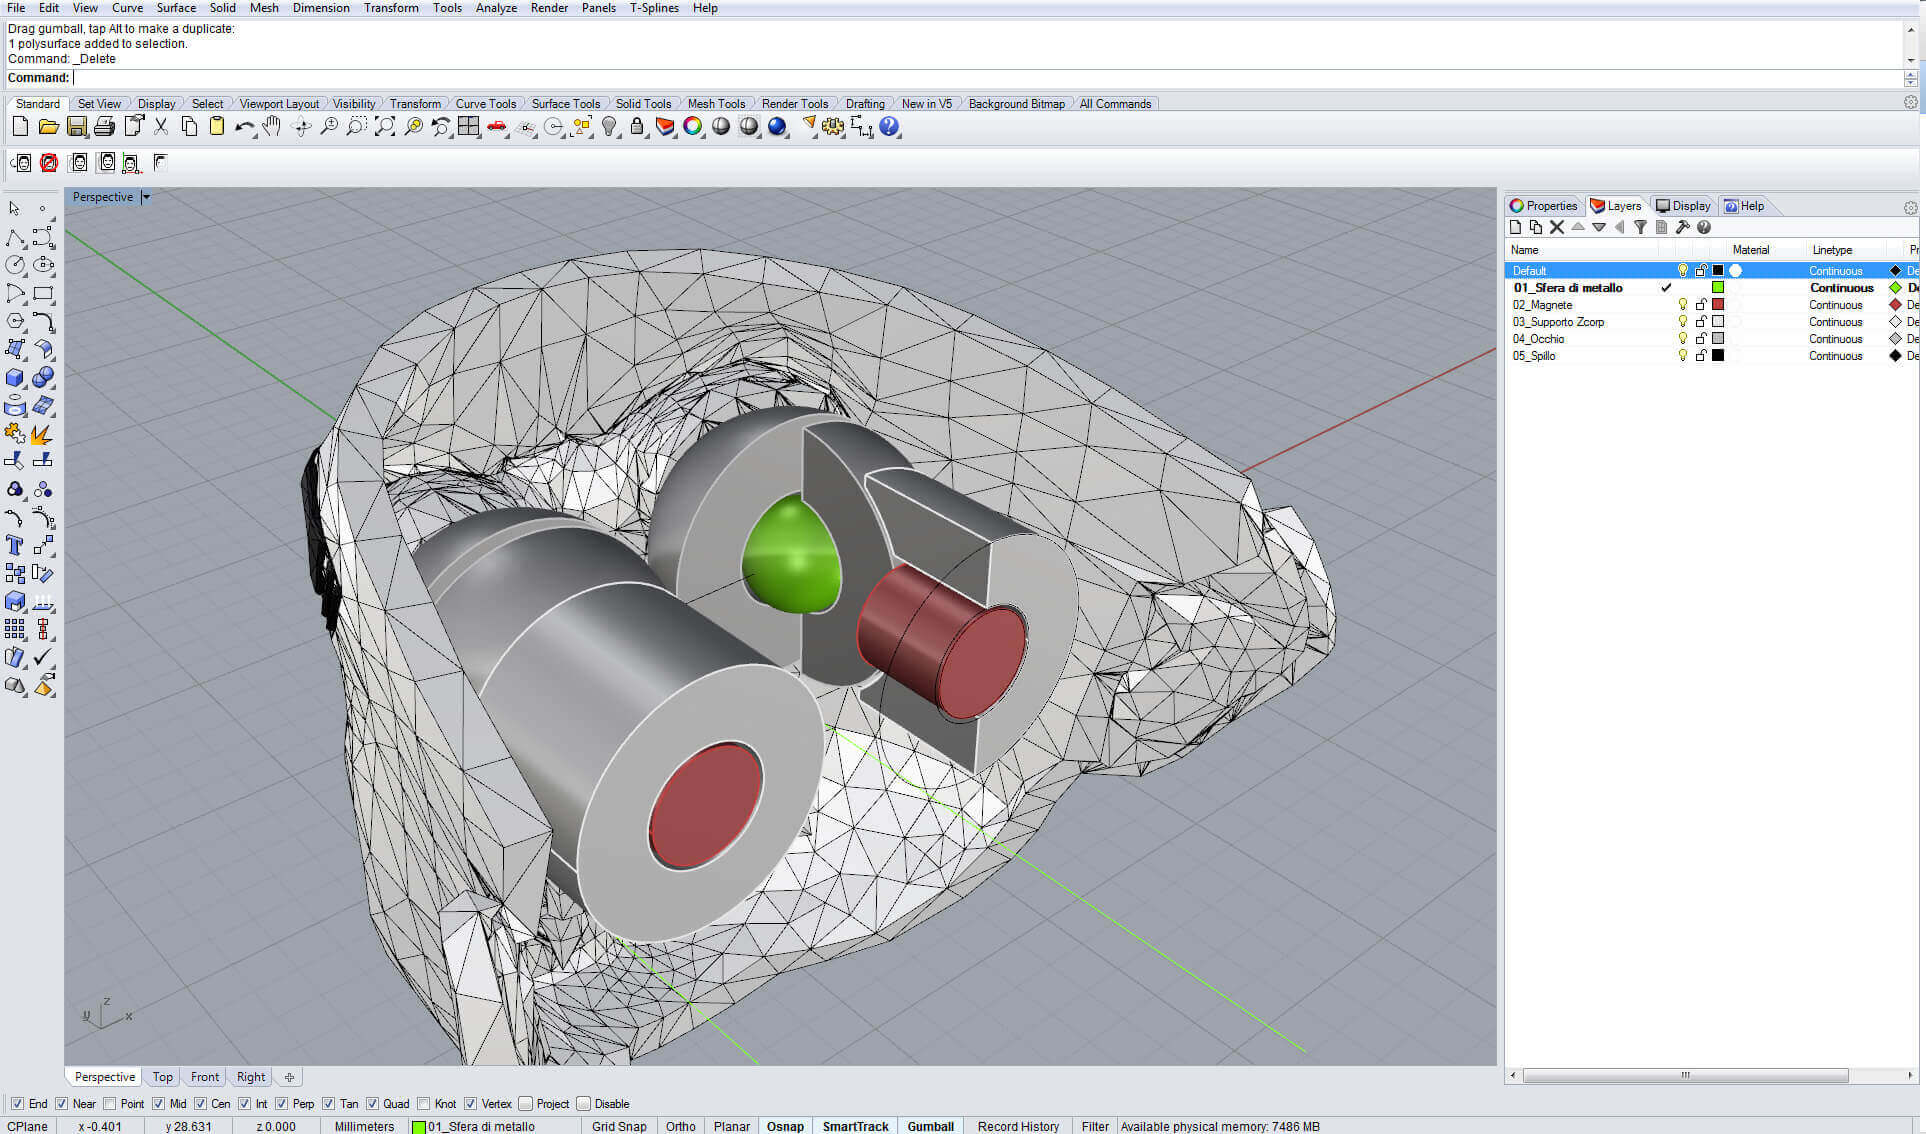
- 1. Head, equipped with supports for moving parts, with or without the bust.
- 2. Eyes, based on a quick release system of magnets embedded into the head.
- 3. Face. articulated in one or more parts, to optimize the number of pieces on the basis of the variety and complexity of the expressions of the character.
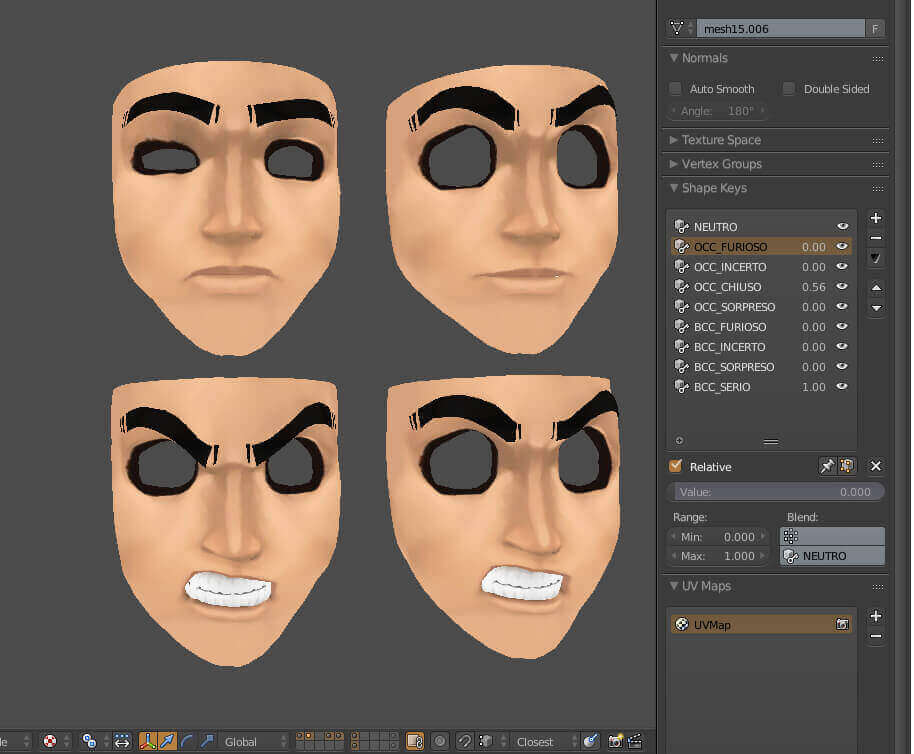
4. Modeling and UV Texturing in Blender
All phases of modeling are implemented in Blender, a popular open source 3D modeling solution. The software is finding an increasingly widespread use in 3D printing specific applications. The model includes all the structural and aesthetic components of the head. The need to manage a large number of variations on a common basis is addressed through the use of Blender “shape keys”.
UV’s and model texturing was also managed through Blender and later exported into Rhinoceros.
All phases of creation are accompanied by careful monitoring of the coherence between the model and the original reference.

5. Finishing Surfaces in Rhino
The model defined in Blender is exported in VRML format, then imported into Rhinoceros. The definition of the cuts requires very close attention both in anticipation of the 3D printing process and for management of the parts during the subsequent animation phase.
Thanks to its surfaces management tools, Rhino was used for definition of the borders and for thickness optimization for all the surfaces to be 3D printed.
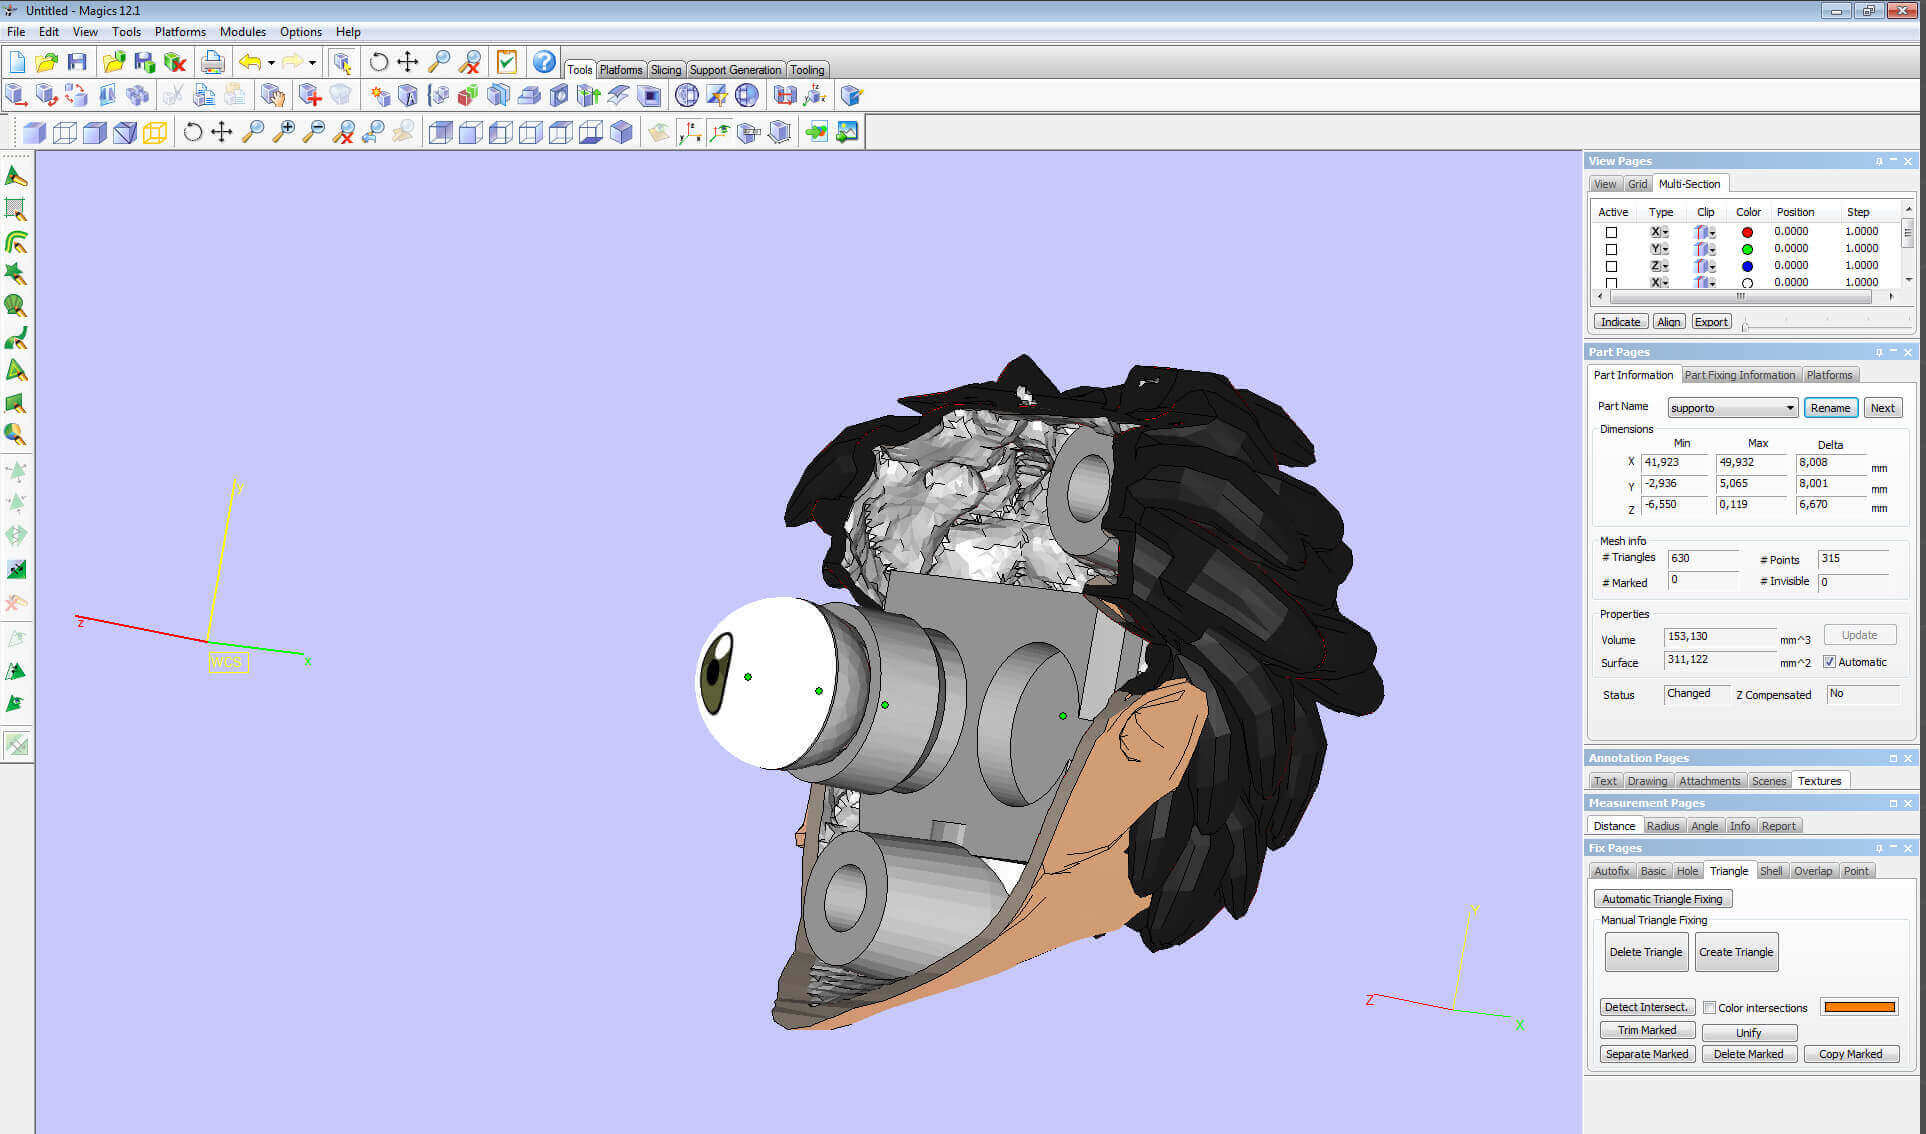
6. Optimizing with Materialise Magics
The last operation before sending the data on to the 3D printer is the optimization of the mathematics involved.
There are many software that can perform this kind of operation. Beyond commercial alternatives, there is a wide range of requirements, depending on the characteristics and complexity of each project.
The choice fell on Materialise Magics.
The tolerance control and general geometry verification lets you work with absolute precision, avoiding the unpleasant surprises that would jeopardize compliance with very tight delivery deadlines.
Magics is a very good solution for a wide range of situations and has been used by Protocube to handle even highly complex projects, in several production areas.
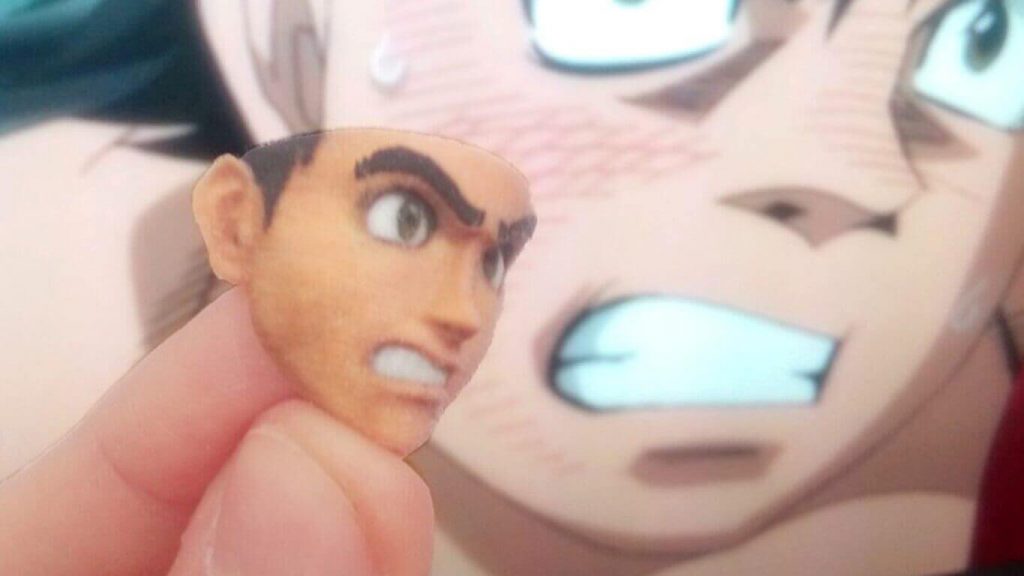
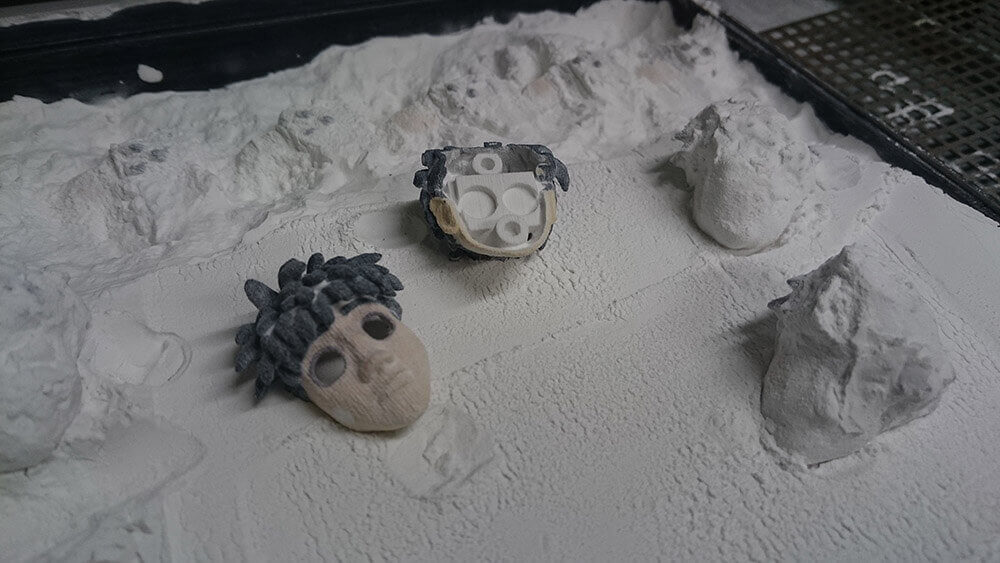
7. 3D Printing and Final Assembly
In relation to the size, finish and number of parts to be printed (between 50 and 100 pieces, depending on the project), Protocube chose to use an in-houser ZPrinter 650 full color 3D printer by 3D Systems.
This sandstone based, binder jetting technology is the same used to produce Mini-me figures. The full color piece only needs to be perfected through basic post-production procedures.
During the final assembly phase the magnets are set and one last decisive verification of aesthetic coherence is carried out.
Glossary
STOP MOTION ANIMATION – technique of filming a series of frames of an object produced one at a time and then assembled in sequence to create an animation.
PUPPET ANIMATION – animation technique involving puppets, marionettes, puppets, toys, paper dolls, models, made from a specific set of recovery.
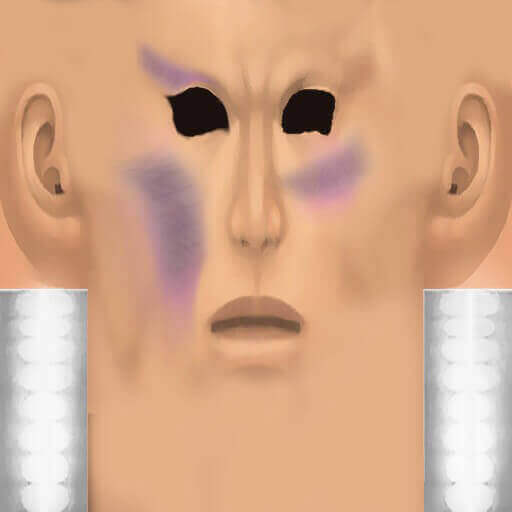
FACESET – set of facial expressions of the characters, that match his mood.
License: The text of "3D Printed Stop Motion: How To Create the Perfect Faceset" by All3DP is licensed under a Creative Commons Attribution 4.0 International License.