3D Printer “Printtable” Made From IKEA LACK Tables

In the wild and wonderful land of tinkering there are constant surprises – here‘s a working 3D printer made from IKEA lack tables.
Just when you think you’ve seen it all, new and seriously cool new things surface. At All3DP, we’ve seen 3D printers made from used 80’s PCs tower cases, an industrial robot 3D printing… but this IKEA hack is really something special.
If you already heard the story and are just interested building an IKEA Lack table 3D printer, please jump here.
First, a working prototype of the 3D printer surfaced on the 3D Hubs forum just some weeks ago. It was made by 3D Hubs user Wayne from Northampton in the UK. Wayne used two old IKEA “Lack” tables (around $10 each, depending on which country you live in) as a case to add the 3D printer components.
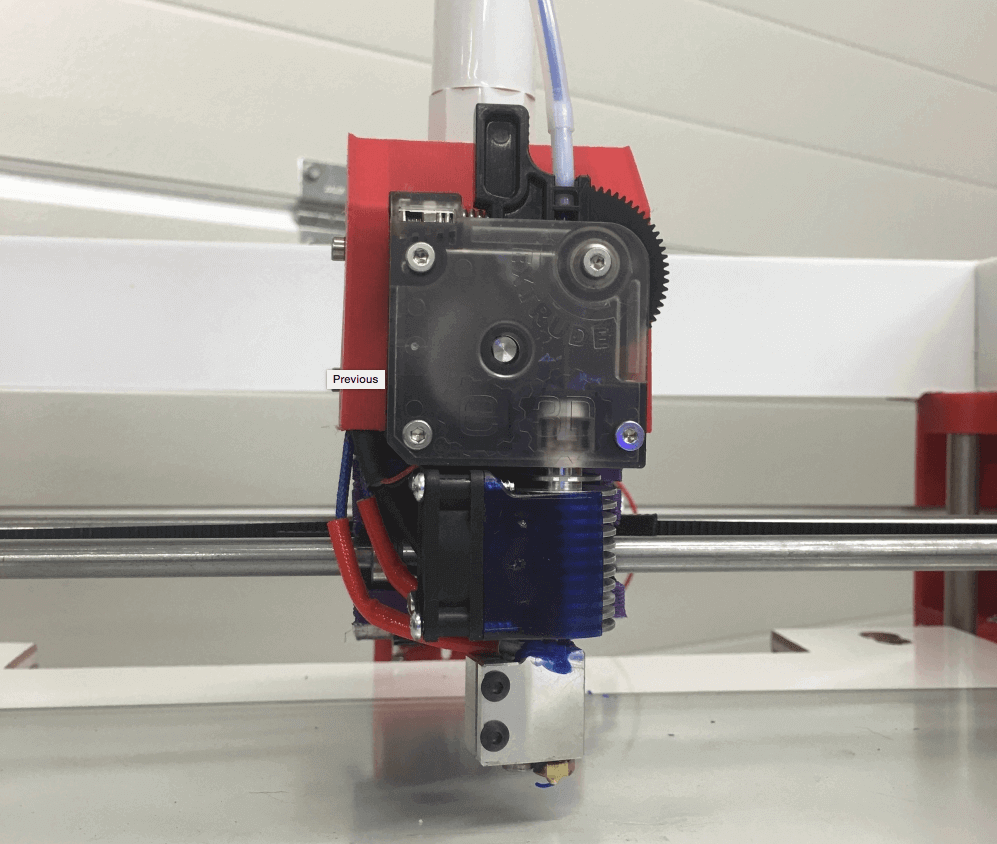
In the first videos you could see the filament spool mounted under the first table, which helped to stabilize the movement of the DIY 3D printer. On the upper “platform” was the real 3D printer. Besides the obvious stepper motors, rods and build plate, Wayne used a E3D V6 volcano and titan extruder, MKS SBase controller and MKS TFT using Smoothieware.
Wayne stated that you’d “be surprised how sturdy this machine is and yet lightweight”. The build of the 3D printer is 340 mm x 310 mm x 300 mm – which is quite big. According to Wayne this was “just the beginning for a cheap large format printer”.

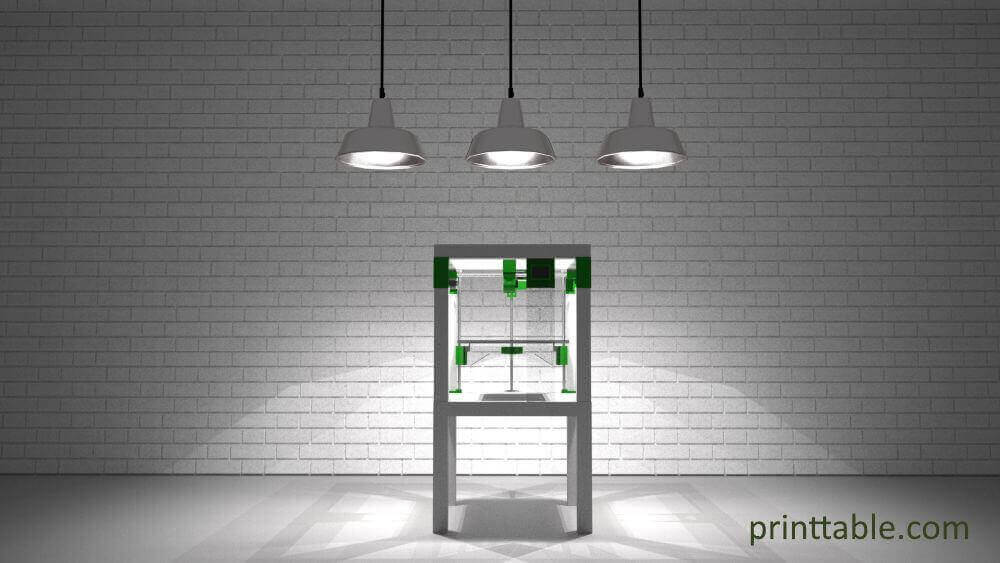
Which brings us to the second iteration. The new model, now properly named “Printtable”, managed to 3D print a rough Marvin keychain (a symbol of the 3D printing movement) in under 4 minutes and a detail 0.1 resolution in 40 minutes using a volcano hot end with 0.6 nozzle.
In the last weeks, the “Printtable” (left) has significantly iterated. It now consists of a cube with an attached filament spool (but you can still put it on a Lack table, if you happen to have a spare.

How To Build The IKEA 3D Printer
If you think the price for this IKEA 3D printer is just $9.99 for the Lack table, you should consider twice. All in all, you’ll pay around $400 for the parts, then there’s the time you’ll spend on building the 3D printer. That’s not exactly cheap, but if you consider a Makerbot Replicator Z18 has roughly the same measurements (30 x 30.5 x 45.7 centimeters) and will set you back $6,500, it’s still a steal – and quite some fun to build.
1. IKEA 3D Printer: The Shopping List
Here’s the ”shopping list” for the parts of the printer. If you know what you’re doing, you can replace the parts with cheaper ones.
- 1 x MKS SBase (Smoothieware Compatible)
- 2 x IKEA LACK tables in your choice of color and finish
- 1 x MKS TFT 28 Touchscreen
- 1 x 150cm IDC Ribbon Cable (ribbon supplied with touchscreen is not long enough)
- 1 x Power Supply (this model uses a 12v 10a 120w) Note ***Upgrade to have Mains voltage heated bed***
- 3 x Stepper Motors Nema 17 (X-Axis, Y-Axis and Extruder)
- 1 x Stepper Motor Nema 23 (Z-Axis)
- 1 x 10mm All Thread 420mm (Z-Axis Lead Screw)
- 1 x Acetal Block 50mm x 30mm x 25mm (lead screw nut and bed fixing)
- 1 x Flexible coupler 6mm/10mm shaft bores (Z-Motor to lead screw connection)
- 2 x 12mm Stainless Steel Rod 500mm (Z-Axis Rods)
- 4 x 8mm Stainless Steel Rod 520mm (Y-Axis Rods)
- 2 x 8mm Stainless Steel Rod ? mm (X-Axis Rods)
- 1x 8mm Stainless Steel or Aluminium Rod (Y-Axis Drive Rod)
- 2 x 6000 series zz Bearing 8mm Bore (Y-Axis Drive Rod)
- 6 x F62322 Flange Metal Double Shielded Ball Bearings ( 4 x for Y-Axis GT2 Belt) (2 x X-Axis GT2 Belt)
- 3 x Small washers/Spacers (for F62322 Flange Bearings above)
- 8 x LM8UU Linear Bearings 24mm
- 2 x LM8UU Linear Bearing 45 mm
- 4 x LM12UU Linear Bearings 30mm
- 3 x End stops (Mechanical limit switches)
- E3D Titan Extruder
- E3D V6 Hot End Complete with 0.6 or 0.4 nozzle and volcano heat block and cooling shroud/fans
- 1 x 40mm x 40mm x10mm fan (For part Cooling)
- 3 x springs for Build plate
- 2x 20 tooth GT2 (6mm Belt) Pulley wheel to it directly to Nema 17 (X-Axis and Y Axis Stepper Motors))
- 2 x 20 tooth GT2 (6mm Belt) Pulley wheels 8mm center bore (Y-Axis Drive Rod)
- 1 x 36 tooth GT2 (6mm Belt) Pulley Wheel 8mm bore (Y-Axis Drive Rod)
- 2 meters of GT2 6mm Belt
- 1 Closed loop 160 GT2 Belt
- 1 x 6mm Polycarbonate Sheet approx. ………. (Bed supports and front screen mounting)
- 1 x 1mtr 20mm flexible conduit
- 1 x 1mtr 20mm conduit
- 2 x 20mm conduit saddles
- 1 x 20mm conduit female connector
- 1 x 20mm flexible conduit adaptor
- 1 x 1.5 meters PTFE tube (for smooth filament guide from reel to extruder)
- 1 x Drag Chain
- Sundries
- Selection of M3, M4 ,M5 Bolts
- Electrical wires and screws
2. IKEA 3D Printer: Print Some Parts
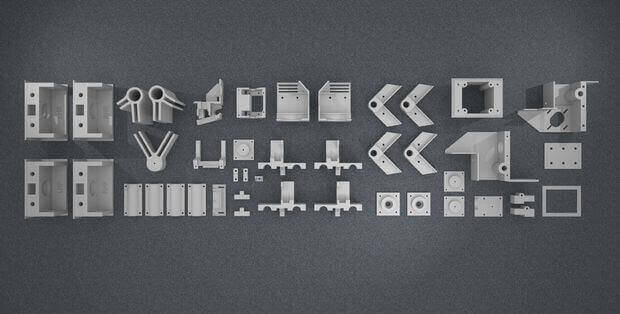
Next, you need to download and 3D print some parts for your Printtable. If you don’t know someone who can help you out, you should take a look at 3D Hubs or consider having the parts printed by a professional 3D printing service (best price here).
3. IKEA 3D Printer: Time to Enter Your Workshop!
After this, the real fun starts. Fortunately, there‘s a very good video documentation on how to build the Printtable and also an in-depth Instructible. Here’s the first of the 17-part video:
If you’re an experienced builder, you should consider 10-30 hours until the printer’s up and running. And if you’ve built one, please send us some photos for publishing at All3DP!
License: The text of "3D Printer “Printtable” Made From IKEA LACK Tables" by All3DP is licensed under a Creative Commons Attribution 4.0 International License.