3D Printing Experiments: Adding Water, Sand, and Metal

The team over at Makefast Workshop did several experiments by adding materials such as sand, water and metal into their 3D prints.
The people over at Makefast Workshop are always eager to try out new things. So they experimented on ways to incorporate different materials such as sand, metal parts and even liquids into 3D prints. To do this, they paused a print halfway through and added the preferred material. But this wasn’t quite as easy as it sounds.
Makefast’s main aim was to find ways to make prints more complex. They wanted greater strength, consistency, and cost savings. A great way to do this was by using things you can get at a hardware store.
Although one of the best things about maker-style 3D printers is the easy access to the print bed and the ability to incorporate parts, Makefast offers an important warning. They wrote: ”There are hot elements, electronics, and rapidly moving parts, so BE CAREFUL.”
The three experiments below include printing with a range of unusual materials and offer some pretty useful ideas for your future prints.
3D Printing Experiment: Adding Water inside a Printed Object
The first experiment involved making a can chiller by mixing salt and water. There were a few issues to tackle here. They point out: “Spilling liquid on a 3D printer can toast it, so it’s a good idea to take some precautions. Have some paper towels handy.”
It was very important that this print didn’t leak and was also strong. To make sure they didn’t break their printer, they used a squeeze bottle to add the liquid in a controlled manner. They suggest leaving room around the top of a print to avoid any water sloshing and splashing overboard. Leaking and bad temperature choices are also a consideration.
If the water is too cold the print may delaminate or come off completely. As for leaks, they said: “We experienced 3-4 pinhole leaks with our test print. We patched them with hot glue, and it seems to be holding well enough to put in the freezer and give it a try.”
If you’re tempted to have a go at printing your own can chiller, check out the Makefast files on Thingiverse.

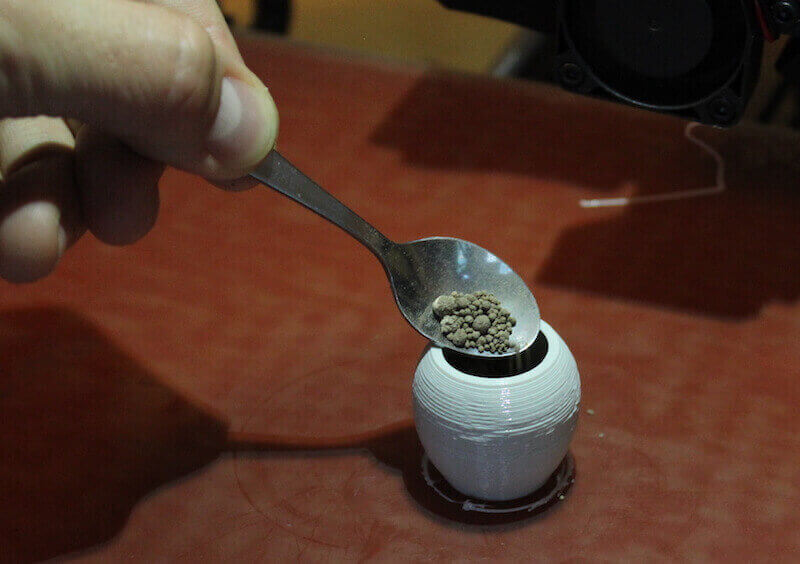
3D Printing Experiment: Adding Sand
If you want a cheap way to add some heft to your objects, sand is a good choice – it’s also very easy to come across.
For this experiment, the Makefast team filled an oval with sand. They found it was important to preheat the sand to get the right results but once they did this, they managed to produce a maraca.
They wrote: “Not only can it be used to make noise, like in the rattle we printed, but it can also serve as a simple way to weight the bottom of otherwise lightweight objects (like a pencil holder or bowl).”
The process was similar to one that produced the liquid-filled can chiller: Simply print up to a certain height, pause the printer. Then add the sand required and resume printing.
You can find the files for the maraca filled with sand on Thingiverse.
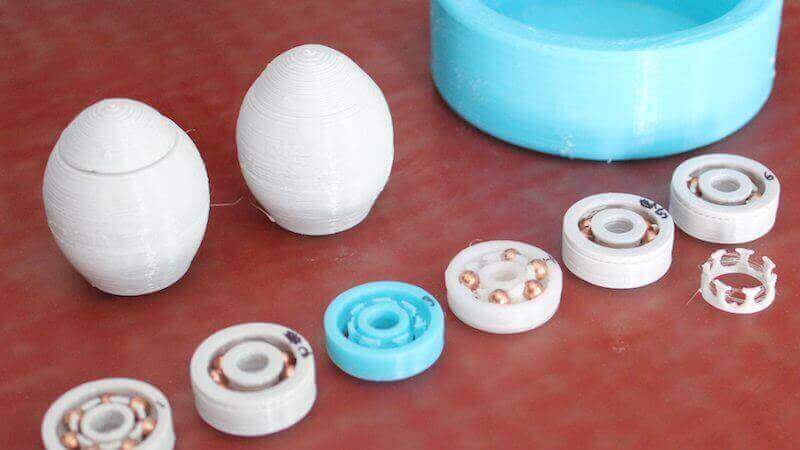
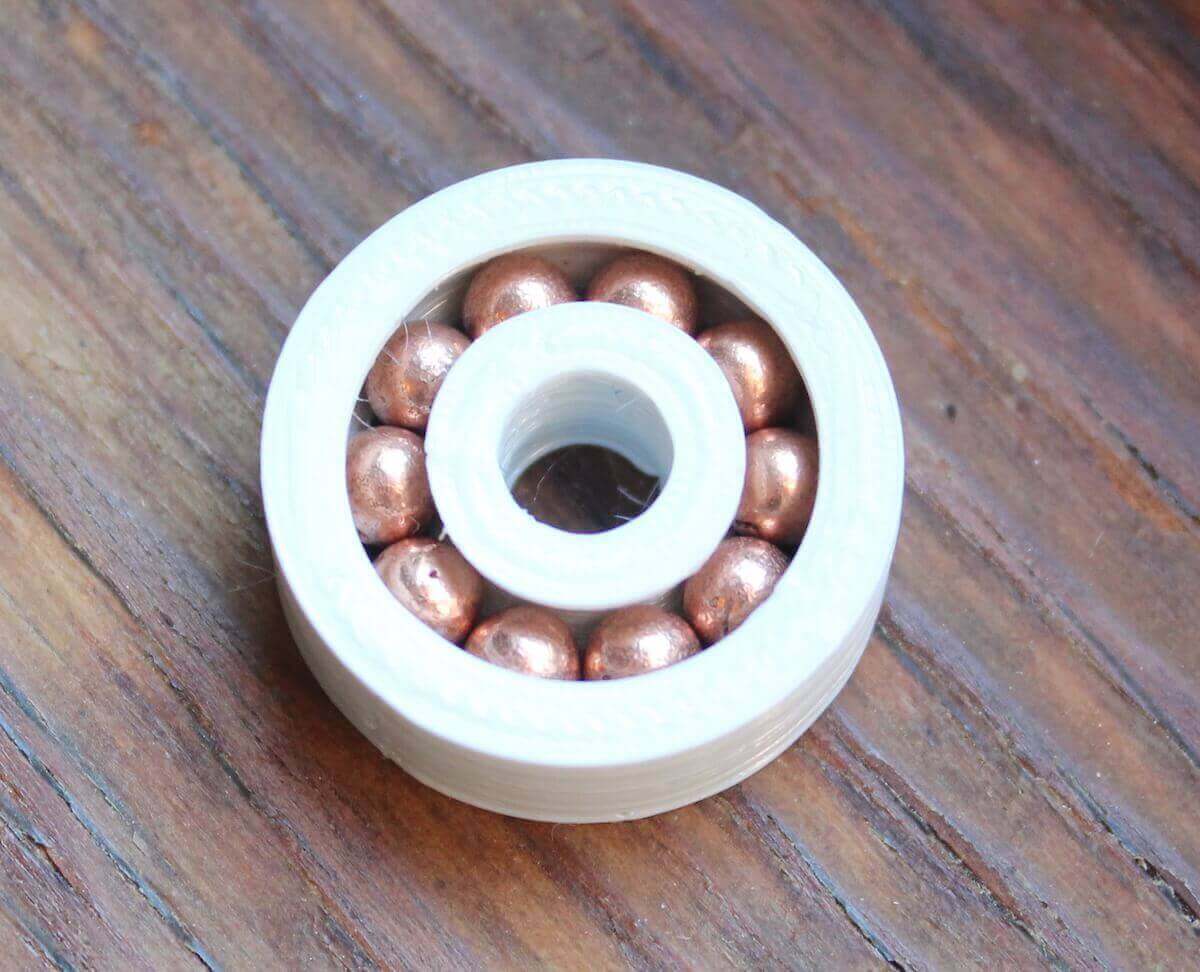
3D Printing Experiment: Incorporating Metal Ball Bearings
In the third experiment, they tackled a common problem in 3D printing: “3D printers can print really hard plastics; that’s no problem. But printing spherical plastic parts that roll smoothly against one another and hold up with use is a different story.”
Their solution to this problem was to design a bearing which would be paused mid-print so they could insert little metal balls. This allowed for smooth rotating parts and, as Makefast points out: “With the mass of the metal BBs, they even continue to smoothly glide a bit when you spin them.”
Some of the problems Makefast faced here included the need for precision and layer adhesion. Through a lot of trial and error, they finally settled on nGen as the perfect material for the design.
To get the right layer adhesion, they used a trick. This includes watching the print carefully and when it reaches the Z height you want, slowing down the machine’s feed rate. You can then add the components while the printer is still running. Makefast admits: “This is a nerve racking approach and obviously a bit dangerous, so exercise caution.”
We have to hand it to them, the risk paid off and the final prints look great, as you can see in the picture below. If you’re tempted to have a go, you can find the ball bearing files on Thingiverse.
Make sure to check out Makefast Workshop’s website for more ideas for your prints.
License: The text of "3D Printing Experiments: Adding Water, Sand, and Metal" by All3DP is licensed under a Creative Commons Attribution 4.0 International License.