Whether you’re new to 3D printing or a seasoned user: These 10 tricks will help you avoid 3D printing quality issues and get better results.
3D Printing Quality Trick #1: Set the 3D printer up according to its manufacturer’s instructions
Setting up a 3D printer is usually not “plug&play”. Even if the procedure seems straightforward: Do closely follow the manufacturer’s setup instructions step by step – often, there are straps or brackets inside that you need to remove.
Also, use the manufacturer’s recommendations for software settings and print settings.
3D Printing Quality Trick #2: Keep the printer firmware and software up to date
Printer manufacturers constantly try to improve the firmware and the printer software/slicer in order to fix errors and improve the functionality. So, check for updates regularly and install them. If the printer software has an auto-update feature: Turn that on to have updates installed automatically.
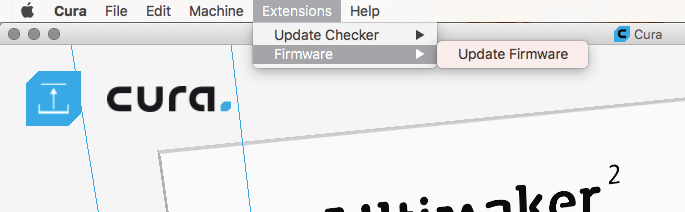
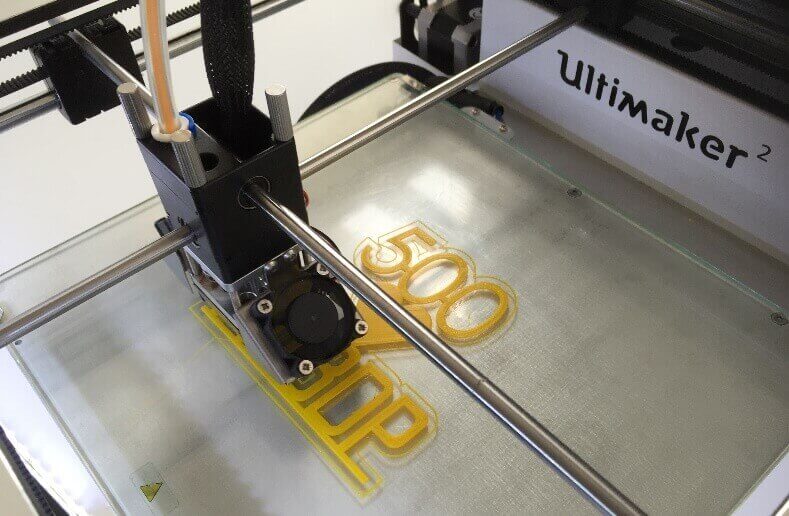
Owners of the popular Ultimaker printers can use the free Cura software to update the printer firmware.
3D Printing Quality Trick #3: Keep your 3D printer maintained and calibrated
Before you start a print, check that all screws are firmly fixed, that no belts or pulleys are loose.
Also, do the maintenance procedures the printer manufacturer recommends. A 3D printer has a lot of moving parts as well as parts that heat up and cool down. If you do not maintain them on a regular basis, they will break sooner or later, and you will have to replace them.
3D Printing Quality Trick #4: Keep the printbed clean
When there are fingerprints on the printbed, the filament will not stick well on the bed. Thus: Clean the be regularly with a lint-free cloth and rubbing alcohol.
Remnants of printed pieces on the bed also impair new prints: Remove them before starting a new print.
3D Printing Quality Trick #5: Make sure the printbed is level
Leveling the printbed is crucial for successful prints: If the printbed is unlevel, the printhead cannot adjust itself. A well levelled bed is the prerequisite that the first layer gets put down correctly. Poor bed level may cause warping of the first few layers and compromise bed adhesion. Another result is that the bottom surface does not come out smoothly.
Levelling the printbed does not mean making it level to the surface on which the printer is placed. The purpose of levelling is to make sure the printhead always stays parallel to the printbed.
If the distance between the printhead and the printbed varies while one layer is printed, the filament may fail to stick (if the distance is too big) or the filament may clog the nozzle causing the printer to jam (if the distance is too short).
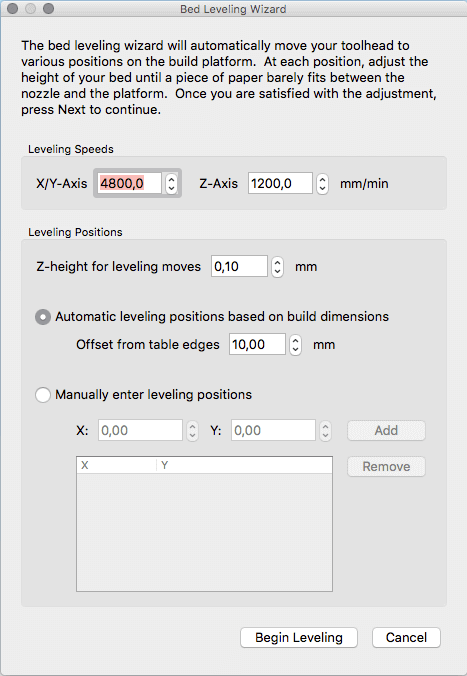
How you level the printbed depends on your printer and printer software. Please refer to your printer’s documentation. If you own a license of the 3D printing software suite Simplify3D, use its Bed Leveling Wizard.
3D Printing Quality Trick #6: Adjust the gap between the printhead and the printbed
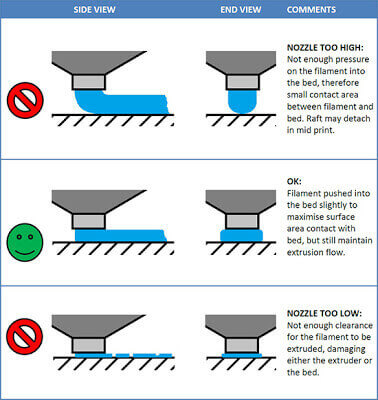
As already mentioned the distance between the nozzle (in the printhead) and the bed needs to be set correctly, otherwise the printed pieces will have flaws. Again, consult the printer documentation for information on how to set the distance and which distance to choose.
The diagrams show what happens if the gap is too big or too small:
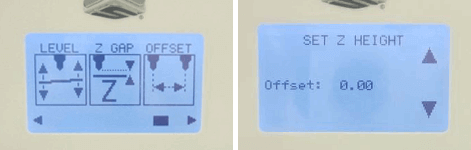
On the CubeX printer from Cubify, the gap between nozzle and printbed is called “Z-Gap”; use the Z-GAP icon on the display to set the Z-Gap height.
3D Printing Quality Trick #7: Print only small amounts and pieces
This tip is mainly for beginners – when you have more experience with 3D printing, it does make sense to print more pieces at a time.
Start with small pieces. It’s frustrating to do a 5-hour print that comes out poorly. And do not print several pieces at a time: When something goes wrong with one of these pieces and it gets dragged around by the print head, it will probably harm the other pieces.
Another hint: When you construct models on your own, it is a good idea to isolate tricky parts and print them (without the rest of the model) to test whether they come out as you want them. So you do not have to throw away the entire model when the tricky part goes wrong.
3D Printing Quality Trick #8: Improve filament adhesion
Typical print problems such as warping are caused when the first few layers do not stick properly to the printbed. To improve the adhesion of the filament, we recommend you coat the bed with Kapton tape or masking tape (masking tape is fine for PLA filaments, Kapton is better when printing ABS filament as Kapton withstands higher temperatures). You may also apply glue or hairspray to the bed (either directly on the glass plate or on the tape).
3D Printing Quality Trick #9: Check the first layers
3D printing processes often take hours to finish. But it’s the very first layers of your print that determine whether the print will be successful. If the first layers do not come out right, we recommend you abort the print process – this saves time and print material.
3D Printing Quality Trick #10: Finally, be patient
The learning curve is steep. So, be patient and don’t let the first print failures demotivate you. High quality output does not fall into your laps. But you can do a lot to improve 3D printing quality.
The lead image is a 3D printed model for the Cook Sharp knife by Misen that was crowdfunded through Kickstarter (source: the Misen page on Facebook)
License: The text of "3D Printing Quality Issues: 10 Tricks To Avoid Them" by All3DP is licensed under a Creative Commons Attribution 4.0 International License.