3D Slash: How to Add Your Name in 3D to an Object

In this workshop, you will learn how to create a signature or name and add it to an existing object in the free 3D Slash software. As 3D Slash does not have a text feature at the moment, you will use an image (a photo or a name created in a graphics software) as a sort of stencil.
Step 1: Insert the image of your name
What you’ll do in this step: Insert an image and position it on your 3D model.
You can import images in the JPG, PNG or GIF file format; 3D Slash also allows you to import STL files – but that’s another story.
-
Switch on Expert mode.
-
Create new model with 64 x 64 x 64mm size.
-
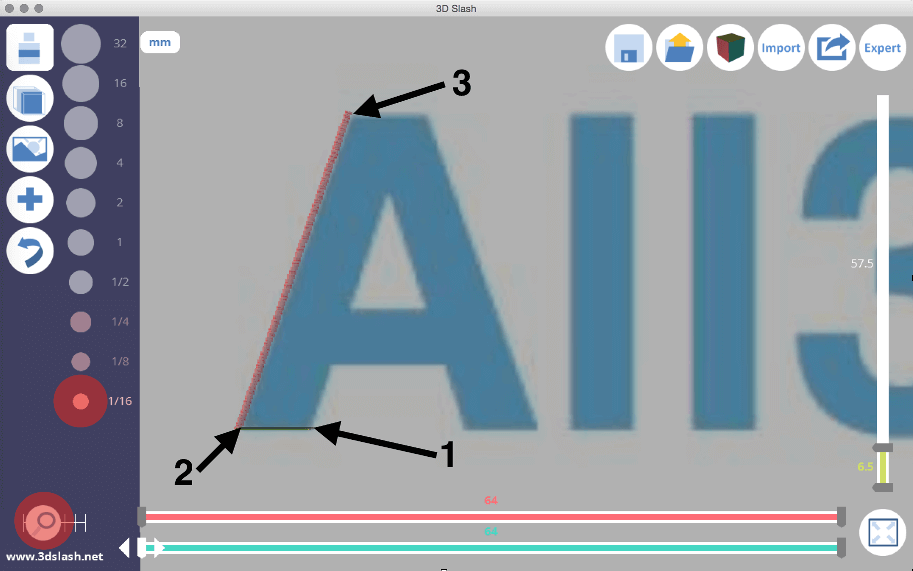
You need an object to put the picture onto. For this workshop, we create flat cuboid: First, use the vertical ruler (1) to reduce the cube to a flat cuboid. Next, use the Drill tool (2) to remove the upper part (3).
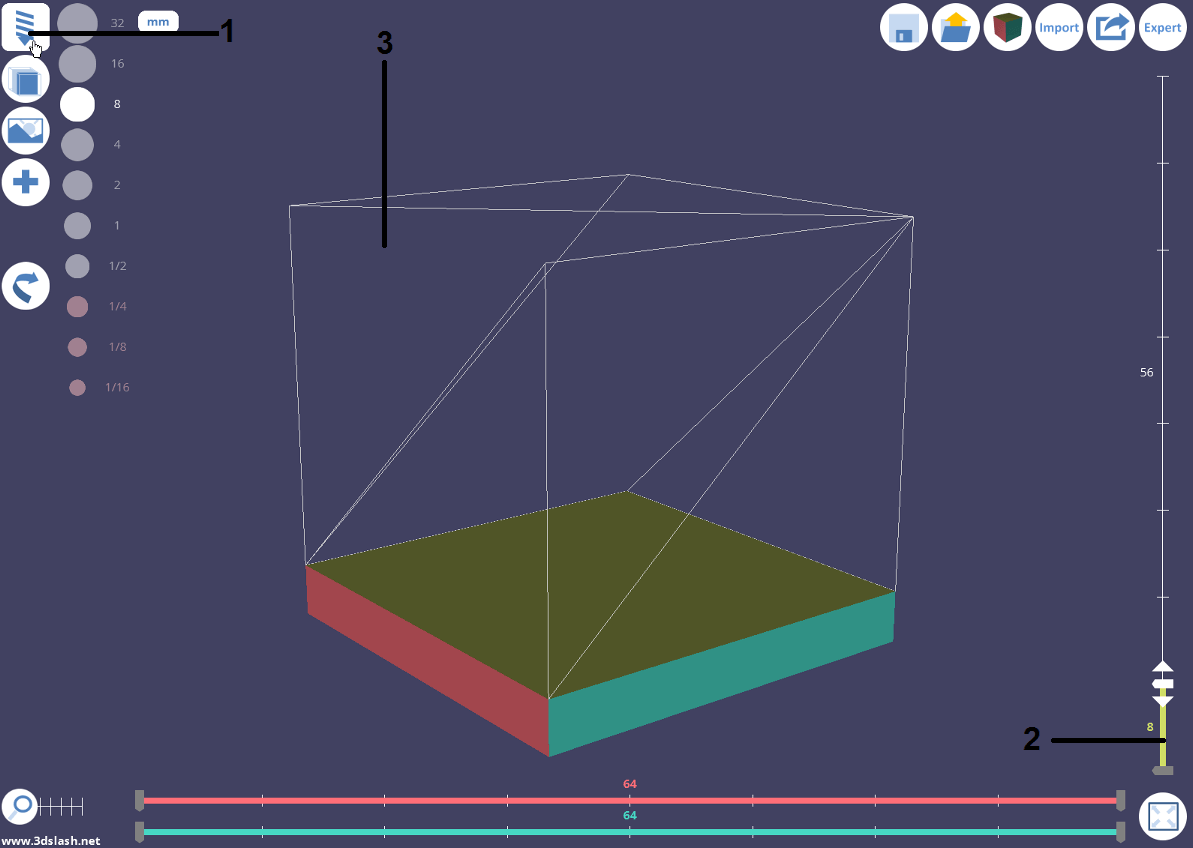
Use the Drill tool (1) to remove the upper part of the cube. -
To insert the picture either use the Import command or simply drag the image file into the 3D Slash window and drop it. Close the notification window.
-
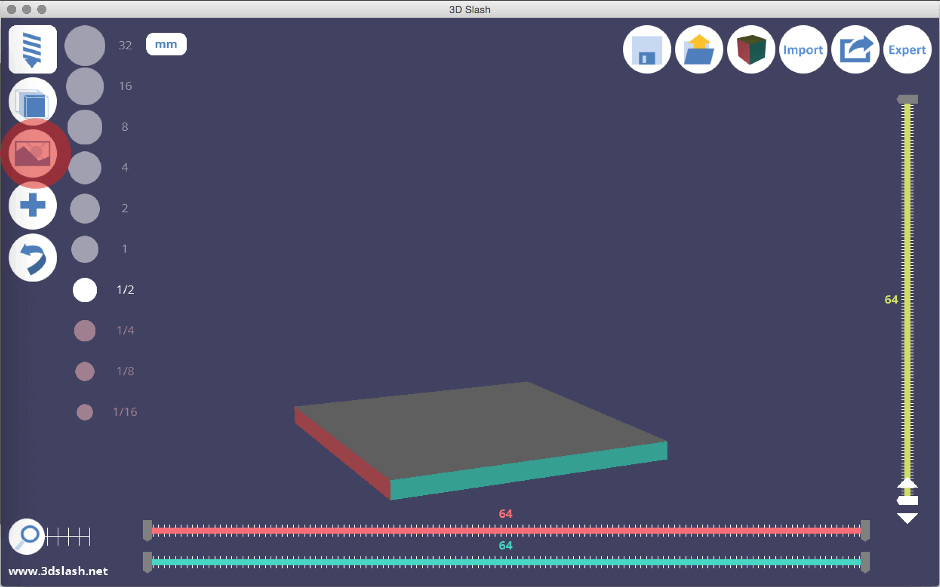
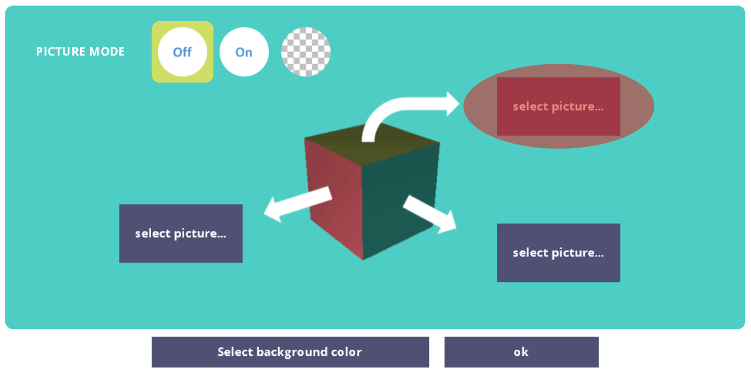
Use the red highlighted button in the screenshot to switch in Picture mode.
-
You can fit in the picture in the front, the side and the top of your object. Click the red highlighted button to select put the image on the top of the cuboid.
-
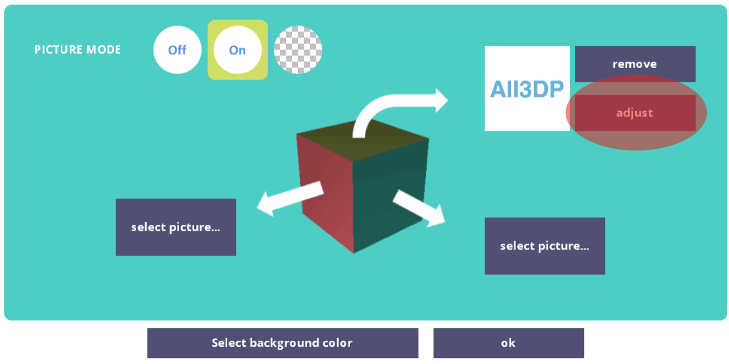
Select the image you imported. To align the picture you press the red highlighted button.
-
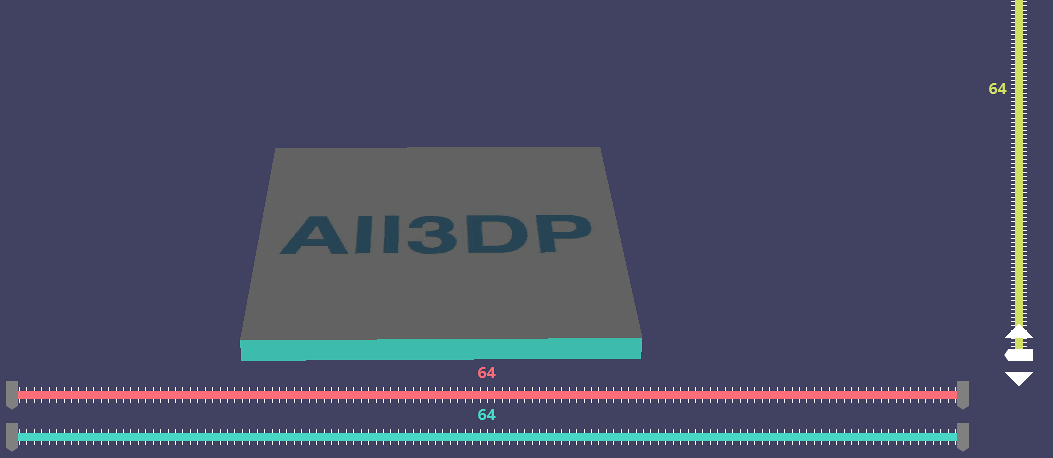
Use the three rulers to zoom in or out (1), rotate the image (2) or modify the brightness (3).
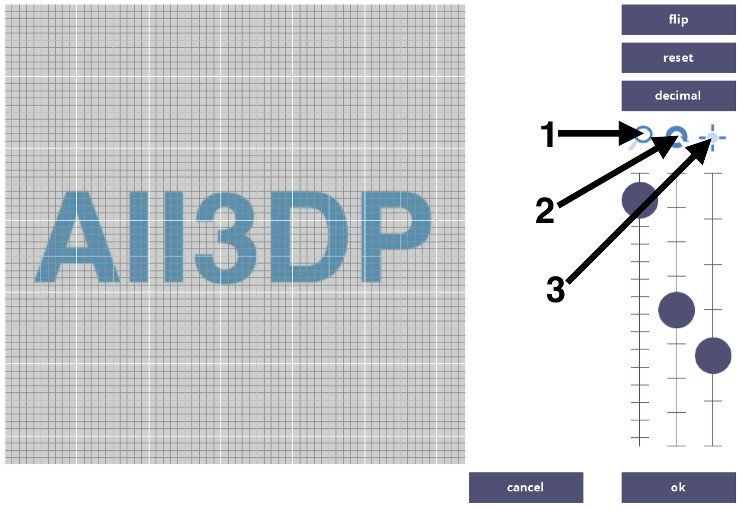
Use these rulers to zoom in/out (1), rotate the image or adjust the brightness. -
Click OK to confirm the settings of your texture. Now your image should be visible on your object.


Step 2: Use the image as a stencil
What you’ll do in this step: You’ll extrude the letters of the name – that means, you’ll make them stand out from the flat cuboid so the will be three-dimensional.
-
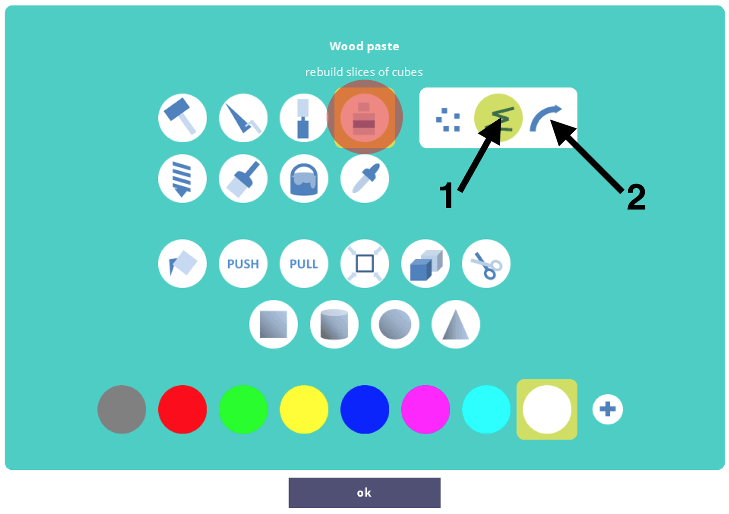
Use the Wood paste tool to rebuild slices of cubes. You will need to rebuild slices with lines (1) for straight letters or curves (2) for curved parts of the letters.
-
Before getting started, you need to set the limits. To build thin and correct lines you need to select a very small dimensional unit and use the Zoom to work as accurate as possible. Start with clicking onone edge of the letter (1) then move the cursor to the next edge (2) and click again. Before you click the next point, the line will be shown as a red line (3).
-
Do so with every edge of the letter to build a wall around it. Whenever you finished press ESC to start with a new letter.
-
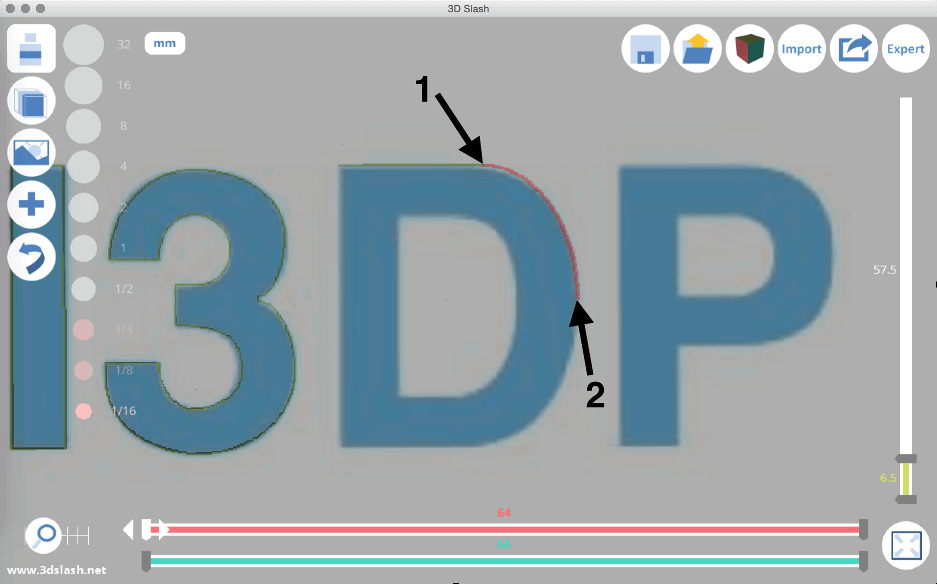
Straight letters like the “A” ore the “l” are really easy. It’s getting a bit more tricky for curved letters like the “D” or the “P” or even numbers like “3”. Use the Wood paste tool for building curved slices. With that tool you still can build straight lines, if you don’t change the depth of the two points like the arrows (1) and (2) in the screenshot show.

The Wood paste slices tool can also be used for straight lines. -
To build curves, you just need to click where the red line is building the correct curve like (2) in the screenshot. Its important that you start at the top left corner of the letter because the curves are always turning right.
-
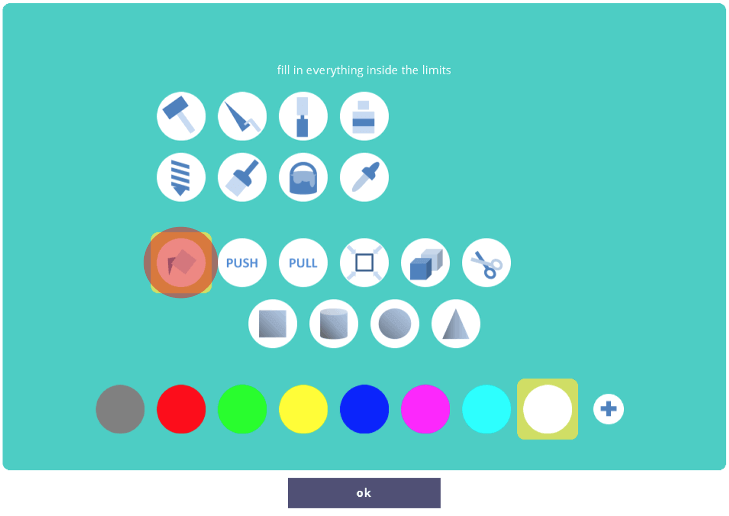
After building the walls of the letters you need to make sure that there is no hole in any wall. We want to fill the letters with cubes by using the Fill everything inside the limits tool that is highlighted in the screenshot. Select that tool.
-
Before filling the letters, set the dimensional unit back as it was before, then click inside the letters to fill them. If there is be a hole, you not only fill the letters but the whole area inside the limits.
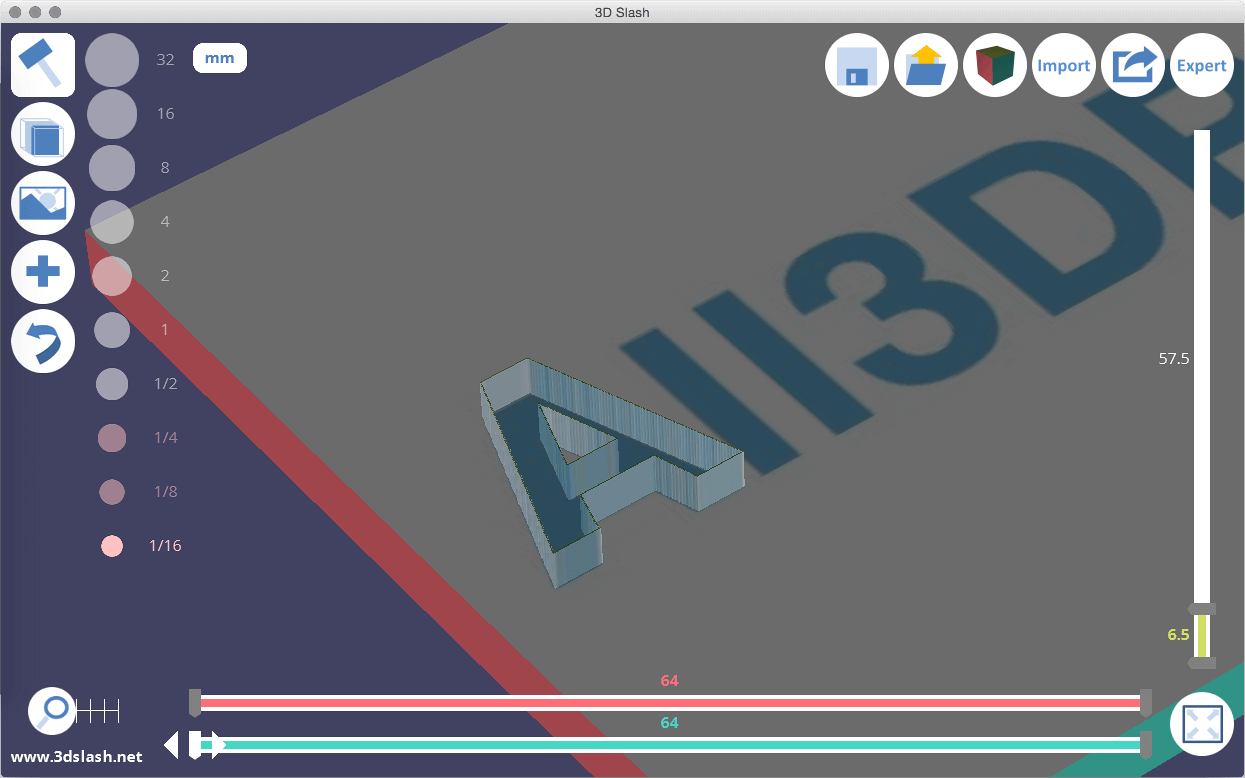

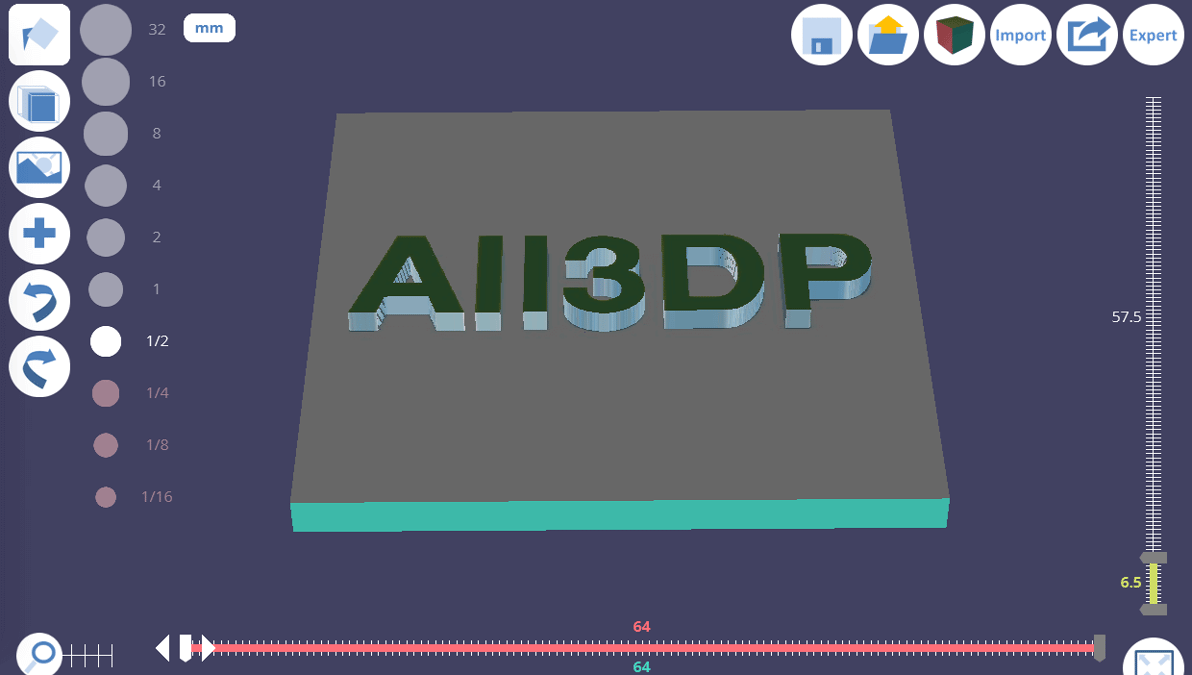
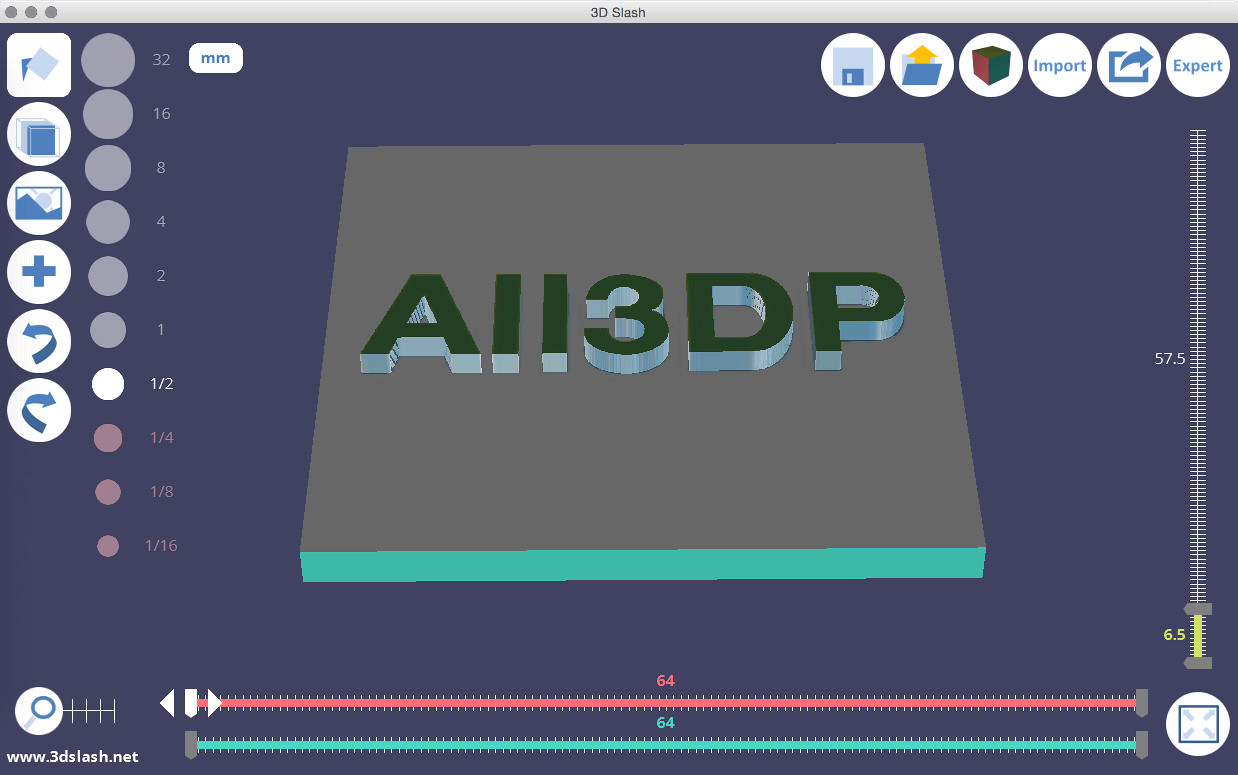
Now your name should look similar to the one in the screenshot but with the letters of your name:
License: The text of "3D Slash: How to Add Your Name in 3D to an Object" by All3DP is licensed under a Creative Commons Attribution 4.0 International License.