In this workshop you’ll learn how to construct a round and hollow 3D object like a coffee or a soft drink cup in the free 3D Slash software.
3D Slash uses a building-block concept which makes it easy to use and still very productive. Actually, you simply remove or add cubes of varying sizes to build a 3D object in 3D Slash. It’s similar to CNC milling: You start with a big block and remove everything you do not need – with the added bonus that you can also add blocks (what you cannot do in CNC milling).
Lesson 1: Building the cup in 3D Slash
Especially in times where environmental protection becomes more and more important, we shouldn‘t always use paper cups from fast food restaurants or coffee-to-go stores. Maybe it‘s time to 3D print your own cup, then bring it to your coffee store and let it fill instead of buying a new one every day.
A quick overview of the features and tools needed
If you haven’t used 3D Slash yet, we recommend you watch the introductory videos 1 to 4 on 3DSlash.net.
For this workshop you will need the buttons and elements highlighted in the next two screenshots.
- If you haven’t done so: Switch from Basic to Expert mode (top right button).
-
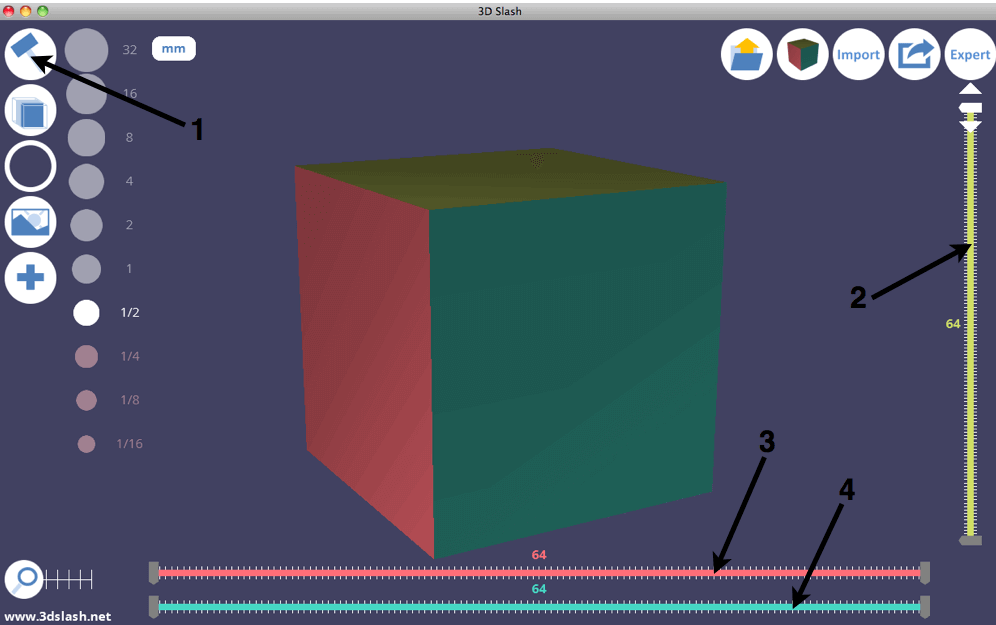
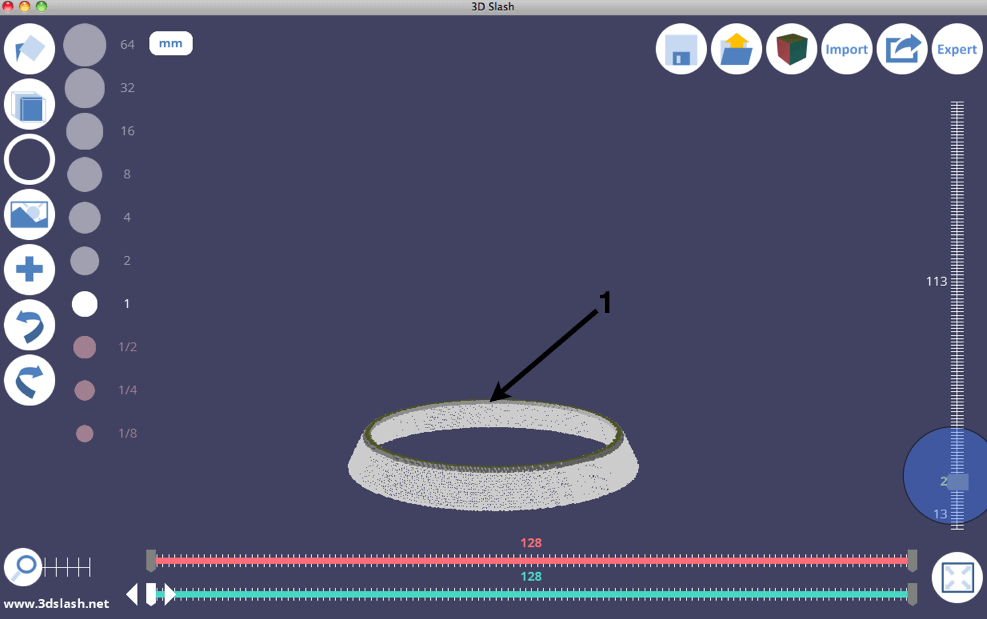
Use the top left button (1) to open the Tool dialog.
-
The three rulers are used to set the limits for height (2), width (3) and depth (4).
-
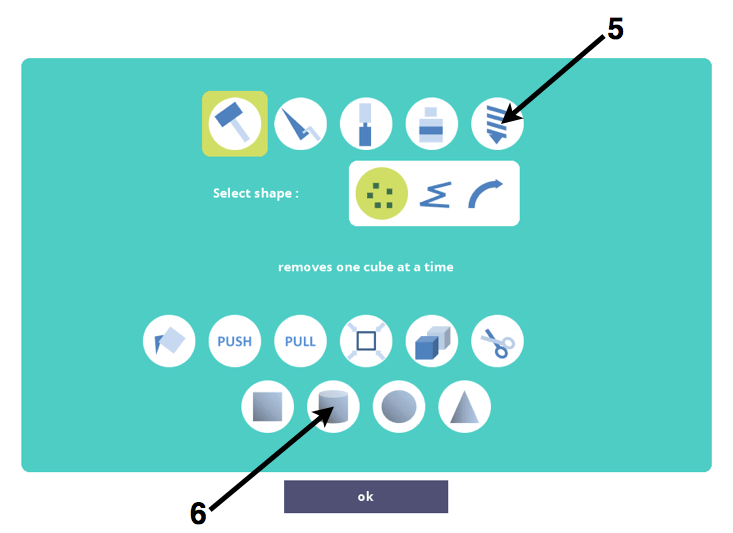
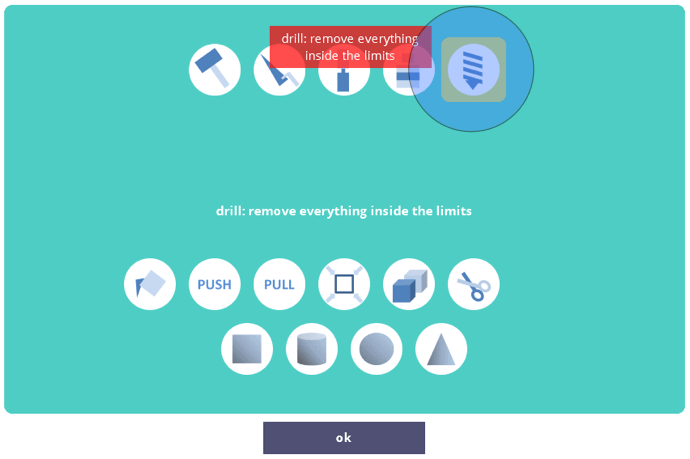
The Drill tool (5) removes everything inside the limits you set before.
-
Use the Cylinder (6) tool you create or remove a cylinder.
Please note: We finished the workshop before 3D Slash 1.1 was released. In version 1.1, the Tool dialog will also contain buttons for adding color to your model. We do not need these buttons for this workshop.
Step 1: Build the basic shape
What you’ll do in this step: Create the basic shape of your cup.
- Switch on the Expert mode, if you haven’t done so, yet.
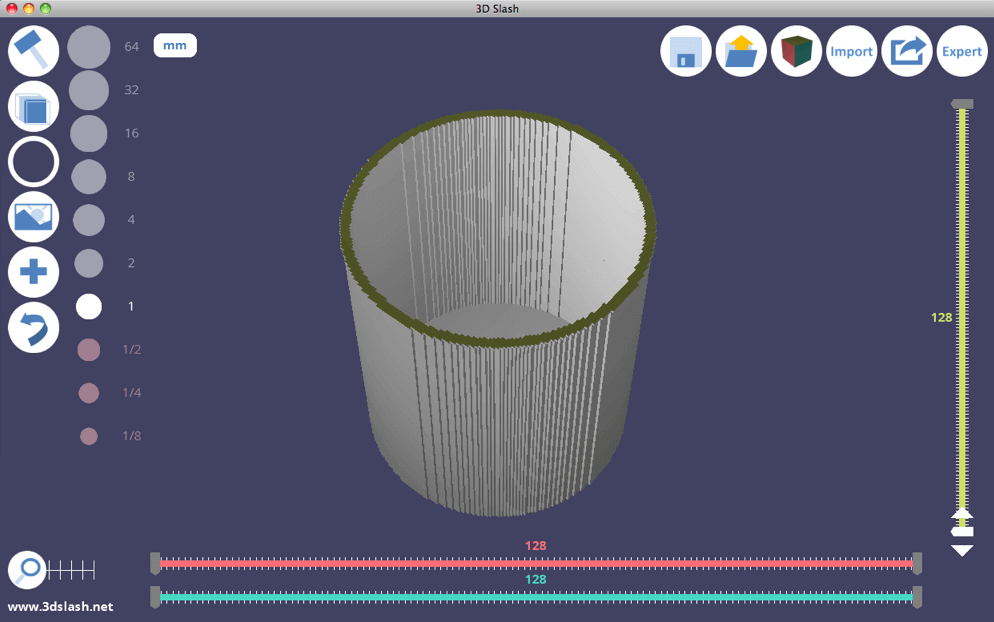
- Start a new model with 128 x 128 x 128mm size.
- Select 1 as dimensional unit.
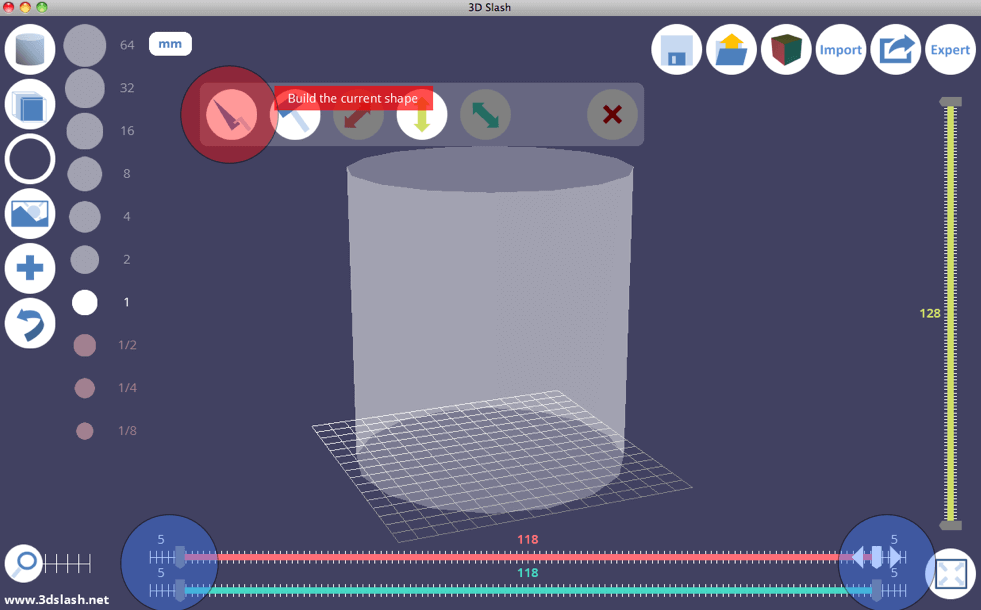
- First, get rid of the cube: Open the Tool dialog, select the Drill tool and click OK. Don’t be startled: There will be only a grid on the screen.
Select the Drill and click the cube to remove it. - Now, create a cylinder: Open the Tool dialog, select the Cylinder tool and click OK.
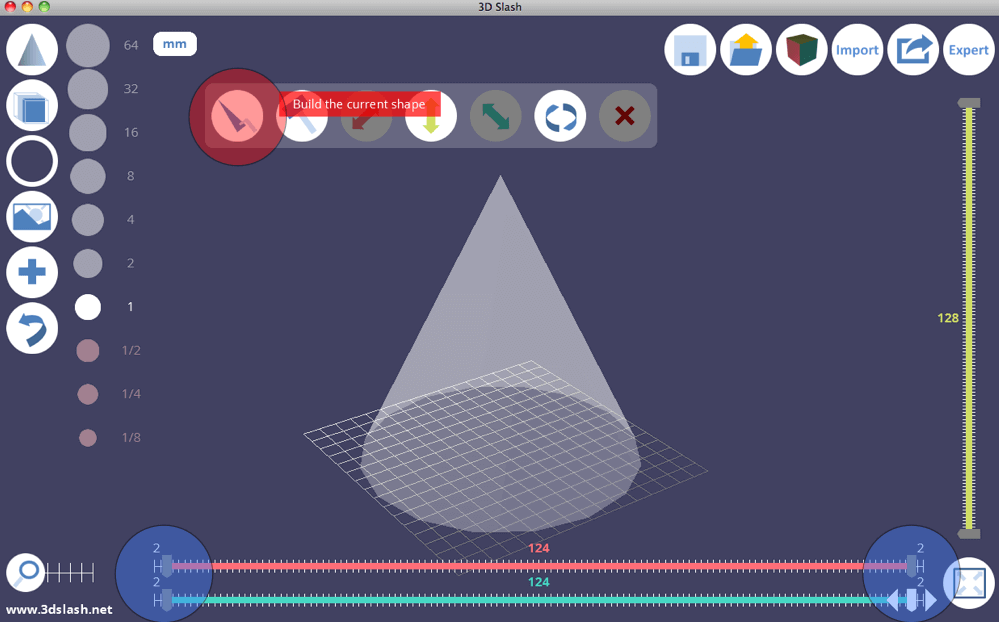
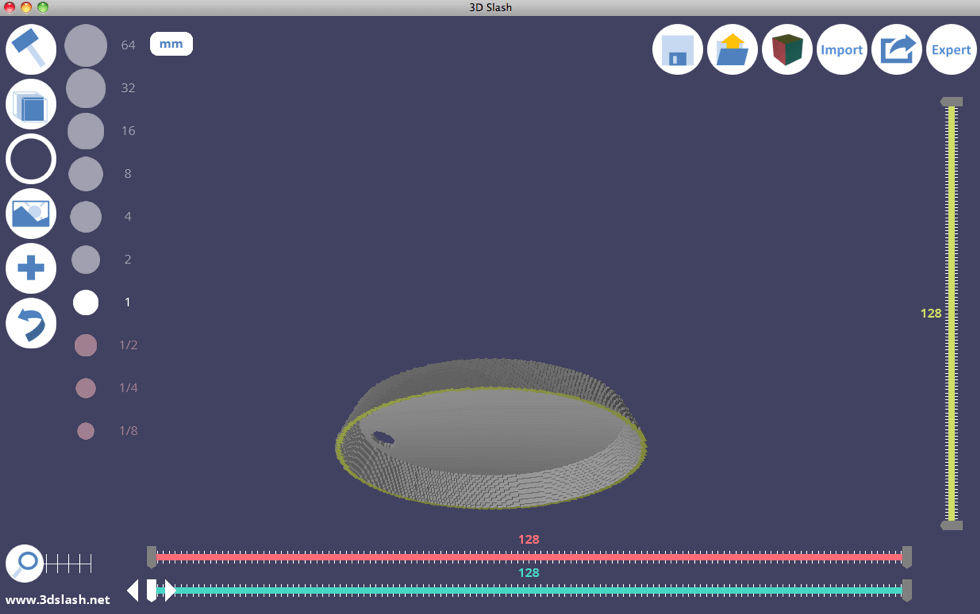
- Before creating the cylinder you have to set the limits (see the 2 blue circles on the horizontal rulers). Don‘t use the whole area. Later you‘ll need some space to build a ring on top of it, so you can put a lid on your cup.

Use the horizontal rulers to set boundaries. - Next, click the Trowel tool (the button in the red circle – it’s labeled Build the current shape), and create the cylinder.
- To build the ring for the lid you need to set the limits, again. Then click the Trowel tool once more.

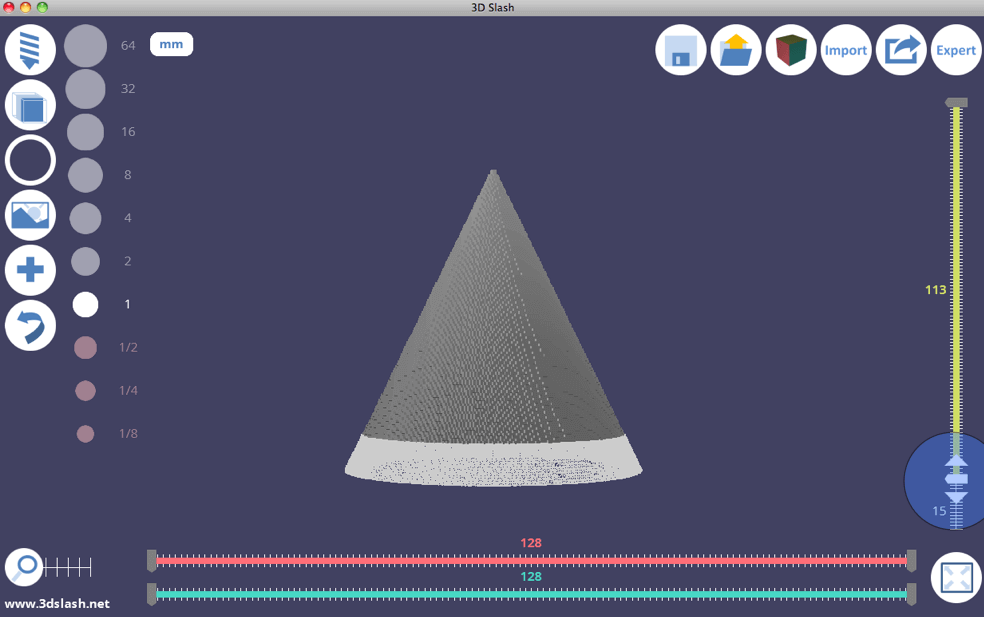
After that your object should look like the one in the screenshot below. The ring for the lid (1) and the basic shape of a cup (2). If you‘ve used the same size, the same dimensional unit and the same limits you now have a cup with a bottom radius of 59 mm and a top radius of 60 mm because of the ring. The height should be 128 mm.

Step 2: Edit the basic shape to create a cup
What you’ll do in this step: Create a hole in your object.
-
Open the Tool dialog, select the Cylinder tool and click OK.
-
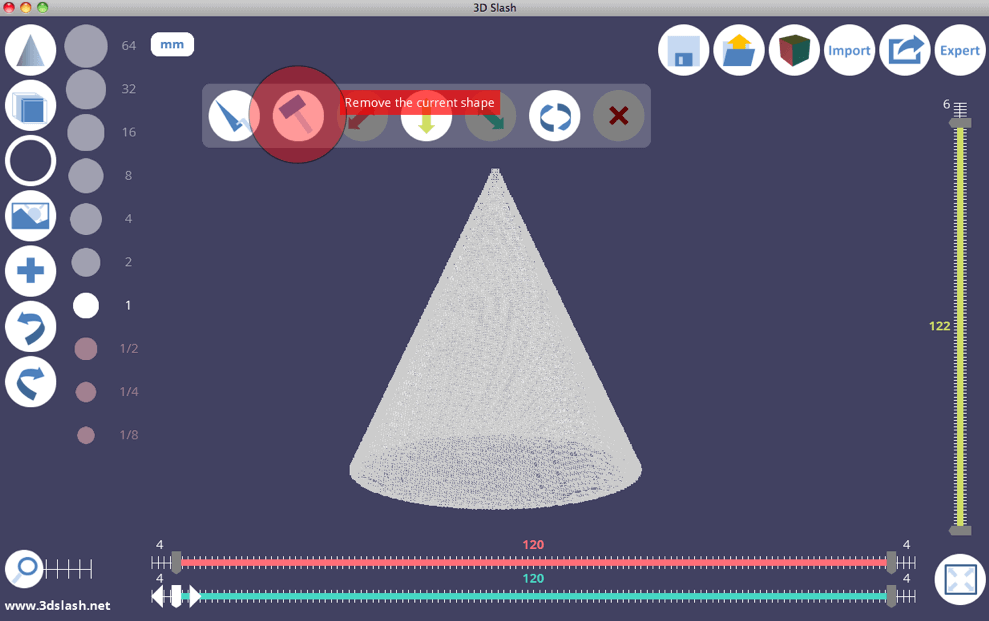
Before removing the cylinder you have to set the limits. Decide how big the walls and the bottom of your cup have to be: Our cup will have a thickness of 3 mm, the bottom will be 3 mm, too. Therefore, the radius of the cylinder has to be 56 mm and the height has to be 125 mm.
-
Click the Hammer button (it’s the button labeled Remove the current shape).
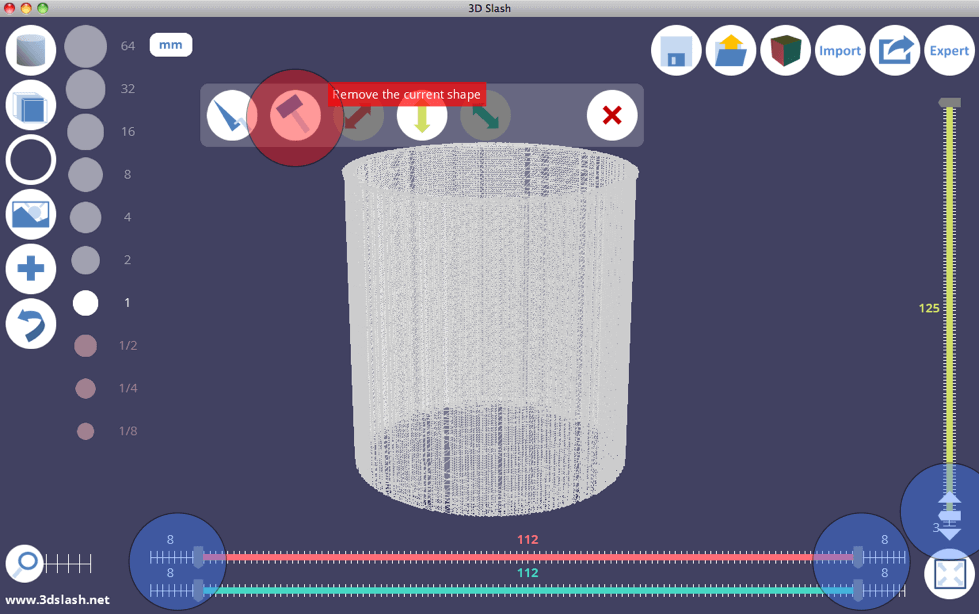
Remove the interior of your cup after setting the limits using the rulers.

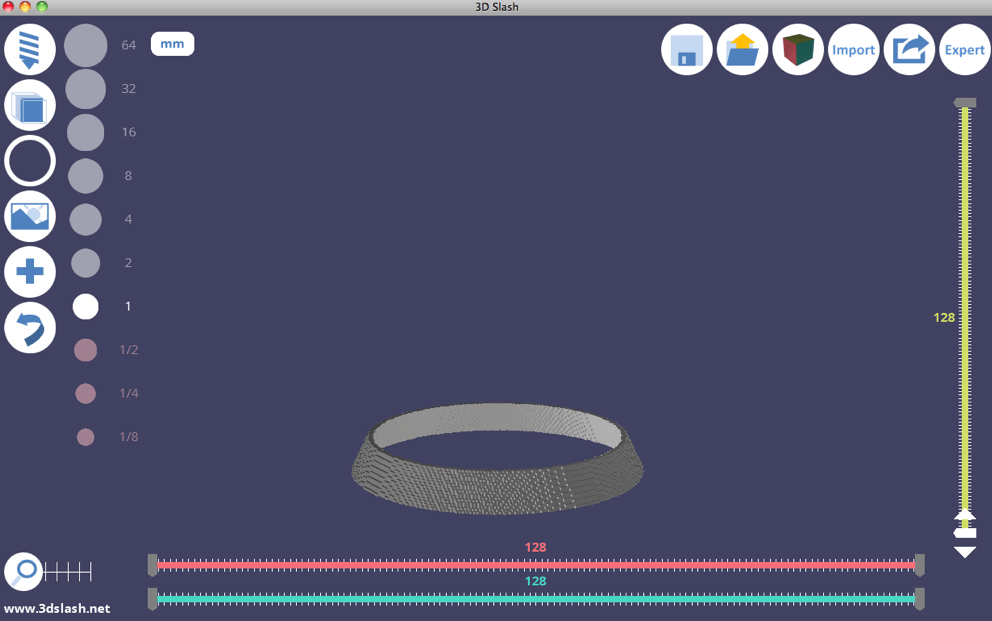
Now, your cup should look similar to this one:
Step 3: Save and print the model
- Use the Save button to save the model to disk.
- Click the Export button and save the model as an .STL or .OBJ file for your 3D printer. Or send it to a printing service.
Lesson 2: Building the lid
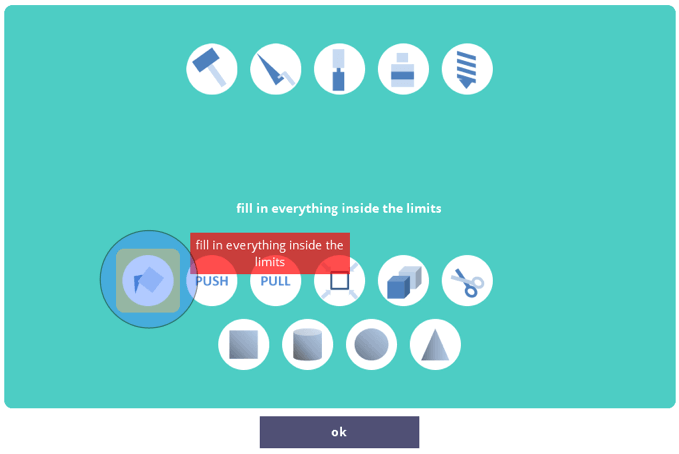
The tools needed and the steps to take are more or less the same as in lesson 2 – with two exceptions: Instead of the Cylinder tool you will use the Cone tool, and you will use the Fill tool to fill everything inside the limits.
Step 1: Build the basic shape
What you’ll do in this step: Create the basic shape of the lid.
-
Build a new model with the same size and dimensional unit as in Lesson 1.
-
Use the Hammer to get rid of the cube.
-
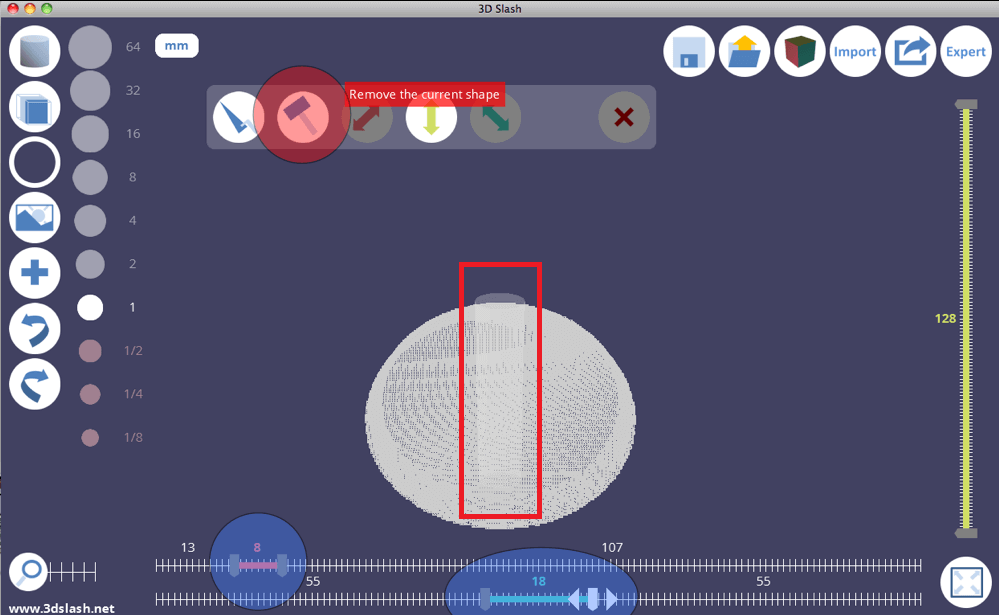
Open the Tool dialog and select the Cone tool.
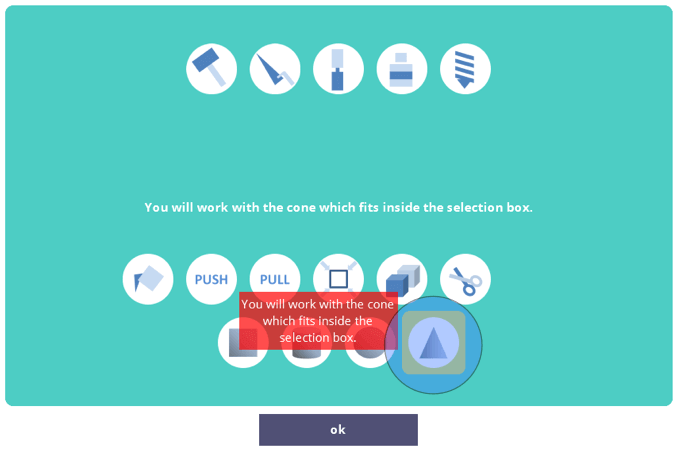
Select the Cone tool. -
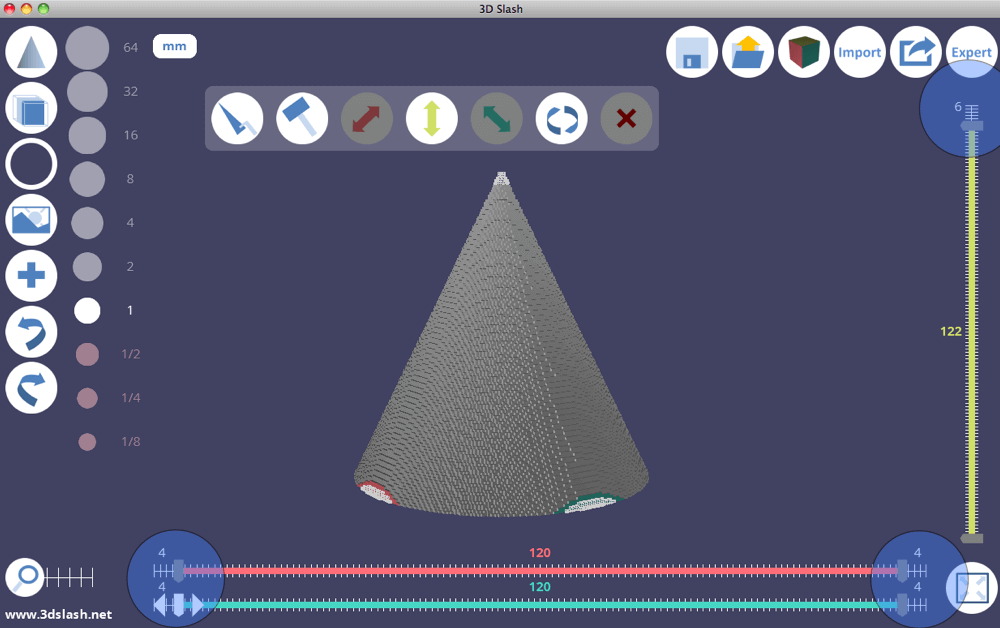
Set the limits right so it fits on the top of the cup. The radius of the cup is 60 mm so the outer bit of the lid needs to have a radius of 62 mm. After that use the red highlighted button (Build the current shape) to create the cone.

Set the limits and create a cone. -
To put a hole in the cone you select the Cone tool again, set the limits to get a radius of 60 mm.
Set the limits to get a radius of 60 mm. -
Now use the red highlighted button to Remove the shape.

Remove the current shape. -
Set the limits, then remove the upper part of the cone by using the Drill tool.
Set the limits before removing the upper part.


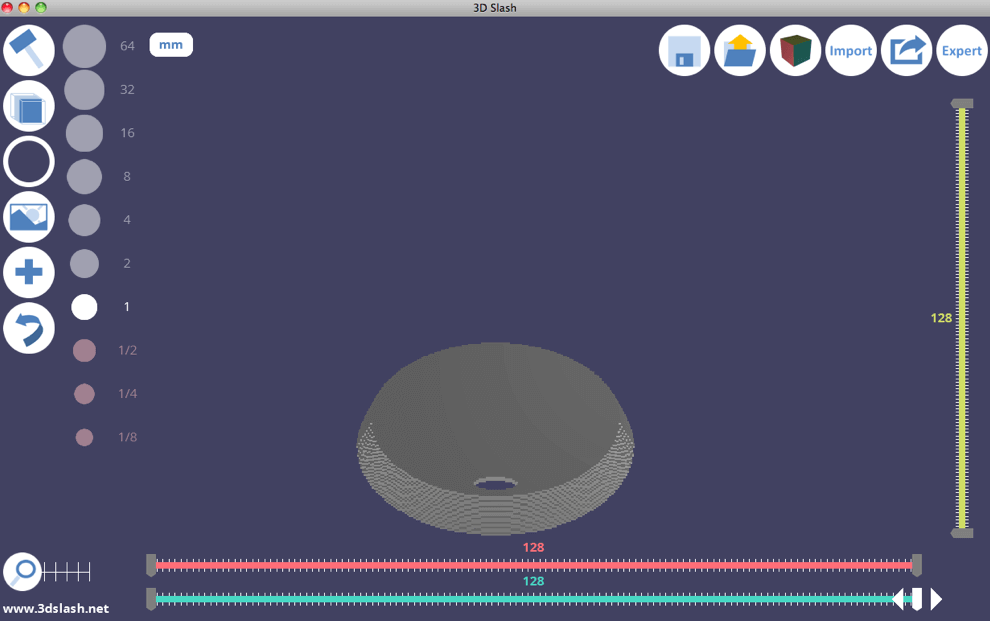
By now the object should look like this:
Step 2: Edit the basic shape to create the lid
What you’ll do in this step: Give the object a top and a hole to drink through the lid.
-
Open the Tool dialog, and select the Fill tool.

Select the Fill tool. -
Set the limits: The top has to have a thickness of 2 mm.
-
Click into center of the lid (see the screenshot).

Click here. -
To build the hole, you use the Cylinder tool. Set the limits the way they are shown in the screenshots and click the red highlighted button Remove the current shape to create a hole in the lid.

Remove the cylinder shape (highlighted by a red box in the screenshot).
Your lid, now should look like this from above:
And it should look like that from beneath:
The walls and the top of this lid have a thickness of 2 mm and a height of 15 mm. The width of the hole is 8 mm and the depth 18 mm.
Step 3: Save and export the lid
See lesson 1.
Annotations for printing coffee cups
Of course, you will use food-safe material for printing. When building a coffee mug, take into consideration that PLA is too soft for hot beverages – the glass point of PLA is 55-65ºC. The bottom of your cup would sag, spilling hot coffee. ABS would work but it is not approved for food. Over time plastic chemicals will leach out into hot water.
What you can use is nylon – you just need a 3D printer that can handle this material.
To seal the surface, use a post-processing technique such as solvent polishing or painting – again with food-safe material.
For more information read the in-depth article on food safe filaments on All3DP.
License: The text of "3D Slash: How to Design a Cup for 3D Printing" by All3DP is licensed under a Creative Commons Attribution 4.0 International License.