
3D Slash Tutorial for Beginners: How to Use 3D Slash

- Lesson 1: It will introduce you to the software and show you how to use it.
- Lesson 2: You’ll build a Star Wars keychain.
- Lesson 3: You will create a Luke Skywalker-style lightsaber.
- Lesson 4: You learn how to make your own Stormtrooper smartphone case.
3D Slash Tutorial – Lesson 1: Getting Started
The first lesson of this 3D Slash tutorial will introduce you to the software and show you how to use it.
The basic idea of 3D Slash is to make 3D creating or modeling accessible to everyone. 3D Slash proves that 3D modeling can be fun and produce useful things. The simple but universal technique to build objects with cubes allows the user to create basic objects as well as advanced ones.
Step 1: How to use the workspace
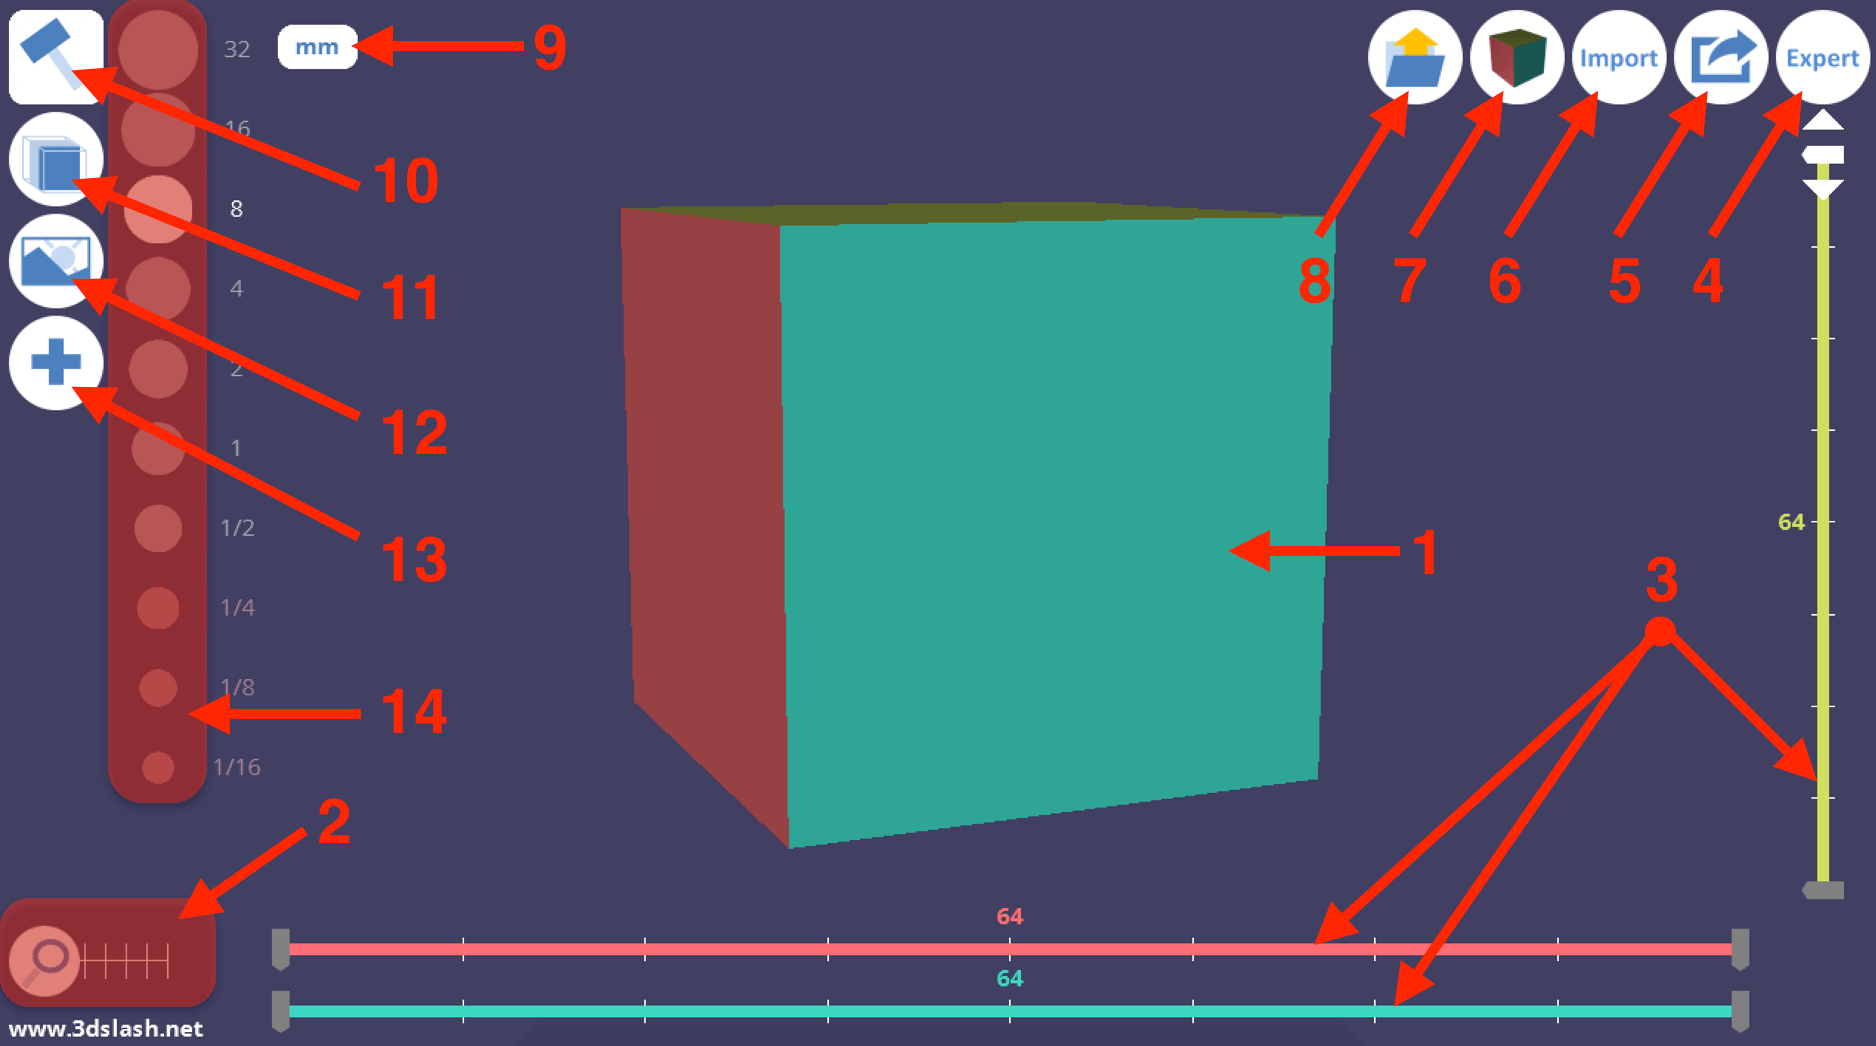
- Hold the left mouse key to change the point of view. Right-click and drag to move the object.
- Zoom in or out.
- Set the limits for Height, Width and Depth.
- Switch to Expert or Basic mode.
- Save and share your object.
- Import .stl or image files (hold and drop on the workspace works as well).
- Create a new model.
- Open an existing model.
- Change the unit and scale.
- Open the Tool dialog to select a tool.
- Change the rendering mode.
- Add and place an image (for reference).
- Set the Options.
- Select the working size.
Step 2: Use the correct tool
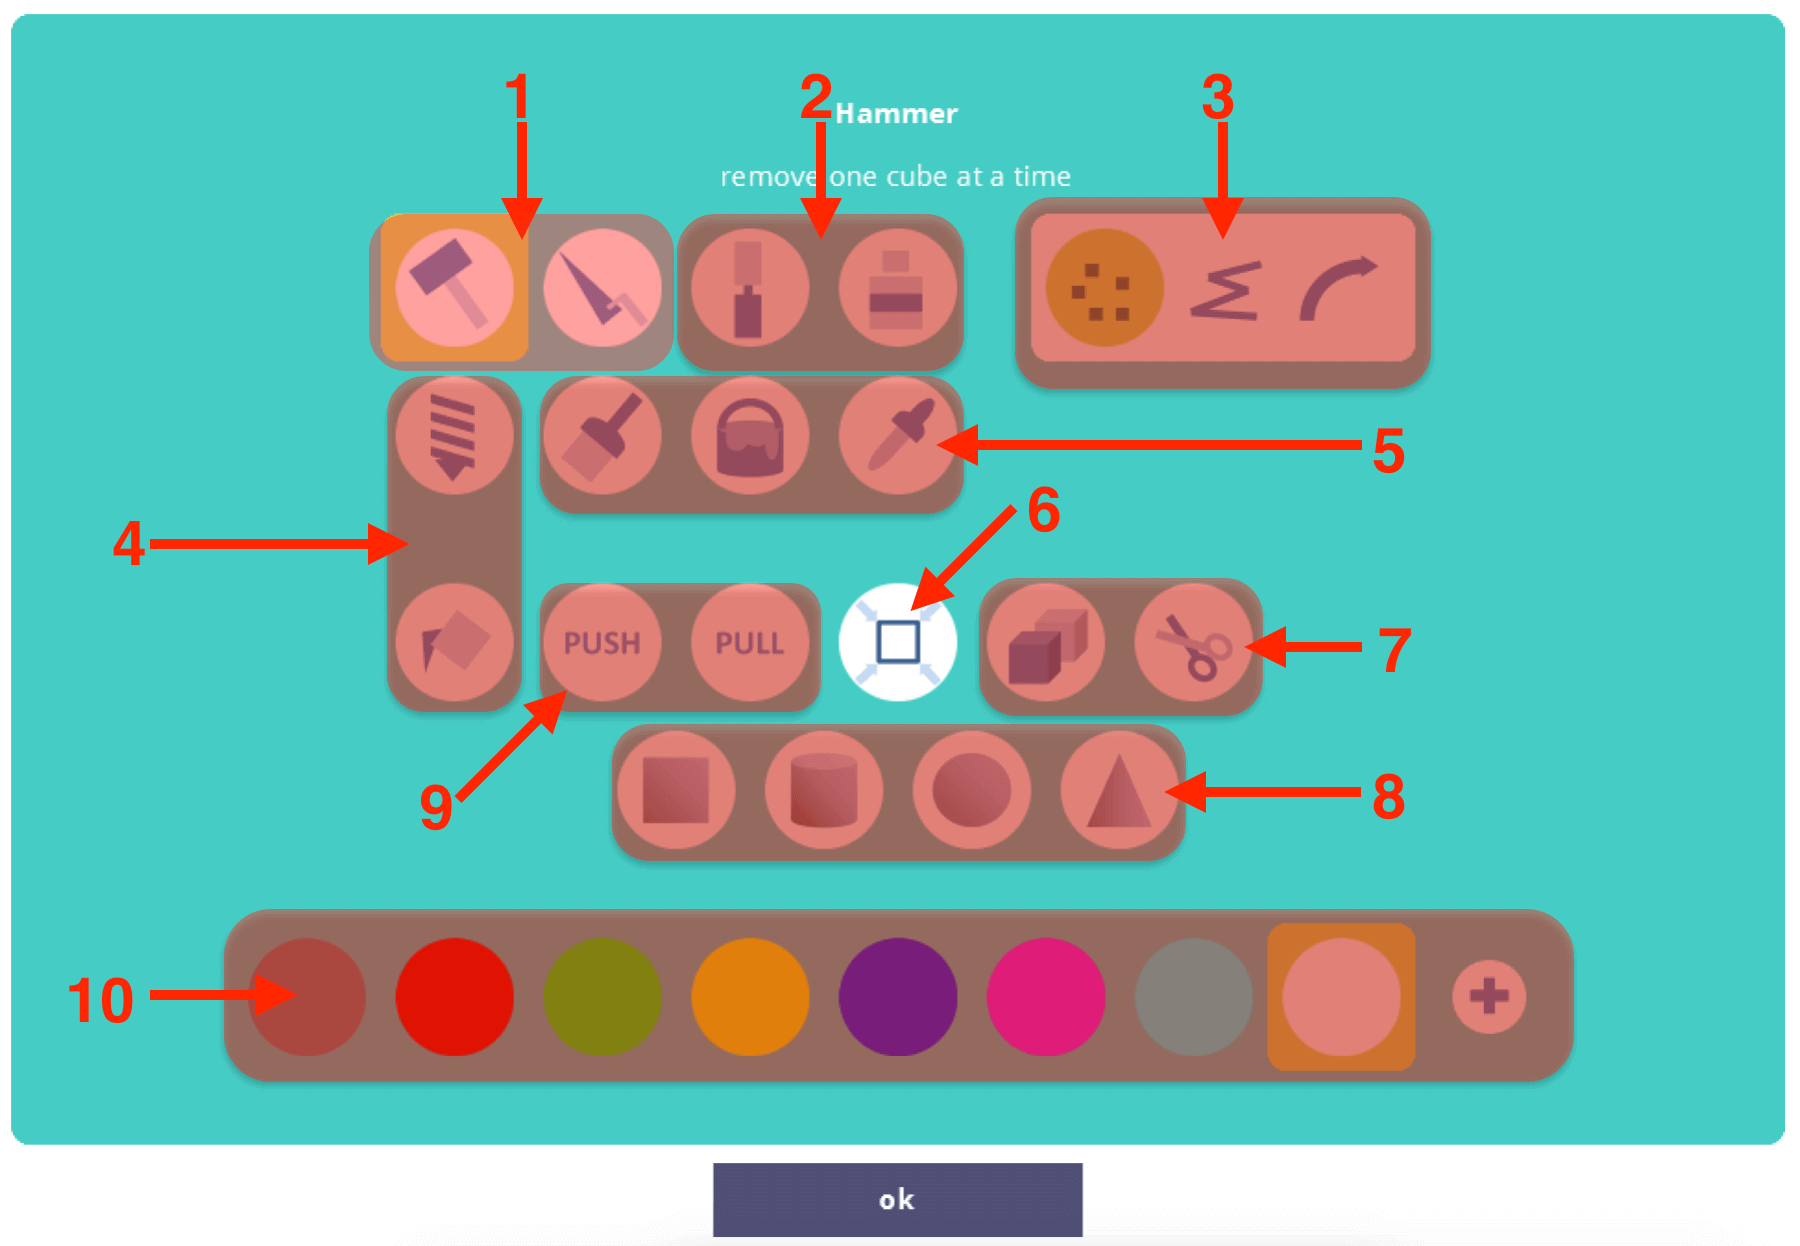
- Hammer (left): remove cubes; Trowel: rebuild cubes.
- Chisel (left): remove slices of cubes; Wood paste: rebuild slices of cubes.
- Select plots, lines or curves for the currently selected tool.
- Drill (top): remove everything inside the limits selected; Fill: fill everything inside the limits; or click into the area you want fill or remove.
- Brush, Bucket, Pipette: paint cubes or fill with color.
- Compress the object to half its size.
- Copy or Cut everything inside the limits.
- Build or remove a Sphere, Cylinder or a Cone inside the limits.
- Push and Pull to look into an object.
- Select a color.
- After you selected your tool, just press OK to return to the workspace.
3D Slash Tutorial – Lesson 2: Building a Star Wars Logo Keychain
In lesson 2 of this 3D Slash tutorial you’ll build a Star Wars keychain.
Using pictures as a stencil is really easy and there already have been published two similar tutorials about this topic in All3DP. That’s why we will not explain that in this tutorial. However, you will learn how to paint and compress the logo and build a keychain out of it.
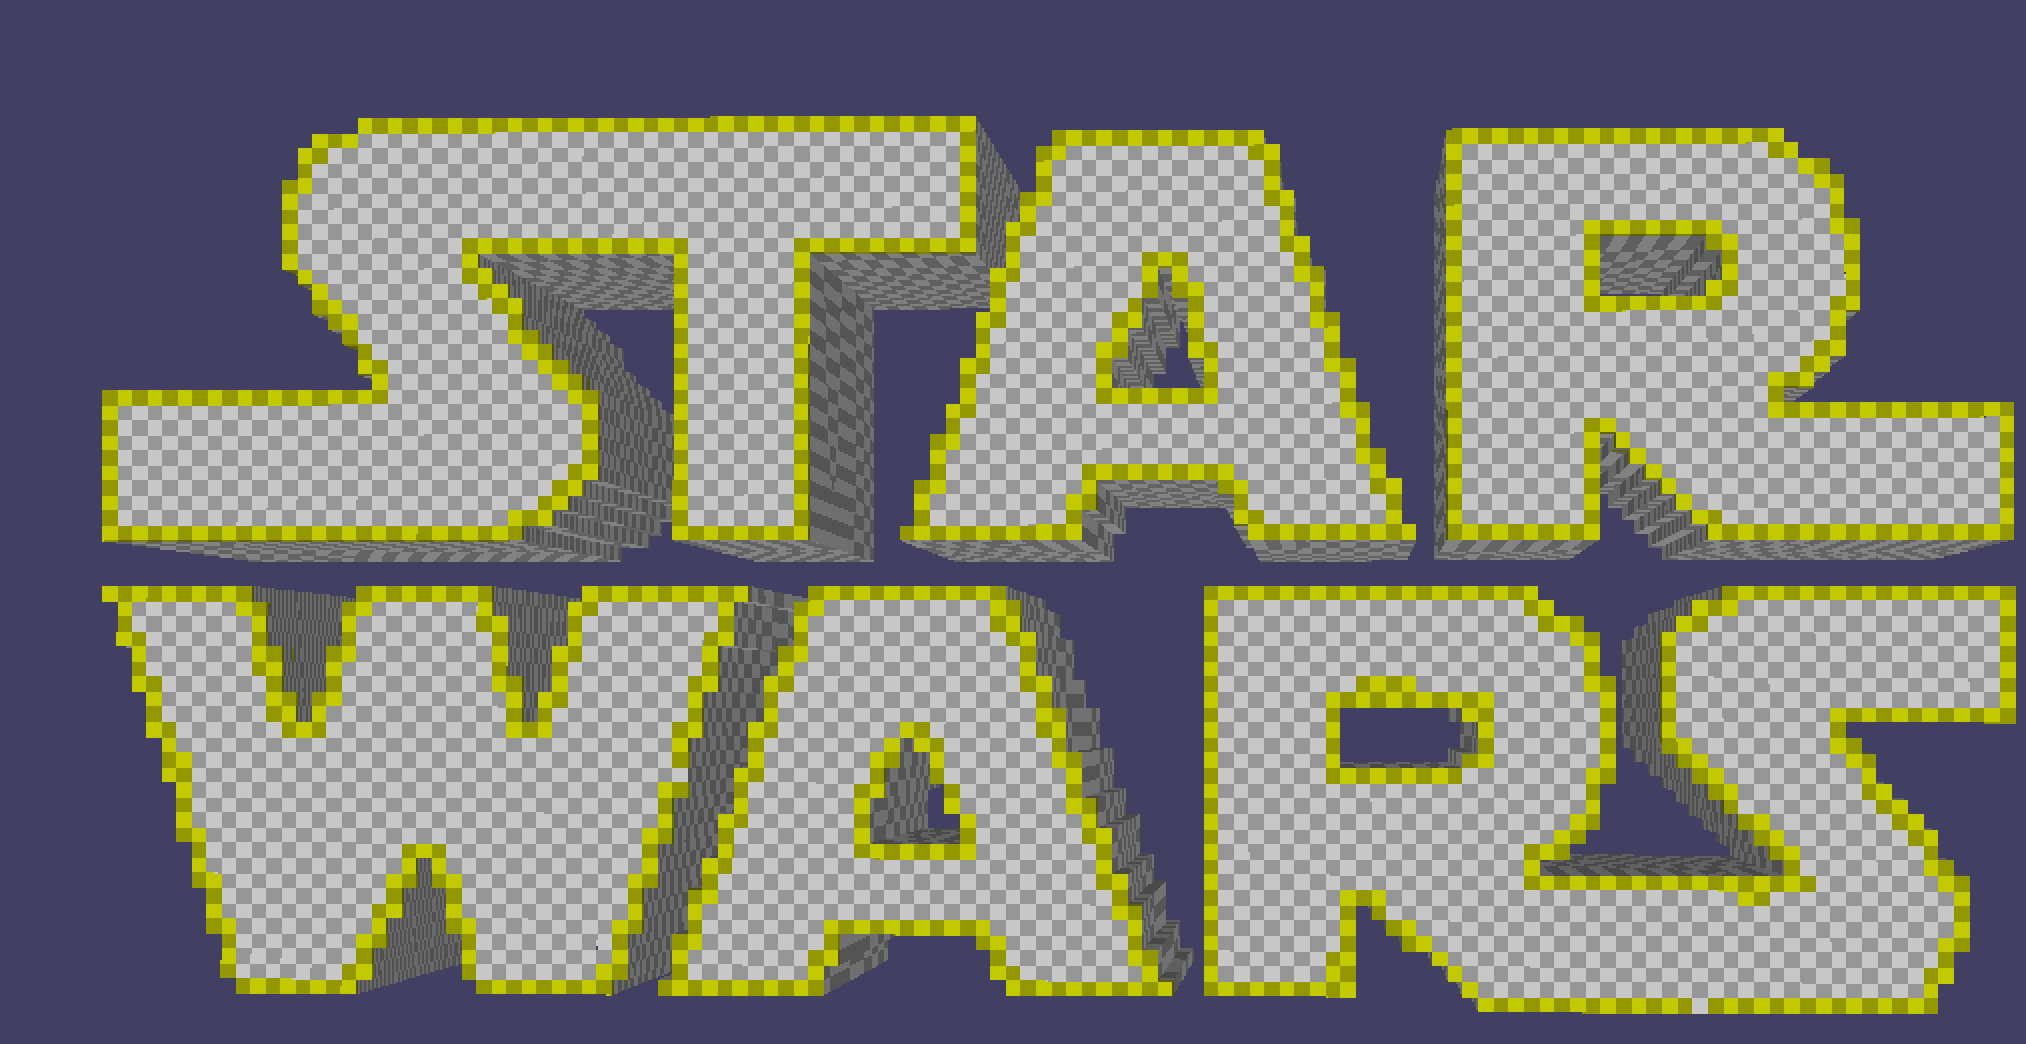
Step 1: Paint the logo
- Use the Paint cubes tool and select the color of your choice. Click every cube or hold the mouse key down while moving over the cubes you wish to apply the color to.

- Use the Fill with color tool to fill the rest of the object that has not been painted with the selected color.


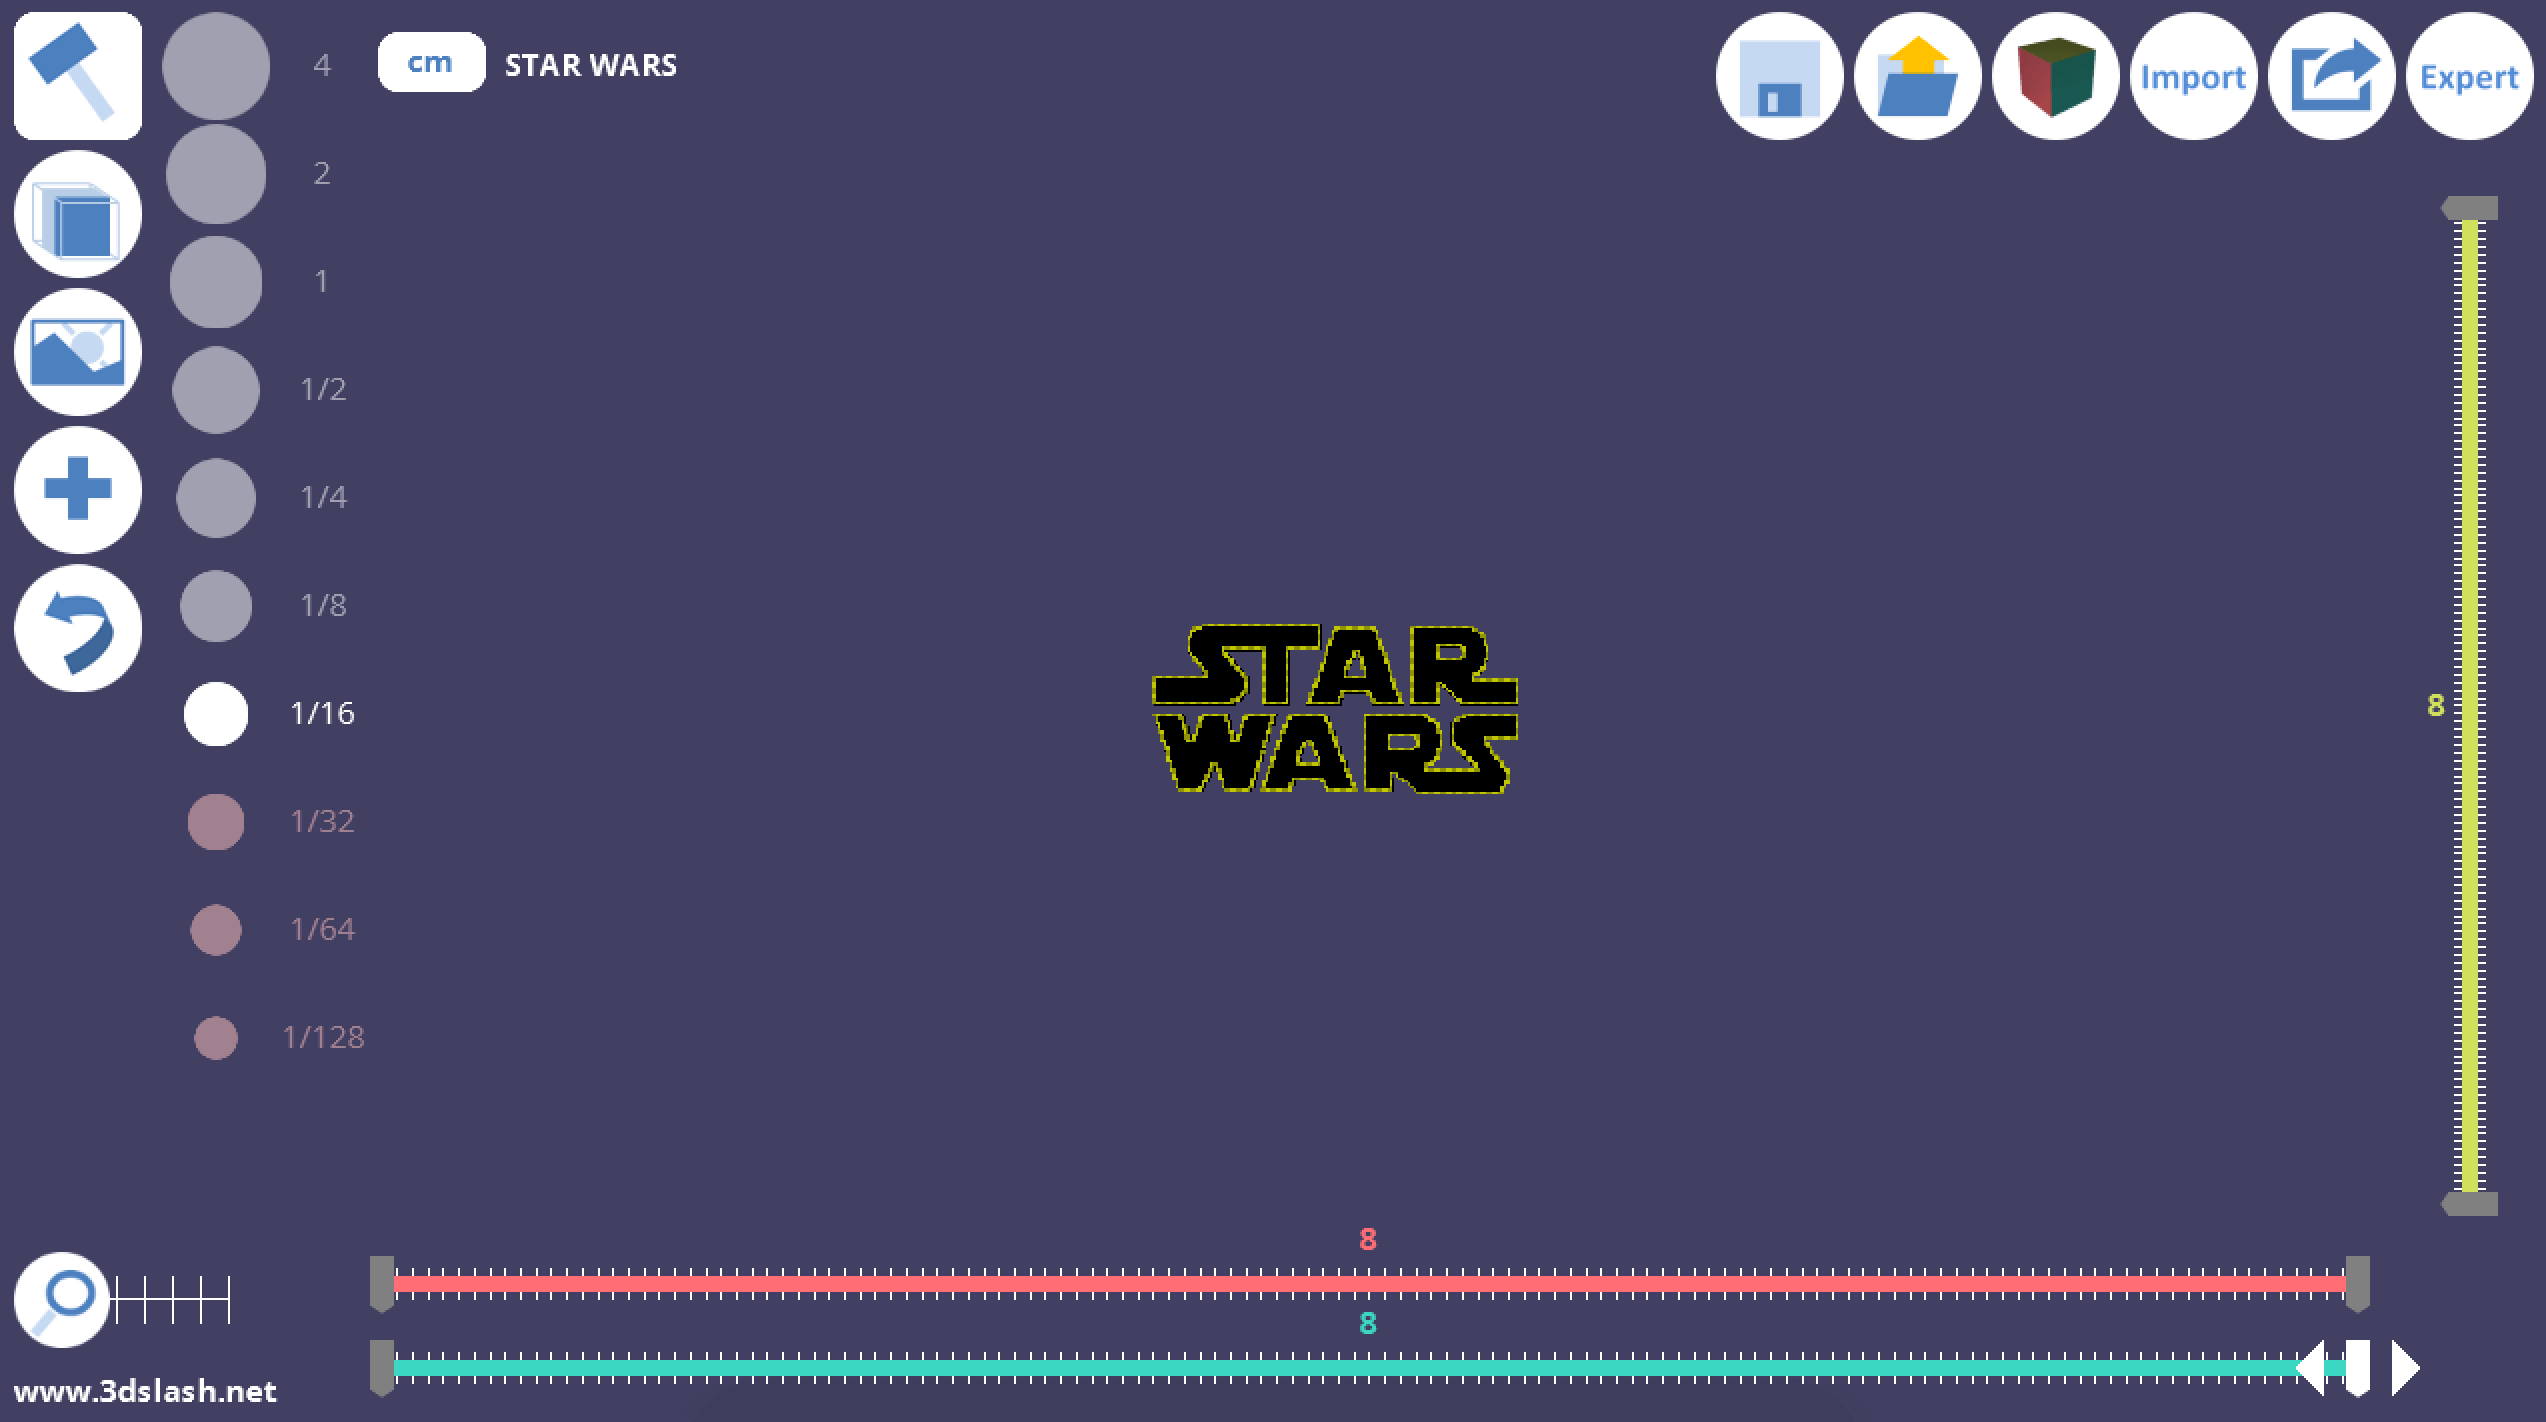
Step 2: Compress the logo
The logo is way to big for use as a keychain – it has a width of about 63 cm. It also fills the whole working area of 3D Slash so you cannot build a ring to make a real keychain out of it. That means you need to compress the logo and change the unit and scale:
- Use the Compress tool to reduce the object to half its size.
- Change the unit to cm and scale to 8 so you have an object with the size of a keychain. (height: 2 cm; width: 4 cm; depth: 0.5 cm)

Step 3: Build the keychain
The upper part of the logo and the lower part are not connected yet. So you have to build cubes between the two parts to make them stick together.
- Before you build the cubes: Select the correct color.
- To attach your keychain to your bunch of keys, you just need to build something to plug a ring through by using the Rebuild cubes tool. You can also build a different kind of connection.
- Save your model and export it to an .stl file or have it printed through one of the services supported by 3D Slash.

3D Slash Tutorial – Lesson 3: Creating a Lightsaber
In lesson 3 of this 3D Slash tutorial, you will create a Luke Skywalker-style lightsaber.
The one and only weapon of a Jedi apart from the Force, is his lightsaber. Can you imagine Star Wars with Jedis only using their Force? So there can’t be a Star Wars tutorial without learning how to create this special weapon.
Part 1: Build the basic lightsaber shape in 3D Slash
Step 1: The look and the dimensions of the lightsaber
I searched for a detailed plan of the lightsaber in the internet and found this perfect plan with all dimensions required:
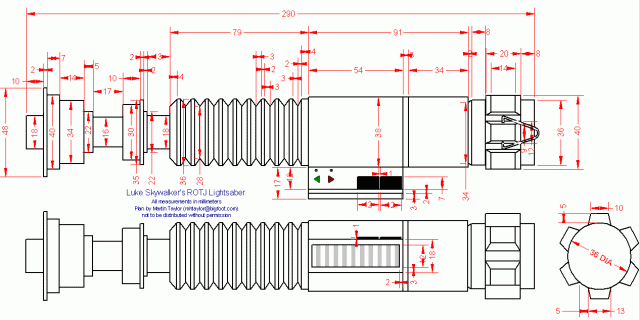
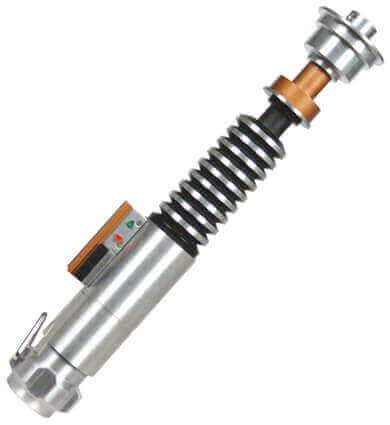
You will also need an image of the lightsaber, so you know exactly what it looks like.
Step 2: Build the basic shape
- Switch on Expert mode.
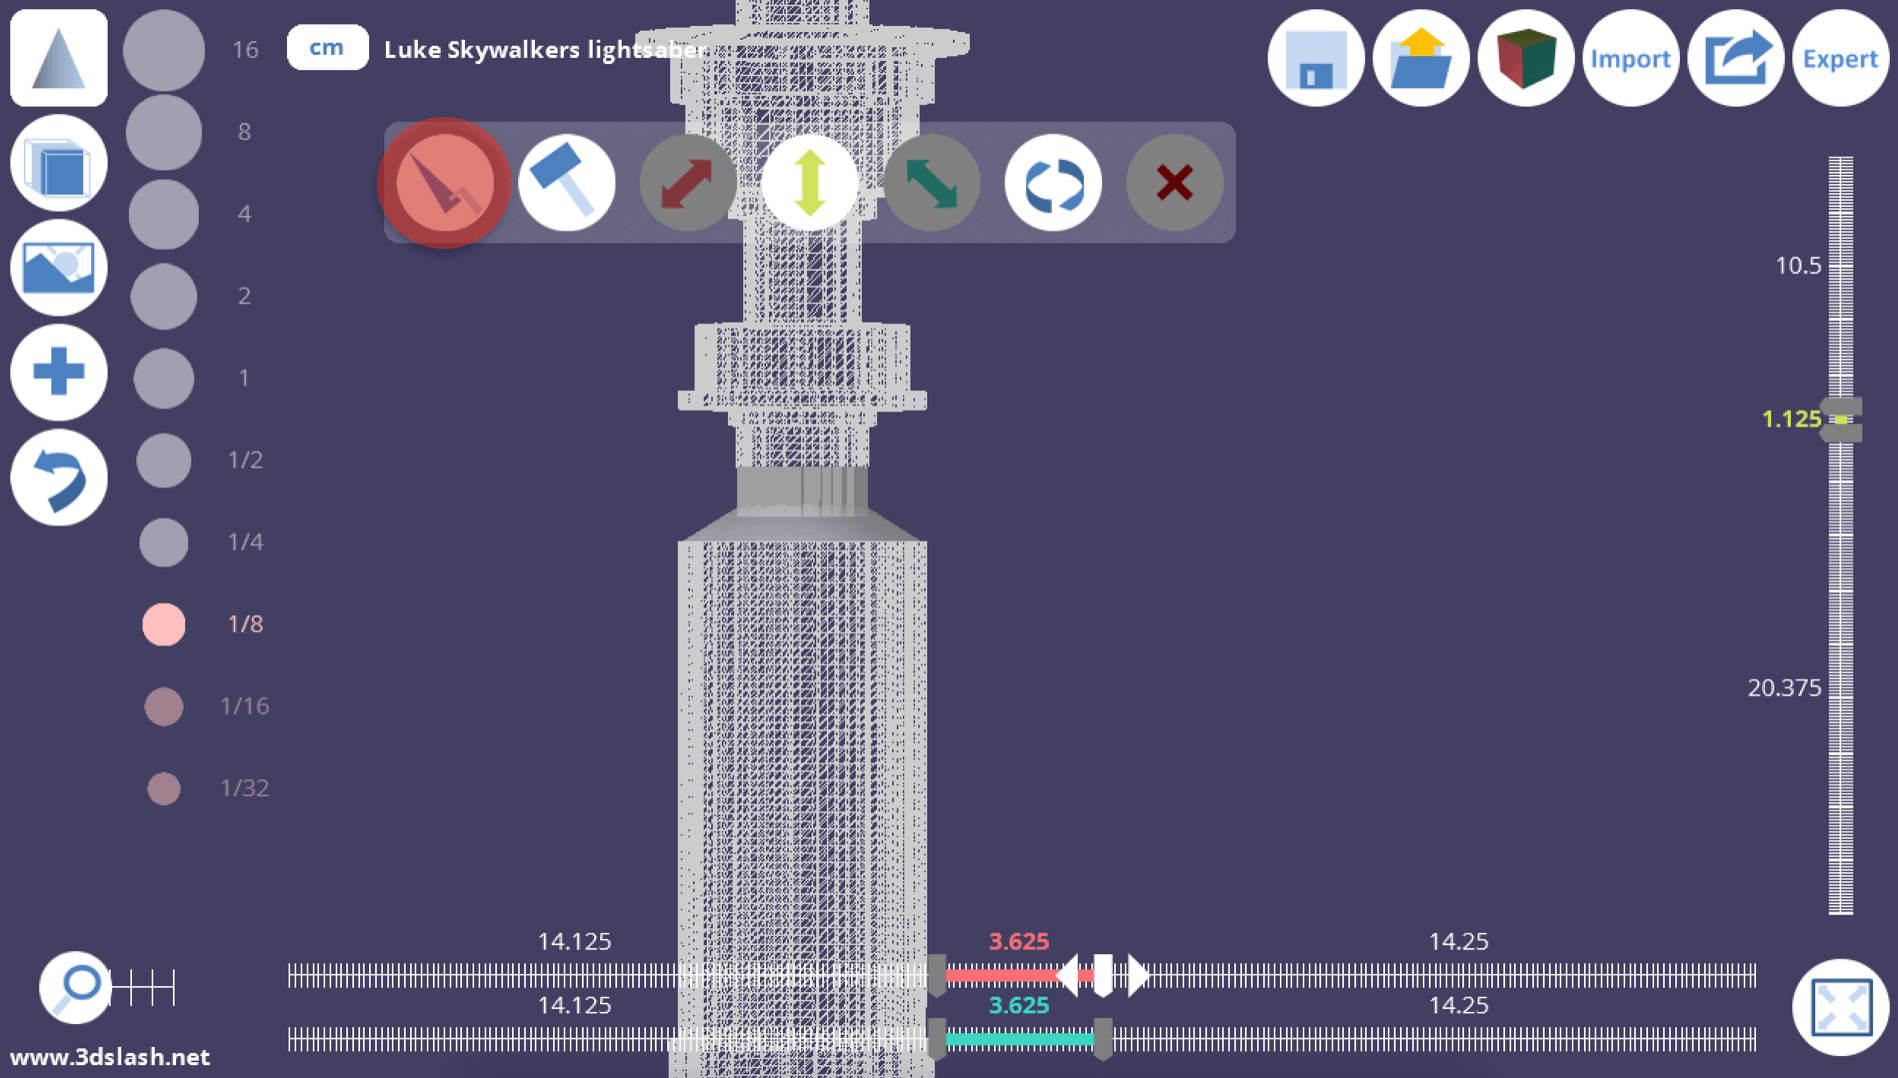
- Create new model sized 32 x 32 x 32 cm.
- Use the Drill tool to get rid of the entire cube.
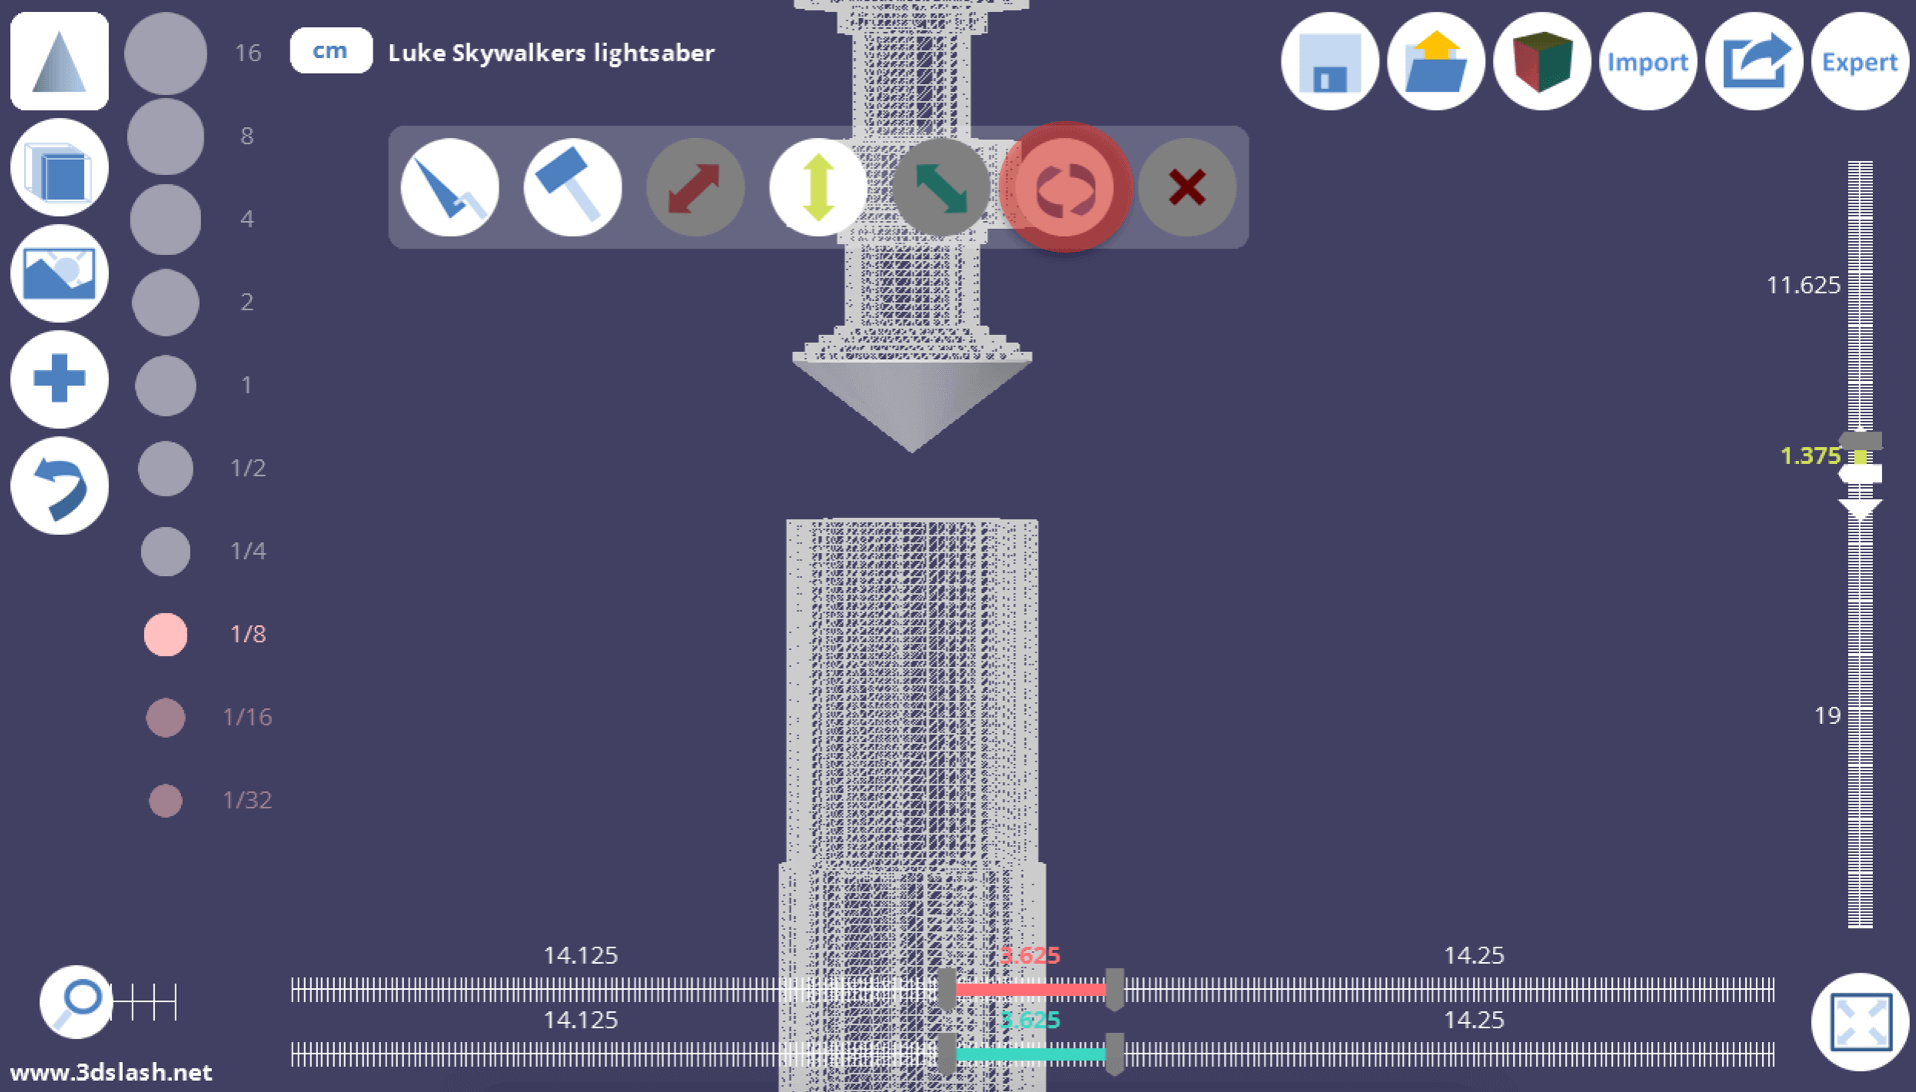
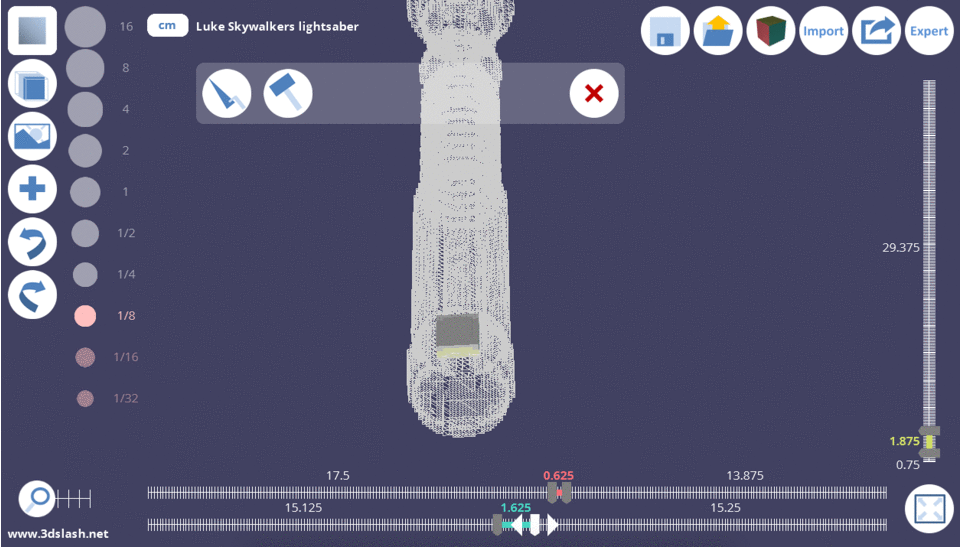
- Create a cylinder of the thinnest part of the lightsaber by using the Cylinder tool. Before you build the current shape with the red highlighted button, make sure you set the limits tothe correct thickness (1.6 cm) and the complete height (29 cm).

Cylinder withthe dimensions of the thinnest part of the lightsaber and the hole length - Continue by creating one cylinder after an other with the correct thickness and hight of the part you want to create based on the plan. The following gif show that I started from the upper part of the lightsaber and give you the limits I used.


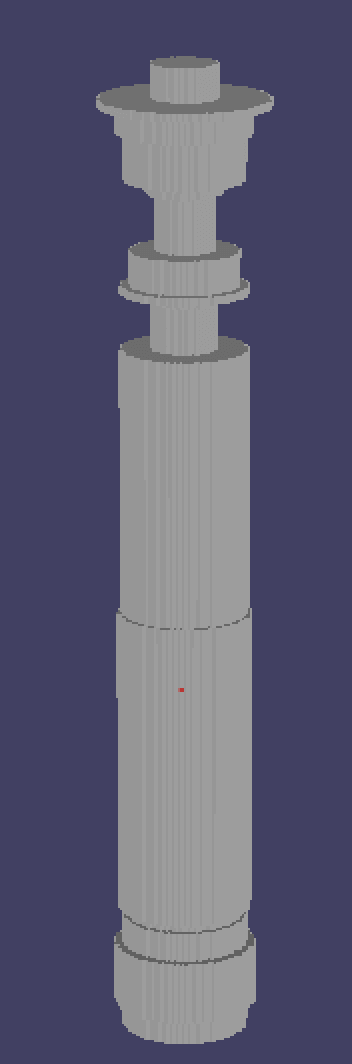
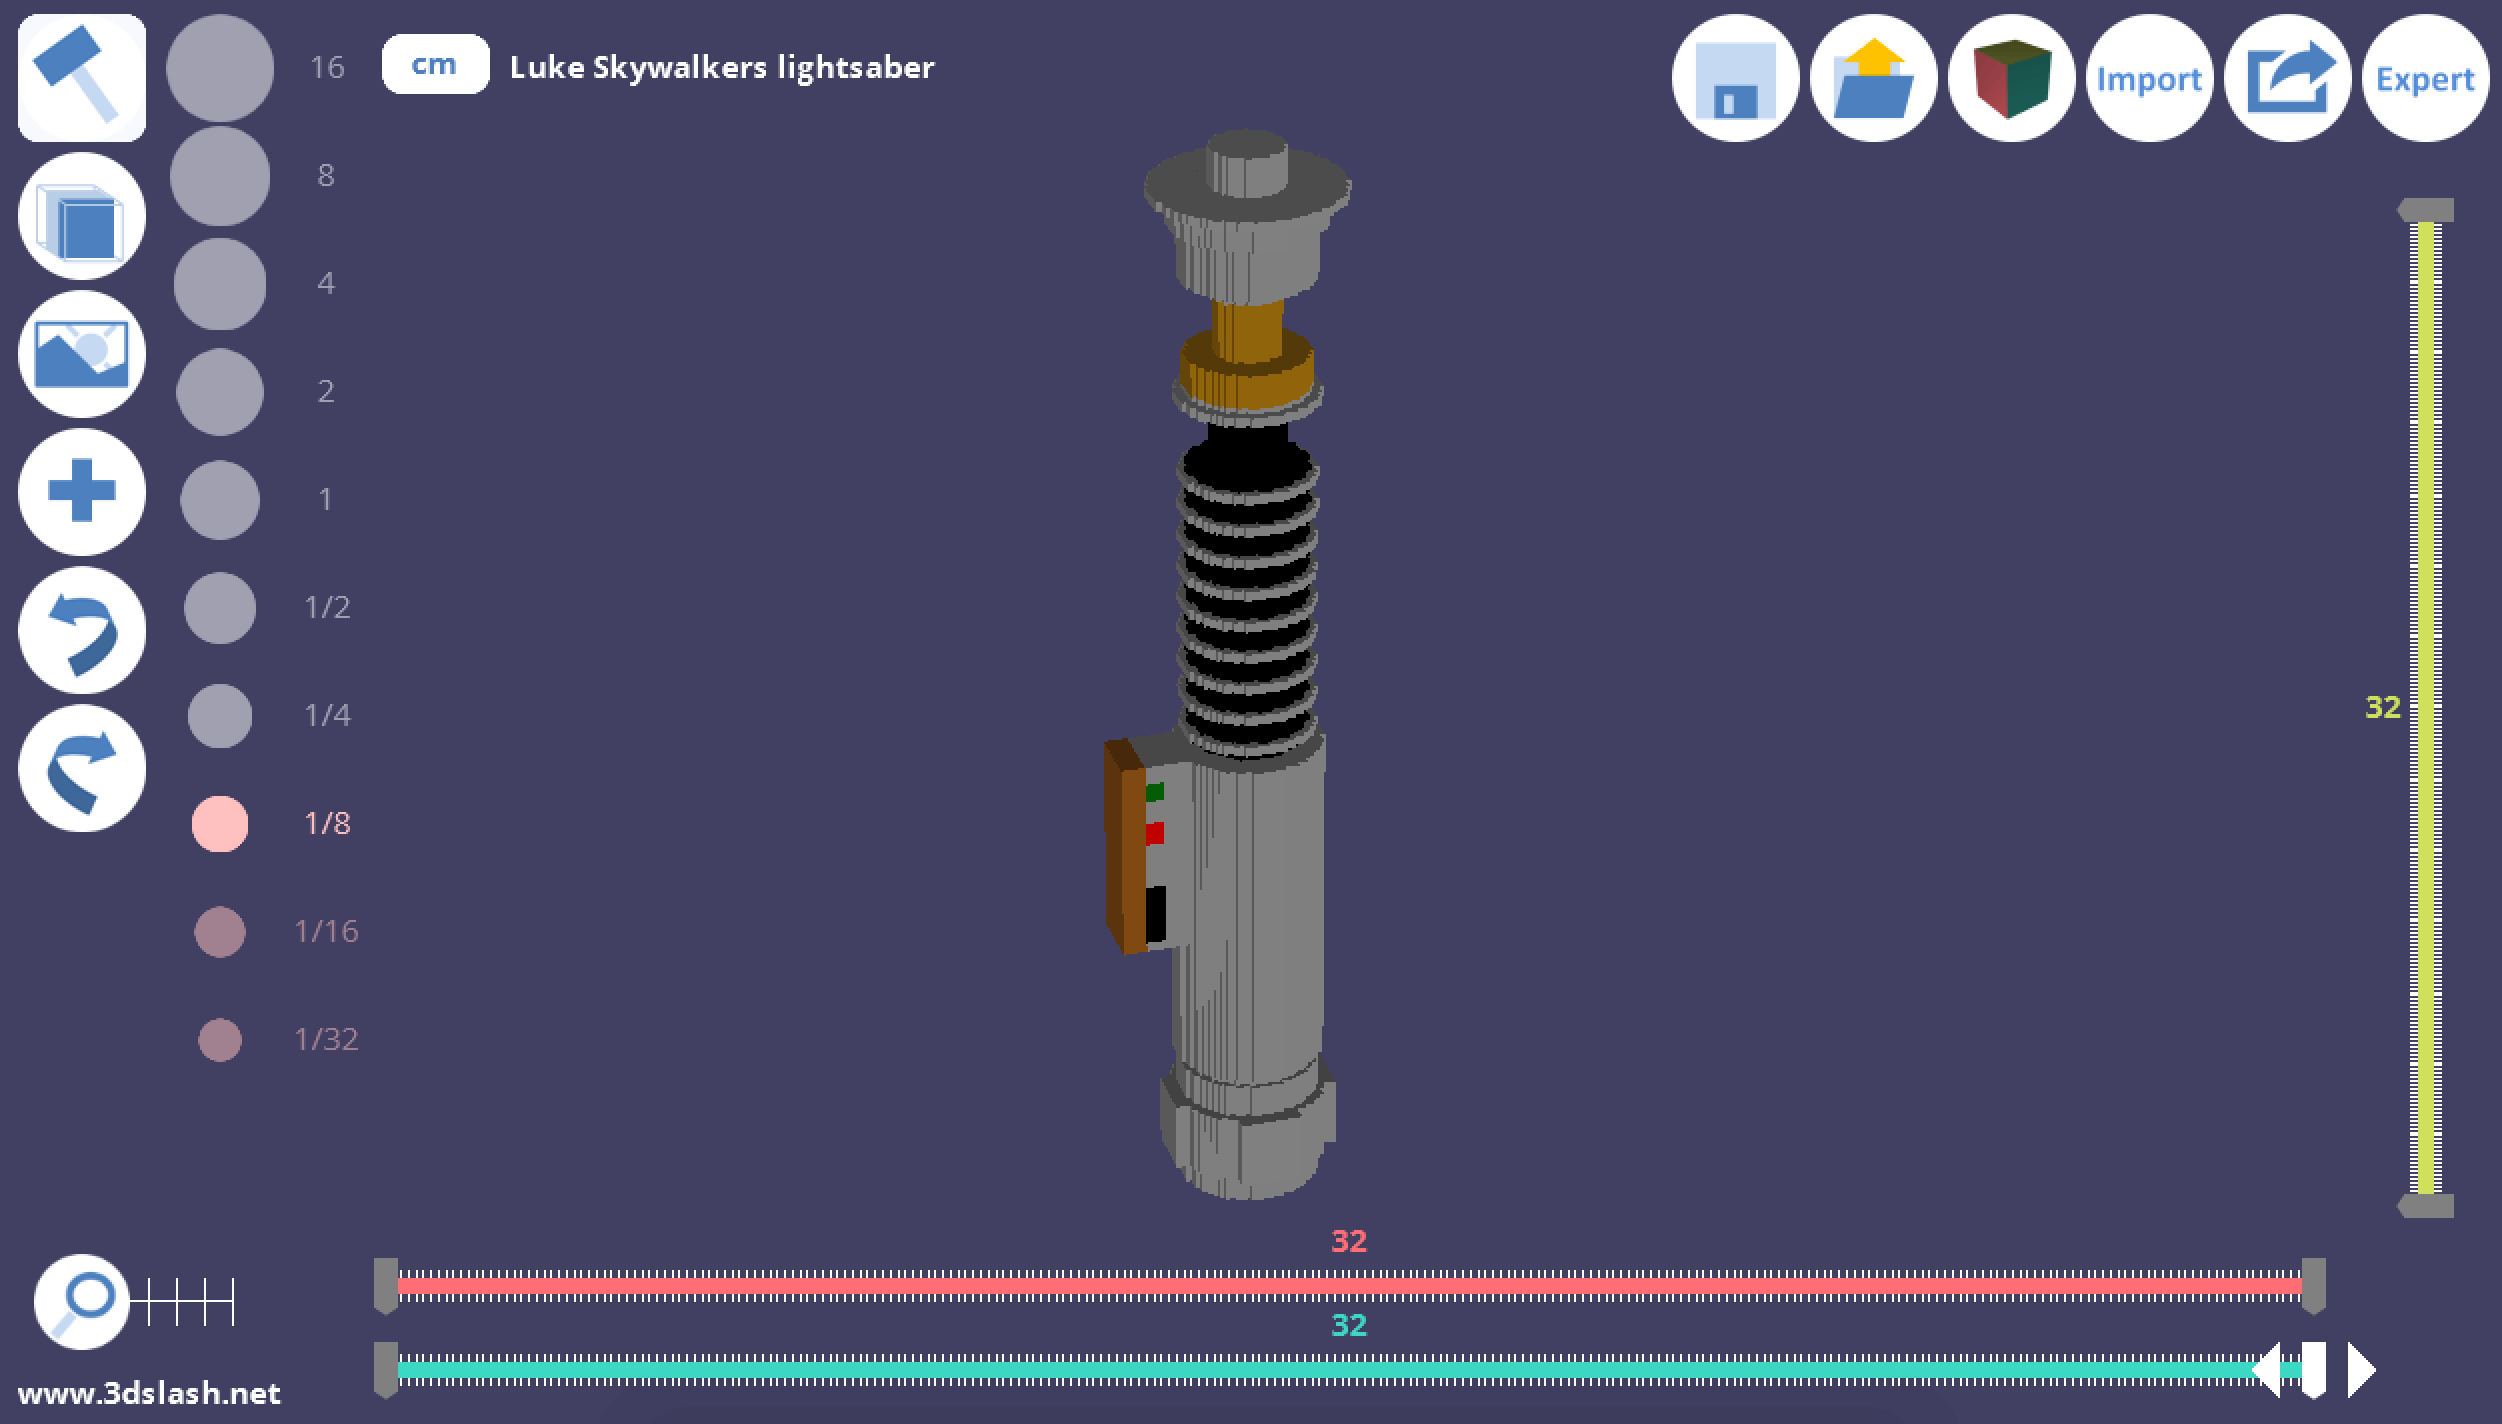
After you finished, your object should look similar to the one in the picture:
Part 2: Refine the shapes
Step 1: Adjust the handle
The handle is not just a cylinder but a lot of cones directed in and out.
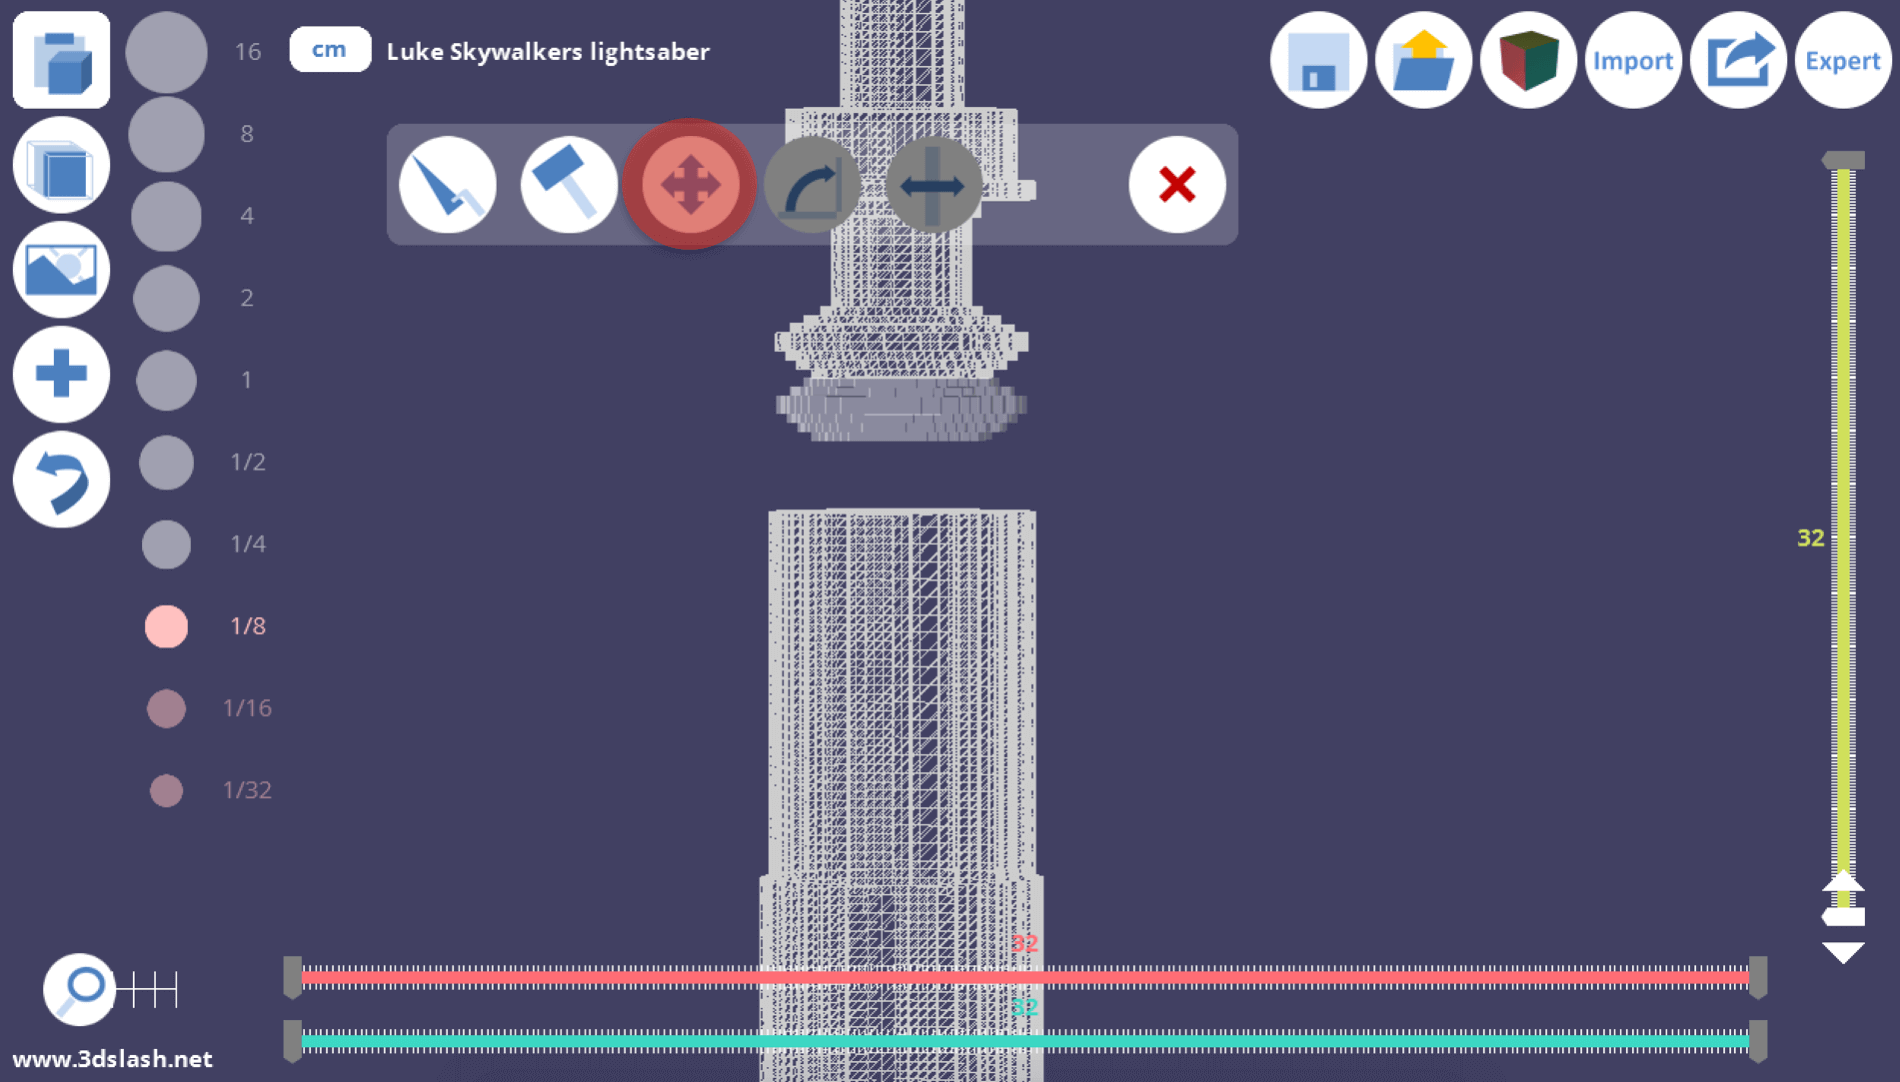
- Get rid of the cylinder you build for the handle. Set the limits and use the Drill tool. (In the pictures the cylinder was removed step by step)
- Use the Cone tool to build a cone. Set the limits so the lower part of the cone is as thick as the cylinder was before and the top of the cone disappears in the upper cylinder. Press the red highlighted button to build the current shape of the cone.
- Build another cone but use the red highlighted button to reverse the cone. Set the limits and build the current shape. Get rid of lower part of the cone by using the Drill tool.
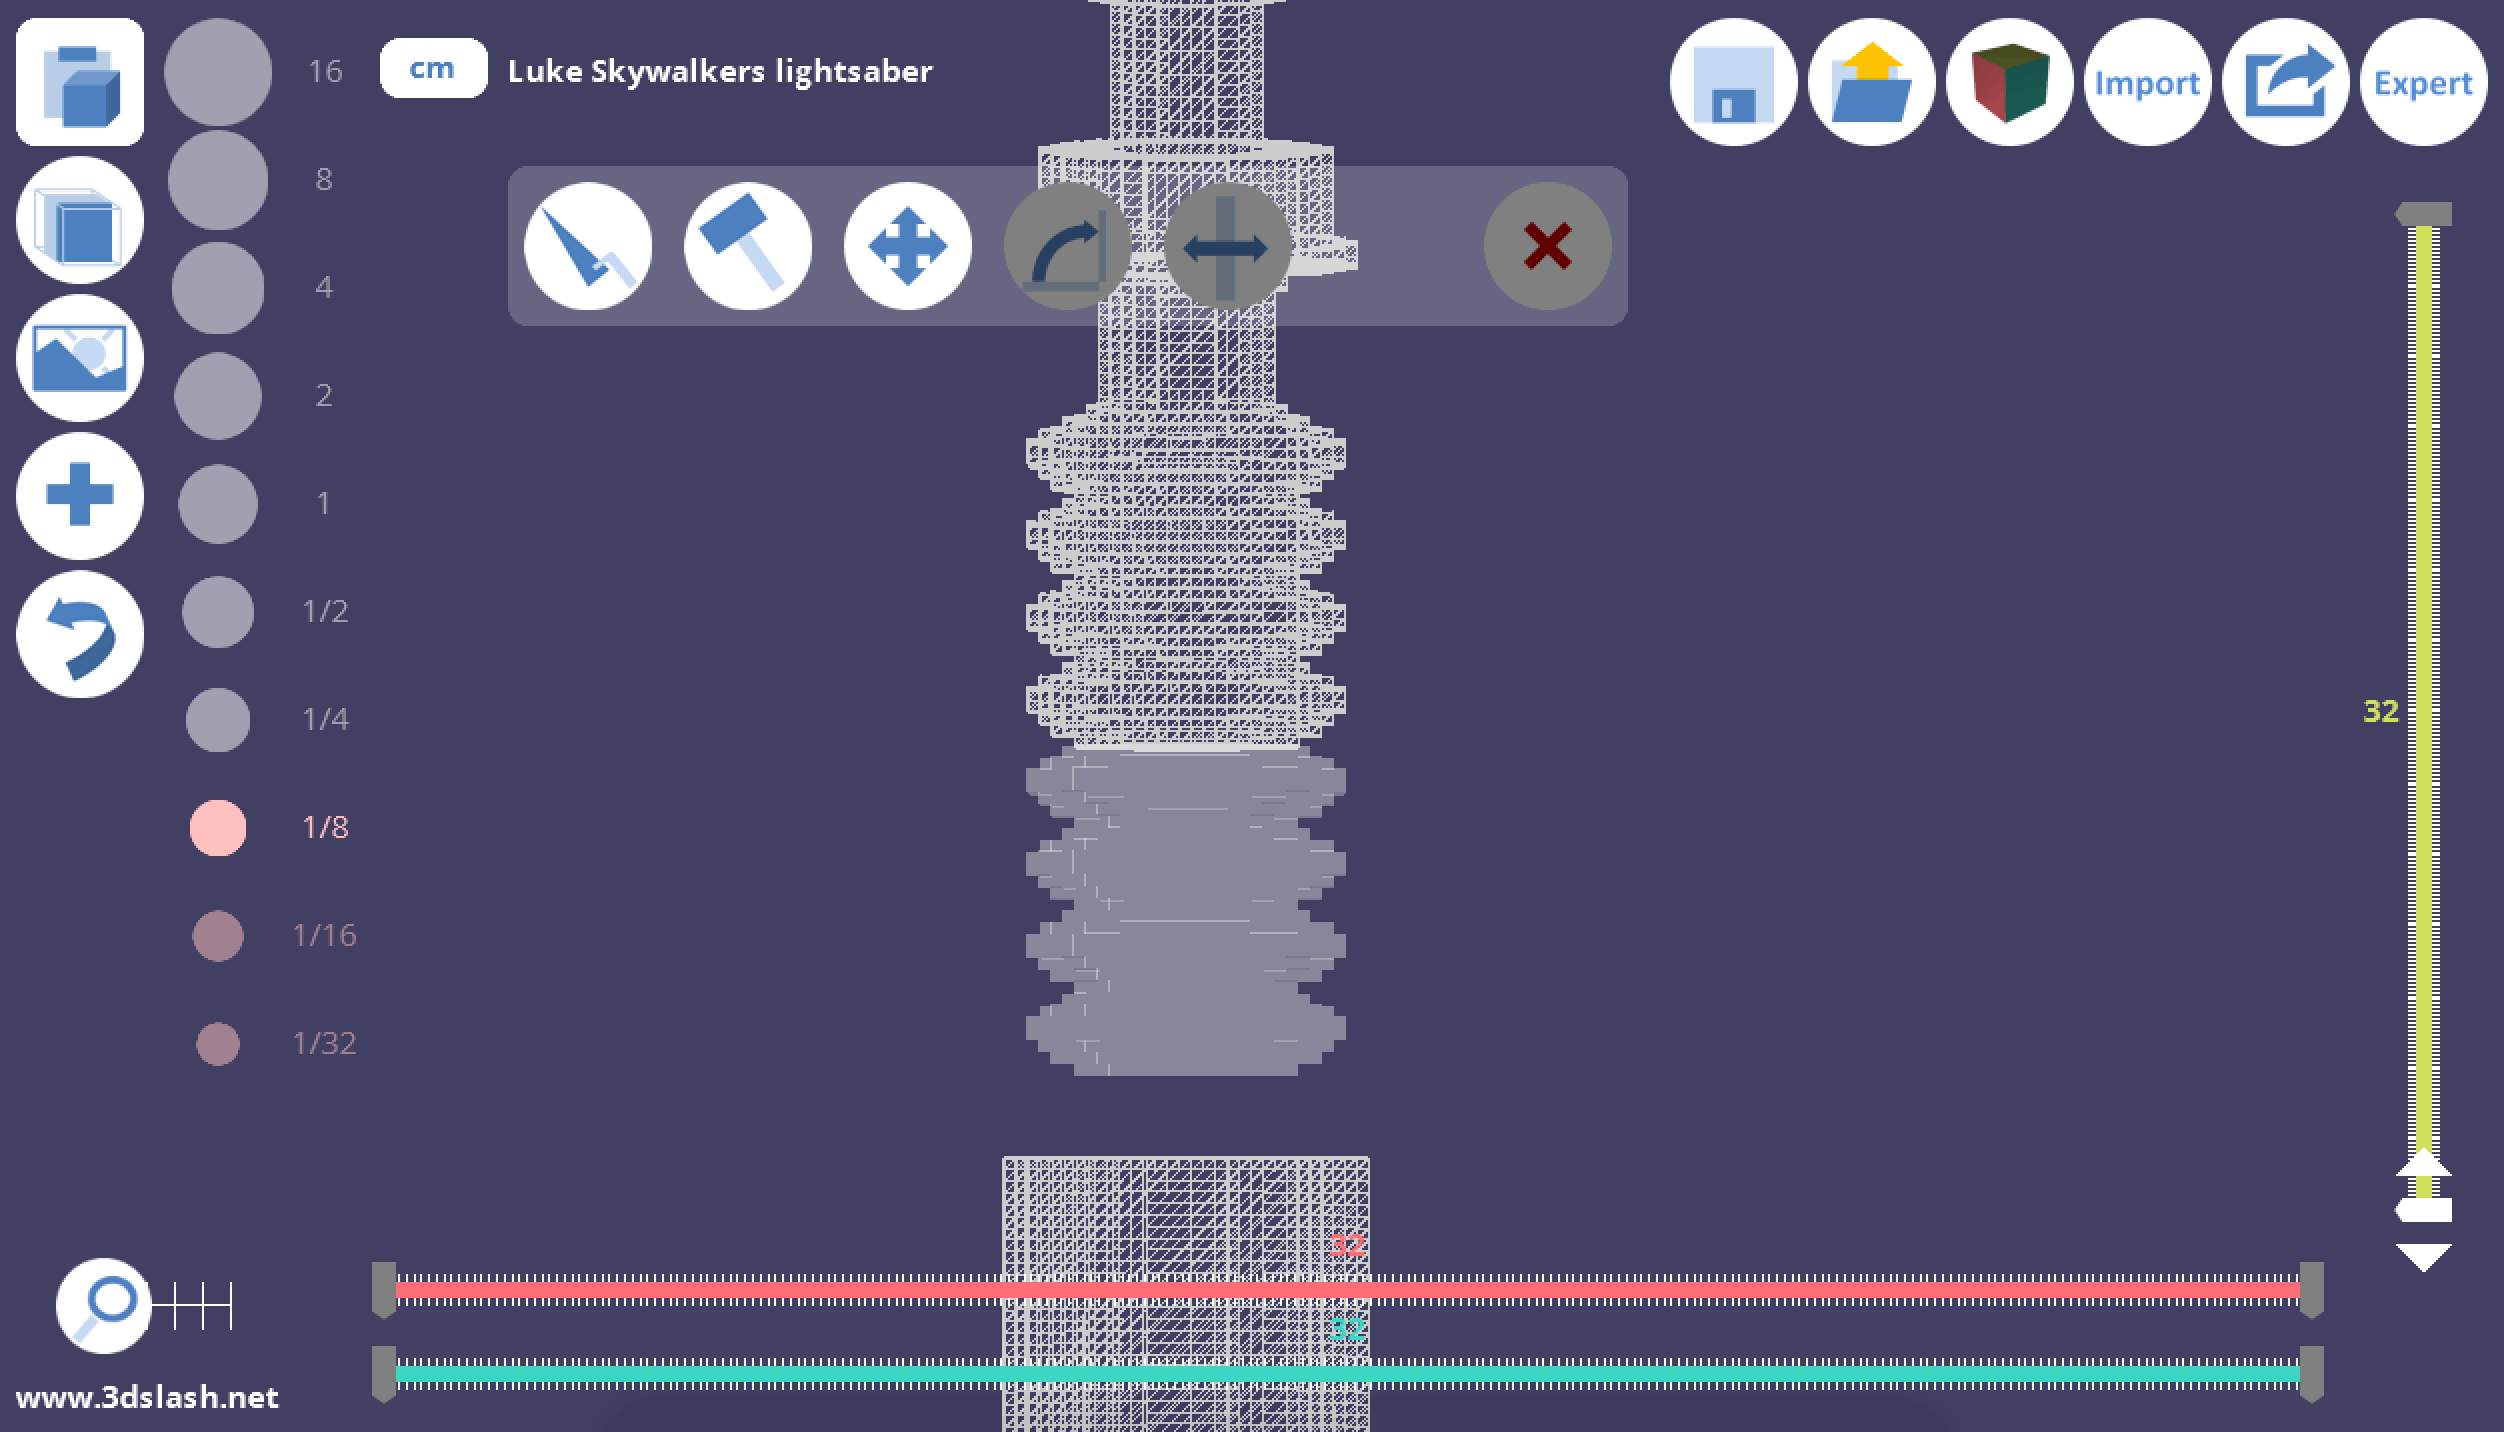
- It would take ages to build nine of these objects we just built. To make it more easy you need to use the Copy tool. Set the right limits of the part you want to copy, then Copy. Now use the red highlighted button to move the object. Just click on the object, hold and move to the place you want the object to be. After you’ve done so you need to build the current shape.
- Repeat but always change the limits so you copy more than just one part.
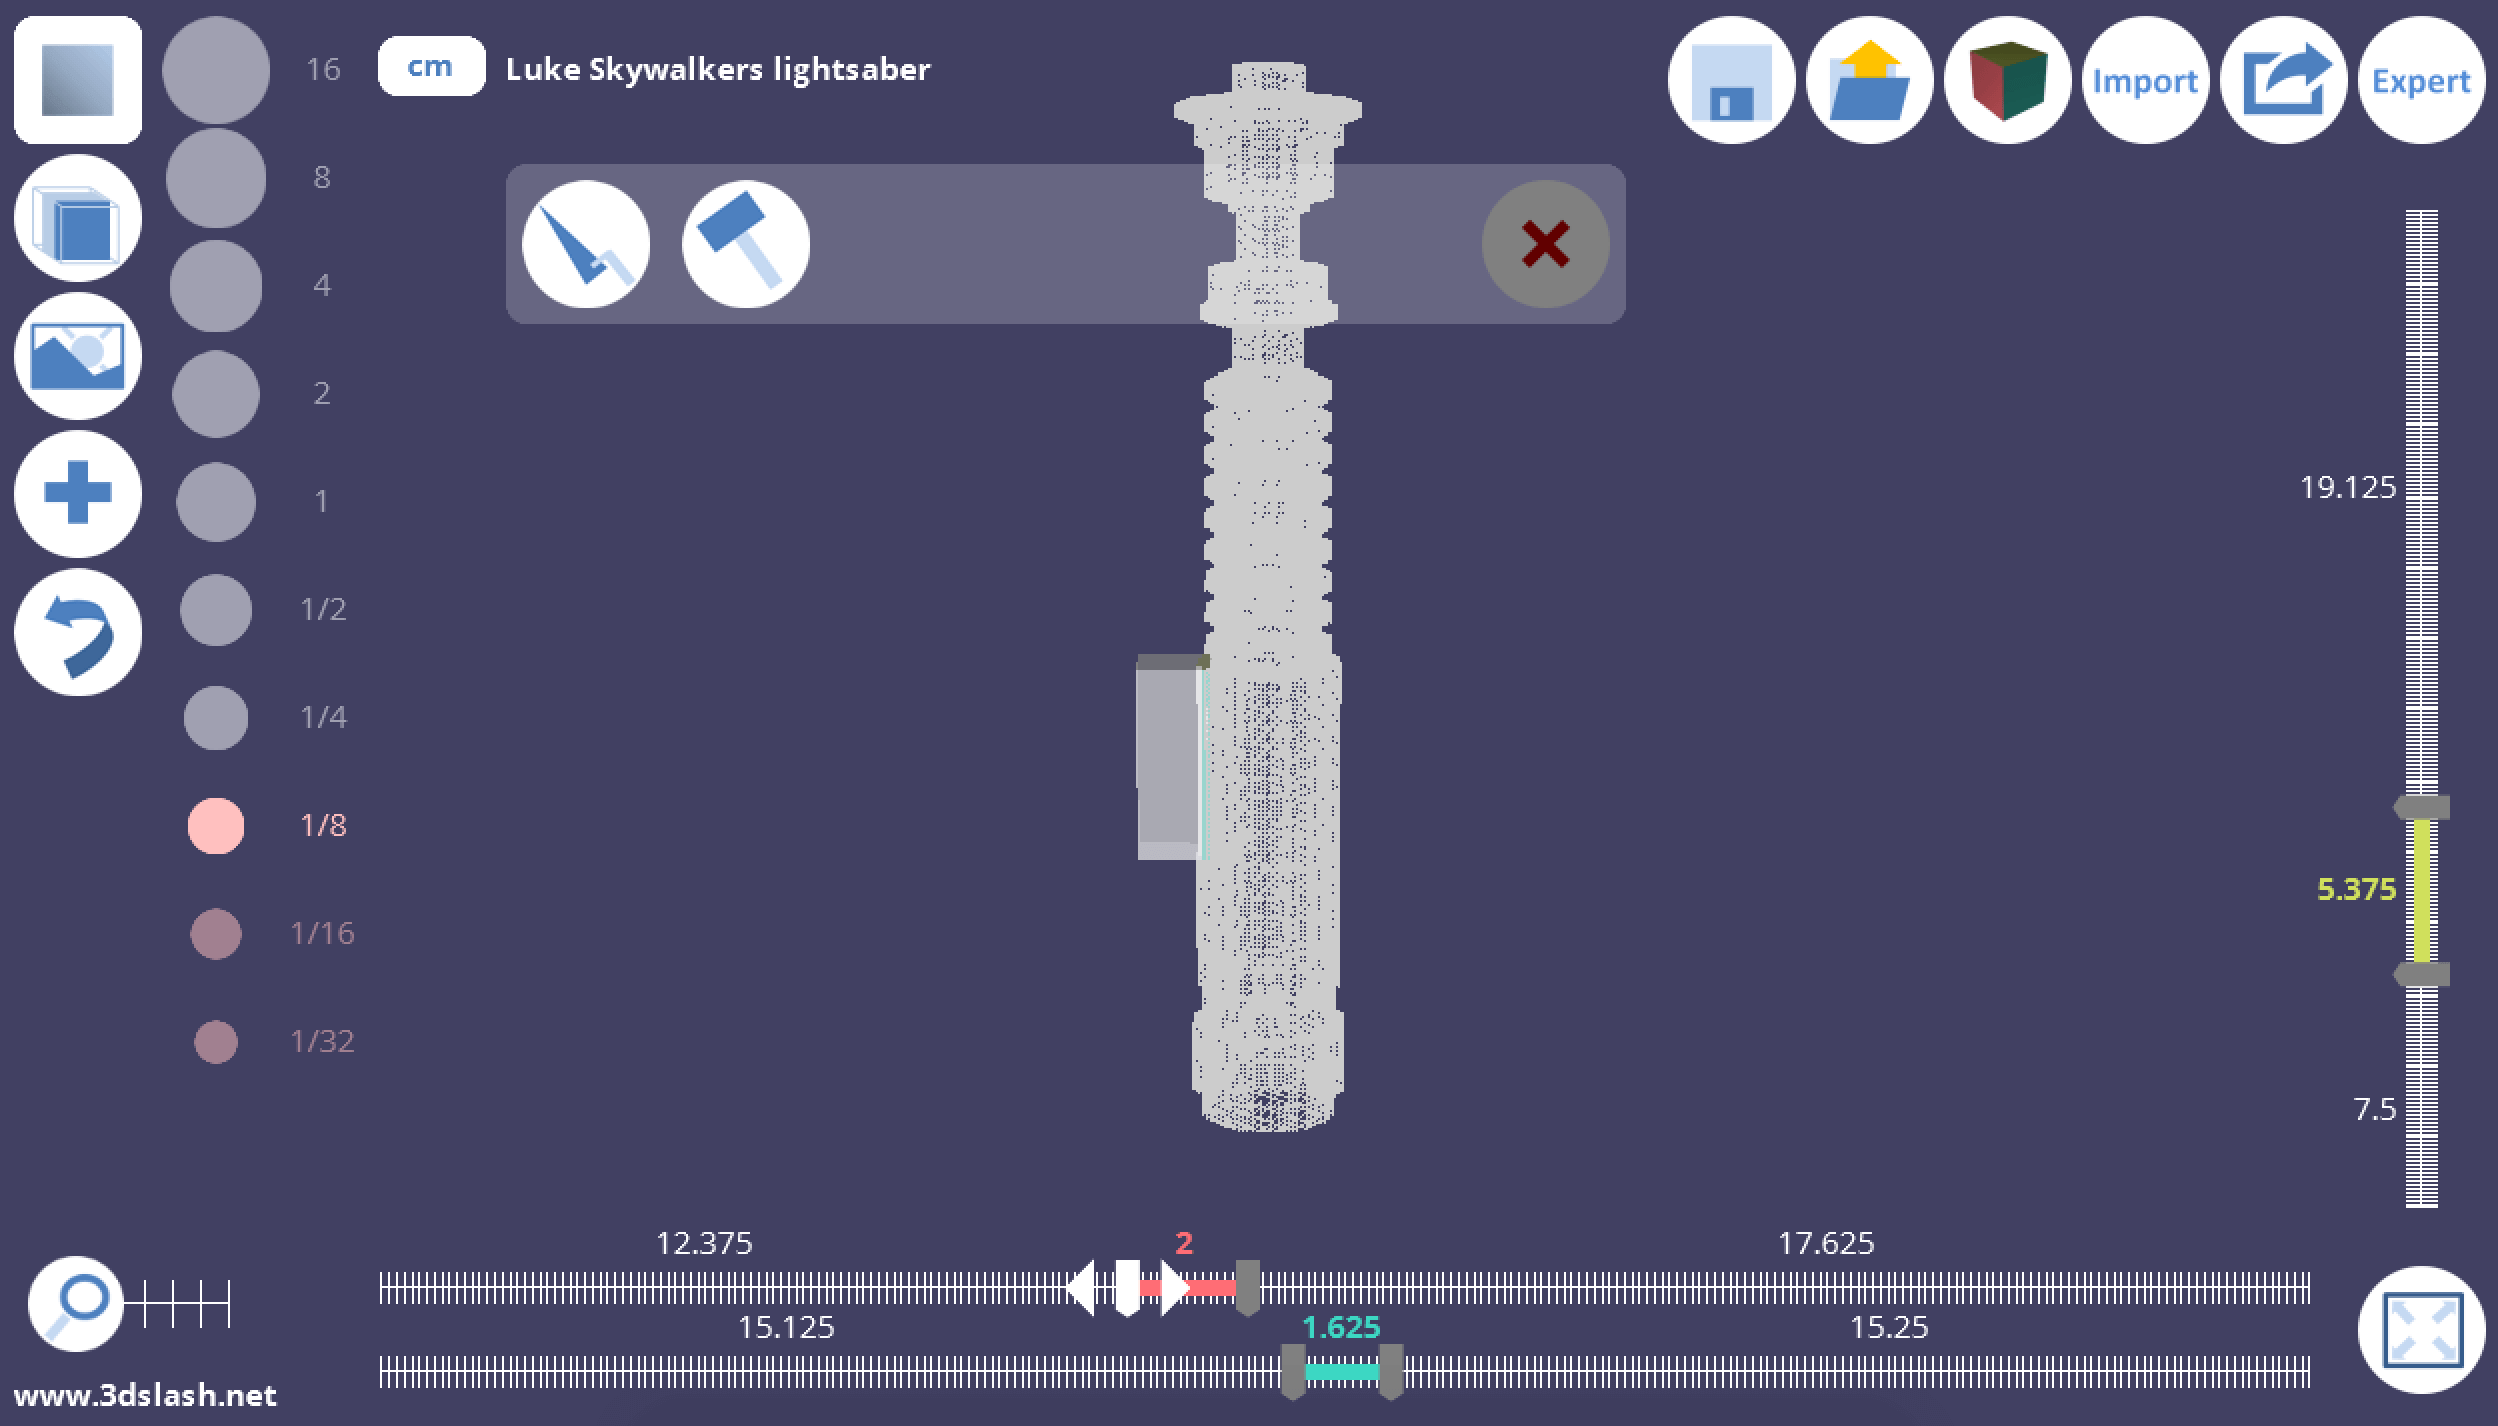
Step 2: Adjust the activation lever and the bottom of the lightsaber
- Use the Fill or remove everything inside the selection box tool next to the Cylinder tool to build a square at the correct position and with the correct limits like the picture shows.
- Build four other squares the same way but for the bottom of the lightsaber like in the gif.
Now you just need to paint the lightsaber with its original colors so it becomes the real lightsaber of Luke Skywalker.
If you want to put something like a light rod in it, just create a hole into the lightsaber by using the Cylinder tool. This time, do not Create the current shape but Remove it.
3D Slash Tutorial – Lesson 4: Making a Smartphone Case
In lessin 4 of this 3D Slash Tutorial, you learn how to make your own Stormtrooper smartphone case. And for impatient readers: At the end of the article, you can download the STL files this workshop we created for.
Part 1: How to use existing objects from the 3D Slash gallery
Step 1: Import a smartphone case file from the 3D Slash gallery
Everybody who is using 3D Slash and has an account can share his objects. The gallery on the 3D Slash site allows every user to use already existing objects from other people to print them or to work with them.
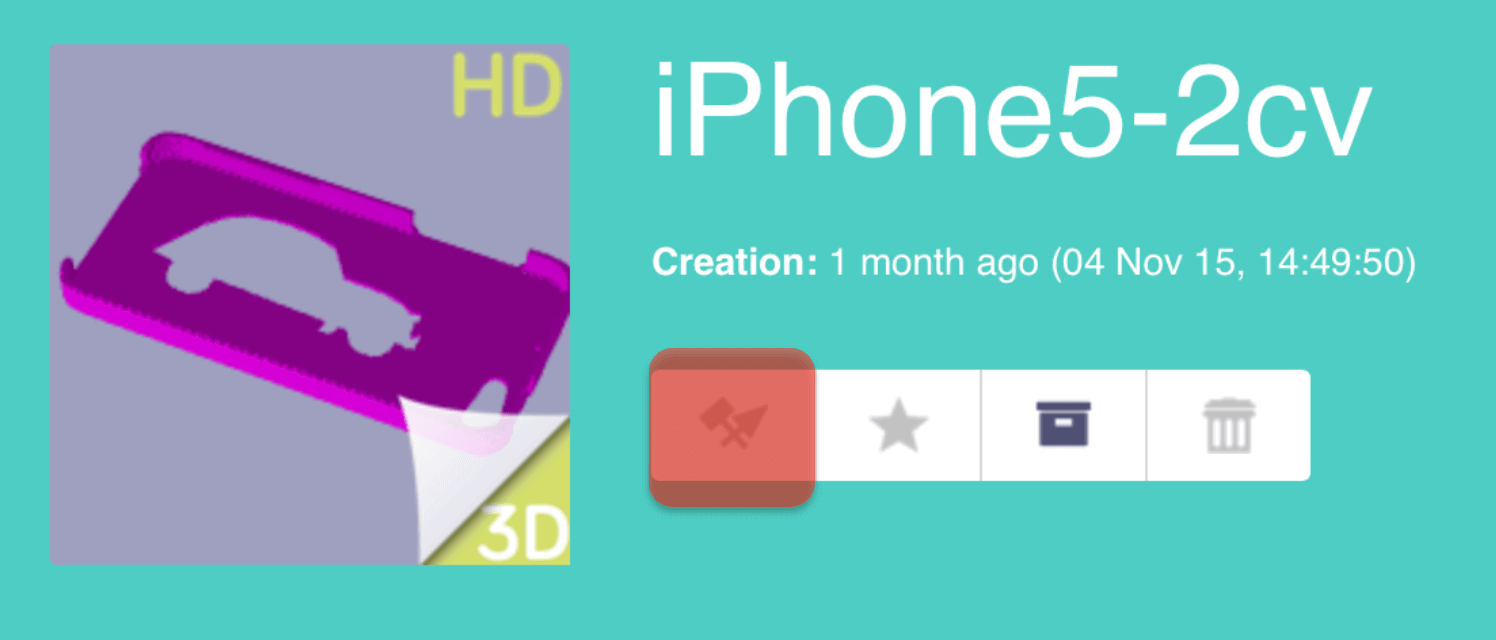
So, you just need to look threw the gallery and search for a matching object you want to work with.
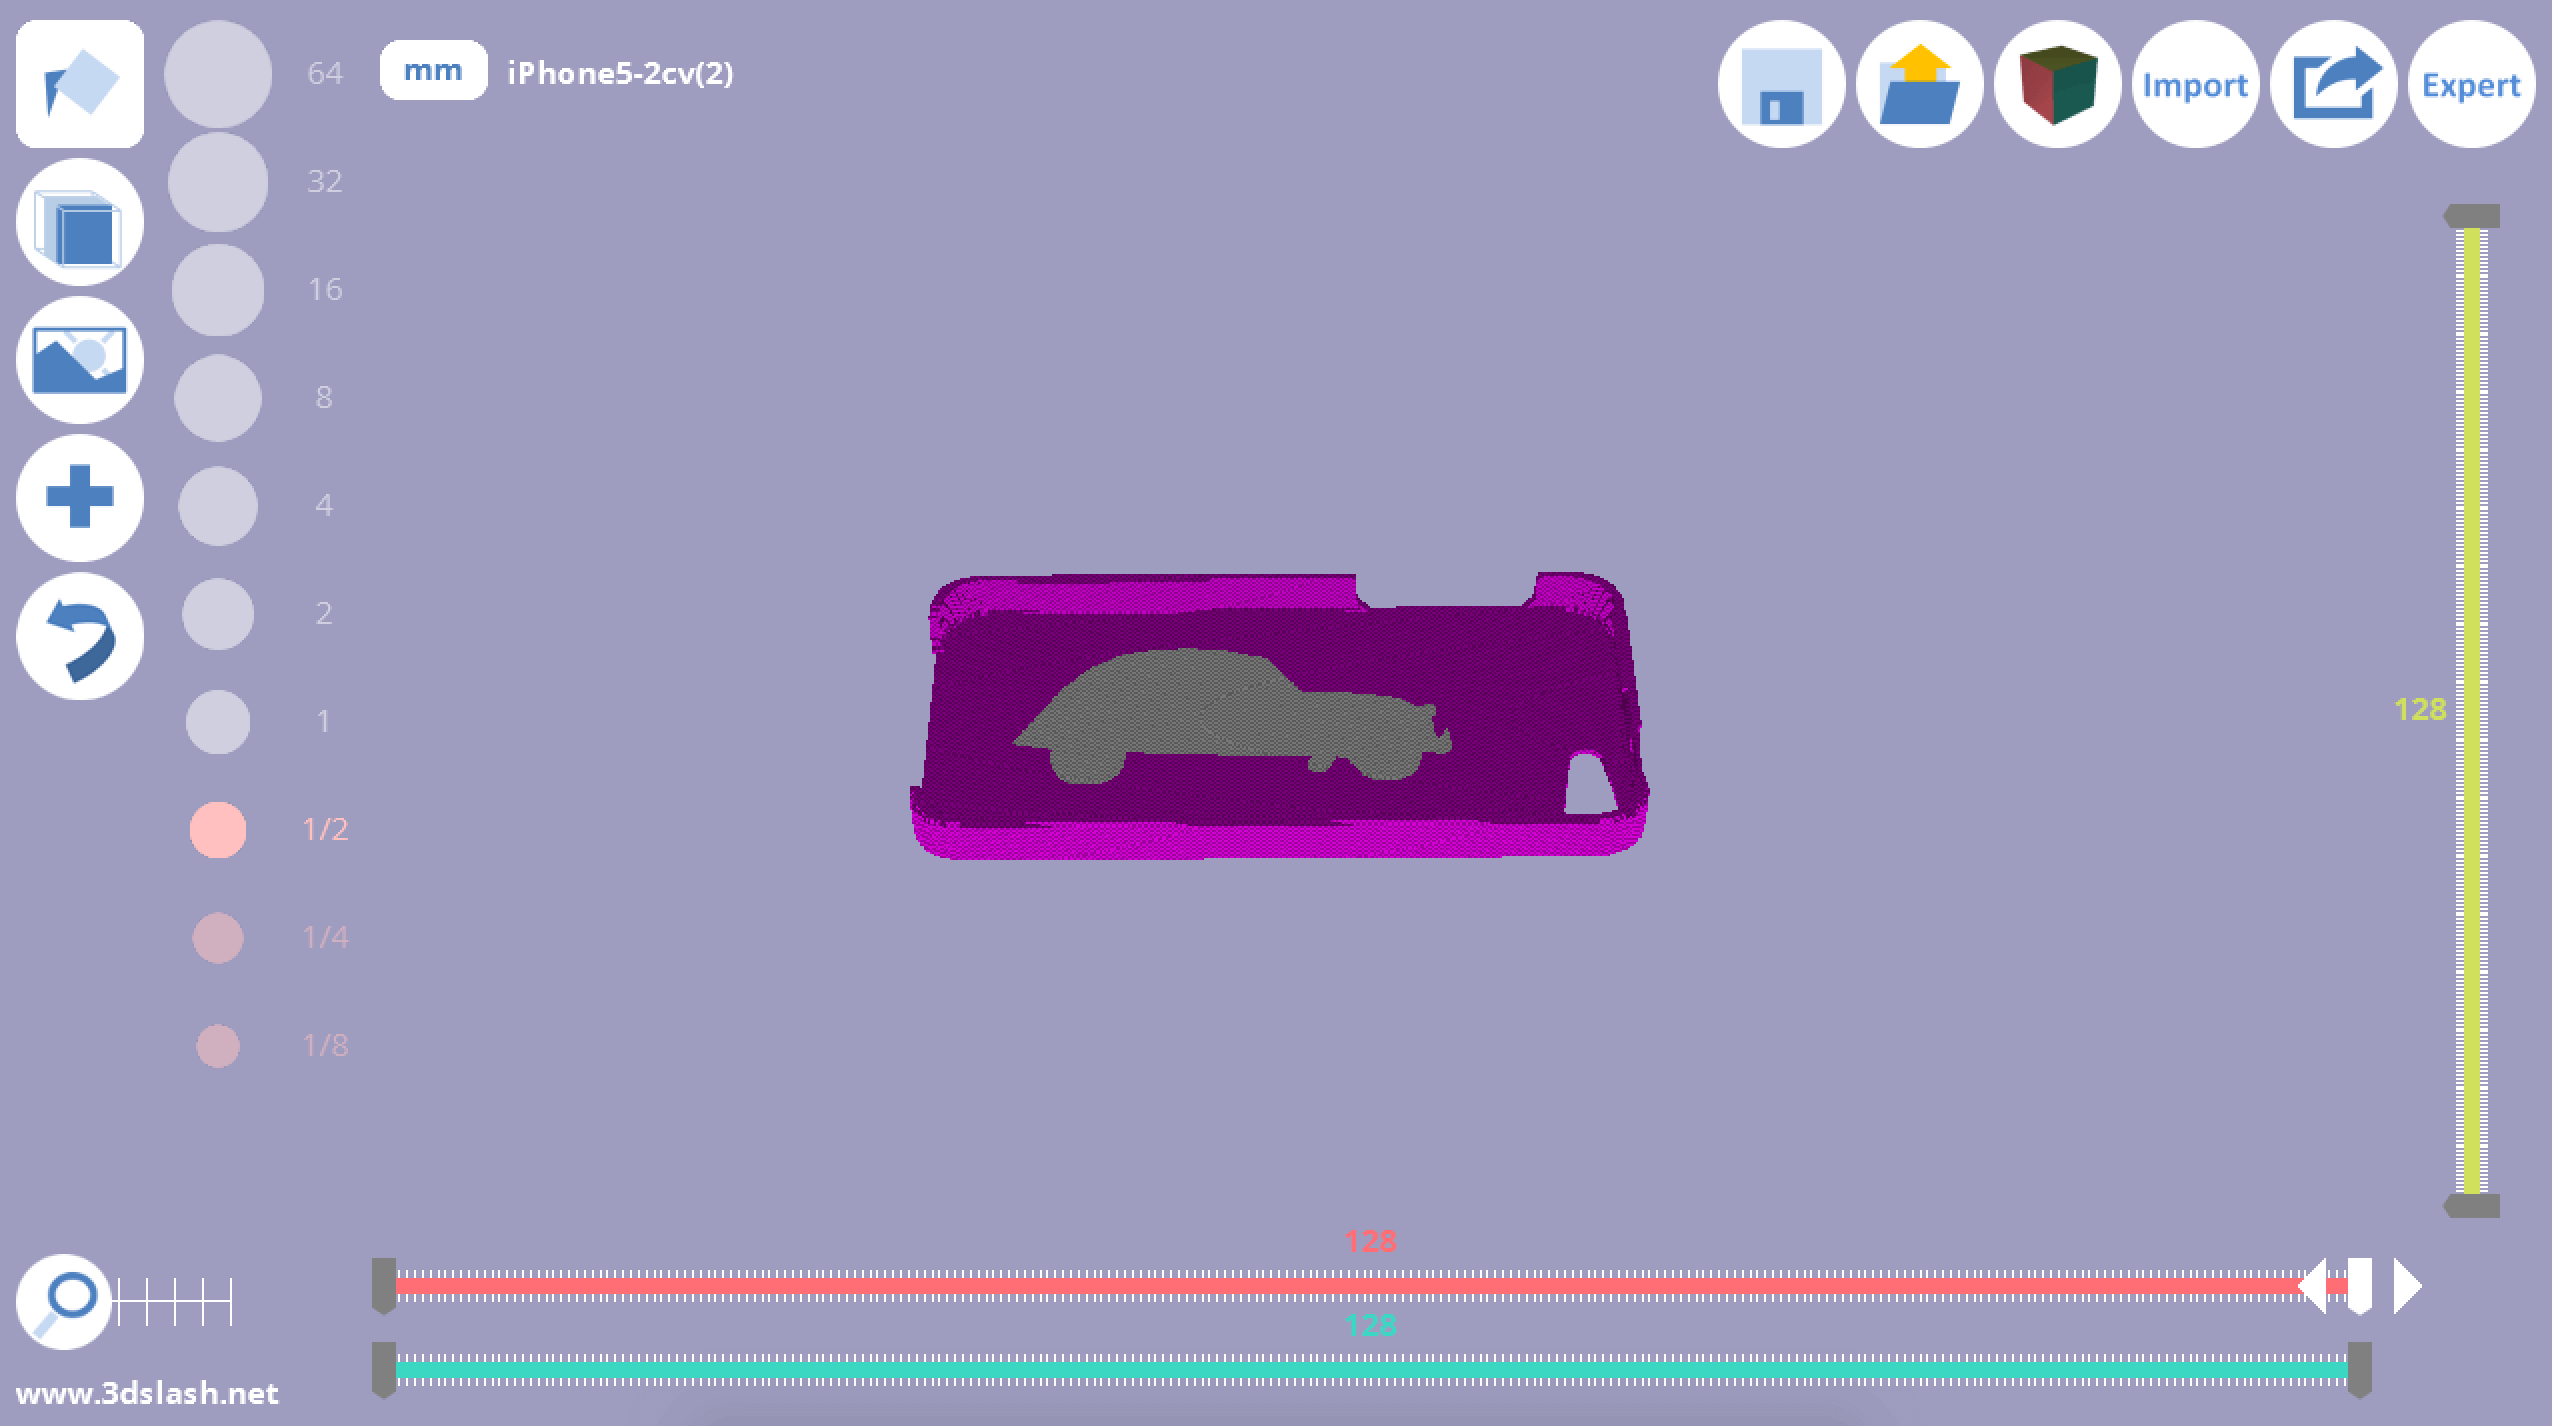
When you found the needed object like this pink iPhone case with a car, you just need to click on the red highlighted button to import the file into your folder.
Step 2: Adjust the object
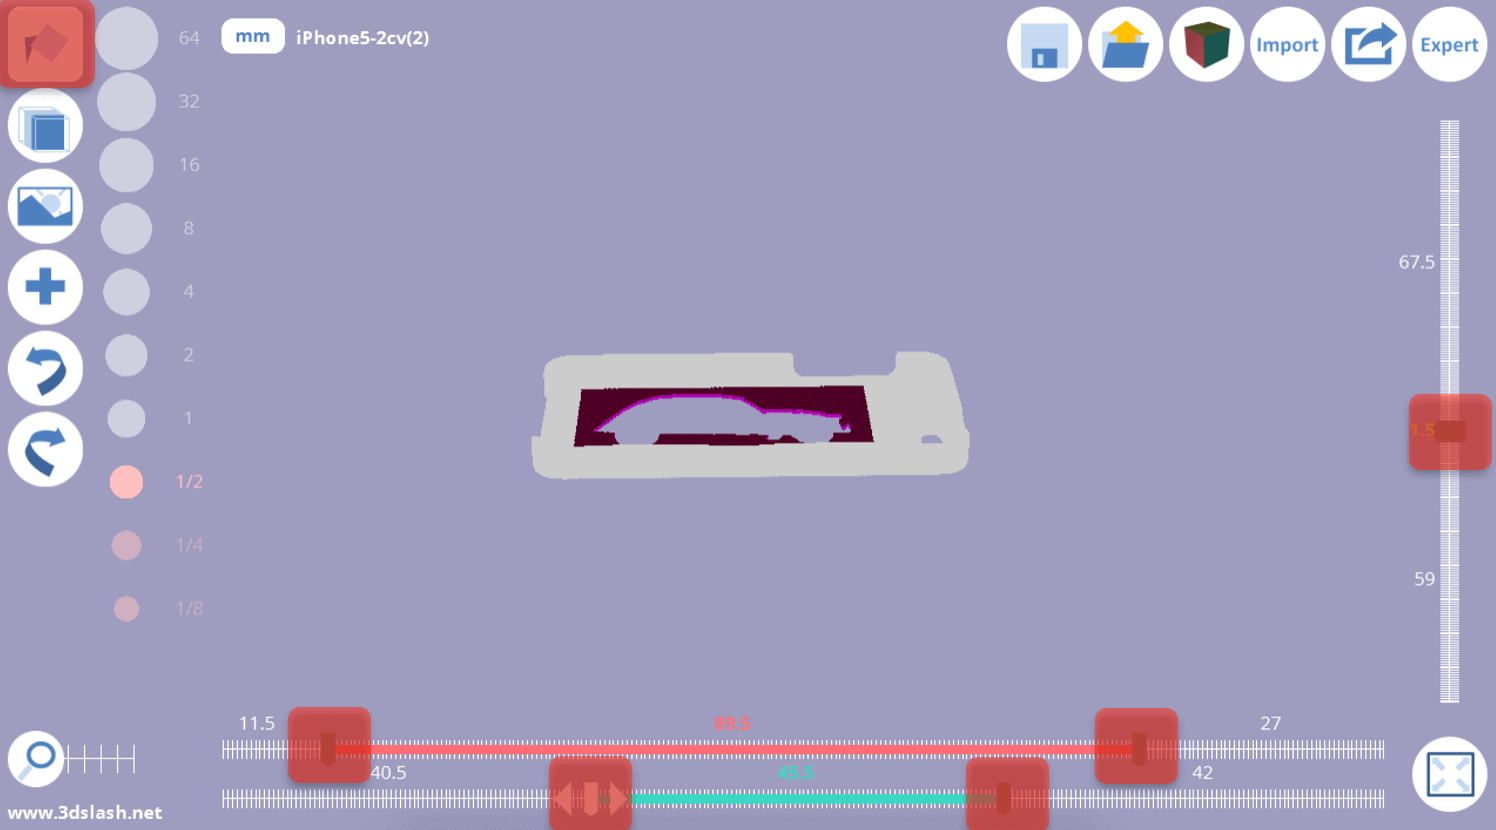
A pink iPhone cover with a car really doesn’t fit our concept of a cool Star Wars iPhone case. So we need to change the object to a basic case without the car and not in pink to transform it into a real Star Wars case.
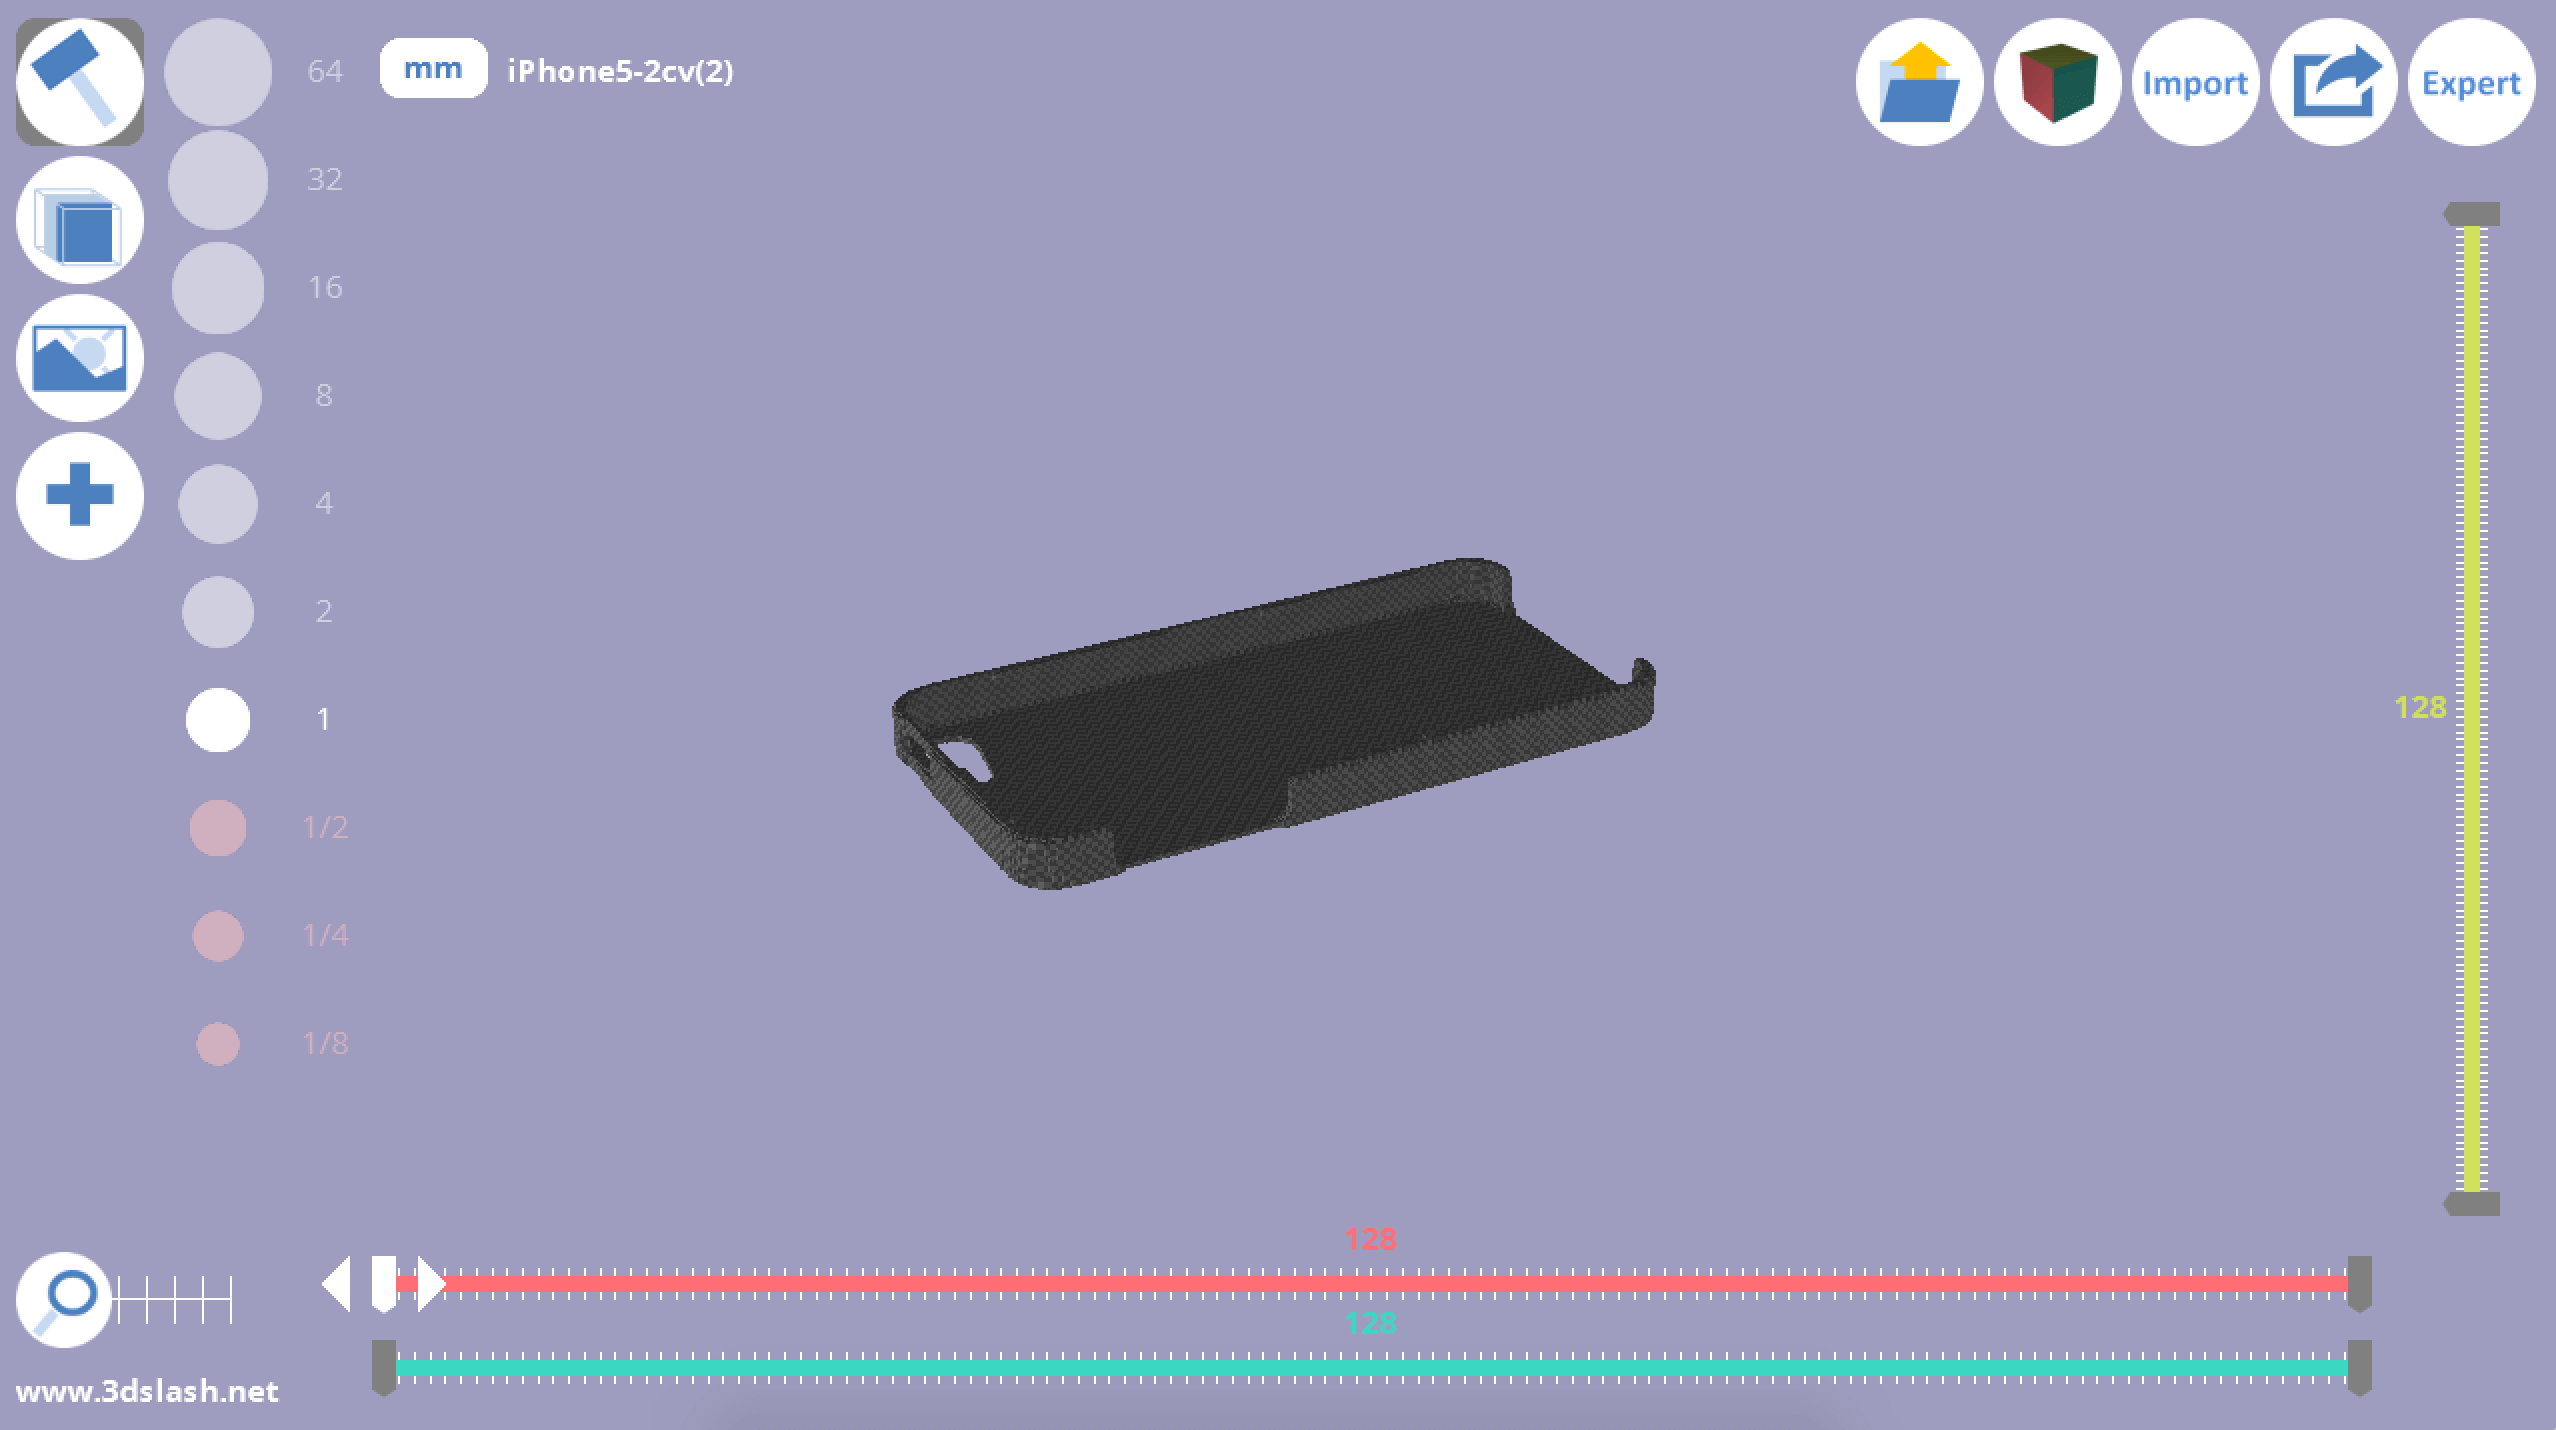
- Get rid of the car by setting the limits right and using the Fill tool.

The case before filling - Paint the object using the Brush tool.
- Save your object.
The case now should look similar to this one.
Part 2: Combine objects from STL files and objects you build in 3D Slash
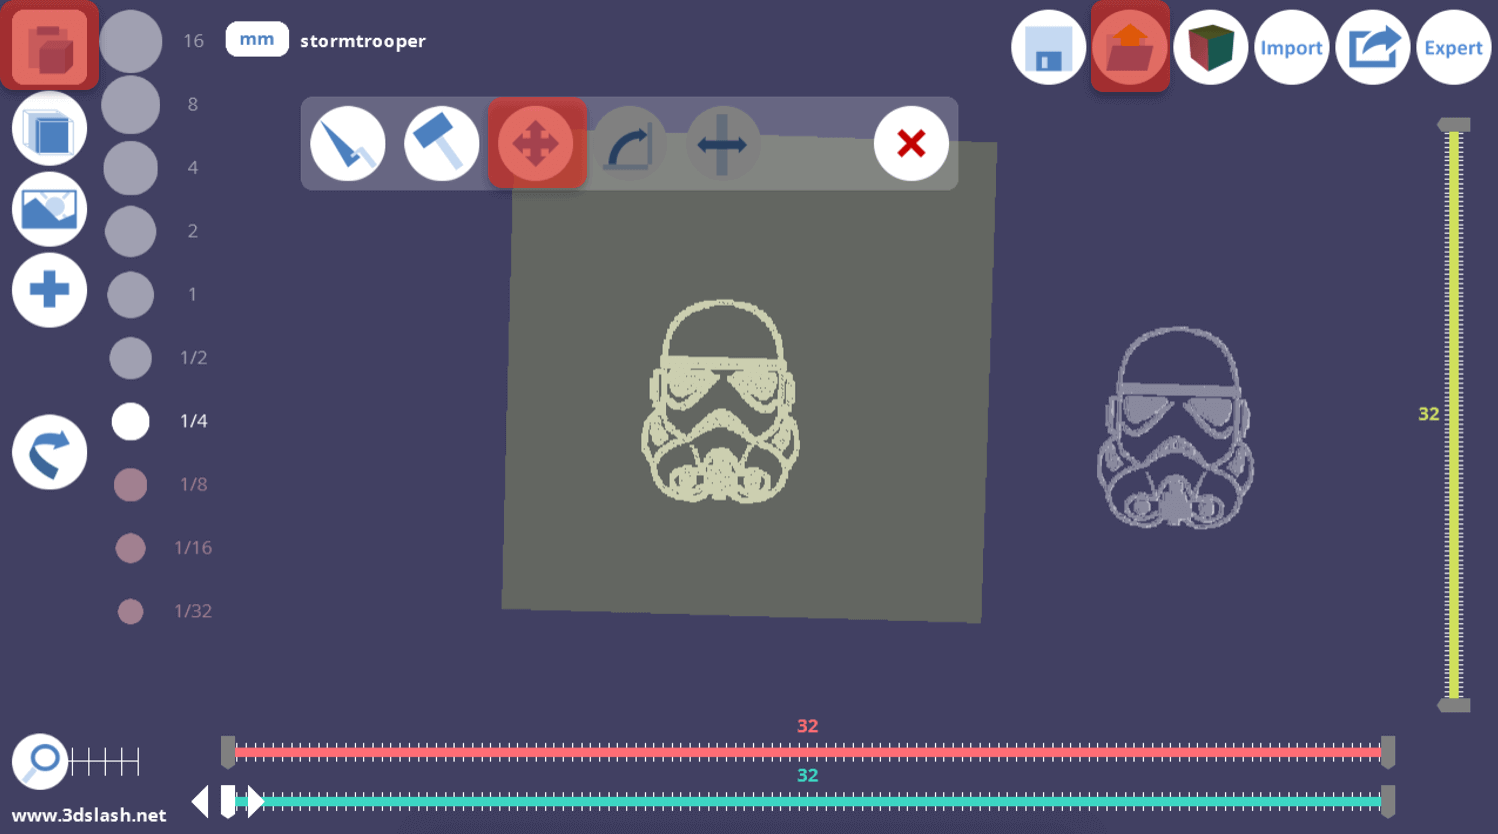
Step 1: Build a Stormtrooper object
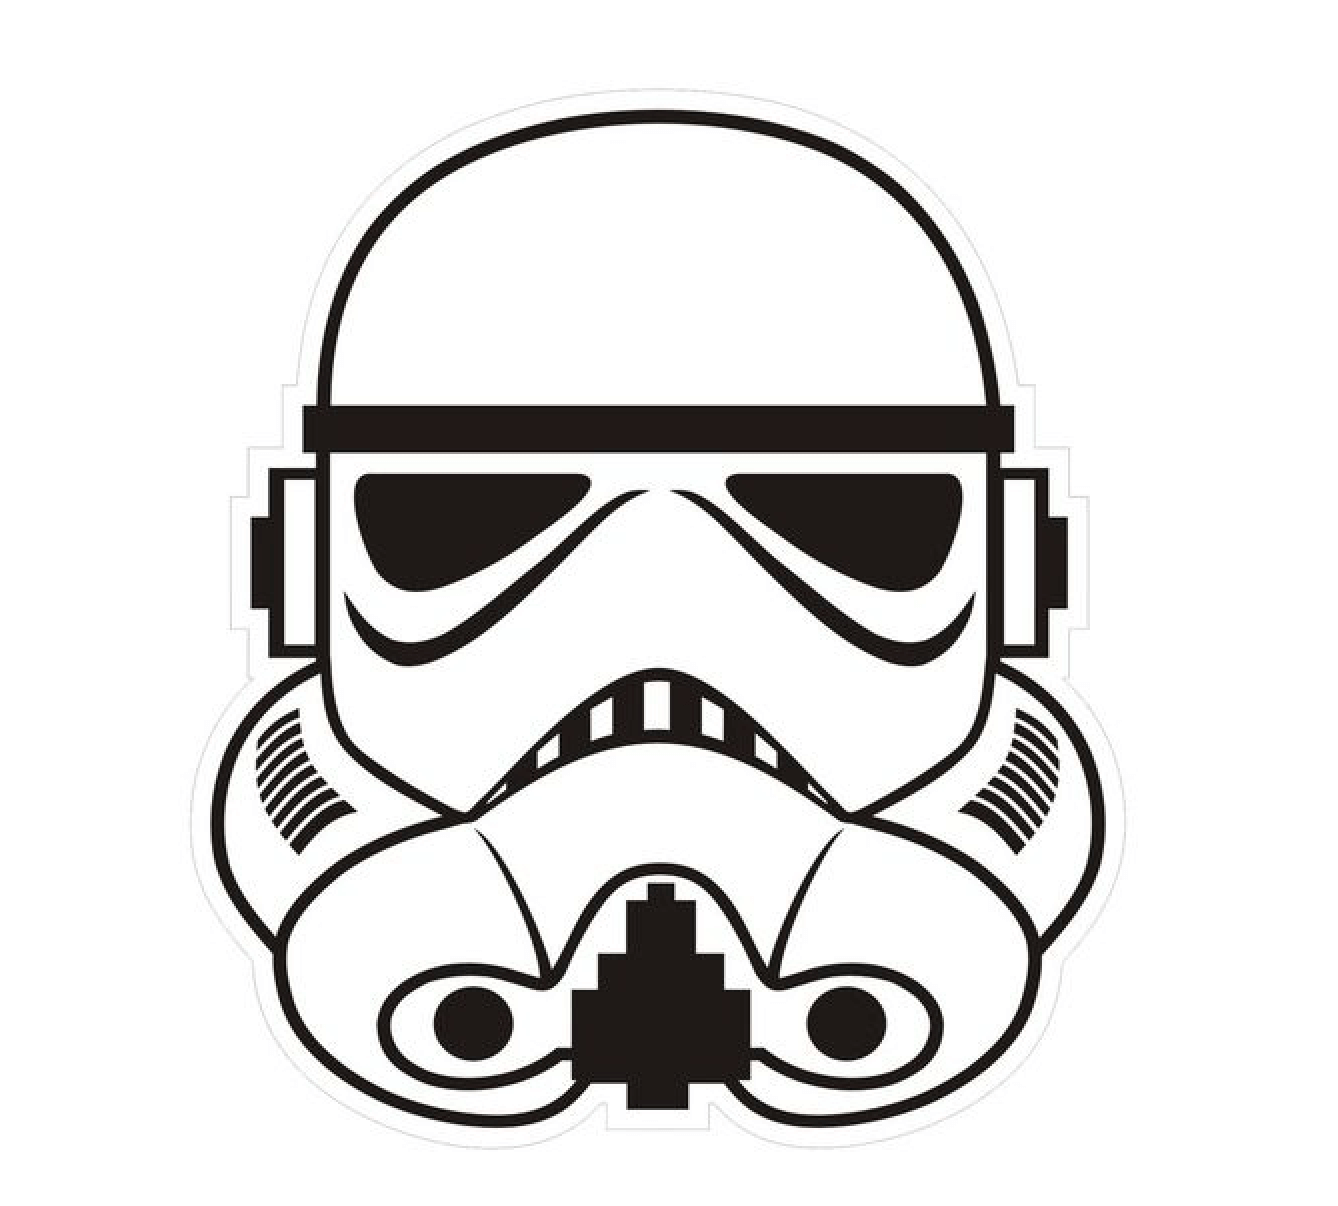
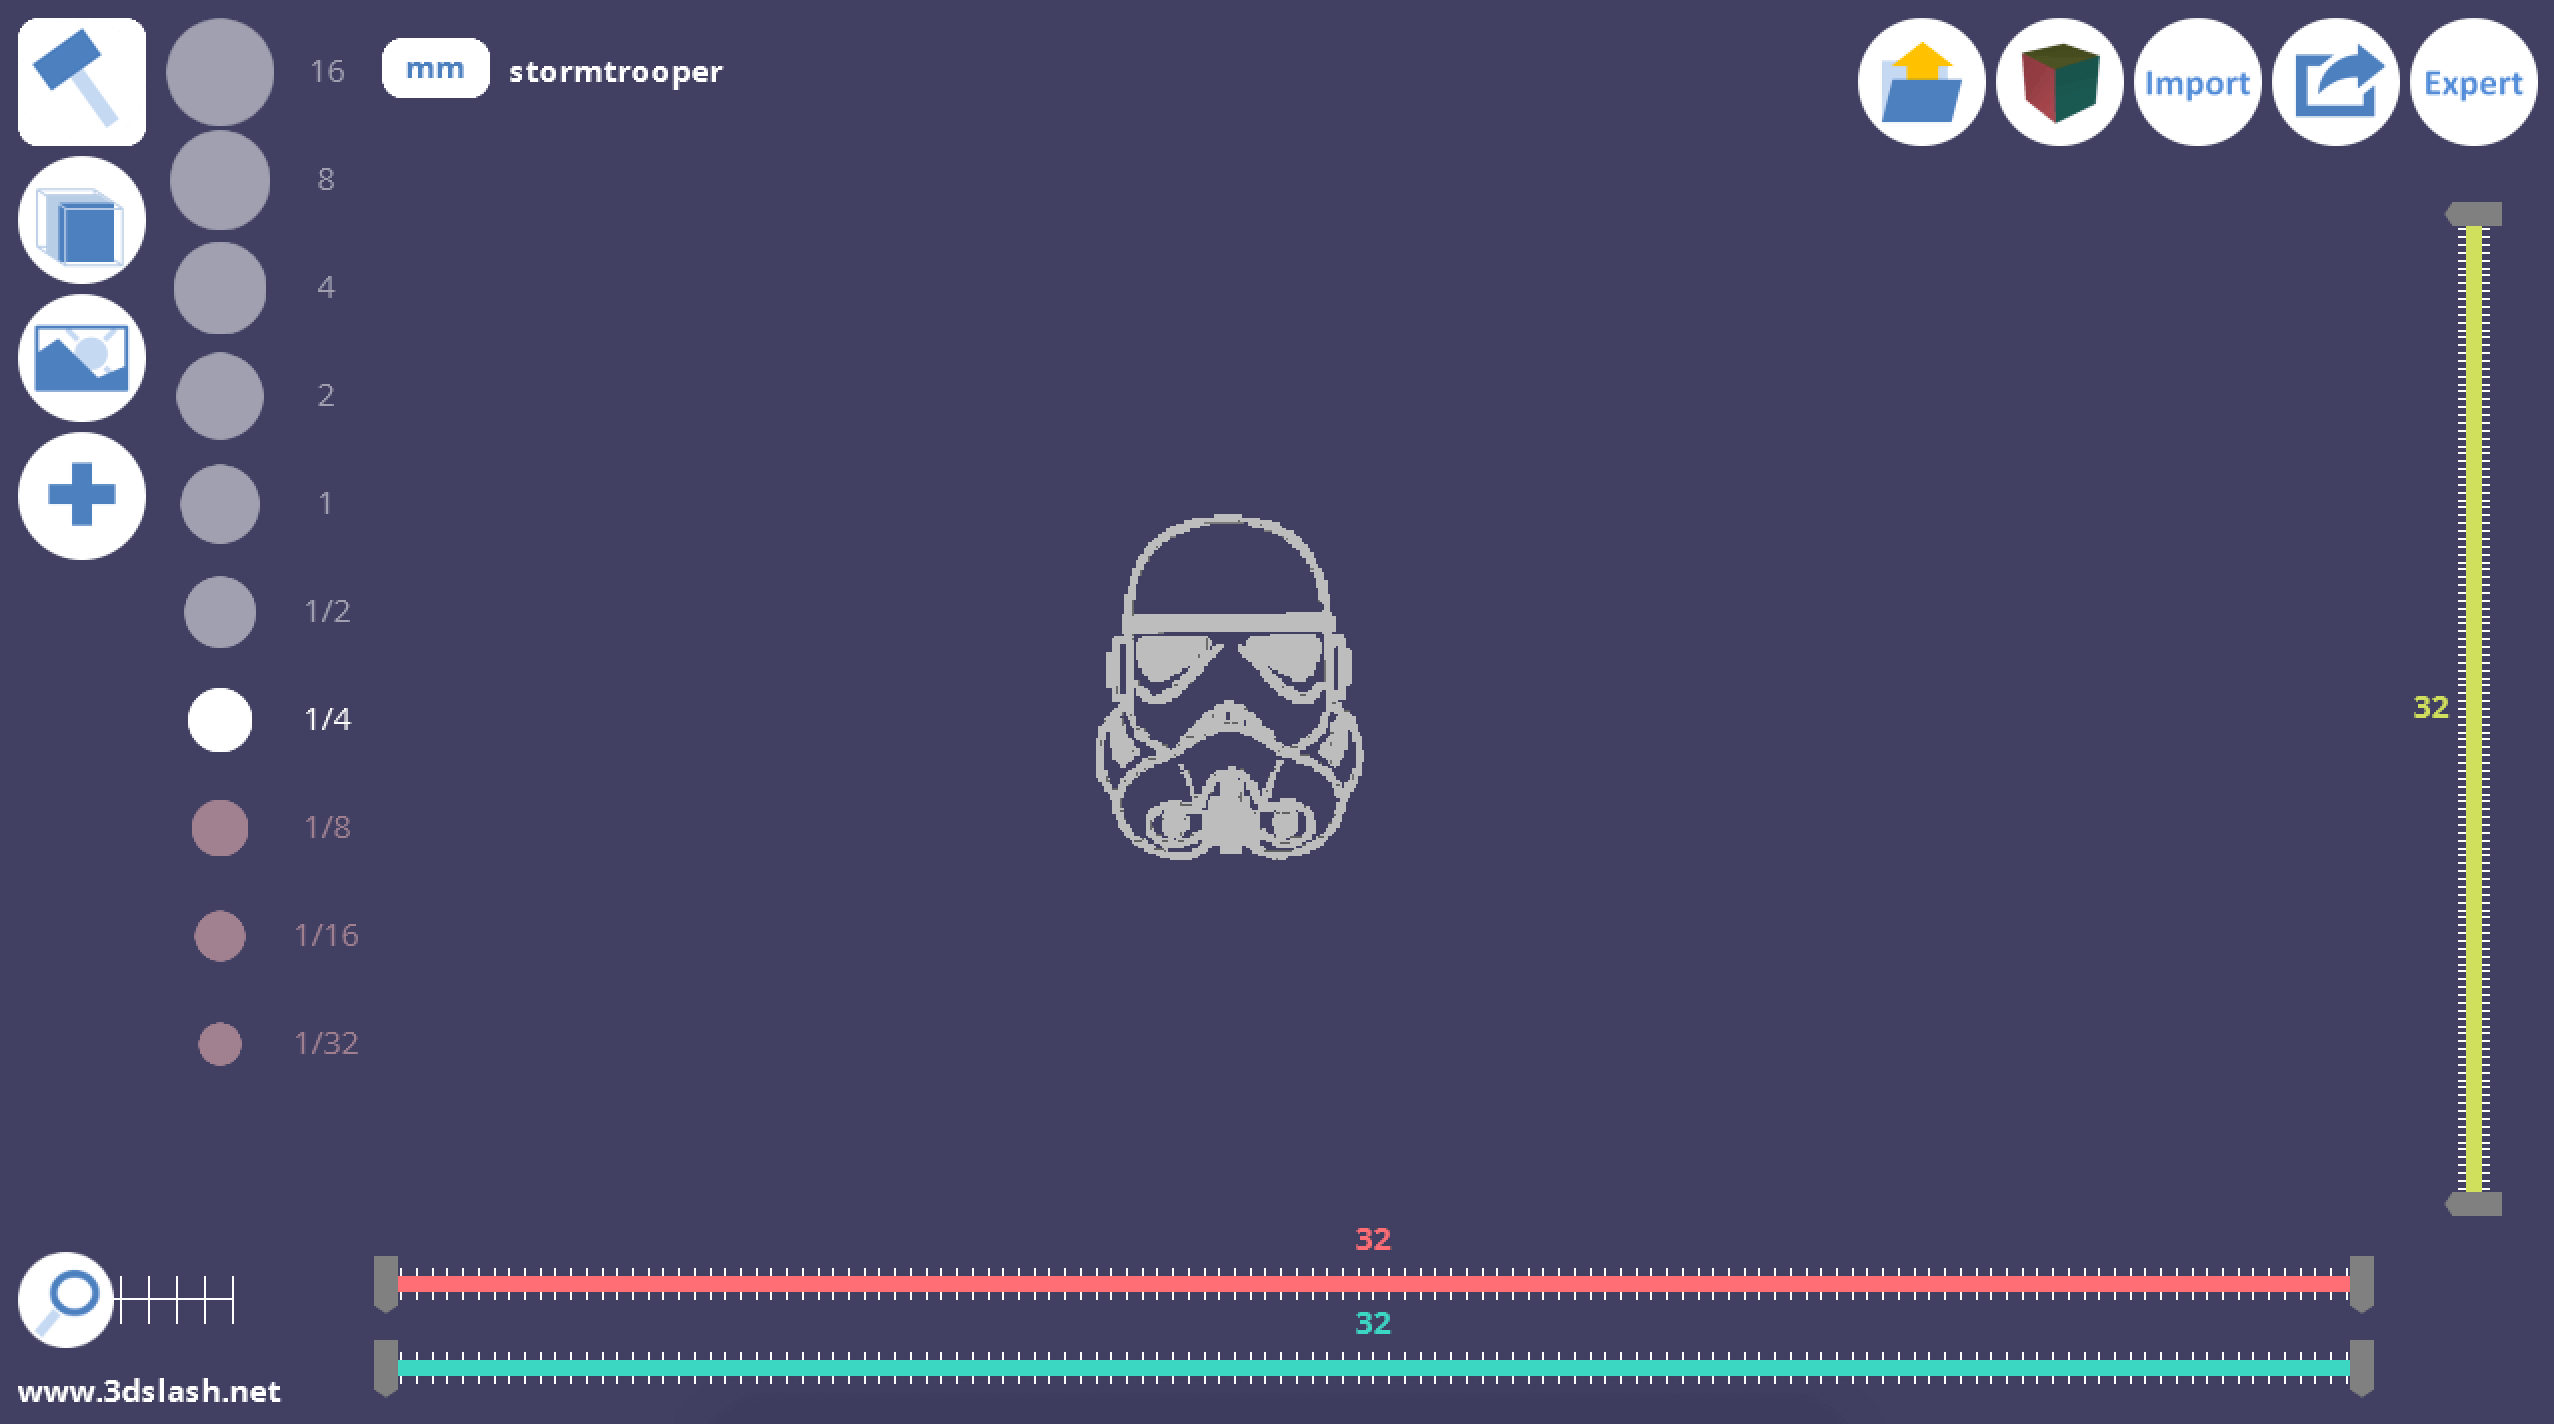
To build a 3D object like a Stormtrooper helmet, we used Blender to interpret this picture. It’s basically the same method we used in the „How to 3D Print a Map“ Blender tutorial but it’s only a black and white picture.
Open this STL file like a picture by pulling the data on the program. That’s what the Stormtrooper looks like in 3D Slash.
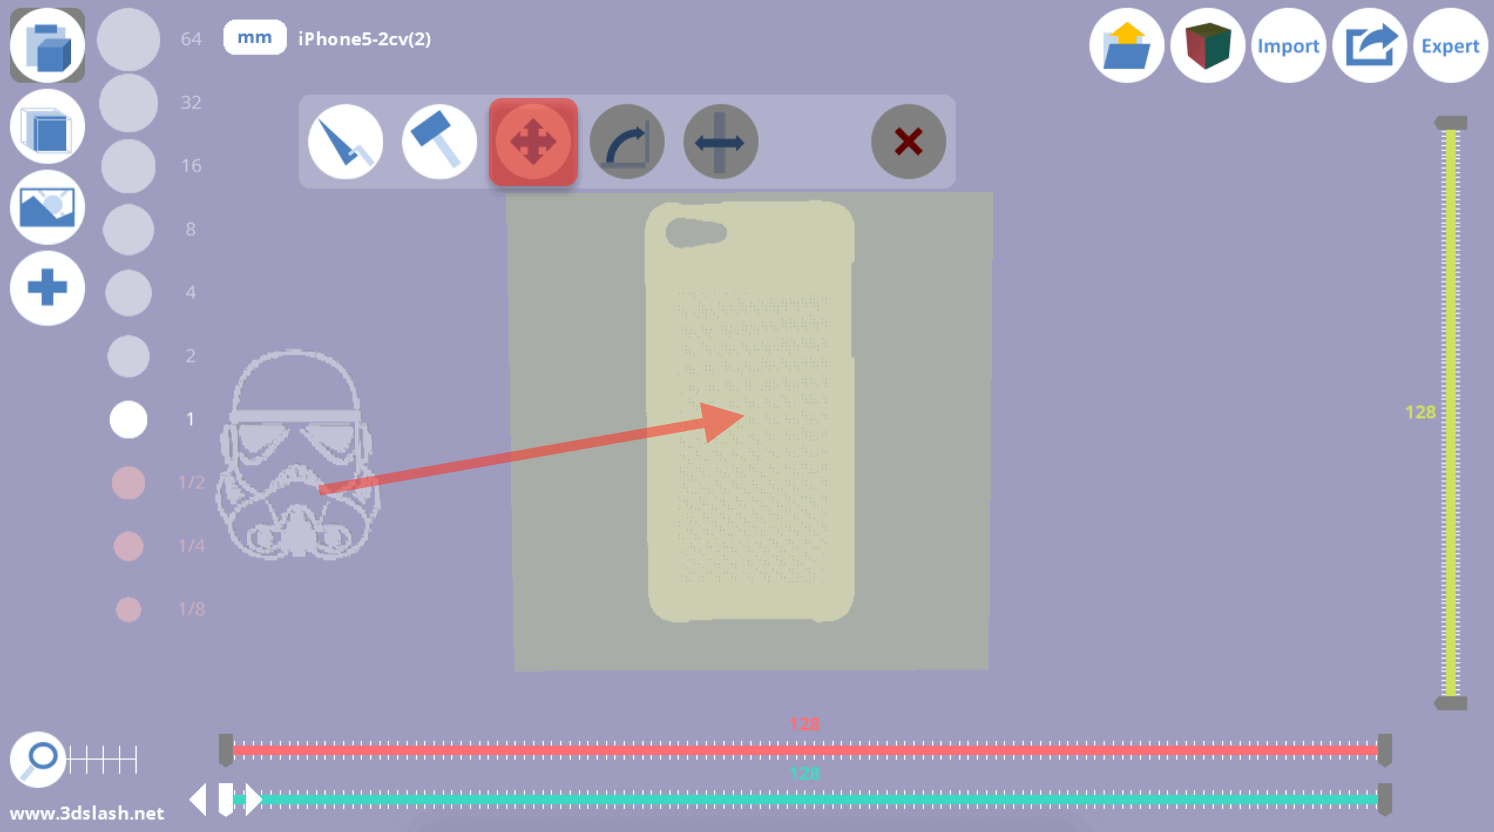
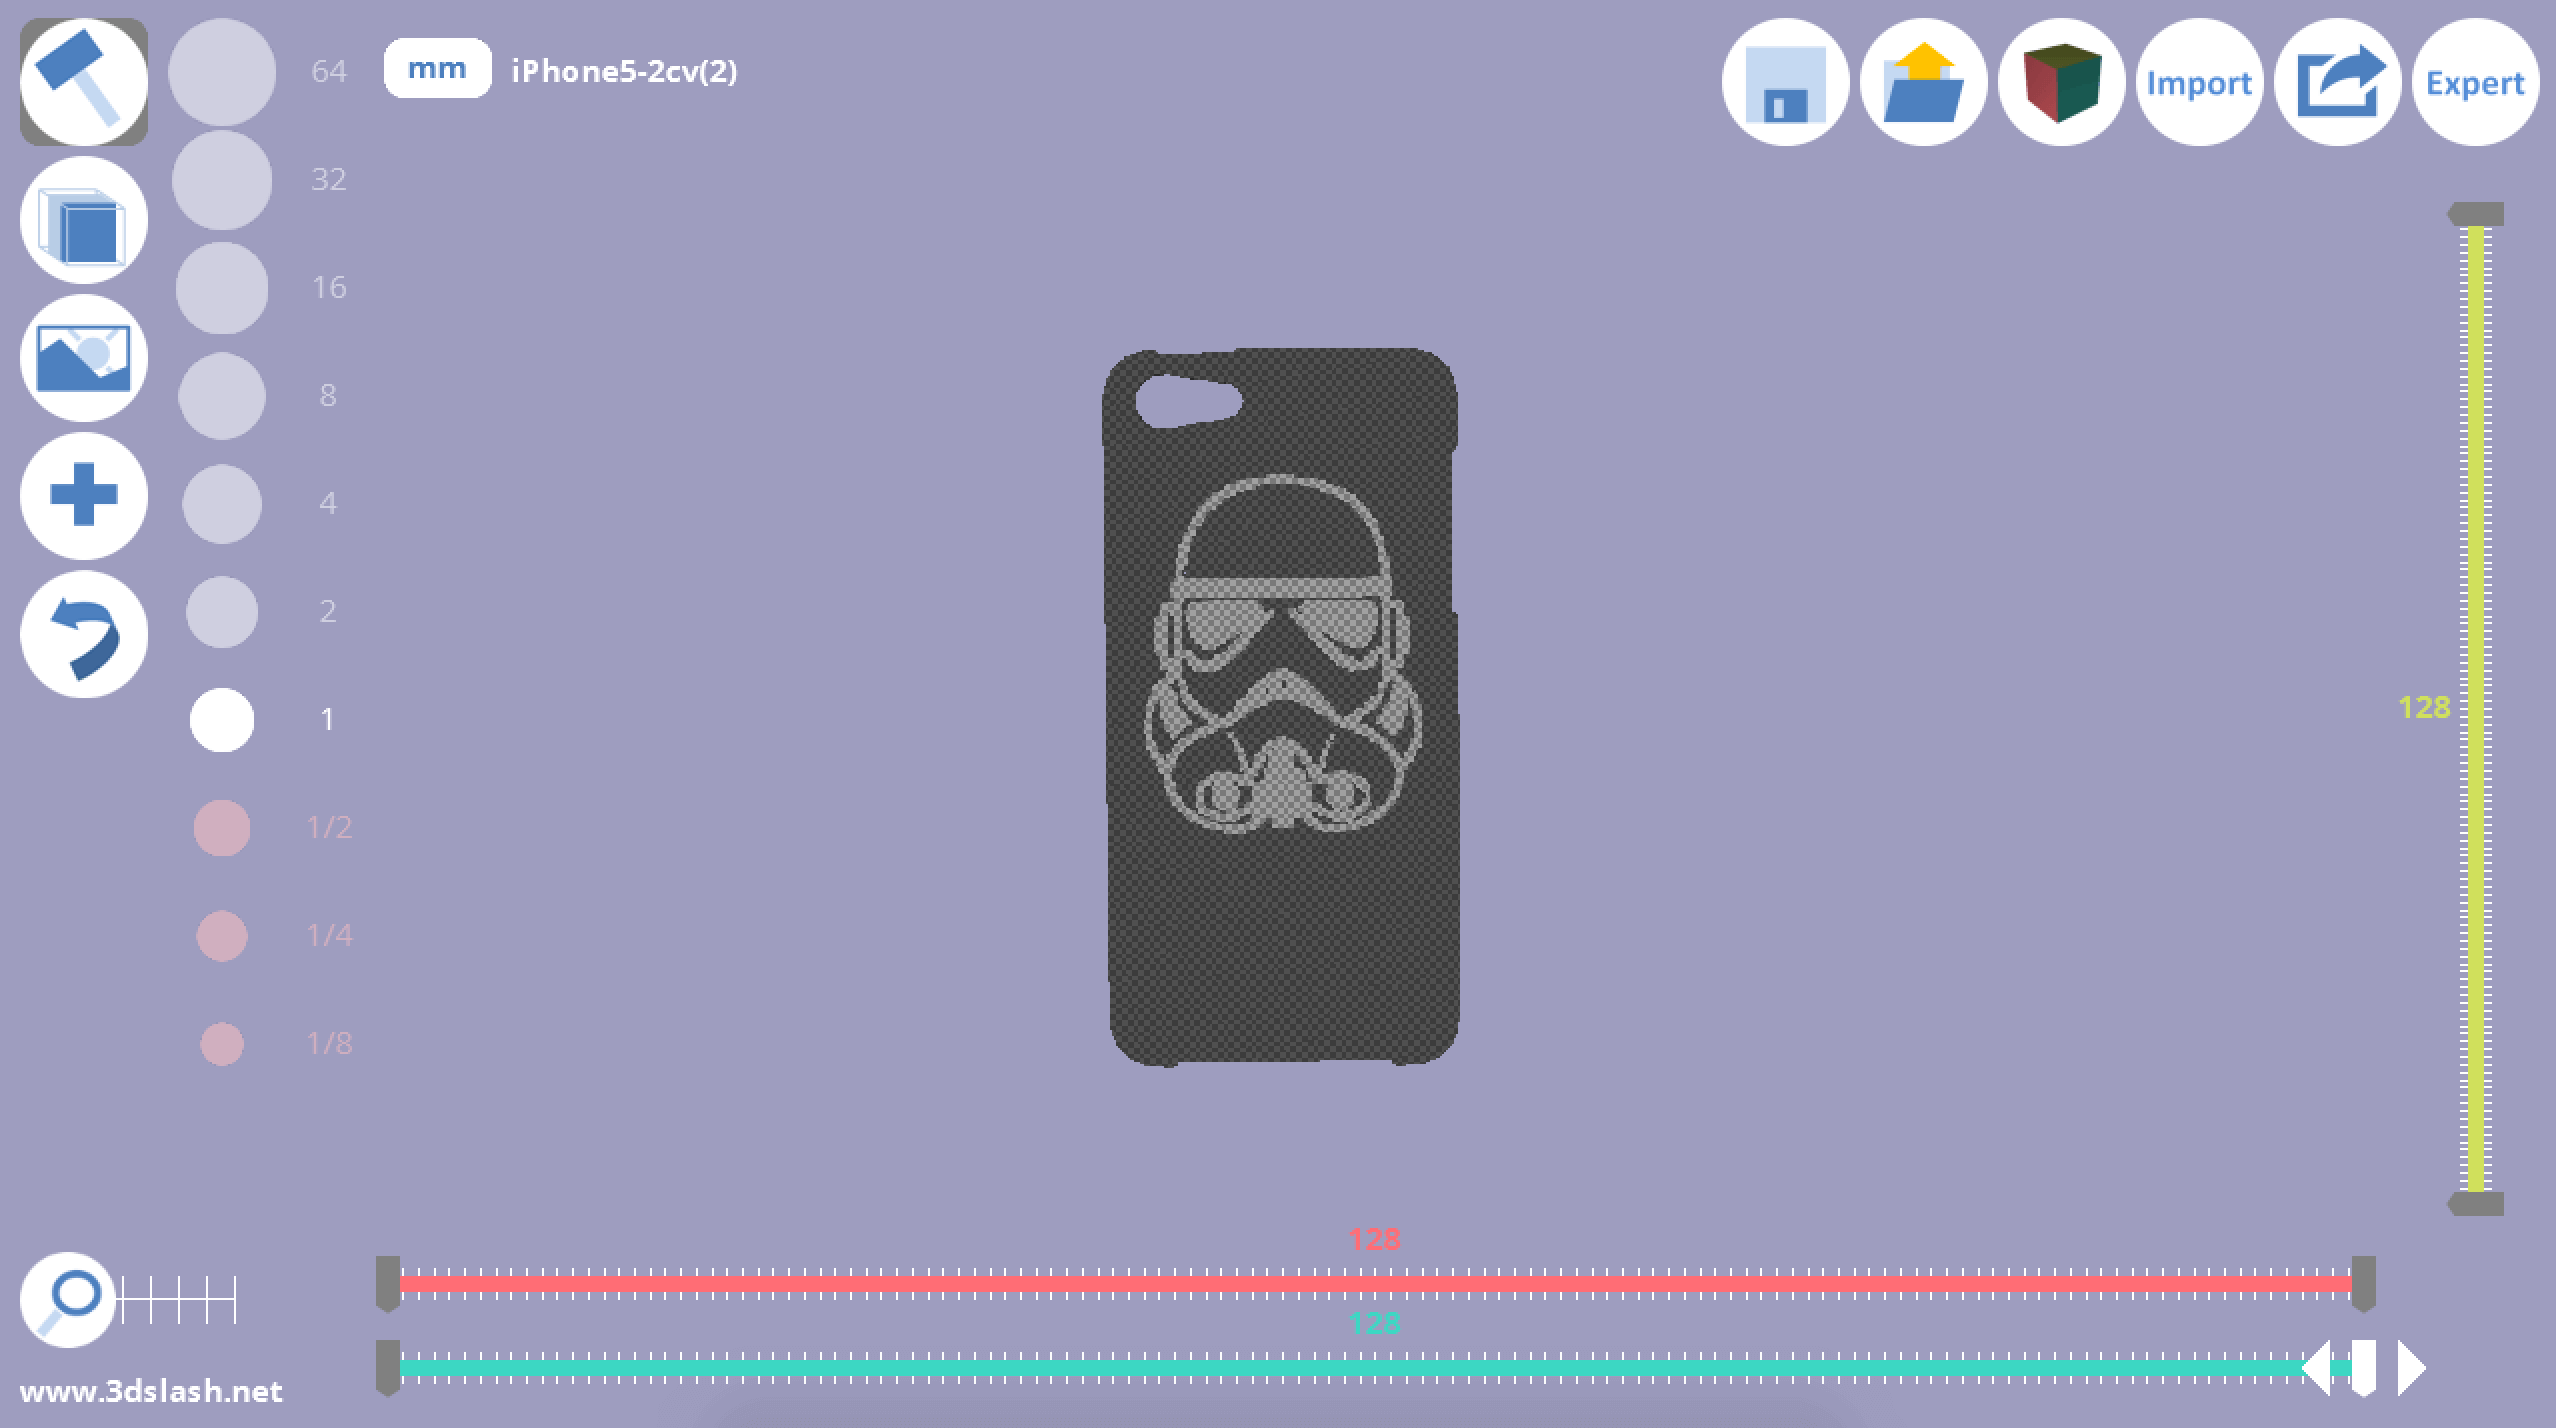
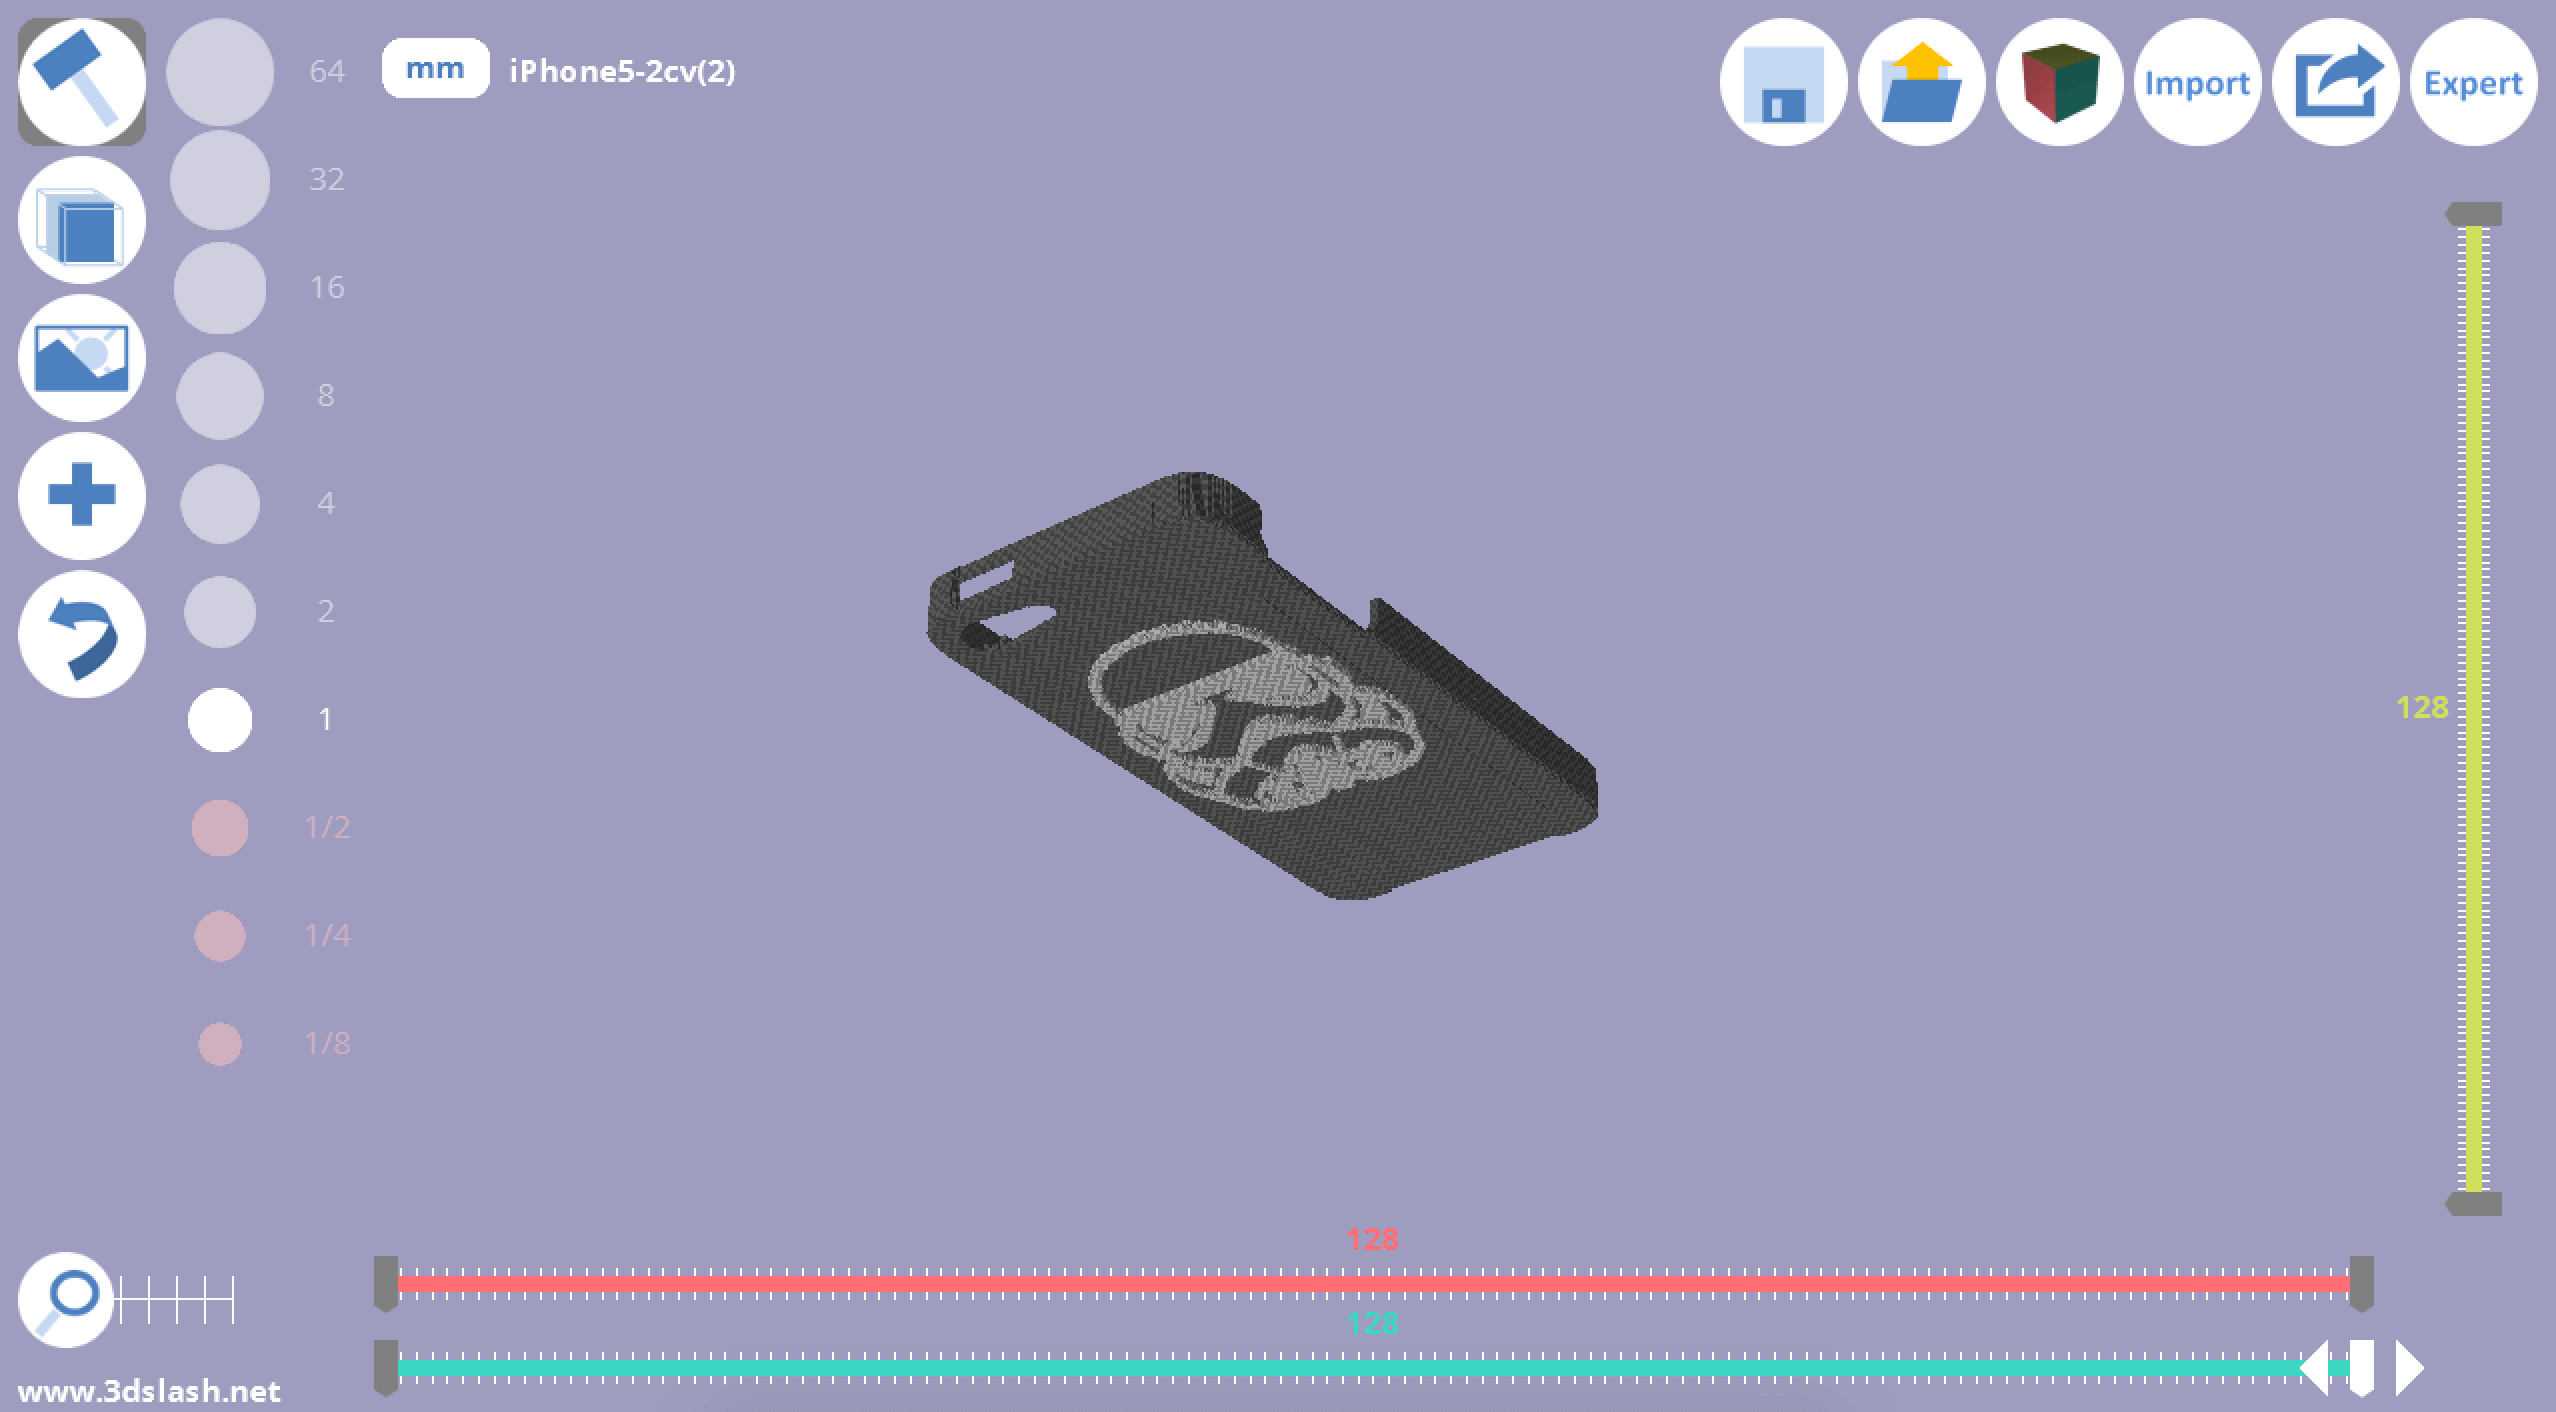
Step 2: Connect the Stormtrooper and the iPhone case.
- Use the Copy tool and move the copied object out of the limits. After that, open your models.
- Click on the object to open the model. The iPhone case and the Stormtrooper now should be visible on the workspace.
- Move the Stormtrooper onto the iPhone in the direction of the arrow.

Before moving the Stormtrooper in horizontal direction - Don’t forget to move the Stormtrooper not only horizontally but also vertically. After you put the stormtrooper in the right position, click on the Trowel tool to build the current shape.

Before moving the Stormtrooper in vertical direction
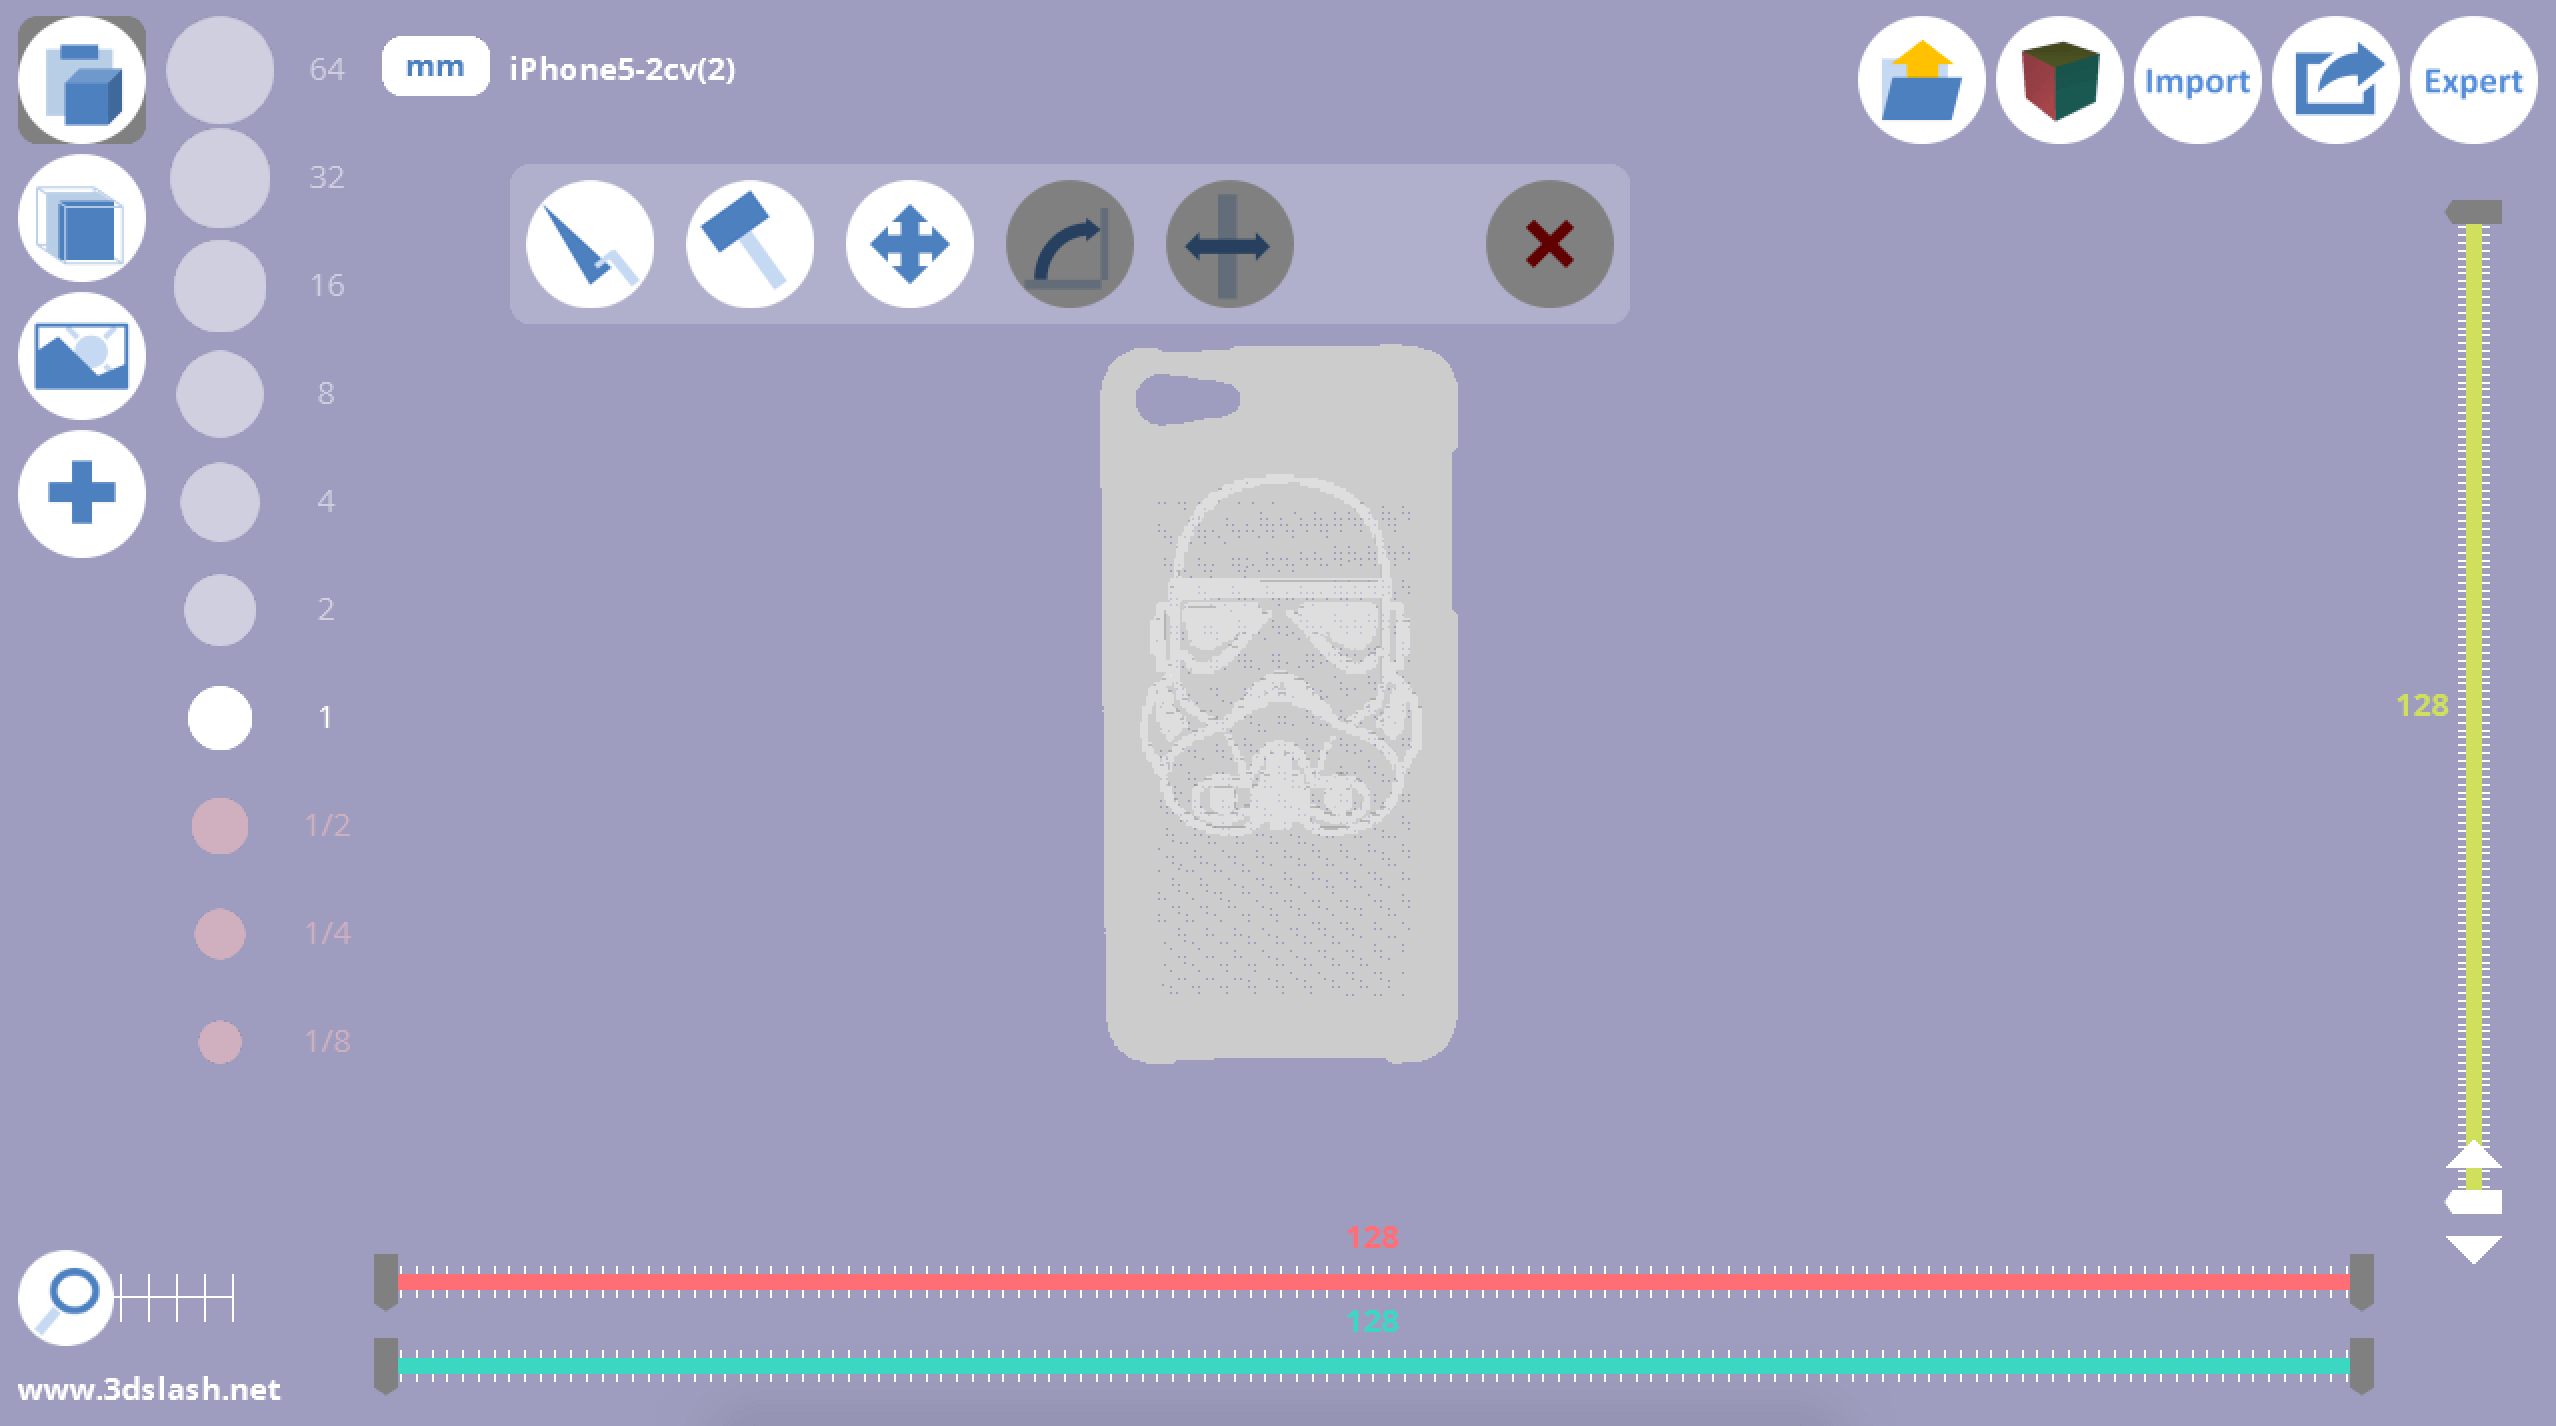

Now your iPhone case should look similar to this one.
Congratulations, you finished this 3D Slash tutorial! Now you can call yourself a 3D Slash Jedi.
And remember: You can use All3DP’s price comparison service to get the best price from the most popular printing services.
License: The text of "3D Slash Tutorial for Beginners: How to Use 3D Slash" by All3DP is licensed under a Creative Commons Attribution 4.0 International License.