Mod Your Prusa for 4-Axis 3D Printing: A Closer Look

Print 90° overhangs without support material using this open-source Prusa mod!
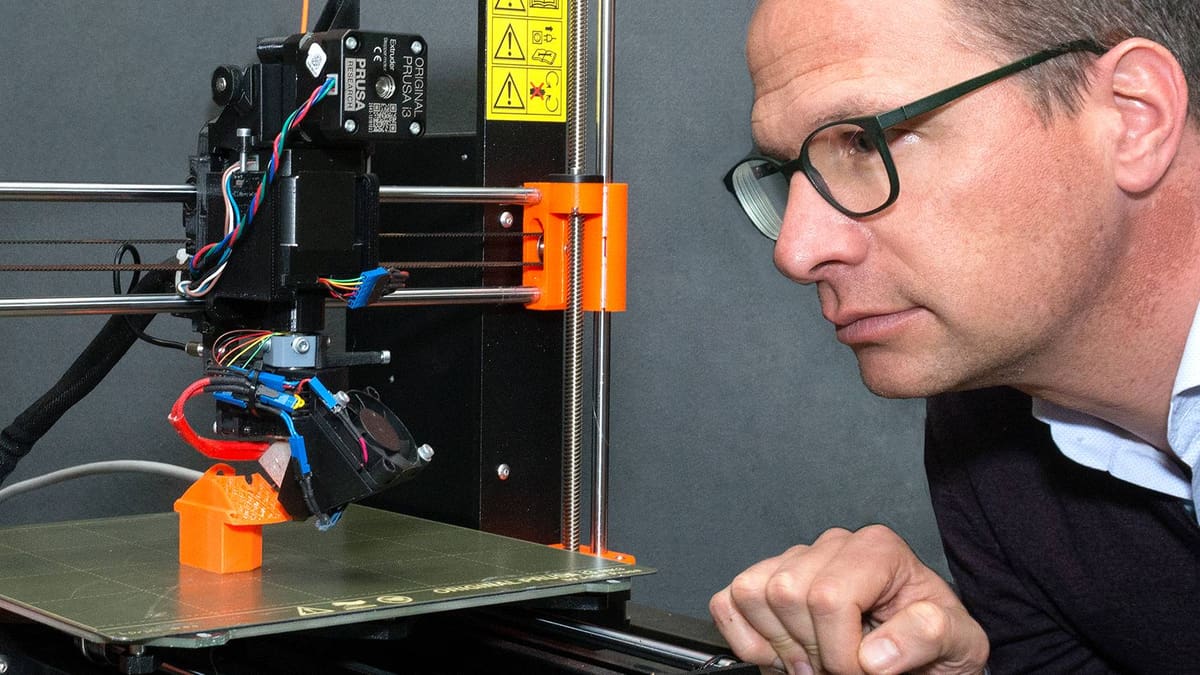
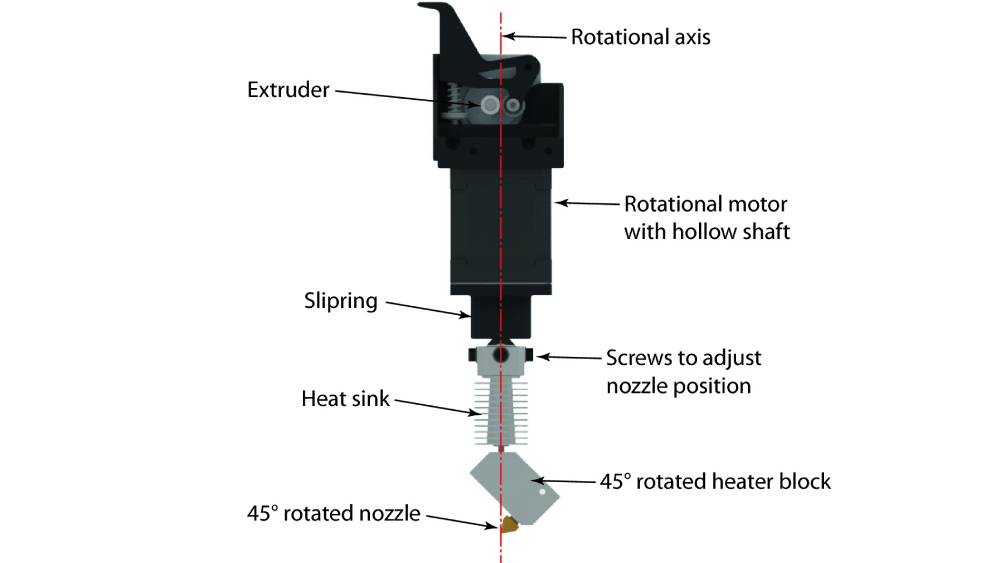
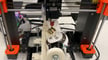
The RotBot is designed by a research team at the Zurich University of Applied Sciences. It works by adapting the kinematic system of a Prusa i3 MK3s with a custom rotating tool head that allows it to rotate around its own Z-axis.
The team behind RotBot has open-sourced the designs, so anyone can try it for themselves for free – although you’ll need to provide your own Prusa.
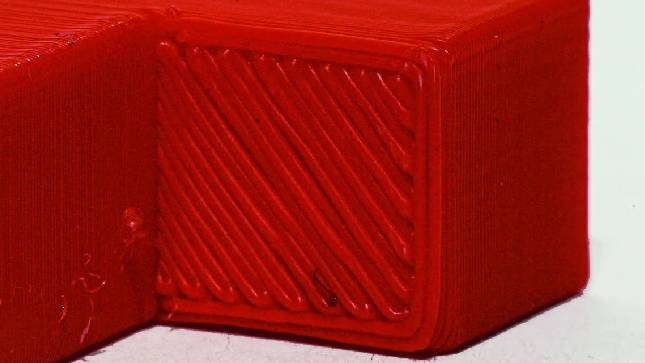
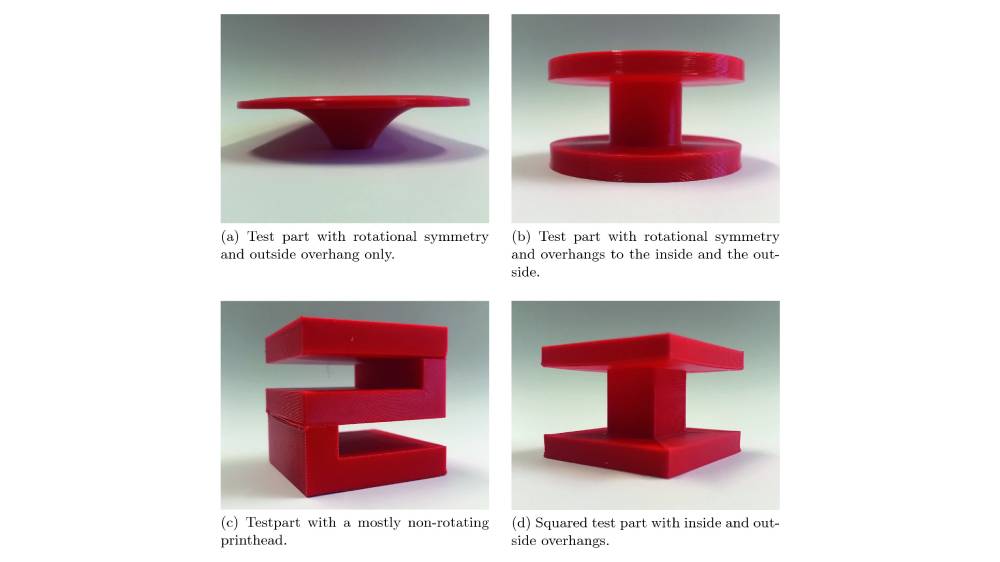
Eliminate the need for support material. An extra axis makes the machine capable of producing complex geometries beyond the limitations of a regular 3D printer. It becomes possible to print 90° overhangs without any sacrificial support material, meaning faster prints and less filament waste. Delicate features that would otherwise break when support material is removed can be printed without issue.
When using a conventional FDM 3D printer, supported surfaces are noticeably lower-quality than other surfaces. This can be mitigated by solutions such as water-soluble support material, although this material is still sacrificial, so it doesn’t solve the material waste issue. Plus it needs multiple extruders to work, is relatively expensive, and tends to go bad easily if not stored properly. A multi-axis method completely eliminates these issues.
Conical Slicing With a Planar Slicer
Of course, hardware like this needs software to drive it, and popular slicing software like Cura or PrusaSlicer can only manage planar layers. However, the RotBot team has found a way to use a regular slicer for a conical slicing technique with free-to-use software.
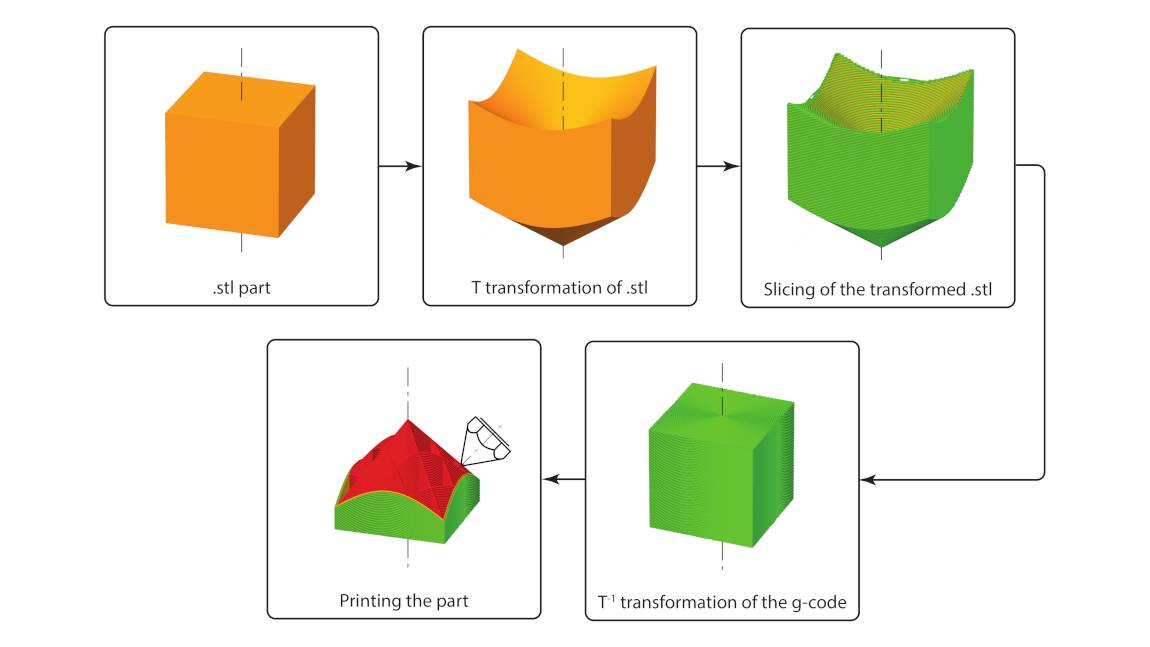
The object is then sliced in the normal, planar way, using regular slicing software.
The G-code output is then back-transformed using another Python script, resulting in non-planar layers.
It’s possible to use these scripts to prepare and print a non-planar object on a regular FDM 3D printer. The only issue is you’ll find the nozzle will start to drag over material that’s already been extruded. This is the reason for the 45° nozzle — it allows the machine to print relative to the conical surface, preventing collisions.
Taking Things Further
“RotBot can be built relatively easily on the basis of a conventional printer with Cartesian kinematics” says Wilfried J. Elspass, a key member of RotBot’s development.
If you’d like to take things further, you’re free to do it – it’s open source. The original project press release, the research paper with underpinning theory, and an in-depth look at the slicing strategy are available for review, and STL files to fit a Prusa MK3s can be downloaded from Printables.
Open Source Tip Offs
Have you seen a noteworthy open-source 3D printing project? Tip us off at @all3dp on Twitter or by email at editors@all3dp.com, and we’ll consider covering them.
You’ve read that; now read these:
Lead image source: ZHAW