Astro Pi: 3D Print Your Own Flight Case for Raspberry Pi

The Raspberry Pi Foundation have released the CAD files for the Astro Pi flight case that ESA astronaut Tim Peake took into space. Build one of your own!
![]()
The purpose of the Astro Pi is to run experimental Python programs written by school students. The results will be downloaded back to Earth and made available online for all to see!
However, to satisfy the safety requirements that ESA and NASA have for small payloads aboard the ISS, the Raspberry Pi Foundation had to build an Astro Pi “flight unit” and put it through a rigorous qualification process.
Making just one case costs over £3,000, and only eight in total were manufactured. The cases were expensive because each half is milled out of a solid block of aerospace-grade aluminum using a five-axis CNC mill.
The two halves are then bead-blasted to give them a matt surface, and then anodized with a special coating to aid thermal radiation. This is followed by manual touch-up work and the Raspberry Pi hardware is then installed.
This is not a cheap process, but ever since it was first announced back in May 2015, makers have been clamoring for an Astro Pi case of their very own. The Foundation offered a tantalizing possibility in their original blog post:
“This will not be available to the public to buy because we’re only making a small number of them. We may however, in due course, release an object file so schools with a 3D printer can print one themselves.”
Thankfully, that possibility is now a reality.
How to Build your own Astro Pi
Initially, the team tried to 3D print the original CAD files to test how difficult it would be. The first problem they faced was that the lower part of their flight case, with grid pins, was chock full of support material from the 3D printer.
To remove all of the scaffolding and rafting, it took twenty minutes with a pair of pliers. They decided that, after accidentally snapping one of the corner pins, this would be too frustrating for most users — a wise decision!
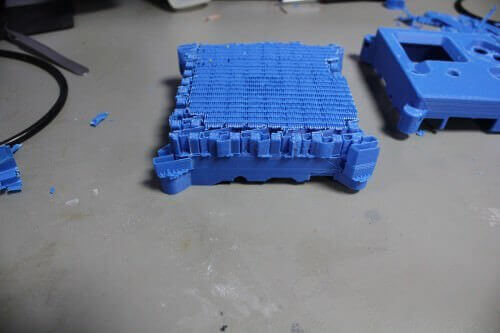
Although the lid was slightly better, it was still covered in rafting, which left a stringy, unappealing finish.
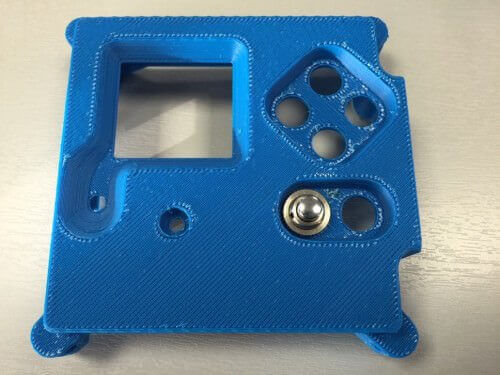
So, engineers began working on the design to make sure that even users with low-end 3D printers would be able to successfully print it, with minimal scaffolding and rafting.
After working on several attempts, they found that by slicing off the heat sink on the base, the case could be printed in the opposite orientation — meaning no overhangs.
They also sliced off the top of the lid so that it could be printed with the clean side facing upwards, meaning the stringy side would be face down.
Other alterations included the pillars between the USB and Ethernet ports being removed, as they snapped off easily. The last step, which was purely for convenience, was to change the corner bolt enclosures from a sunken captive screw to a straight-through M4 nut-and-bolt design.
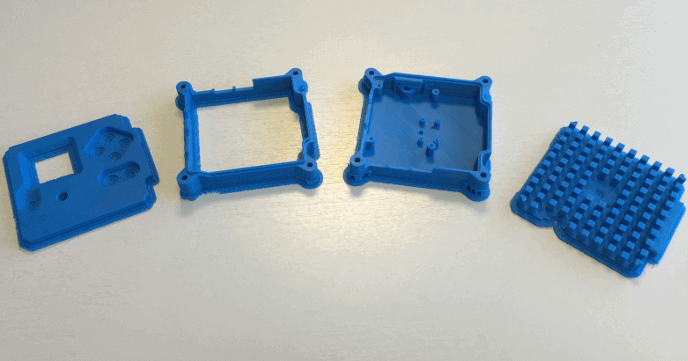
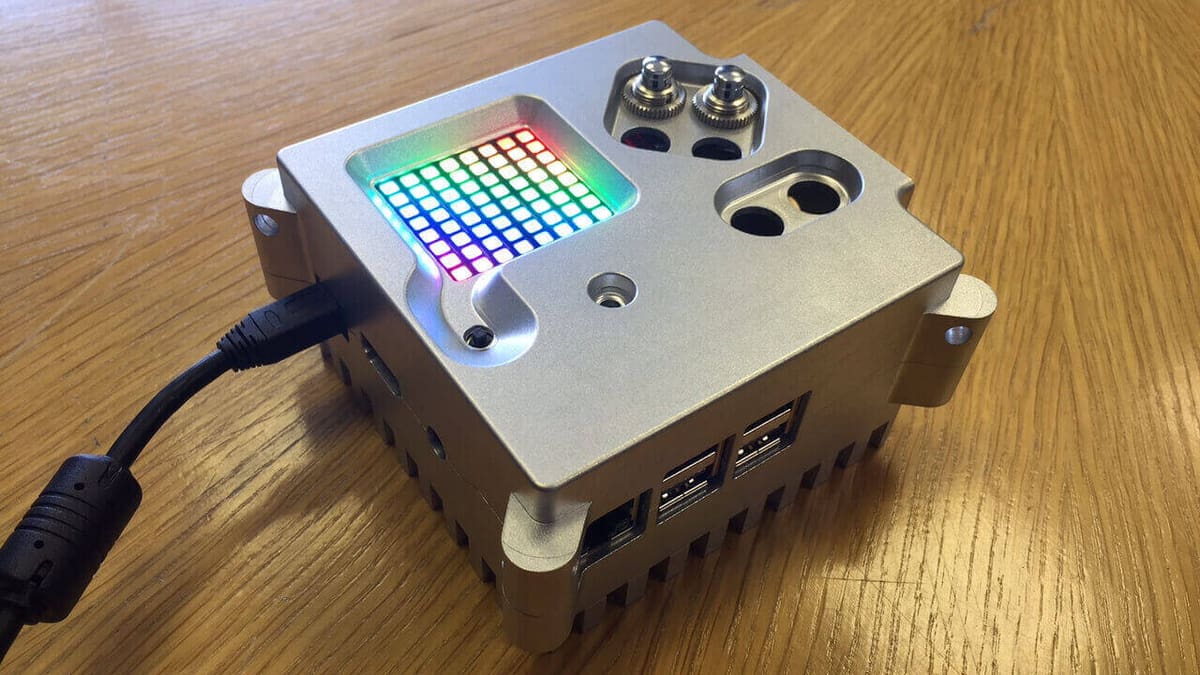
If you decide to print your own case, then you can use epoxy adhesive (or similar) to join the heat sink to the base and the lid to the middle. When the Raspberry Pi and Sense HAT are installed, your finished case should look a little something like this:
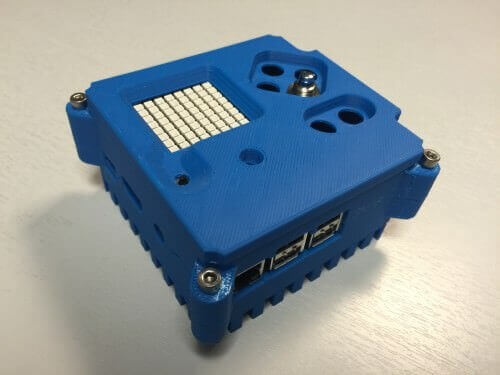
Impressive, eh? The Raspberry Pi Foundation have made all the necessary files downloadable from GitHub. And if you’re having any trouble building your case, they’ve even prepared a brand new educational resource which you can follow here. Have fun!
License: The text of "Astro Pi: 3D Print Your Own Flight Case for Raspberry Pi" by All3DP is licensed under a Creative Commons Attribution 4.0 International License.