British Makerspace Builds £1,000 Full-Body 3D Scanner with 27 Raspberry Pi

A British Design student and director of BuildBrighton Makerspace developed a full-body 3D scanner using 27 low-cost Raspberry Pi computers.
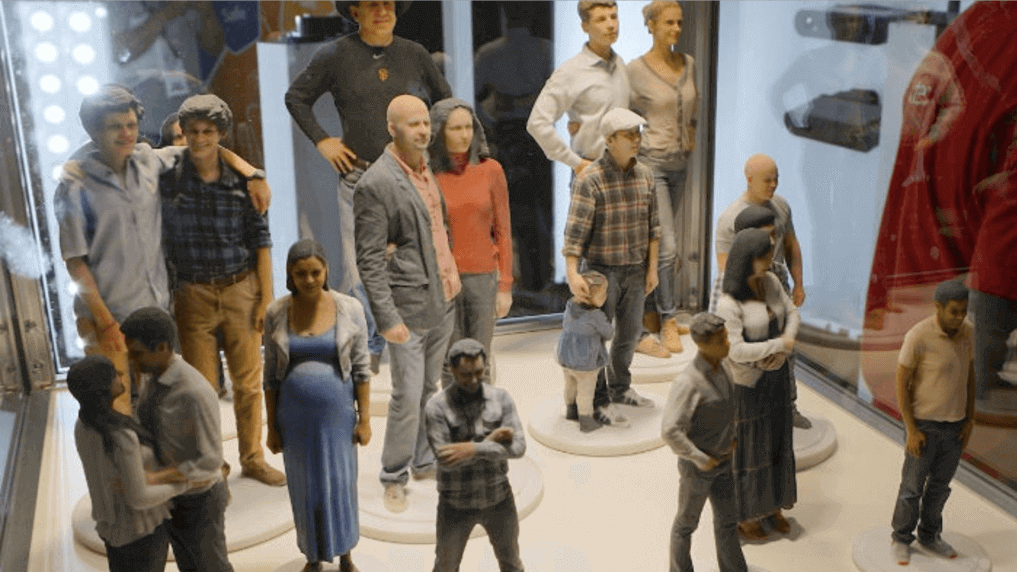
Selfie booths are a sophisticated piece of technology… but they are also very expensive. On the market, a price of $20,000 for a booth isn’t unusual.
But Poppy Mosbacher, an MA Sustainable Design student, put her knowledge to good use: She created a 3D scanner at BuildBrighton Makerspace using cardboard and 27 Raspberry Pi microcomputers. Mosbacher received a £1,000 grant from Santander, given as a University of Brighton Digital Award, to create the scanner. Then, she began prototyping and developing a design, using 3D printing, cardboard, and a lot of Raspberry Pi. She explains:
“I am going to use the scanner to help me design clothes. To start with, I’ve sliced my model using free software, and laser cut a dressmakers dummy out of cardboard that is my exact personal body shape. Next, I’m planning to see what clothes look like on a 3D model in VR, before I commit to making them.”
The goal is to encourage social innovation, and by offering a scanner in maker spaces, anyone will have access to creative tools they need for production.
Although Mosbacher’s team spent more than the £1,000 on prototyping different options, she explains that as part of the design brief, they’ve made sure a final version could remain in budget. With such a price, it could be possible for other groups to raise money and build a similar machine.
Mosbacher’s 3D Scanner Built Using a Raspberry Pi
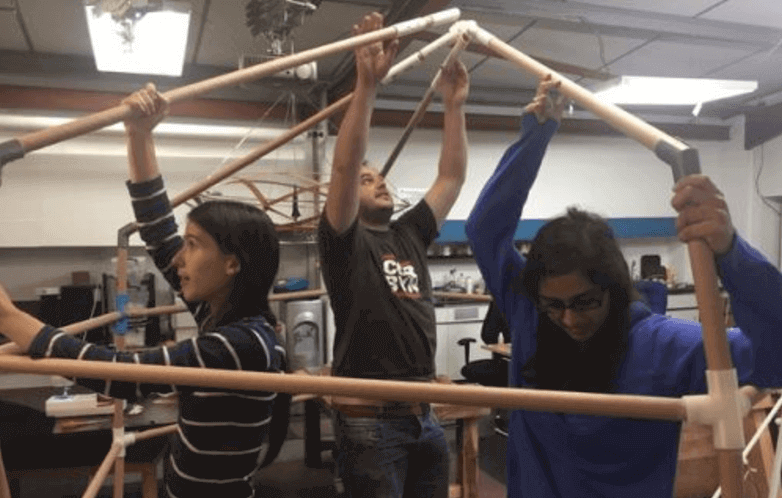
To build the scanner, Mosbacher required 27 Raspberry Pi Zero W, 27 Raspberry Pi camera modules, 27 Raspberry Pi zero camera cables and 27 USB to Micro USB cables.
As well as this, they used 20 Cardboard tubes (125cm long x 32mm diameter with 29mm diameter core), 8 end caps for the tubes and PLA 3D printing filament. Mosbacher explains:
“For environmental reasons, we chose PLA for the 3D printed connectors and cardboard tubes for the structure. Cardboard is easy to reshape if the parts don’t fit perfectly, so it makes a great prototyping tool, and at 3mm thick, the tubes are strong and rigid.”
For software, the team relied on Autodesk Remake before using a 3D printer to create the connectors. After collecting all of the required materials, Mosbacher got to work with help from members of BuildBrighton. Her friend Arthur Guy also played a vital role and wrote the code for the scanner.
You can find the full list of components and instructions on Instructables. Mosbacher hopes that others will be inspired by the project. She notes that, with a 3D scanner available at a maker space, new community projects can grow. For example, creating 3D miniatures of a theatrical cast or even creating better set designs.
Source: Raspberry Pi
License: The text of "British Makerspace Builds £1,000 Full-Body 3D Scanner with 27 Raspberry Pi" by All3DP is licensed under a Creative Commons Attribution 4.0 International License.