CEL Robox Review: A Whole Lot Easier Than Others

The CEL Robox 3D printer is stuffed full of interesting features. But are they any good? Read this in-depth CEL Robox review including a video by Thomas Sanladerer.
The CEL Robox is, by far, the printer with the largest amount of innovative, new features out right now. But can that be enough to actually make it an awesome machine? Let’s find out.
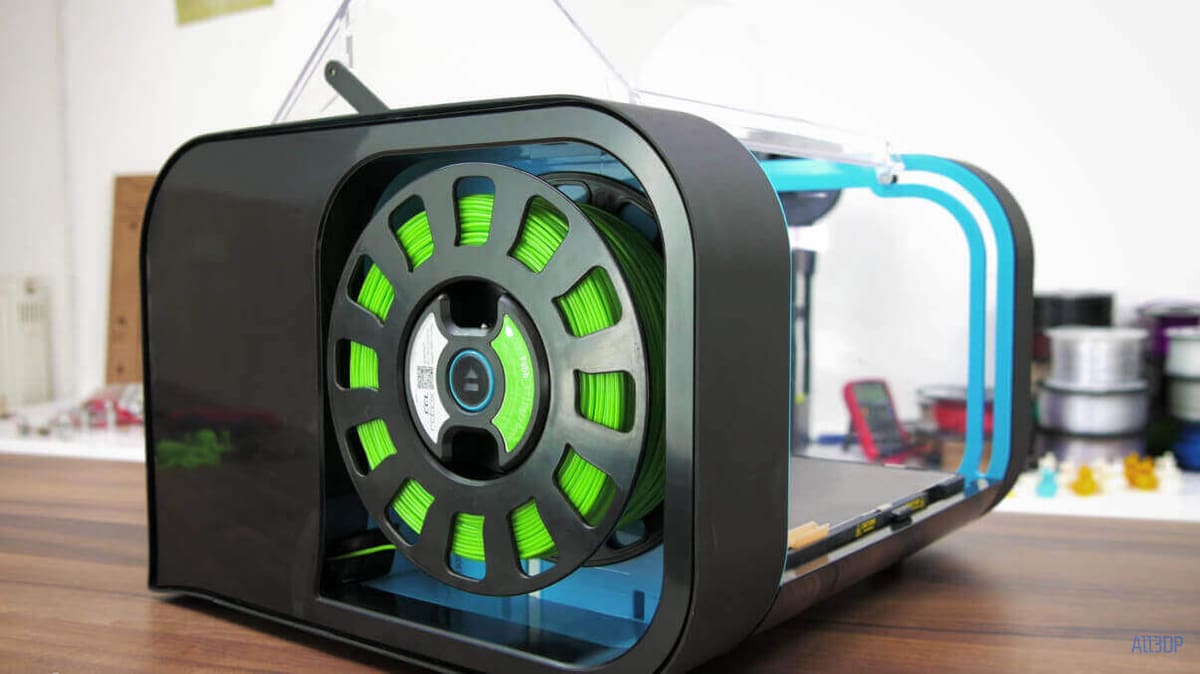
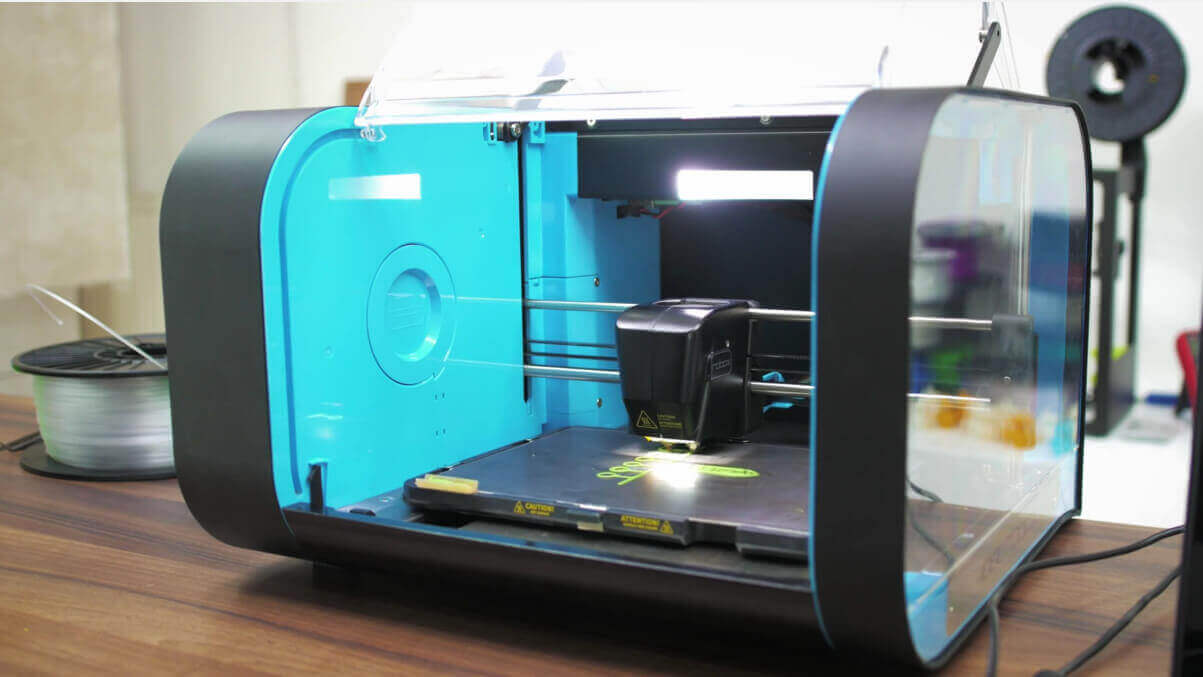
At first sight, the CEL Robox doesn’t look that different from other consumer 3D printers. It’s a medium-sized machine with a 210 x 150 x 100mm or 8 by 6 by 4 inches build space.
The Robox has got a black aluminum frame with a few transparent bits and a hinged door on the front, and a spool of filament neatly stowed away in the side of the printer. And this is where the innovations begin.
CEL Robox Review: SmartReel is really Smart
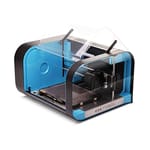
The filament intended for the Robox comes on what they call “SmartReels”, a 600g spool with some re-writable memory that stores the exact type of filament, what printing parameters should be used, and how much of the reel you’ve already used up.
Which means that with all the official SmartReel filament from the Robox ecosystem, you’ll get a nearly plug-and-play experience without having to fiddle with temperature, speed, and cooling settings. That’s all been done for you already.
Currently, you can get the common filaments PLA, ABS, as well as HIPS and ColorFabb XT (a type of PET which is becoming quite popular lately).
You can also use almost any type of filament, like Nylon, from standard spools, but flexible filaments are out of reach, as well as some of the high-temperature plastics like Polycarbonate, since the hotend will not get hot enough for those — even though CEL advertise the Robox as being able to print Polycarbonate, but apparently that only applies to a few special low temperature blends.
CEL Robox Review: Loading Filament is Simple
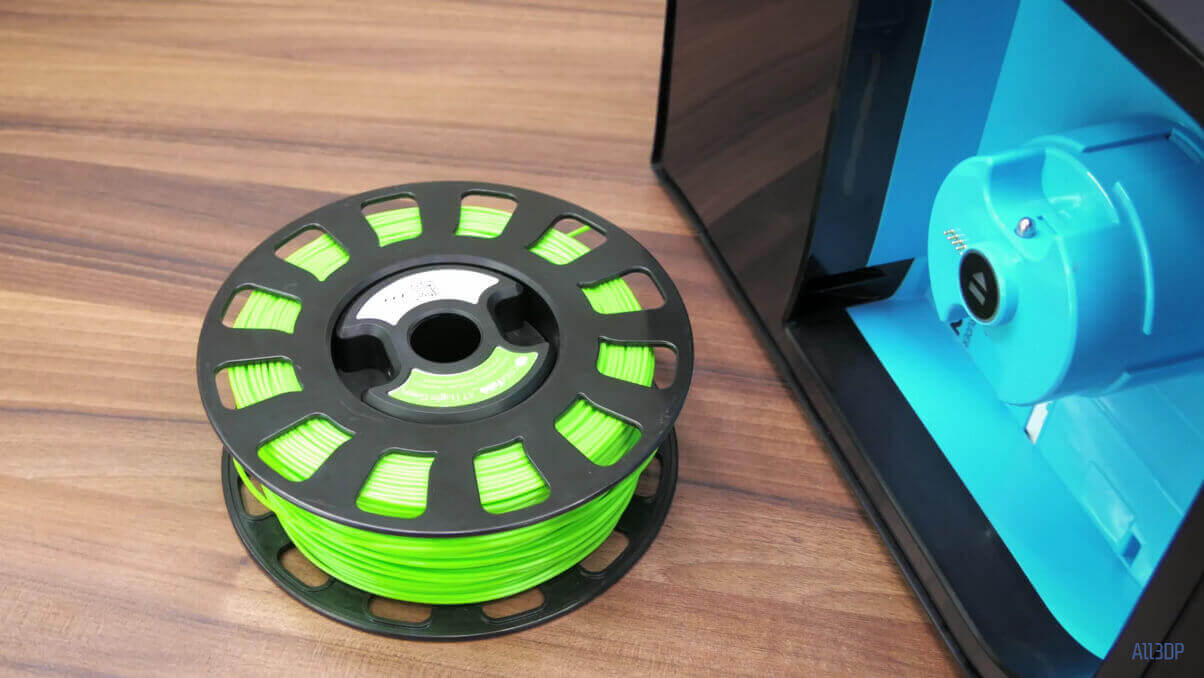
Further down the filament path, loading and unloading filament has also been greatly simplified. To load filament, all you need to do is grab the end of the filament and push it into the appropriate feed hole next to the spool mount. That’s it. No preheating, unhinging extruder parts or trying to guide the filament into tiny orifices somewhere on the printer.
To unload the Robox, there’s a big glowing button in the center of the SmartReel mount — just hold that for a second and the Robox will warm up and rewind the filament until you can simply pull it out. I think this is very well implemented. Even though loading the filament occasionally took me two tries for the Robox to properly grab on, it is still much simpler than on any other printer I’ve tried so far.
And lastly, on the end of the filament path, you’re always going to a pair of nozzles, which seems strange for a printer with only a single filament feed. In the version of the Robox with a dual-extruder and dual-filament, you get two identical nozzles, one for each filament, to print parts in two colors, two materials or with a separate, dissolvable support material. This the same way any other dual-extruder printer does it.
However, in this single-extruder and single-filament version of the CEL Robox, you get two differently-sized nozzles fed from the same filament stock. The idea is to make your prints finish faster without sacrificing on quality too much. But as it turns out, the larger nozzle is only used for the lowest of print qualities, “draft”, and is completely unused in the “normal” and “fine” print qualities.
CEL Robox Review: Print Quality is Above Average
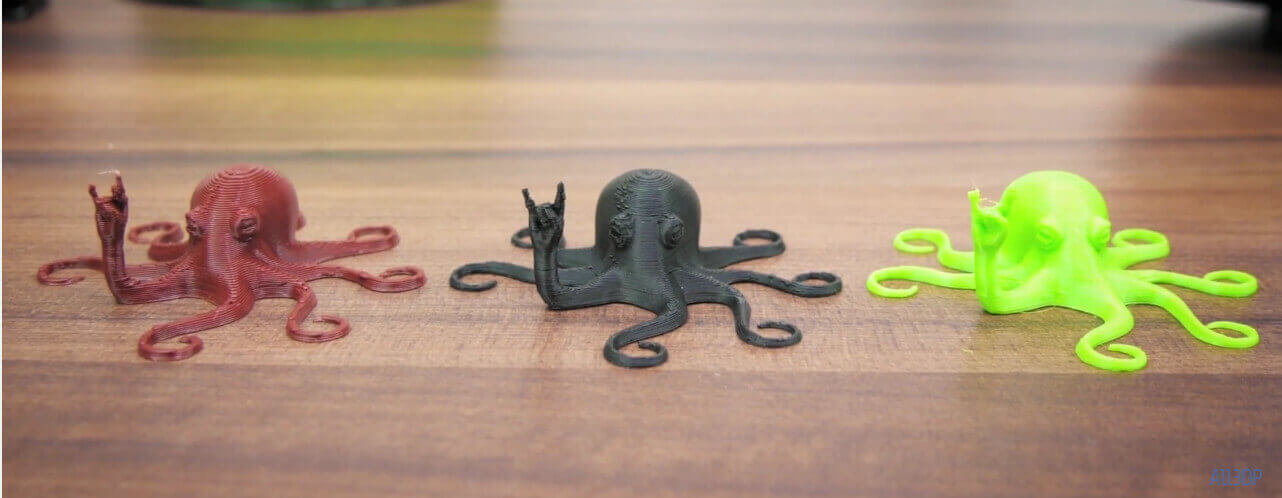
Speaking of print quality, the CEL Robox has an above-average print quality, but there are a few hiccups that keep it from being truly outstanding.
While vertical surfaces are mostly consistent and smooth, with layers barely visible at the “fine” print settings, horizontal top surfaces often turn out inconsistently, with an incomplete fill at any quality setting.
All these prints were done with the default profiles for draft, normal and coarse. The green ones were done with the included ColorFabb XT filament, while the brown one was a test print with dasfilament PLA and the black one using eSun ABS.
It’s interesting to note that the profiles used were the ones intended for the CEL filaments, which you can copy and use for non-SmartReel plastics as well.
CEL Robox Review: Automaker is Great but Needs Work
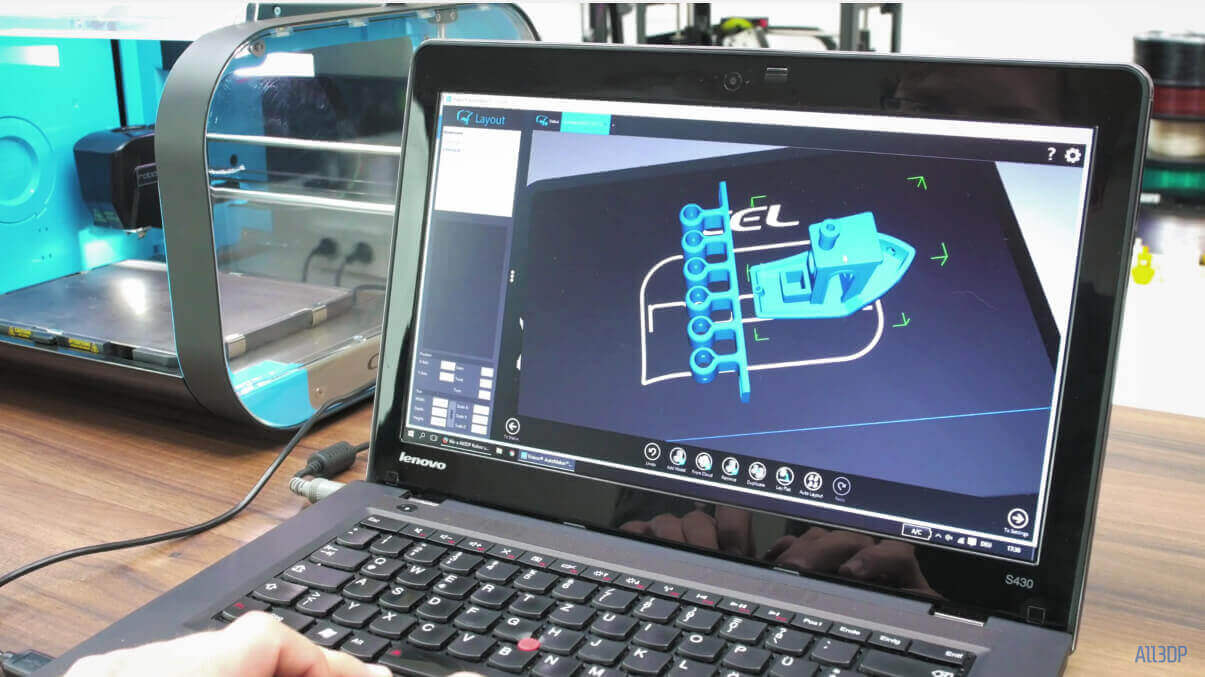
And this brings us around to the Automaker software, which I think is both the strongest and weakest point of the CEL Robox. It does enable all of the intelligent features around the SmartReels, and is generally your one-stop-shop for anything from running diagnostics on the Robox to slicing and printing your files.
At its core, it’s based around the Cura and Slic3r engines and wraps a nice interface around them that is tailor-made for this very printer. To get a print out, it walks you through three basic screens. The first one being a status overview, showing you what filament is loaded and if anything on the printer needs your attentions, the next one allows to fill the build plate with printable designs, then you get to choose your print setting and finally start the print.
Should there be anything that needs to be done before the print can start, like purging old filament from the extruder, the software will prompt you to do just that and give you the necessary instructions. Neat!
But also, the Automaker firmware in general, doesn’t feel particularly well-made and polished… yet. Sure, the basic functionality is there, and as long as everything’s going smoothly, there’s really no reason to complain. But it’s just not robust enough. For example, you can very easily or accidentally trick the Robox into printing with the door wide open, which the “safety features” being turned on should have prevented.
Also, the purge process frequently failed because AutoMaker doesn’t actually prevent you from doing other stuff while it’s doing that. The SmartReel that came with the printer always showed zero material left, which is something you work around by reprogramming the SmartReel (but you shouldn’t have to do that). Even then, when I tried to create custom filament profiles for filaments without a SmartReel, those would disappear from the list of options after just a single print.
Also, the general workflow and interface of Automaker doesn’t feel all that intuitive yet — but sure, other examples of control software aren’t much better, either.
CEL Robox Review: Conclusion
In general, if you’re looking for an experience that is a whole lot easier than other, more bare-bones printers — and don’t mind staying within that Robox ecosystem for filaments — then you’re probably going to have a good time with the CEL Robox.
The Robox prints decently well and doesn’t lock you down as much as some other options that use a closed ecosystem, like the Cubify printers. The bugs in the Automaker software are nothing compared to the issues you might run into with a fully custom-built printer, but it would still be nice to see them fixed.
Curious to learn more about the CEL Robox 3D Printer? Click here for our unboxing and setup video.
Apart from a heated build plate and auto-leveling, this 3D printer features an innovative nozzle design, which allows it to print very quickly.
License: The text of "CEL Robox Review: A Whole Lot Easier Than Others" by All3DP is licensed under a Creative Commons Attribution 4.0 International License.
CERTAIN CONTENT THAT APPEARS ON THIS SITE COMES FROM AMAZON. THIS CONTENT IS PROVIDED ‘AS IS’ AND IS SUBJECT TO CHANGE OR REMOVAL AT ANY TIME.