Da Vinci Jr. 3D Printer Review: Good for Beginners?

A 3D printer that costs just $349? Is it wise to buy such a low-cost model? Read our verdict in this Da Vinci Jr. 3D printer review.
The Da Vinci Jr. 1.0, made by Chinese manufacturer XYZprinting, is currently one of the most affordable 3D printers on the market. In the US, the printer costs just $345 plus tax and shipping. In Europe, the printer is also available through iGo3D for €399.00 (incl. tax and shipping). The test printer was provided by XYZ Printing.
The printer is geared towards beginners, children, and schools. Don’t expect high-quality printouts. The printer’s minimum layer thickness is 0.1 mm (0.039 inches). Plus, the da Vinci Jr. 1.0 only supports PLA filaments that must be purchased through XYZprinting.
But it is very beginner-friendly, provides customized software, and scores high in terms of the price/performance ratio (cost-benefit).
Read on to find out more about the quality of the printer in in our Da Vinci Jr. 1.0 Review.
Da Vinci Jr. 3D Printer Review: Unboxing
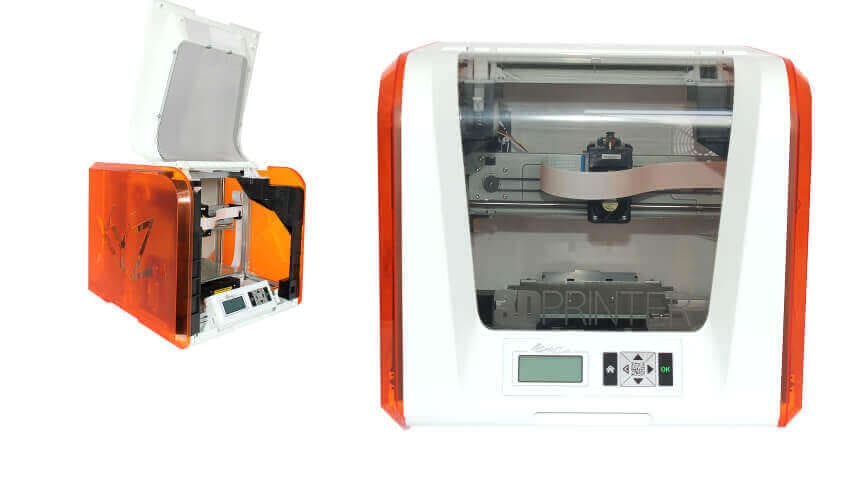
The Da Vinci Jr. 1.0 makes a solid impression from the outset. After you remove the packaging, the printer is just about ready for printing – very nice that hardly anything needs to be assembled. The retro-futuristic design with its orange side covers takes a little getting used to, but it definitely makes a visual impact. The printing area is enclosed all around; the transparent printer door allows you to open the printer.
Items included in the shipment
In addition to the printer, you’ll find several other items in the box:
- An easy to understand quick-start guide that explains the key steps in getting ready for your first print run
- A spatula with wooden handle to remove the printed objects
- A USB cable for software updates and transferring the 3D models to the printer
- An SD card to transfer 3D models from your laptop to the printer
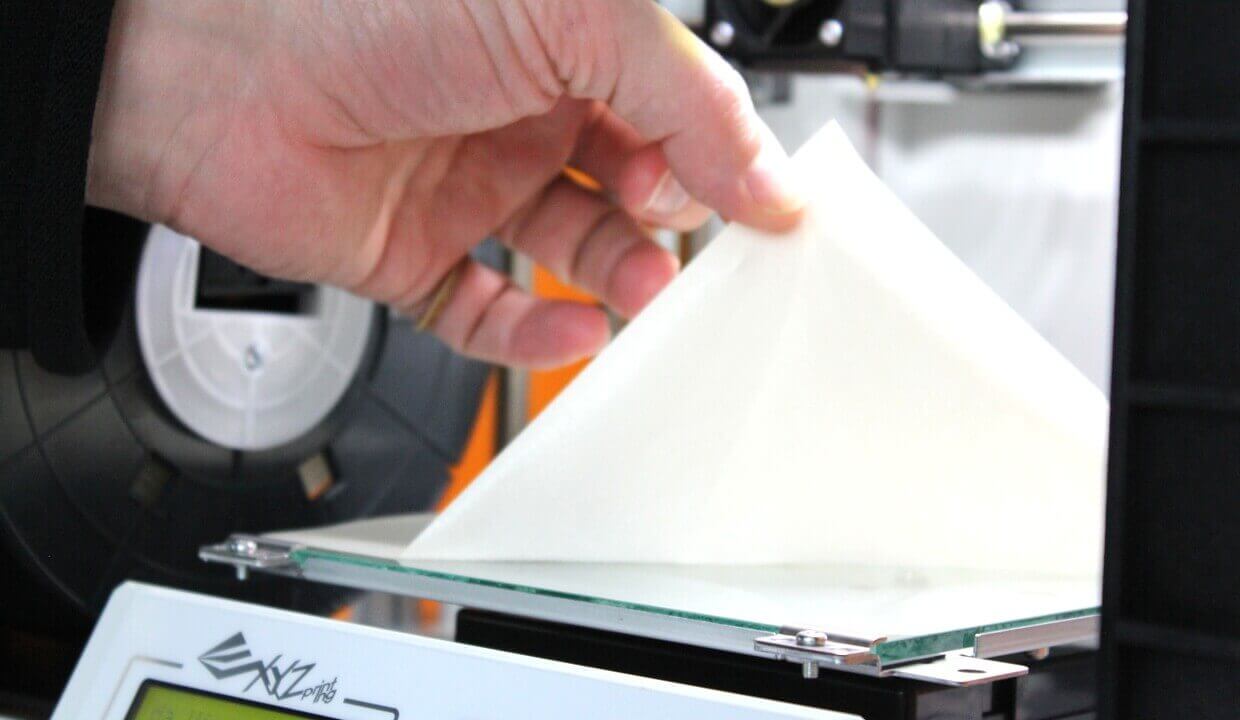
- Adhesive foil used on the build plate so that the printing material sticks to it better
- A flexible tube that leads the filament from the filament spool to the extruder
- Small utensils to clean the nozzle
- A PLA filament spool so you can start printing your first object right away
- The obligatory power cable
Da Vinci Jr. 3D Printer Review: Assembly
One of the definite strengths of the XYZprinting 3D printer becomes obvious when you get ready to assemble the printer. The build plate comes ready-installed, and on the inside, you’ll find the holder for the filament spool. The transparent tube included in the shipment is easy to attach to the fixtures on the filament spool and the extruder. Now all you have to do is push the filament spool onto the holder.
If you want to start printing right away, you’ll have to load the filament first. To do that, you need to select the following from the menu: UTILITIES/CHANGE SPOOL/LOAD FILAMENT. The extruder will start heating up. Once the extruder reaches the right operating temperature, you start loading the filament. Close to the spool you’ll see a small opening with a lever. If you push the lever up, you can insert the filament into the opening. Now all you have to do is click “OK” and the filament will be moved forward automatically. As soon as the material emerges from the nozzle, you click on “OK” again, and the printer is ready for its first print run.
The great news is that you won’t have to calibrate the build plate, which is one of the things that make this a very beginner-friendly system.
Our evaluation
Up to this point, there’s not much to complain about the Da Vinci Jr. 1.0. The printer is solid (about the size of a beer crate), and the filament is safely loaded into the printer. The display and controls – a membrane keyboard with pressure pad – seem a little on the cheap side but definitely serves its purpose. Because of the closed design of the printer, you won’t have to worry about air drafts interfering with the quality of the print results.
Incidentally, the power usage is about 75 watts. Compared to other printers, this is surprisingly low.
Experienced users will not be very thrilled with some things, however. The build plate is too small. You can only print objects with an edge length of maximum 15 cm (5.9 inches. You can only purchase the PLA filament on a proprietary spool, which has a diameter of 1.75 mm (0.069 inches). The price of a 600 g/1.323-pound spool is about $30. This makes printing expensive, and you can’t experiment with any materials other than PLA. The choice of colors is also limited.
Da Vinci Jr. 3D Printer Review: Software
XYZprinting offers its own 3D printing software, namely XYZware. It includes all functions necessary to import 3D models in .stl and .3w (XYZ format) file formats and prepare them for printing. The XYZware software is already on the SD card included in the shipment, but it can also be downloaded from the manufacturer’s website. It is compatible with all of printers from XYZprinting and supports Windows 7 and above as well as Mac OSX version 10.8 and above.
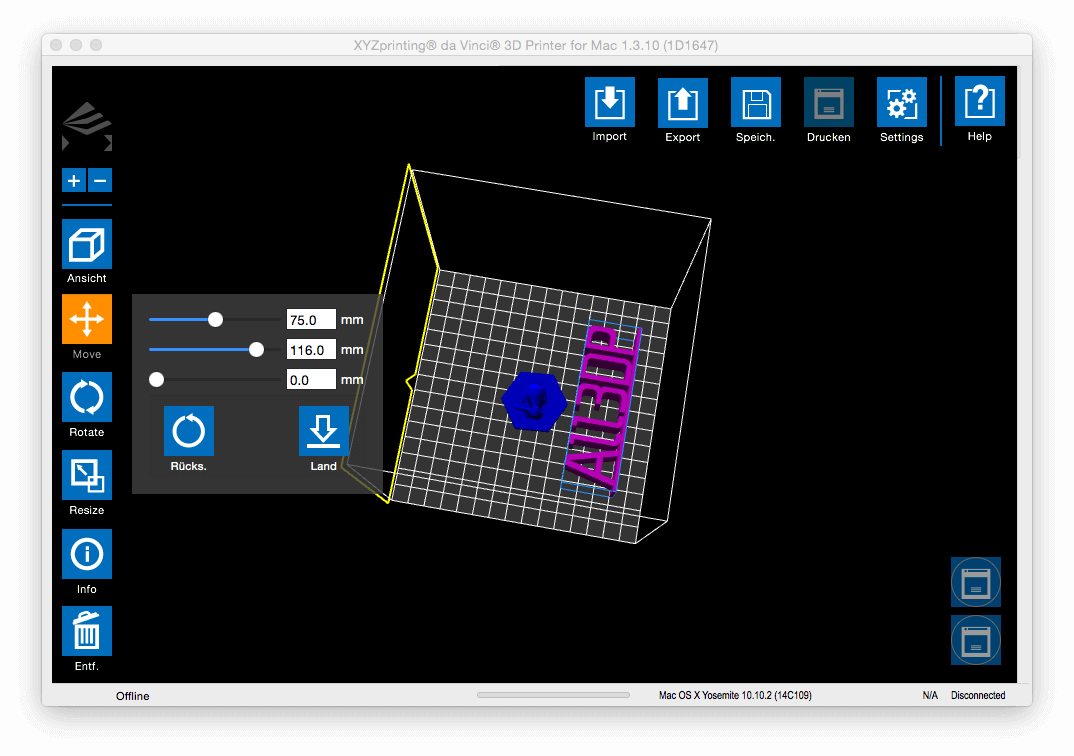
The button “Move” lets you move the 3D model around. You’ll need this if the adhesive foil is worn in places or you want to print several models at the same time. The same goes for the “Rotate” function, which allows you to rotate the 3D model around its axis. When moving the models, you should always make sure that they lie flat on the build plate. The “Move/Land” function automatically positions the model.
Unfortunately, when exporting or printing objects in the .3w file format, the status is not displayed, only the past printing time. When we tested the printer, we stopped the various printing processes after up to 3 hours ‒ other printers had printed the model in just one hour, while the da Vinci Jr. 1.0 continued to draw tracks in the air.
Afterwards, all important data is displayed in the info area: dimensions, printing time, material consumption, etc.
Our evaluation
Initially, the software program makes a good impression. It is intuitive and therefore, easy to use. We liked that the software was already on the SD card that was included in the shipment, which eliminates the need to search for the right download, etc. We found it unfortunate that only .stl and 3w files are supported.
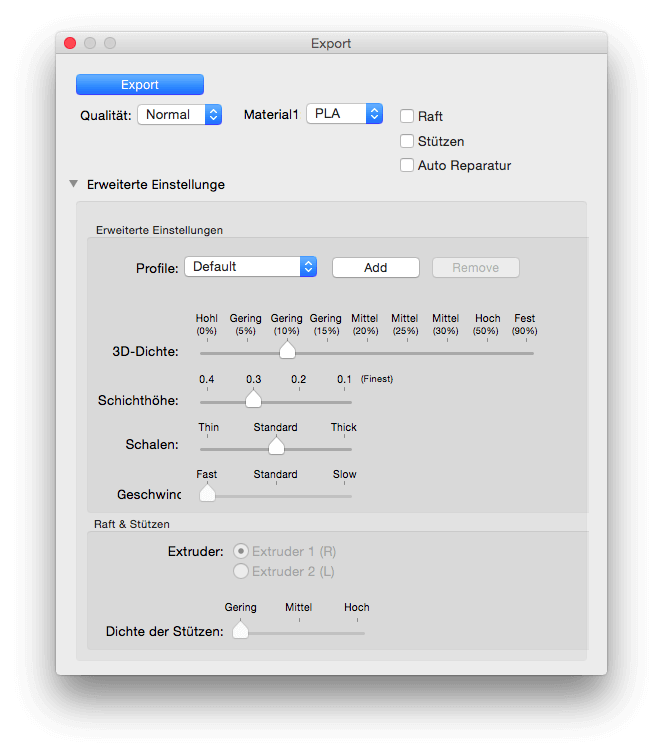
But when you’re actually working with the software, you quickly run into problems. If you select the lowest quality level, everything works smoothly. However, this means that you’ll be working with a layer thickness of 0.4 mm (0.016 inches) only suitable for simple prints.
In summary, the XYZware program is easy to use, but it’s still in its infancy when in terms of being able to make individualized adjustments.
Da Vinci Jr. 3D Printer Review: Printing
Now let’s talk about the printing process. As already mentioned, the Da Vinci does not need to be calibrated. If you’re not satisfied with the print quality, you can adjust the Z-axis. You’ll have to do this when you attach the adhesive foil to the build plate.
After saving the finished model on the SD card, you insert it in the printer and select the model in question from the menu. The loading time before the printing process begins will vary, depending on the size of the model. While the object is being printed, the display shows how much time is left until the printing is done. Even though this is not 100% accurate, it gives you a good idea of how much longer it will take until you can actually hold the final result in your hands.
Just like the XYZware program, operating the system is intuitive and therefore easy to understand. We ran into problems when we tried to go beyond the standard settings. When we attempted to increase the print quality, the display no longer showed the printing status. The extruder started on the correct course, but no material came out of the nozzle. This always occurred when we changed the settings in XYZware, which tells us that the software program can only be used for conversions in the right format.
After the relatively long printing process was completed, we found that it was somewhat difficult to remove the model from the build plate, despite the adhesive foil. Inevitably, the foil got damaged in the process. At least the “Move” function in XYZware worked ‒ therefore, we didn’t have to attach a new foil for each printing process.
The quality was not satisfactory. At a layer thickness of 0.4 mm (0.016 inches), it’s almost impossible to get smooth surfaces and clean round surfaces and corners. However, considering the very low purchase price, the cost-benefit is good. With some trial and error, it should be possible to get the best layer thickness of 0.1 mm (0.039 inches), as specified.
Our evaluation
If you don’t mind using the standard settings, beginners will get where they want quickly ‒ the only thing is to be aware of is the fact that the print results can’t compete with those of the more expensive 3D printers.
The menu is well-structured and easy to find your way around in. Experienced users, however, are likely to lose interest quickly, since it’s hard to get more out of the system than just the standard settings.
Considering the low price, the quality of the print results is reasonable. Because of the high printing costs and long printing time, the Da Vinci Jr. 1.0 is only suitable for occasional printing. And since it was developed for teaching purposes and for beginners, it definitely serves its purpose. But considering the many malfunctions, the system is still in need of improvements.
Da Vinci Jr. 3D Printer Review: Verdict
The Da Vinci 1.0 Jr. stands out because of its low price. The printer easy to operate and not least because of its compact closed design. Unfortunately, the print quality is not comparable to that of the more expensive printers, such as the Ultimaker 2 and the Zortrax M200 ‒ with this printer, there is a significant loss in quality.
If you want to delve deeper into 3D printing, you’ll quickly become frustrated. While the software offers many print settings, some of them just didn’t work during our printer test. A future software update might solve this problem.
Da Vinci Jr. 3D Printer Review: Technical Data
DIMENSION (WxDxH)
Product: 16.54 x 16.93 x 14.96 inches (42 x 43 x 38 cm )
Package: 21.53 x 22.87 x 18.7 inch (54.7 x 58.1 x 47.5 cm)
GROSS WEIGHT
33.07 lbs (15kg)
TECHNOLOGY
FFF (Fused Filament Fabrication)
Maximum Build Volume (WxDxH):5.9 x 5.9 x 5.9 inch (15x15x15cm)
Resolution:
- Fine 0.1 mm (100 microns)
- Standard 0.2 mm (200 microns)
- Speed 0.3 mm (300 microns)
- Ultra Fast 0.4 mm (400 microns)
Single Nozzle:
Nozzle Diameter: 0.4 mm
Filament Diameter: 1.75 mm
Filament Material: PLA
DISPLAY
Panel Type: 2.6” FSTN LCM
Language: Multi Language
Connectivity: USB 2.0, SD card *Systems are compatible with SDHC cards up to 32 GB in size.
SOFTWARE – XYZware
File Types: .stl , XYZ format (.3w)
Operating System: Windows 7 and above (for PC), Mac OSX 10.8 and above 64-bit (for Mac)
- Note: Stardard VGA driver on operating system or a graphics card doesn’t support OpenGL 2.1, may cause unknown error in XYZware.
Hardware Requirements (for PC/Mac)
- X86 32/64-bit compatible PCs with 4GB+ DRAM (for PC)
- X86 64-bit compatible Macs with 4GB+ DRAM (for Mac)
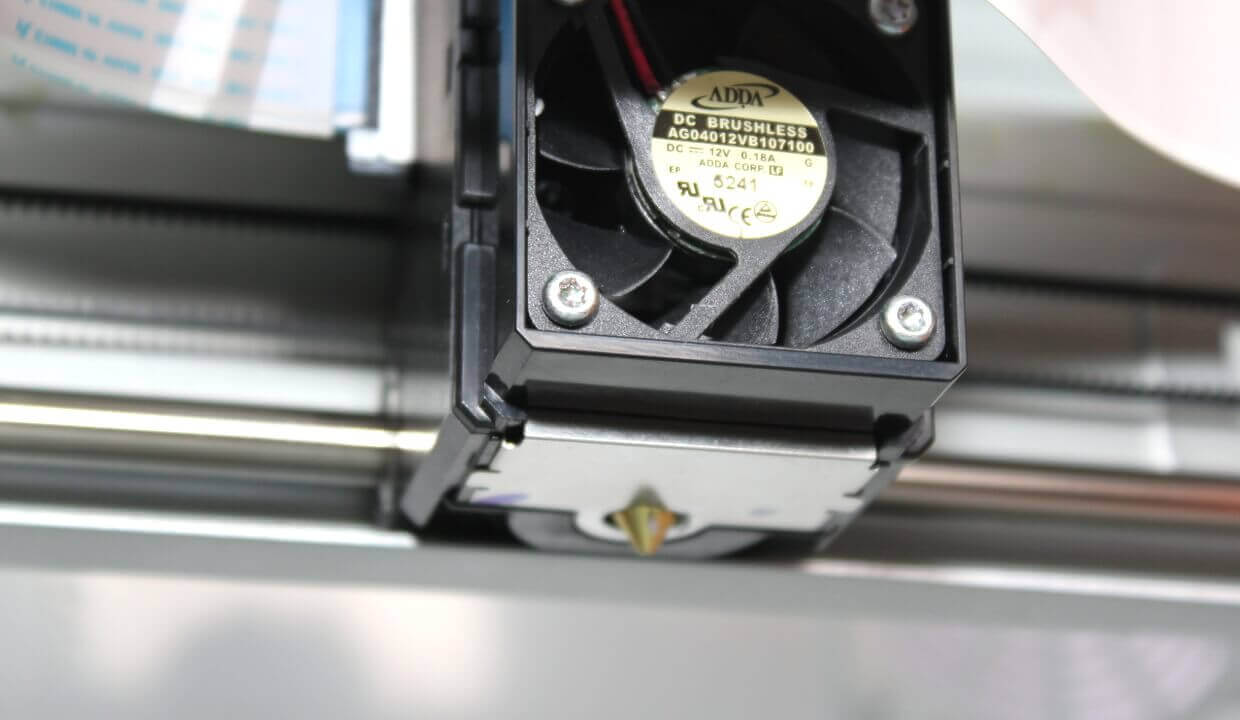
The da Vinci Jr. features is a robust machine offering an enclosed build chamber, automatic offset calibration, and easy extruder replacement.
License: The text of "Da Vinci Jr. 3D Printer Review: Good for Beginners?" by All3DP is licensed under a Creative Commons Attribution 4.0 International License.
CERTAIN CONTENT THAT APPEARS ON THIS SITE COMES FROM AMAZON. THIS CONTENT IS PROVIDED ‘AS IS’ AND IS SUBJECT TO CHANGE OR REMOVAL AT ANY TIME.