How to Use All3DP’s Price Comparison Service

You wish to get the best price when using a 3D printing service such as Shapeways, i.materialise or Sculpteo? Just make use of All3DP’s print price comparison service that gets you from uploading your 3D model to placing your order in 3 easy steps.
The All3DP service provides easy ordering and secure payment; the 3D print jobs are fulfilled and delivered by All3DP’s partners.
The printing services covered by the price comparison tool
For now, the price comparison tool covers these three services:
-
Shapeways: the world’s largest online 3D printing service, community, and marketplace
-
i.materialise: an online 3D printing service for all people with an eye for design and a head full of ideas
-
Sculpteo: an online 3D printing service for your 3D designs
These three services offer world-wide shipping.
Step 0: Launch the comparison service
Start your web browser and go to the 3D Printing Price Comparison page – either by clicking this direct link or by clicking the Prices link on the All3DP.com start page.
The price comparison tool runs in the Chrome, Firefox and Safari browsers; it requires JavaScript.
Step 1: Upload your 3D model
The services covered by the All3DP printing price comparison tool support the following file formats: STL, OBJ, DAE, and WRL.
Please note:
-
STL files do not contain color information. When you upload a STL file, you select the color in step 2.
-
If you want to order full-color 3D prints you can upload a ZIP archive, containing only one full color 3D model file (OBJ + MTL file, DAE or WRL file) and related texture files (JPG, GIF or PNG). All three printing services support this option.
-
The maximum file size is 64 Megabyte.
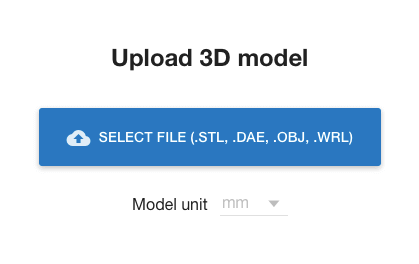
In order to upload your 3D model:
1. Click the Upload A 3D Model button.
2. If you do not wish to have the model measured in millimeters, click the drop-down list next to Model unit and select the unit of your choice (mm, cm, in).
3. Click Select File, and select the file from your hard disk.
All3DP then checks whether your model is printable.
If your model is not printable, use one of these free tools to repair it: Meshlab, OpenFlipper, TrIMM, MeshFix, Graphite.
Step 2: Compare prices
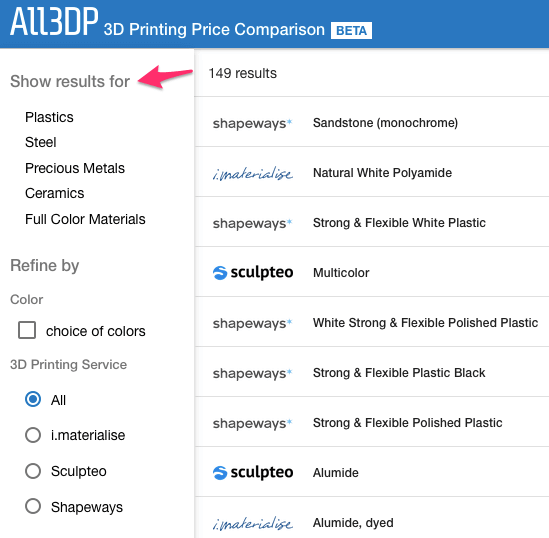
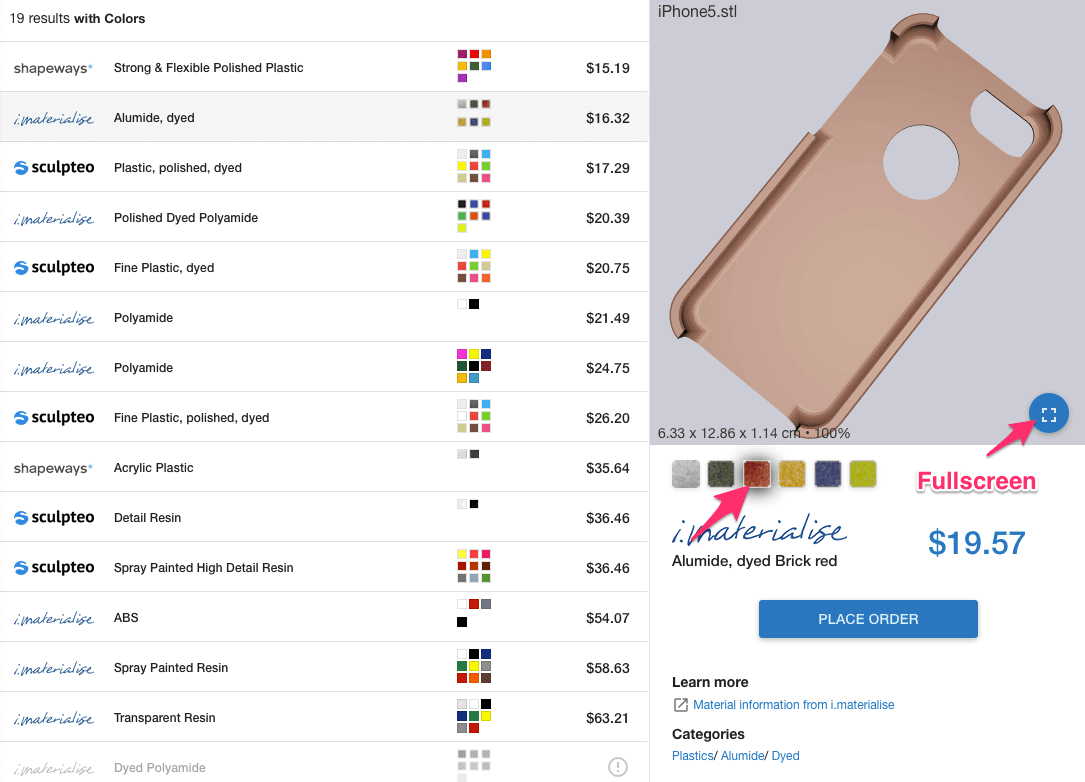
If your model is printable, you get a list of all materials available. The list is sorted by price, lowest price first.
The list gets pretty long, as the printing services offer a large selection of materials (and this selection is growing and growing).
1. So, if you already know which material you want to have your model printed with, select the material under Show results for.
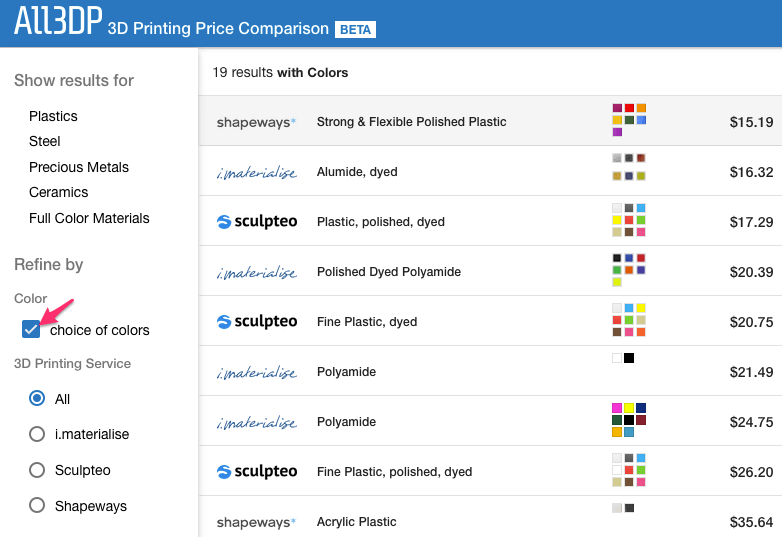
Alternatively, you can condense the list by selecting choice of colors: Then all colors for one material are bracketed together. We recommend you use this option as you get a much clearer list of choices.
2. Go through the list, and select the material of your choice.
3. Select the color – note that prices can vary depending on the color you choose.
4. You can use the mouse to move or rotate your model on the screen. If you wish to see a large-scale preview of your model in the selected material and color, click the Enter fullscreen button to the right; to leave fullscreen view, tap the ESC key.
Step 3: Place your order
1. When you’re satisfied, click the Place Order button.
2. Enter your shipping address. If you order on behalf of a company, check the I am ordering for a company checkbox.
3. Next, click Review order. Note that now the cost for shipping has been added (after you entered your address).
Hint: Save shipping cost by adding a second model to your order. Simply click the Upload 3D Model button and restart with Step 1.
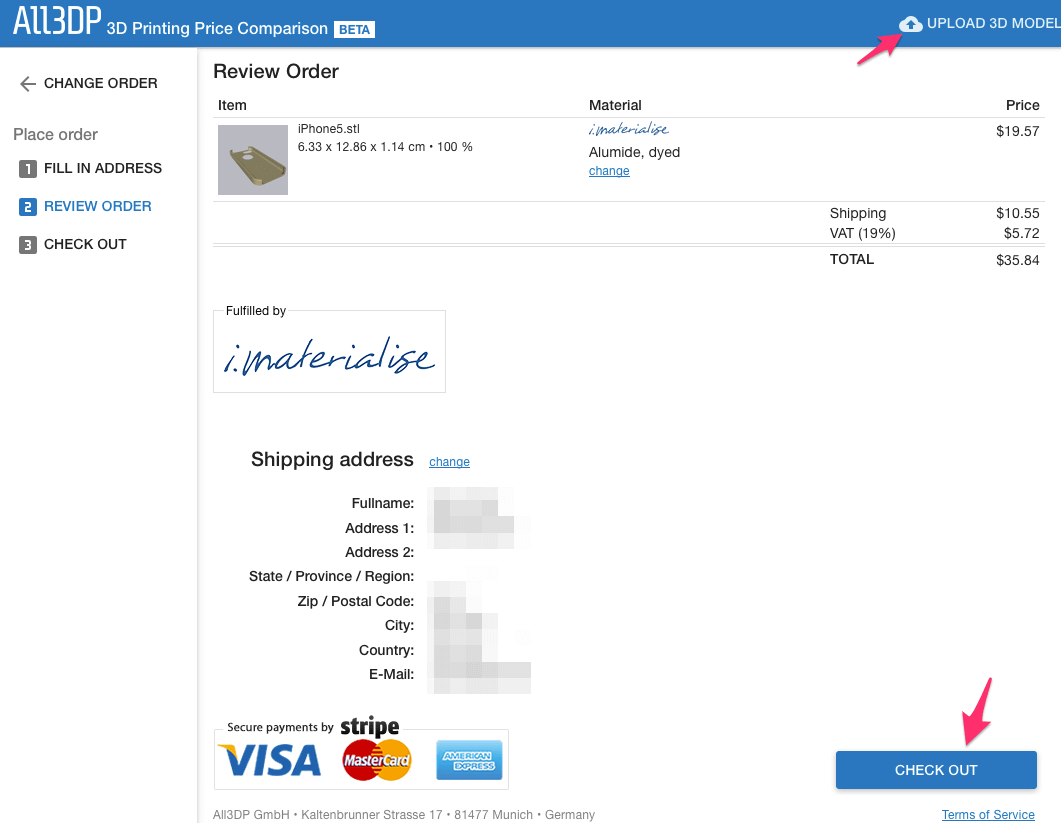
4. Once, you’re done, click Check Out.
5. Enter your credit card number, the validity date and CVC number; if you plan to order more than once, check the Remember me checkbox. Click the Pay button.
Alternatively, select Bitcon and send bitcoins to the address shown in the dialogue.
That’s it.
License: The text of "How to Use All3DP’s Price Comparison Service" by All3DP is licensed under a Creative Commons Attribution 4.0 International License.