Neosanding 2.0 3D Printing Technique Smooths Planes Quicker

The Ultimaker community-developed Neosanding feature, currently live in Cura’s 2.7 Beta, gets an upgrade. The technique’s original creator has just outlined a new method that offers better results with no loss in print time.
Hot in pursuit of perfect 3D prints, Ultimaker forum mod Neotko has penned an interesting new take on his Neosanding feature.
For those unfamiliar with the topic, Neotko first outlined his Neosanding technique back in September 2016. The original post explains how to use Simplify3D to force your printer to iron the top layers of flat surfaces.
Since Ultimaker maintains Cura, an open-source slicer, the company was inspired to work Neotko’s idea into an officially supported feature. Added in latest beta version of Cura, users of the software can find it under the much duller (but more accurate) name “Ironing”.
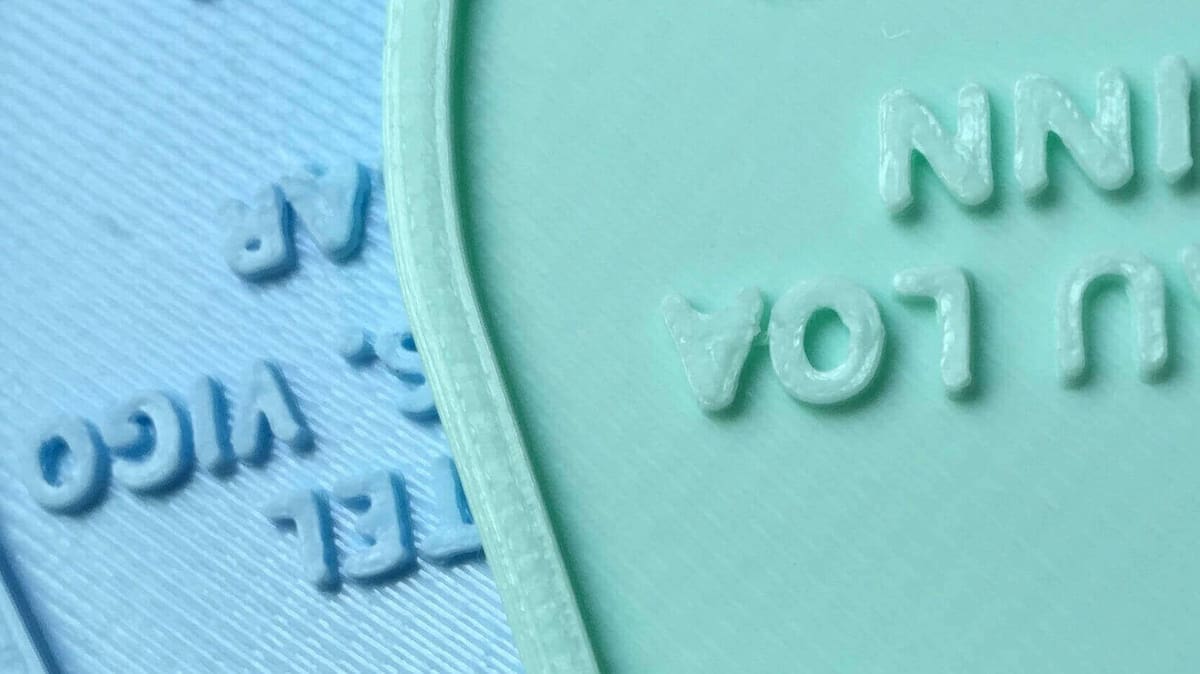
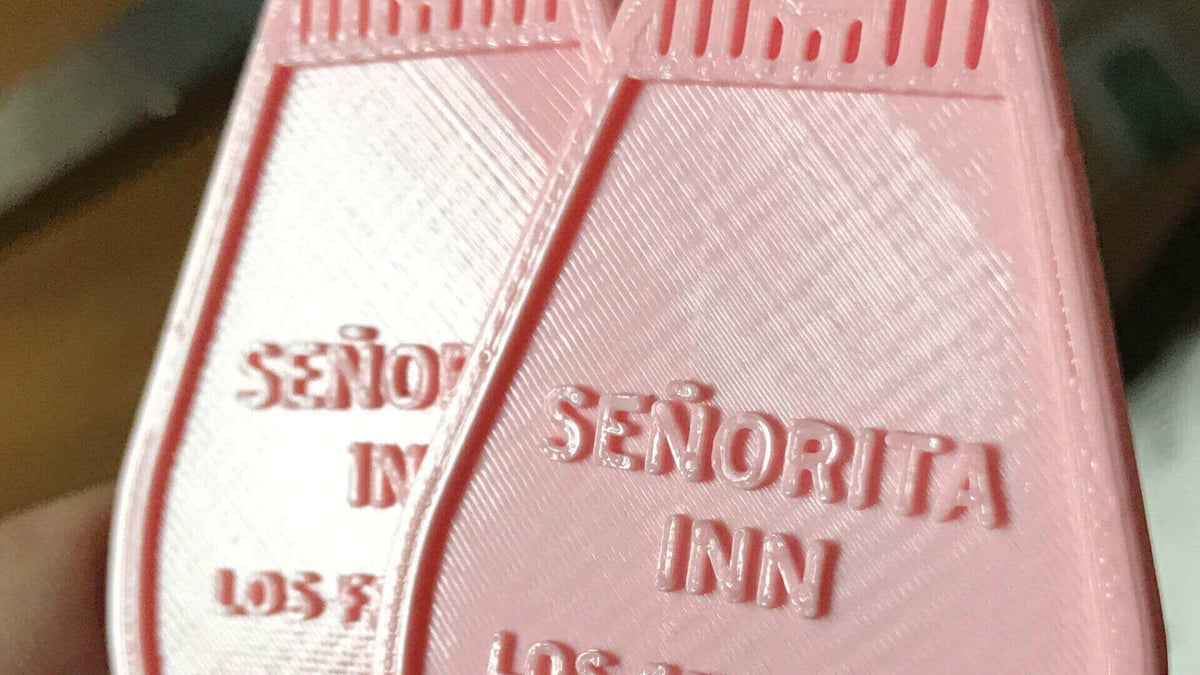
Essentially, Neosanding 1.0 (“Ironing” in Cura 2.7 beta) has your heated hot end repeat the final layer move in a fast pass over the finished surface. By faking the size of your nozzle and reducing extrusion to nothing, the printer makes several overlapping moves, ironing out ridges and making the extrusion lines less discernible. The result is a smooth surface with less prominent boundary lines.
It’s a marvelously inventive idea, and one that sacrifices a little extra print time for higher quality results. Until now…
Neotko’s Neato Neosanding 2.0
Where Neosanding 1.0 treats the smoothing moves as their own separate move-set applied after the print completes, Neotko’s new method instead incorporates it into the printing of the final layers themselves.
Once again though, this new advanced procedure is detailed for use in Simplify3D.
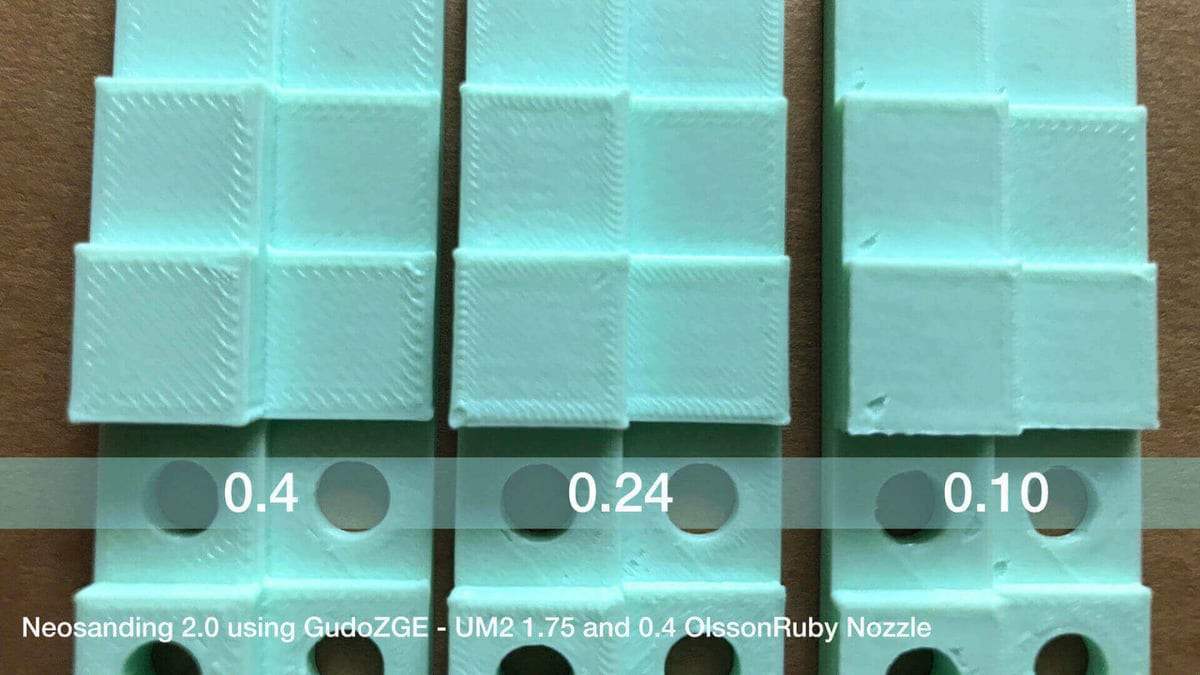
The new method works in almost the same way as the original. And again relies on inputting a reduced extrusion width to make your slicer generate the additional (and to it, required) passes of the print head to “complete” the layer.
But instead of applying this to the surface layer post- print, you apply variable settings to the final layer/s instead. Reducing the extrusion width to approximately half (Neotko states 0.24 for a 0.4mm nozzle) and still allowing some small extrusion, the effect of Neosanding 1.0 is achievable during the main print itself. And in the same amount of time, too.
Doubling the print speed counters the additional print passes the head performs (for the faked layer width). Bear in mind this is for the surface layers’ infill, not perimeters.
Reducing — but not stopping — the extrusion flow fills in troughs created in the process, and consequently smooths them, too.
Overall, the result is an “ironed” print in roughly the same time it would take to print a piece ordinarily.
According to a Reddit discussion on the matter, it’s possible to achieve the Neosanding 2.0 finish in Cura conventionally. A simple print modifyer of reducing the Top Line Layer Width to 0.24mm and upping the print speed.
Neotko covers the process in much more detail, over on the Ultimaker forum. It’s worth checking out if you’re feeling pretty adventurous with your prints and have a head for advanced print settings. Here’s the YouMagine page featuring Neotko’s test print.
Alternatively, both Neosanding methods are possible in some form using the most current Cura.
License: The text of "Neosanding 2.0 3D Printing Technique Smooths Planes Quicker" by All3DP is licensed under a Creative Commons Attribution 4.0 International License.