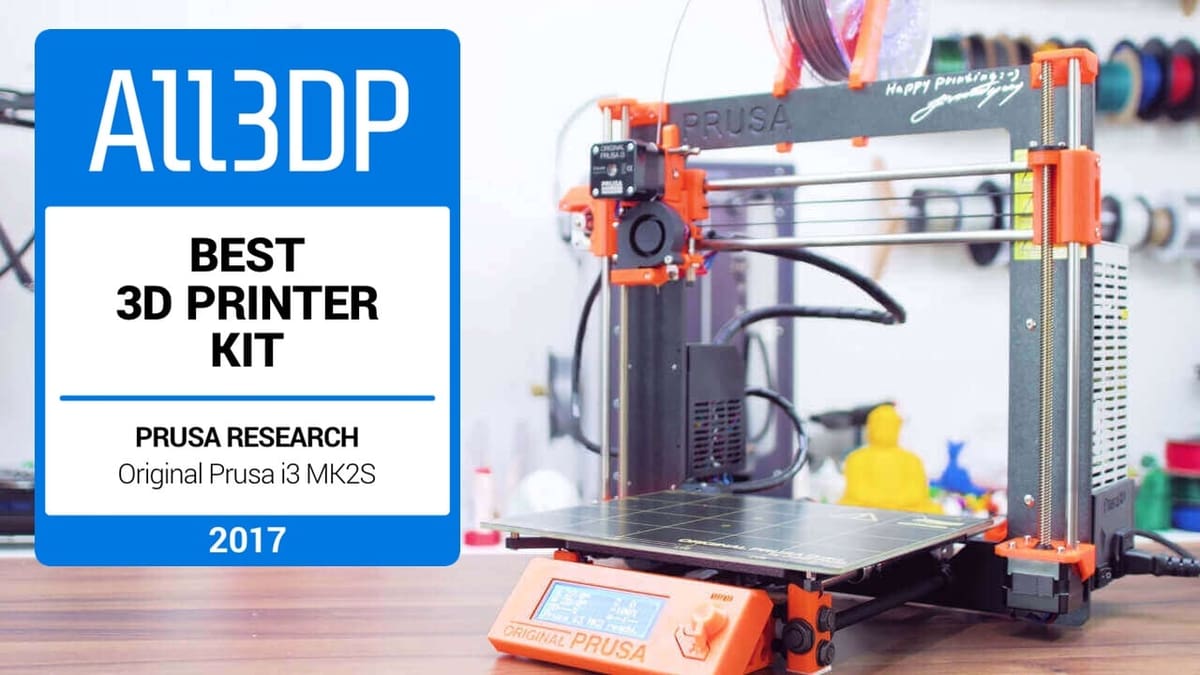
Original Prusa i3 MK2 Review: Best 3D Printer Kit of 2017
This is where 3D printing is right now, according to Thomas Sanladerer. Read his detailed and enthusiastic Original
Don’t miss:
Editor’s Note: This content originally appeared on Thomas Sanladerer’s YouTube Channel and is licensed as Creative Commons Attribution Share-alike thanks to his supporters on Patreon.
So as it turns out, there are a number of issues with reviewing the Original
The first one being, it completely changed my frame of reference for how I’ll expect a printer to perform at a given price-point.
And secondly… I guarantee you, there will be people calling me a sellout for this, but as always, this review was not influenced by anything other than my own experiences with this machine. I think this is the absolutely best goddamn 3D printer on the market right now.
But let’s start out with what this i3 is. If you’re at all interested in 3D printing, you will have heard the name “Prusa i3” or just “i3” or even “i4” for various 3D printer kits before, some of which have practically nothing to do with what the i3 actually is.
The thing is, “Prusa” is actually a person, Josef “Jo”
Skip forward to today and you’ll find an almost 60-person strong team under the Prusa Research brand, engineering, and selling, what is now the Original Joseph
Original Prusa i3 MK2 Review: Overview
If you’ve seen articles like “”, some of those machines are based on the open source i3 design, but thinking you’ll get the exact same experience from any of the kits from Far East sellers would be like buying this Goophone i7 and expecting it to rival an actual Apple iPhone 7. You get the idea.
Original Prusa i3 MK2 Review: Features & Specifications
Now, of course, the
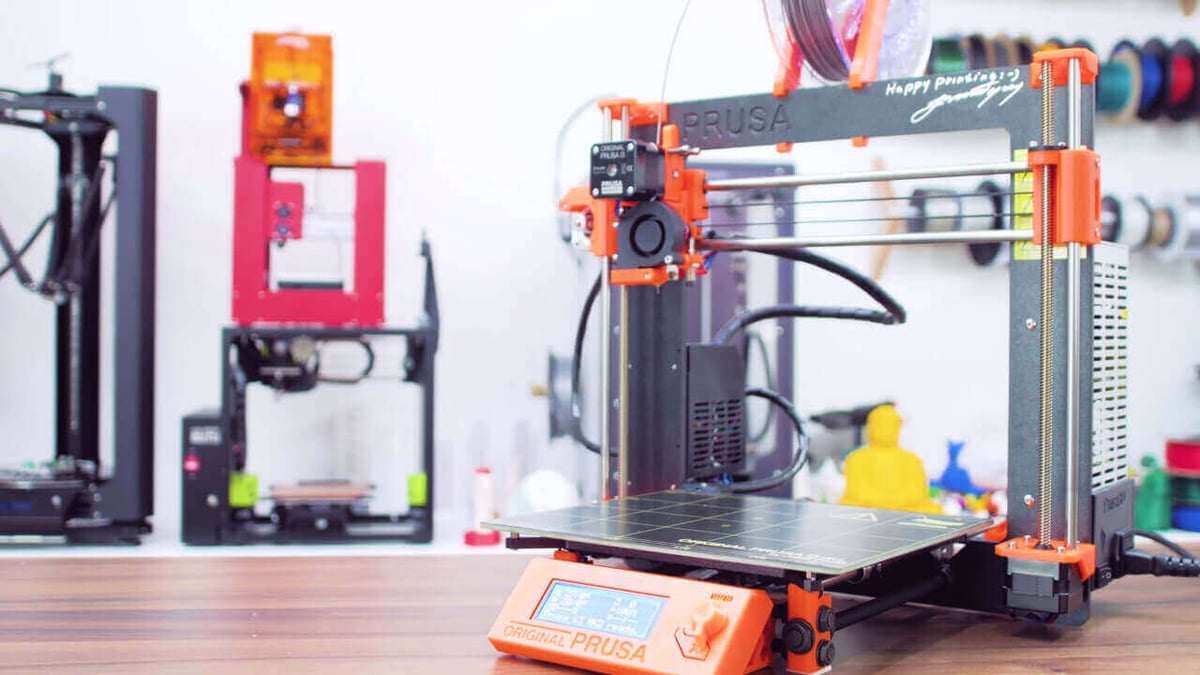
So it’s still the familiar design of the vertical center plate carrying the Z and X axis and the M12 threaded rod base that carries that vertical plate and the Y-axis. This gives the Original
It’s printing onto the MK42 heated bed, so the solution to all problems apparently, and that’s a thick, custom PCB — or printed circuit board — heater with no aluminum, glass, or anything else required to give it stiffness, since it’s already made from glass-fiber-reinforced resin, and to get your prints to stick, a thin PEI foil on top. This means it heats up and cools down fairly quickly, actually just as quickly as the hotend if you simply want to print PLA, and also ends up as a very light y-axis setup.
The MK42 heater PCB also has zones with different heating properties that compensate for the bed cooling down faster at its edges, so you’ll get a very even temperature distribution at any point of the bed, which is important for printing larger prints with high-temp plastics.
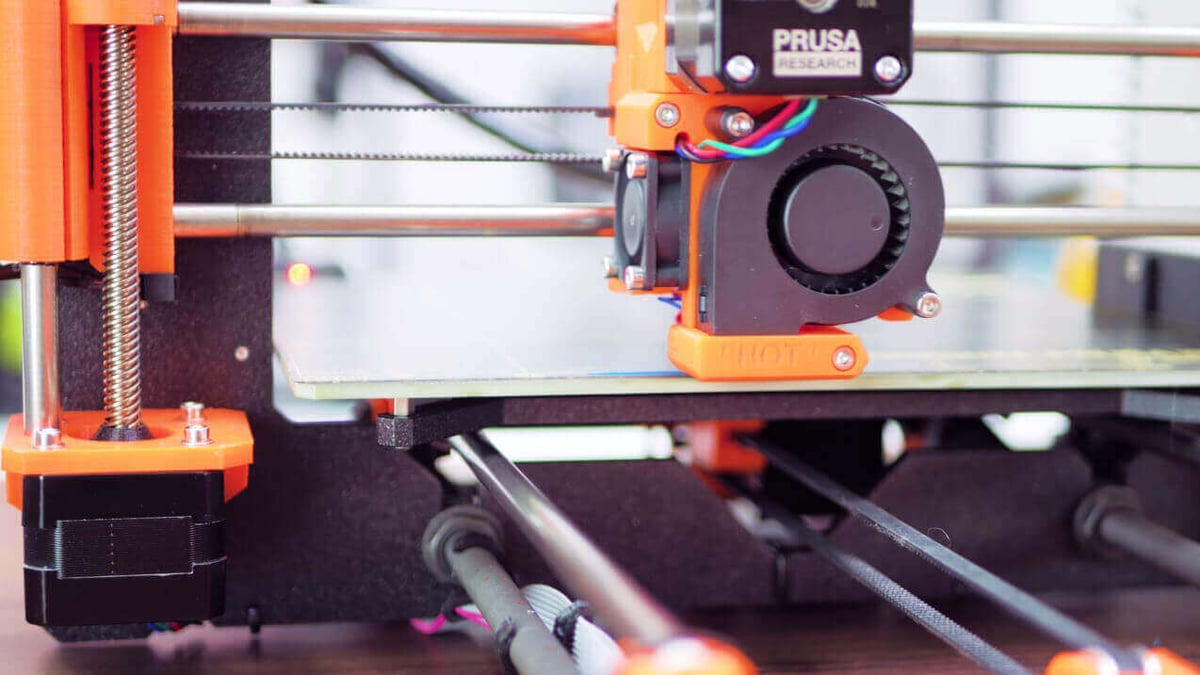
And having a genuine all-metal E3D v6.1 hotend in here means that you can throw any material at the printer. Use PLA, ABS, PET, Nylon or particle-filled filaments like wood-infused materials with the stock setup and brass 0.4mm nozzle; or swap in a hardened or coated nozzle for glass or carbon-fiber-reinforced filaments; or add a Volcano heater and nozzle if you want to go, like, really fast.
Or if you’d rather end up with even more precise prints instead, grab a finer 0.25mm nozzle. Spoiler alert: it already prints magnificently with the default setup, but of course, the v6.1 does give you a lot of flexibility there.
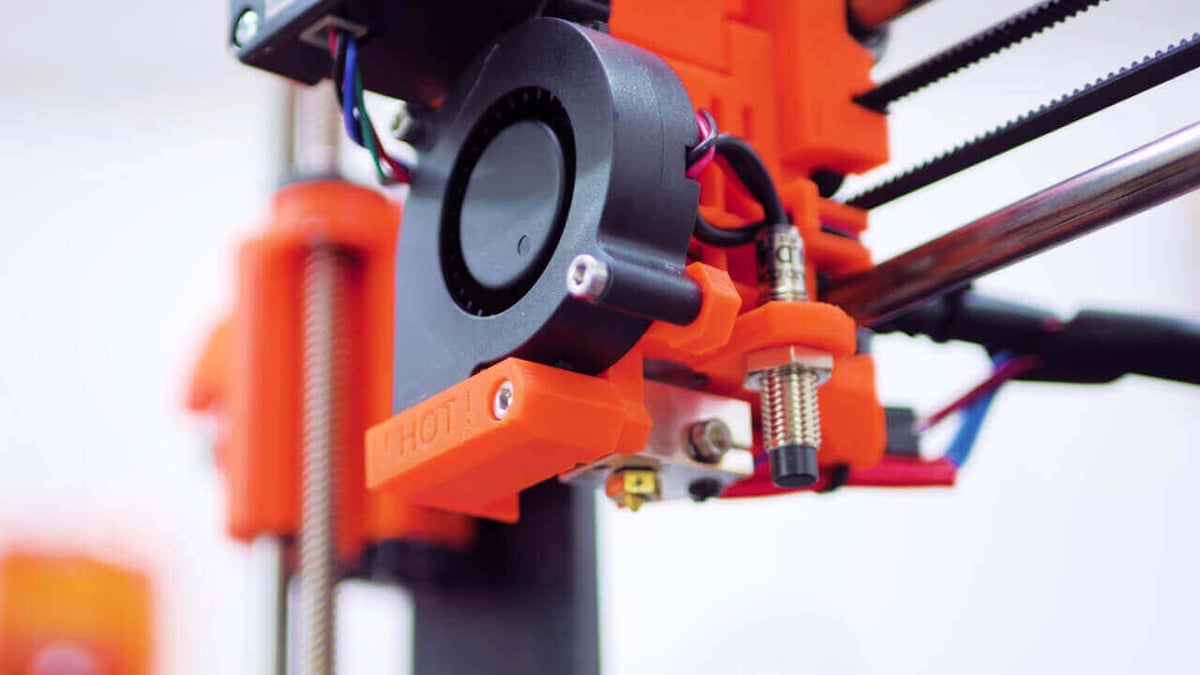
Next to the hotend, we find something I believe should be mandatory for any 3D printer sold today — a bed probe. And not just any probe, but a smaller-than-usual inductive one. Dubbed the P.I.N.D.A. probe (which apparently has a different meaning in Czech), it’s a custom-made sensor that of course takes up less space and also runs reliably off of 5v directly instead of requiring some sort of voltage level adaption like the larger, standard industrial probes.
The Original
Some reviewers actually left that part out completely. It does square itself up, no need to meticulously adjust it while building it. And both the mesh leveling and the auto-squaring were developed by the
You’ll mostly be operating the printer through this decidedly unspectacular LCD controller. But I do actually like the way the clickwheel knob looks with this flap, which makes it super easy to use with a quick flick of a finger. I know, it’s the smallest of all details, but those usually do make the biggest differences.

On the LCD, you get all the options for running the calibration routines, and loading and unloading filament. And it’s all not just dumb scripts, these will actually detect if something doesn’t look right, like the heaters not responding properly or the sensor not triggering at the height it’s expecting it to. So in plain words, if you mess up building the printer or something else fails, the Original
So the entire machine is driven by a genuine Ultimachine Mini Rambo, which means reliable components for driving heaters and such as well as having a solid fusing concept that will protect the machine should anything ever short out. On the other side behind the frame we find a generic power supply without a fan, which does get warm to the touch during regular use.
What’s awesome here is that it has this cover on its connector side, and this, in fact, also comes preinstalled even on the kit. You will not need to wire up mains voltage into your machine, you simply plug in your power cord into the fused IEC connector and the other side into the Mini Rambo mainboard. That’s awesome! And the frame also gets grounded properly by having the power supply attached to it, and even stiffened up by having it brace the vertical frame against the subframe.
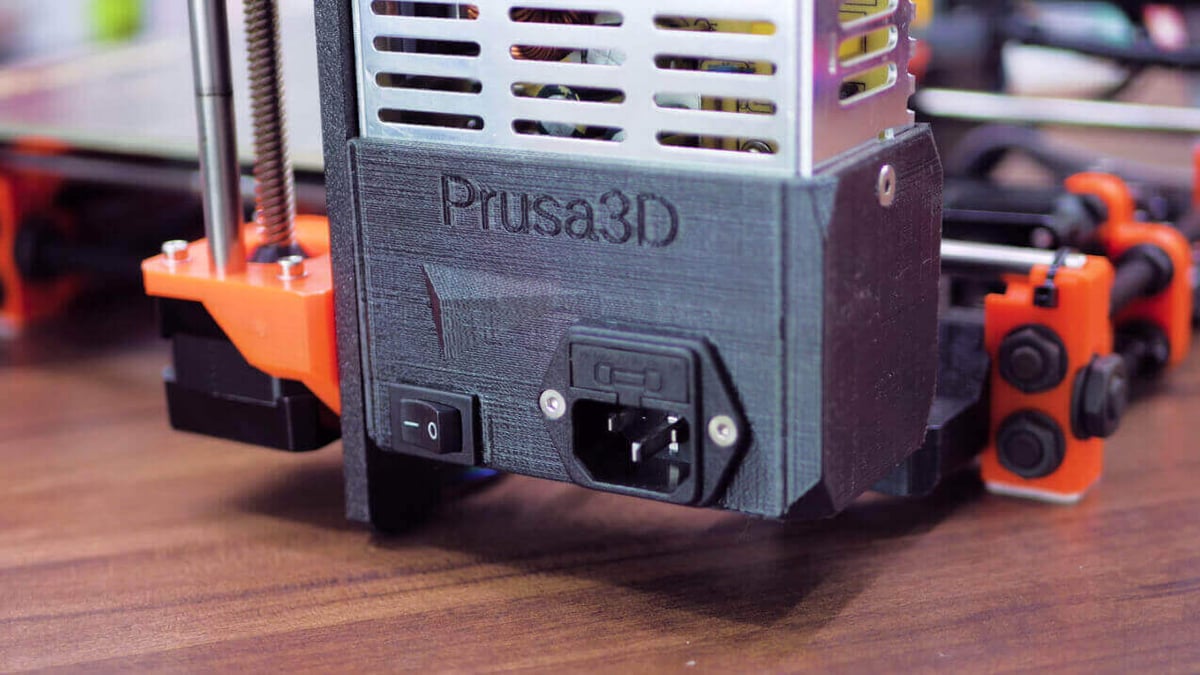
One thing about the entire wiring situation that stands out is that the most strained wire bundles, the ones going to the extruder and to the heated bed, actually include a piece of 3 mm Nylon filament to keep them from kinking and wearing out from repeatedly bending in the same spot. And short of using an actual drag chain, that’s what i think is one of the best ways of taking care of such a wire bundle.
Original Prusa i3 MK2 Review: Assembly & Performance
So if you’re deciding to build the Original
The manual takes you through each step of the assembly, and then through the automatic calibration, and shows you how to prepare your own prints. While the pictures in the printed version aren’t particularly great, you can also pull up the additional online guide alongside it and augment the printed one with the images there.
Now, Jo

So with both machines assembled, it turns out they actually perform absolutely identically. If it weren’t for the signed frame, I’d have no way to tell them apart other than the serial number.
You get a testing protocol with each machine; on the kit, they hook up the components on a dummy setup, for the assembled one, they actually test all components in the printer itself, as to how each part actually performs compared to how it should perform.
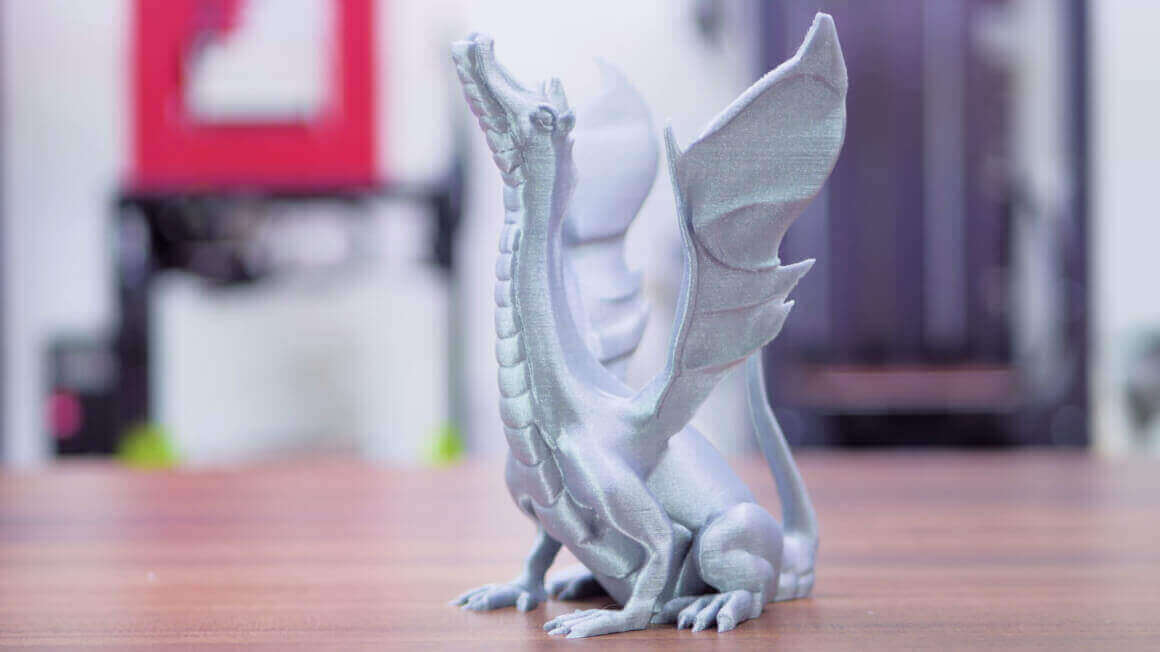
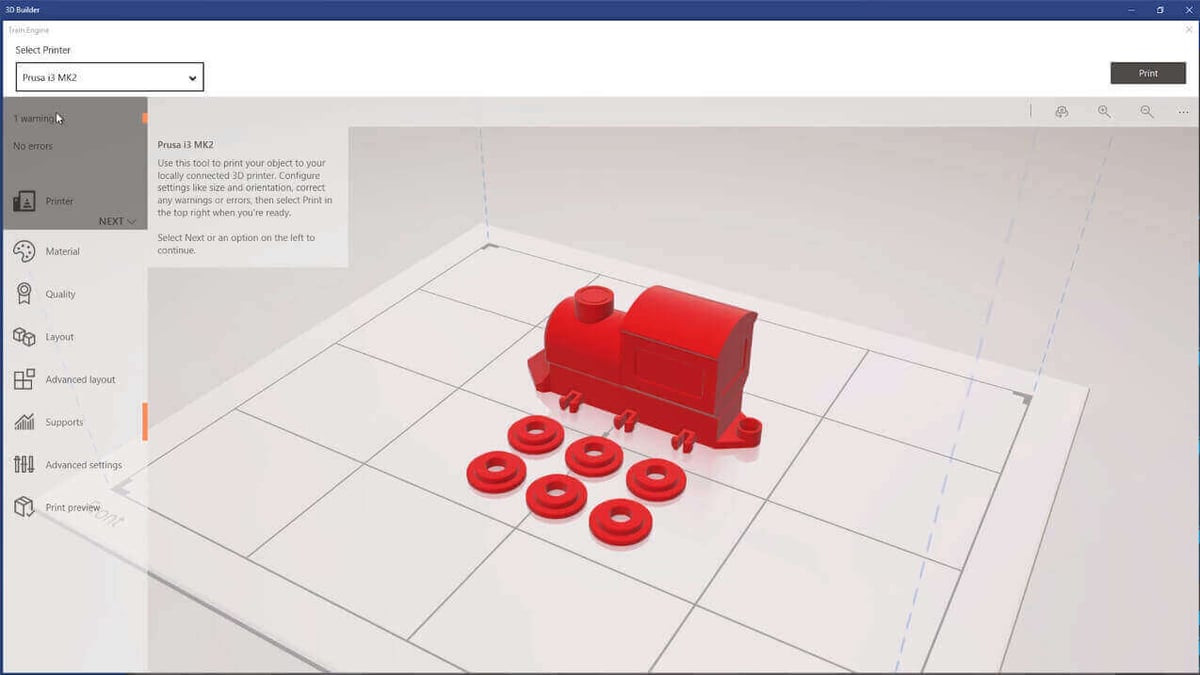
And boy, do these MK2s perform well. Let me just show you the first “real” print I did on the assembled Original
This frog was printed live on stream, using the supplied sample GCode and Fillamentum Rapunzel Silver filament. And it looks absolutely perfect. There is literally nothing about this print that I could criticize, and that’s Ultimaker-level quality straight out of the box!
But what good would a single demo print be if you couldn’t print your own stuff this well? Well, turns out you can do just that. So software-wise,
Let’s go through those one by one: Drivers! The Original
That is pretty awesome, I think, and other than some 3D Systems and Stratasys machines, I don’t know of any other 3D printer that allows you to work that way yet. Basically, you get the Original
But of course, you can still use the traditional way of exporting your model as an STL file and taking that through a slicer. You get a pre-configured version of Slic3r, which is actually a newer and improved version compared to what you can officially download.
This includes a full profile for the printer, for various layer heights and after-market nozzle sizes – here’s where that smaller 0.25mm nozzle comes in – and for a bunch of different materials, covering all the basic ones from PLA, ABS, PET, over Taulman T-Glase or Bridge Nylon. All the ones I tried ended up working absolutely perfectly – unless, of course, I messed up the settings myself. You can still go in and tweak all of them, it’s just usually not necessary.
If you prefer a different slicer, say Cura or Simplify3D, you can also download ready-to-go profiles for those from
Now, having a ready-to-rock slicer like this is, in my opinion, one of the easiest and most effective ways to add value to any 3D printer. Because I don’t want to mess with tuning in a 3D printer and having my first ten or so print being complete failures, especially after I’ve just spent half day assembling it already. And having sort of this one-click solution to slicing available just completely removes that step from the equation, especially if you get profiles that are as well-tuned-in as the ones the Original
Pretty much all of my prints with this machine so far were done with the exact stock profiles and I just don’t feel a need to tweak them unless I wanted to add a new material that’s not supported out of the box.
One more cool feature I’ve been using for years on most of my custom printers is the hotend priming on the bed edge instead of having the slicer draw a skirt around the print for that. Basically, you get a more reliably primed hotend and don’t waste a whole bunch of space on your printbed.
Let’s move on with the software. You also get a firmware update tool for the Original
Also, there were some performance improvements already, but be honest, I didn’t have any issues with the firmware running out of processing power anyways. If you’re using the supplied Slic3r install, you’ll even get a notification on the MK2’s LCD before a print if a new firmware is available.
Then, color print! While the Original
Original Prusa i3 MK2 Review: A Flawless Experience?
So overall, that’s pretty much a flawless experience with the Original
I still had one print fail, this ginormous Squid Attack model, which I even scaled down and therefore made it even harder to print. The overhangs on this one were just a bit too extreme and ended up curling up and getting the printer to skip.

Now there are two different run modes you can select on the Original
I guess going with power mode could have made the Squid Attack print go through successfully. Of course, the printer does also get significantly louder, so to make use of that mode, you should definitely have the machine in a room separate from your living room.
So let’s recap. The Original Joseph
Again, the Original
License: The text of "Original Prusa i3 MK2 Review: Best 3D Printer Kit of 2017" by All3DP is licensed under a Creative Commons Attribution 4.0 International License.