3D Pen Tutorial: 3D Sketch and Create Free 3D Pen Stencils

Learn how to sketch with a 3D pen and to create 3D pen templates in this 3D pen tutorial. Also, transform any 3D files into 3D pen stencils!
Welcome to All3DP’s 3d pen tutorial. For this tutorial, we used a 3Doodler Create. Of course, you can use any 3D pen you are comfortable with. If you don‘t own a 3D pen, check the reviews here. You will also need a scissor to trim extra material, a screwdriver, the free 3D editing software Blender, and a 2D Printer if you want to create your own 3D pen template from a 3D object.
If you just want to know how to create a 3D pen template from a 3D object, jump here.
3D Pen Tutorial: Tips for 3D Sketching with a 3D Pen
1. 3D Drawing with a 3D Printing Pen: Know Your Material
When 3D drawing with a 3D pen, you will have to consider the material you are printing with. You can 3D print with the thermoplastics ABS and PLA and some special flexible or transparent PLA filament.
ABS is more durable and harder but less flexible than PLA, which makes it great for mechanical projects! It also has a higher melting point than PLA at about 230°C. In comparison PLA melts at about 200°C. Before you start drawing, you’ll need to adjust the temperature of your 3D pen to prevent the filament melting too fast or not at all.
Drawing with PLA is perfect for artistical projects and day to day use. It is also cheaper and emits less harmful fumes than ABS. Whatever material you use, always sure to use your 3D pen in big ventilated areas.
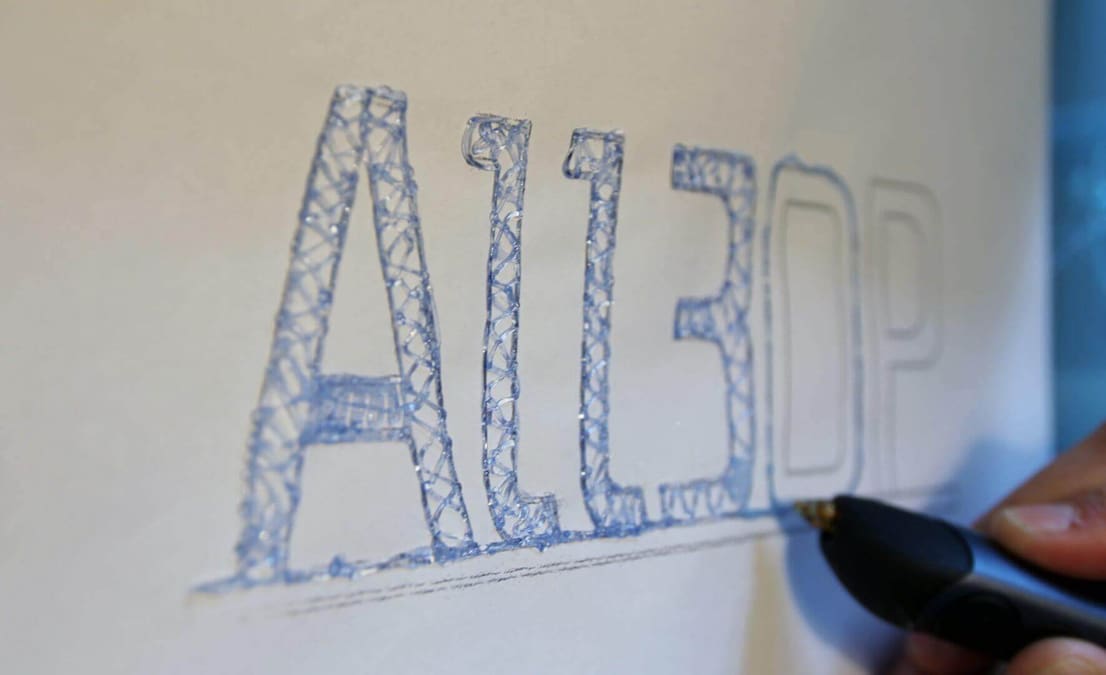
2. 3D Drawing with a 3D Printing Pen: Draw On Paper First
If you are just getting used to your 3D Pen or you want to create complex 3D structures, it is best to draw the different faces of your object on a sheet of paper. You can download several different 3D pen stencils online or even create your own 3D pen template!
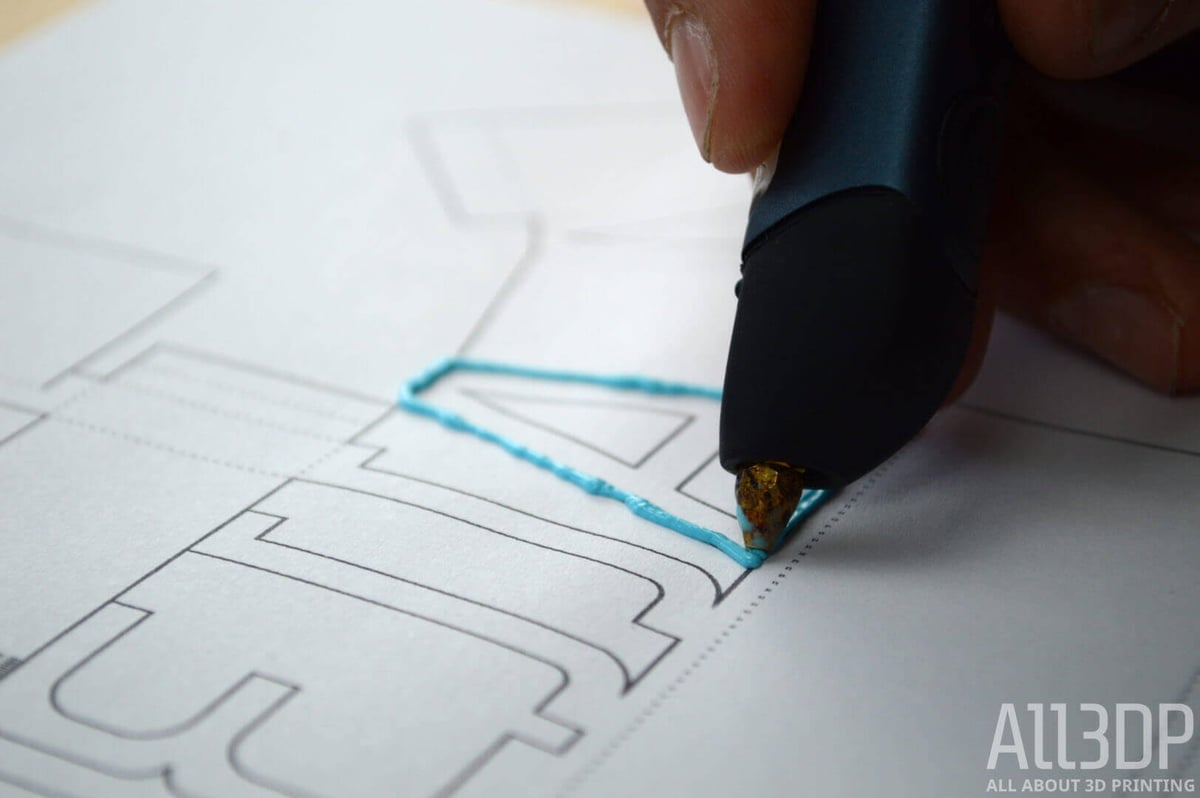
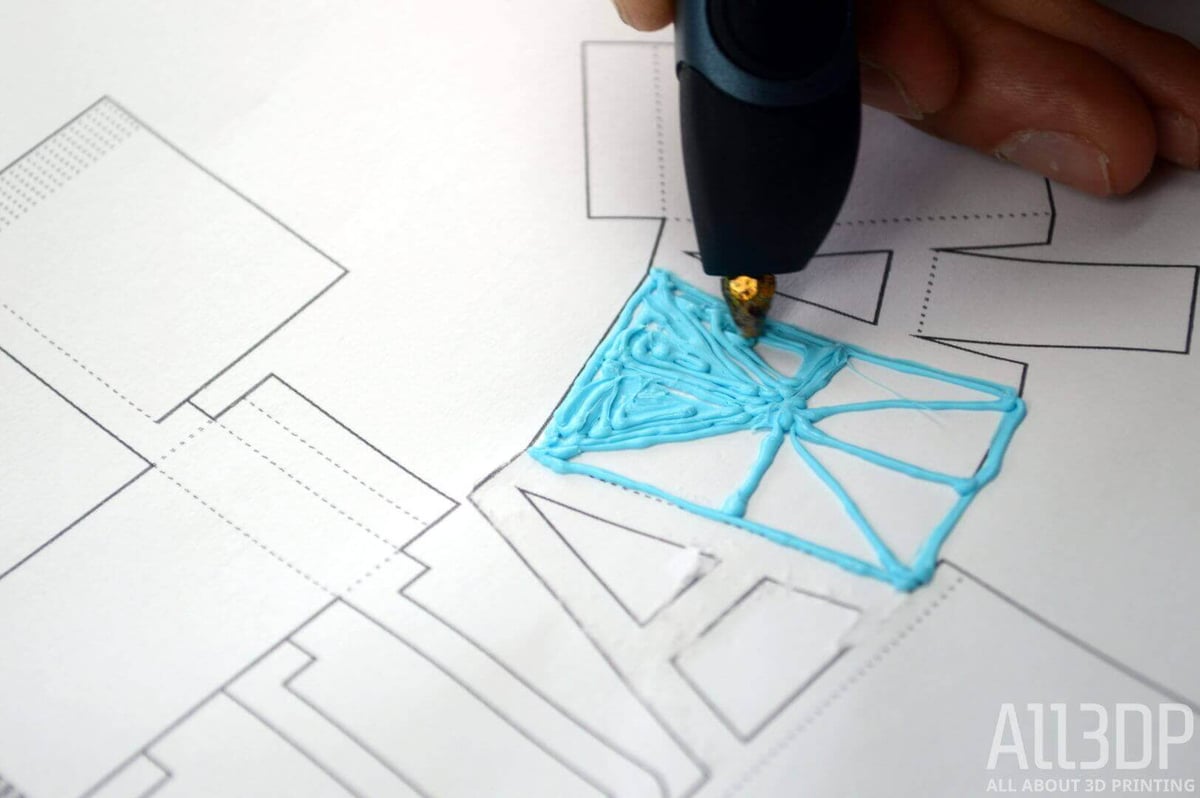
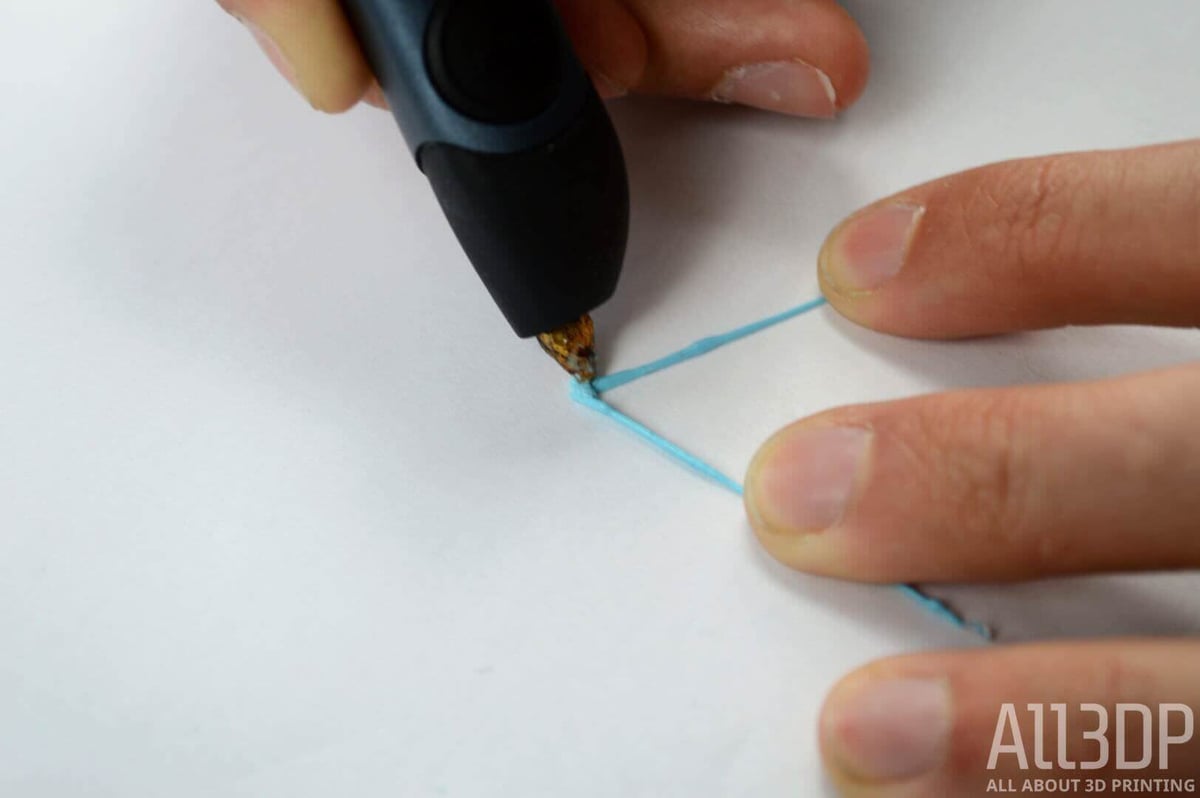
Draw lines by holding the tip of your 3D pen on the paper like a normal pen. The filament can be extruded at low or high speed. Move slower to create thick lines or fast for thinner ones. You can draw different shapes and then fill the inside by creating a triangular track.
When you have created small triangle inside the face, place a dot of the filament on the inside of a triangle and spread the material with the hot tip of your pen. You can also print a sloped pattern between the border lines of the plane to create a solid plane.
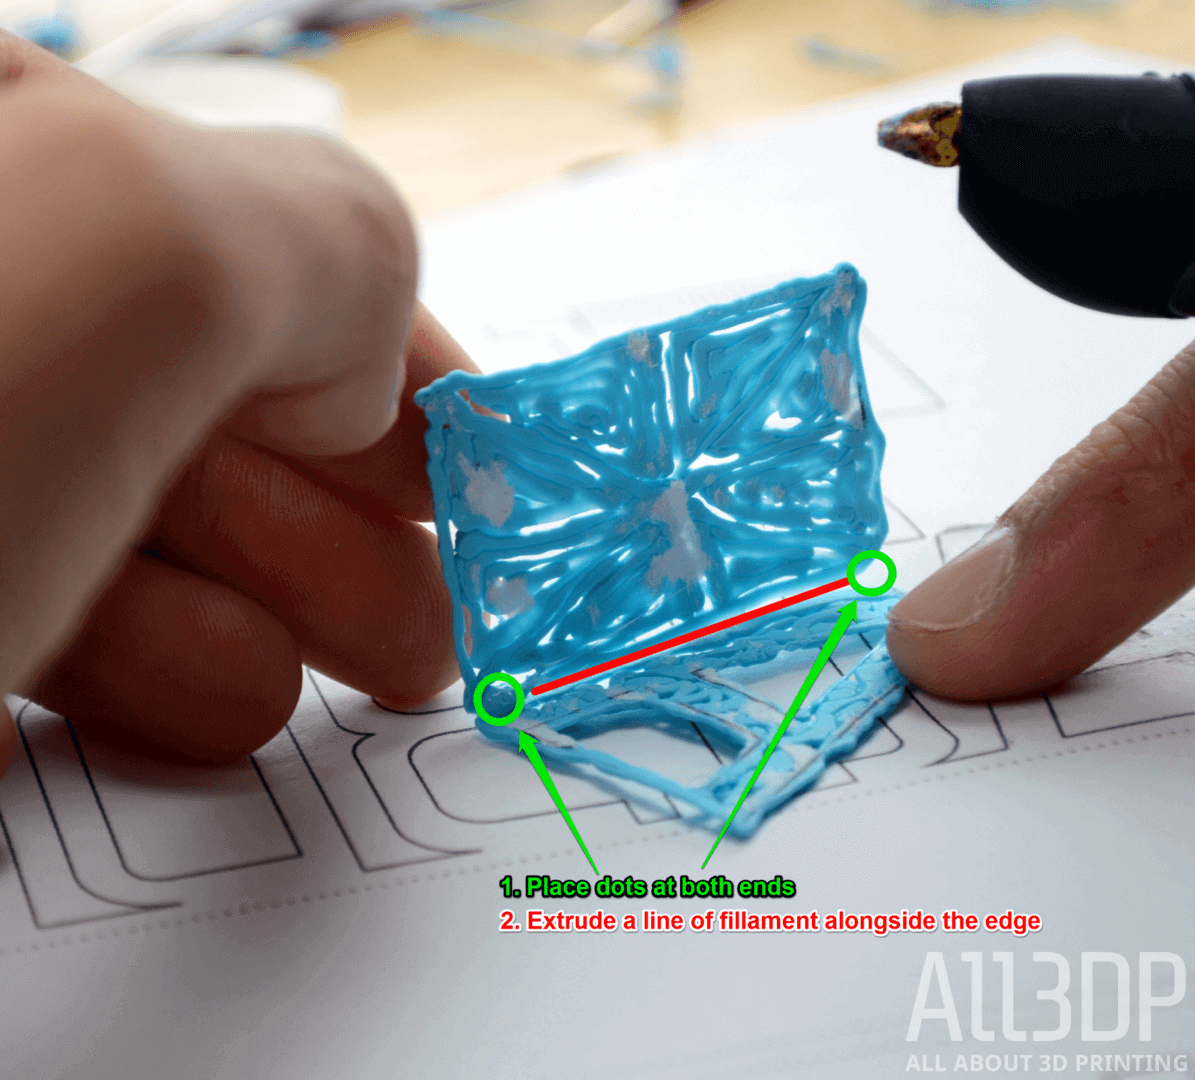
3. 3D Drawing with a 3D Printing Pen: How to Weld Plastic With a 3D Pen
As soon as you have two parts, you can weld them together in the desired angle. To achieve this, put the top of your pen onto one corner of the conjoined planes. This will heat the material and start extruding a dot of filament. Remove your 3D pen and wait for the filament to cool down. Then repeat the step at the opposite corner. When the second welding spot has cooled down, extrude a line alongside the conjoined edge. These welded joints are just as hard as the combined parts, as the material you are working with is a thermoplastic and great to weld. It is advantageous to break down your ideas in basic 2D planes, draw them on paper and combine these planes to a 3D object by welding them together.
4. 3D Drawing with a 3D Printing Pen: Prevent the Paper From Sticking
Sometimes your creation can not be removed from the paper sheet without ripping out some of it. This might happen if the extruded plastic is too hot. Try lowering the printing temperature of your 3D pen.
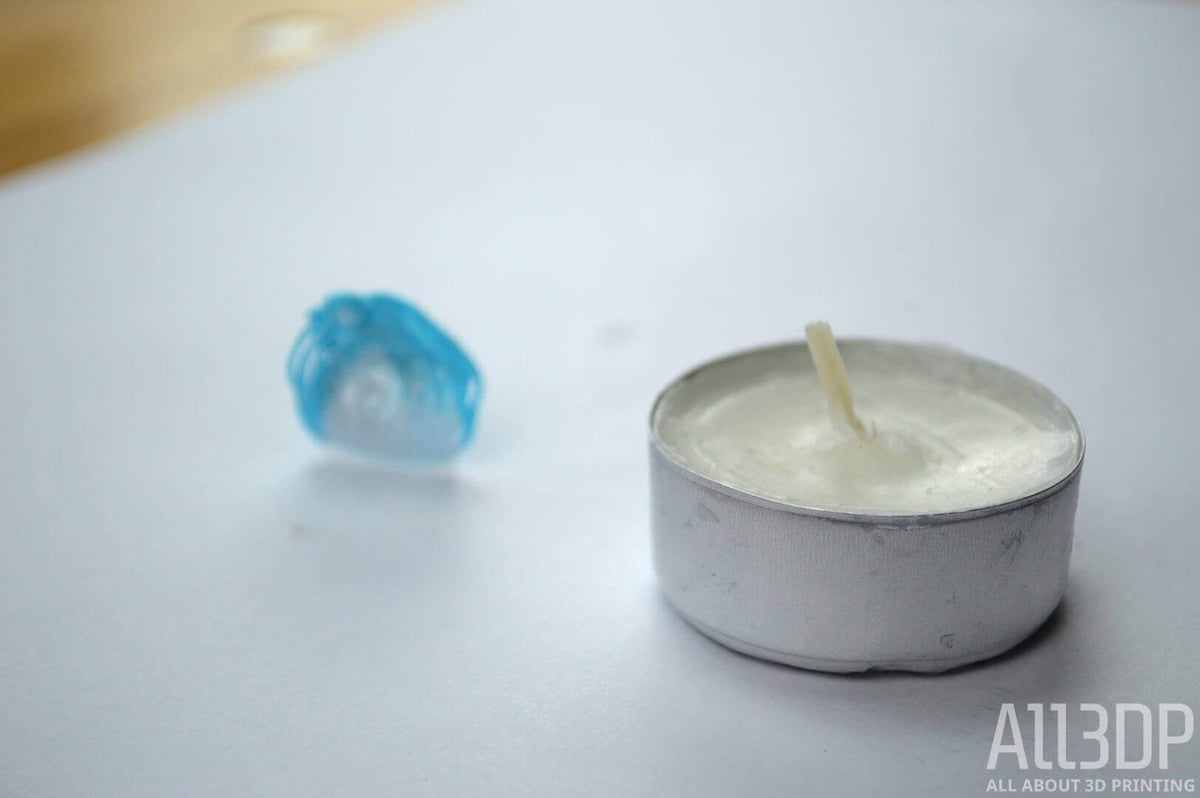
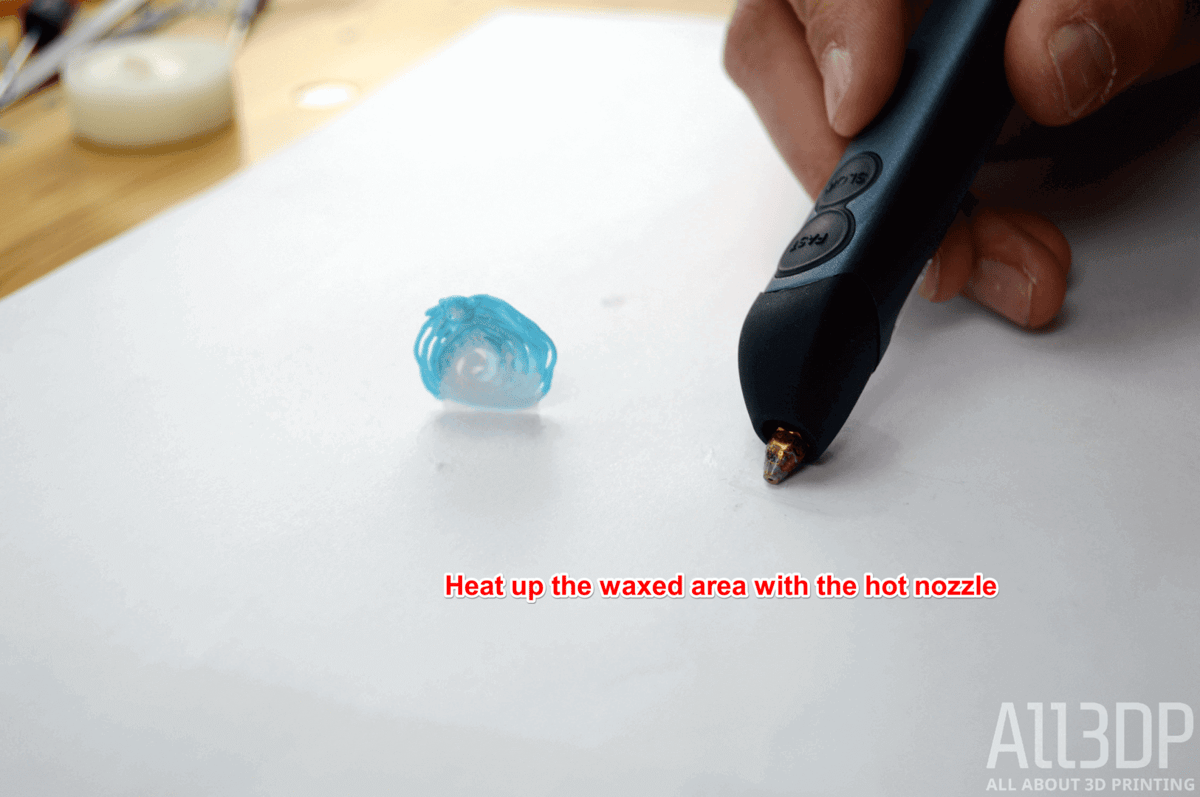
If this doesn’t help, you can take a piece of wax like a small candle and carefully rub it on the sheet. Heat up the waxed area with the nozzle of your pen without extruding. You can also use an iron for larger areas or buy waxed paper.
This will prevent the plastic from sticking at all so it is hard to start the sketch on top of the waxed area! Start on the outside with low printing speed and you won’t have any problems removing your 3D print.

5. 3D Drawing with a 3D Printing Pen: Create Smooth Planes Easily
If you want to end up with a very smooth surface, place some baking parchment on top of a plane while it is still on paper. Then use an iron on two dot setting and firmly apply pressure onto the plane. Also move the iron around to smoothen the surface. You can also use the hot tip of your pen without extruding to spread the filament.
6. 3D Drawing with a 3D Printing Pen: 3D Sketch into Thin Air

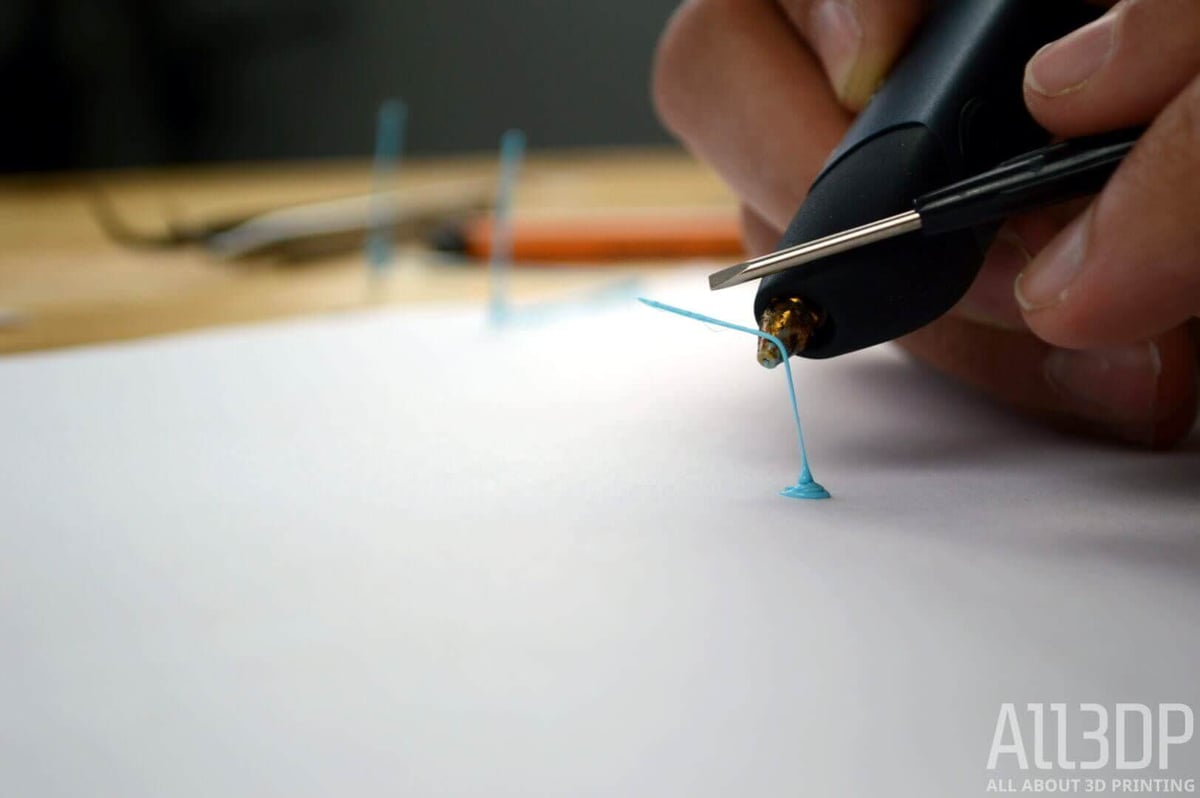
This is the most difficult way to use the 3D pen and it needs a lot of training. Start your 3D sketch by creating a little foundation. Now drag it in the direction you want to sketch the line at the pace of the nozzle extruding. You can use fast or the slow option. Just keep in mind to move at the same speed.
When you have reached the desired length stop extruding but keep dragging the pen so the line is under constant stress and does not bend. You can blow gently or use a little fan to harden it faster.
You can, depending on your choice of filament, to print up to about 100mm freehand, although it will lose quality and it gets challenging. If you need long lines in your creation, it is recommended drawing them on paper with the help of a ruler first. Those lines will be much stronger and straight. If you want to combine lines, simply place the hot nozzle onto conjoined points you want to weld together. Then extrude some plastic and wait for it to cool down.
7. 3D Drawing with a 3D Printing Pen: How to Make Curved Lines in 3D

This is actually easier than you might think: If you want to sketch curved lines freehand, you will need to set a foundation first. Then move the 3D pen upwards and stop. Start again when the plastic hardened and move about 10mm in the direction you want to extrude at slow speed then stopping again and wait for the plastic to cool.
You can 3D print an arc very easy by extruding some material and then using a pen, nail, screwdriver, etc. to form. If the plastic has already hardened, simply touch the spot you want to bend around with the hot tip of your pen without extruding. Then use your hand or a tool to bend the plastic.
If you know any more tricks, please feel free to add them to the comment section.
3D Pen Templates: Create a 3D Pen Template from Any 3D File
The easiest way to 3D print something with your 3D Pen is by printing with the help of a 3D pen template. There are many websites providing 3D pen stencils … however, the selection is limited. So, wouldn’t it be good if you could create your own 3D pen templates?
That’s possible if you follow this 3D pen template tutorial. Let’s say you found a cool looking simple 3D object on the internet or you have created your own. If you want to 3D print it, you would need a 3D printer, but you can also do a fast print with your 3D Pen! When creating a 3D object with the 3D Pen, it is great to draw 2D planes on a piece of paper and assemble them to a 3D object. There is one problem though. How do you project a 3D object onto paper? One simple way to project all the planes of the object is using the free software Blender and the “Export Paper Model” plugin.
1. 3D Pen Templates: Getting Started and Basic Movement in Blender
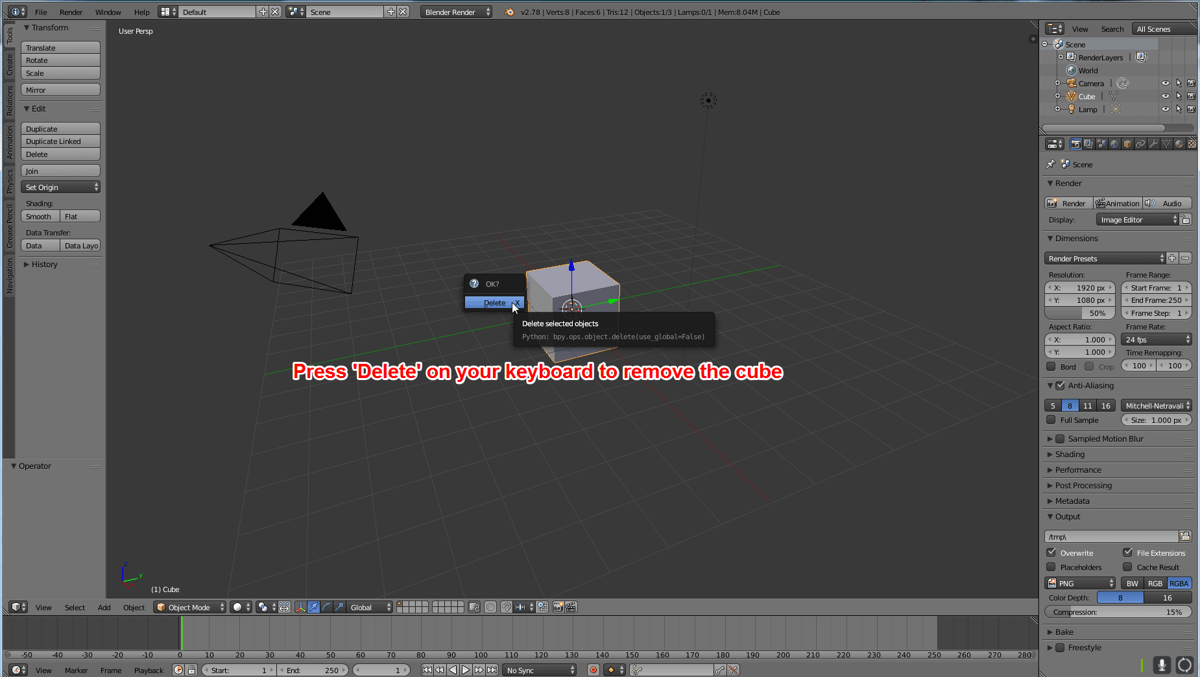
When opening Blender you will see a random notification in the middle of your screen. Click next to it to discard it. You can now see a cube in the center. Use the mouse wheel to zoom in and out of your object. Hold the mouse wheel to rotate. Hold SHIFT + mouse wheel to pan. Select objects by clicking them with right mouse button. You can also select an array of connected entities with CTRL + right mouse button and select individually with SHIFT + right mouse button. Select all by pressing “A” on your keyboard. Marked parts will be displayed in orange. Now delete the cube by highlighting it, press “Delete” on your keyboard and confirm with enter. Next step in creating 3D pen templates is to install export paper model plugin.
2. 3D Pen Templates: Install Export Paper Model Plugin
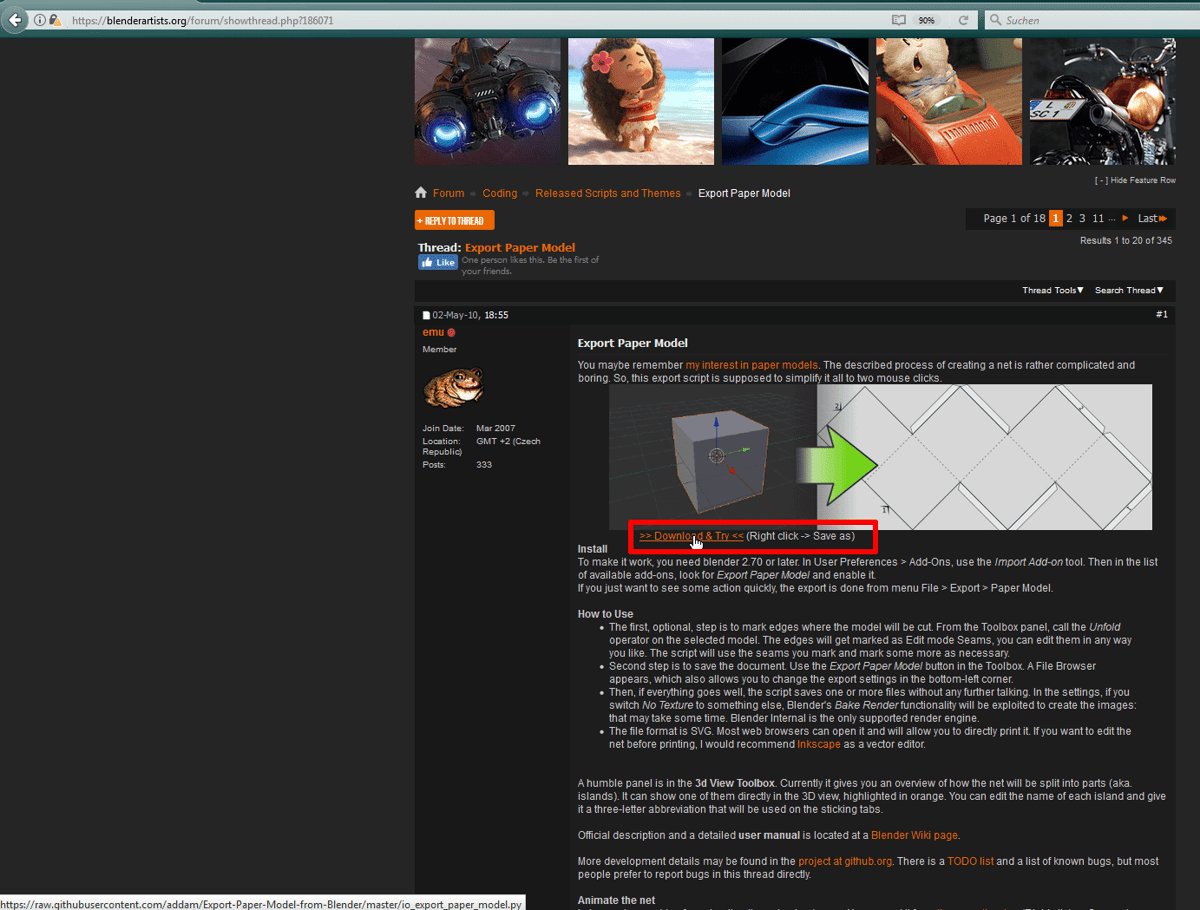
To easily create 3D pen templates from any 3D objects you will need to install Adam Dominec’s ‘Export Paper Model’ Plugin for Blender. This tool was originally created for making paper models, but it is an excellent way to create an exact 2D representation of a 3D model.
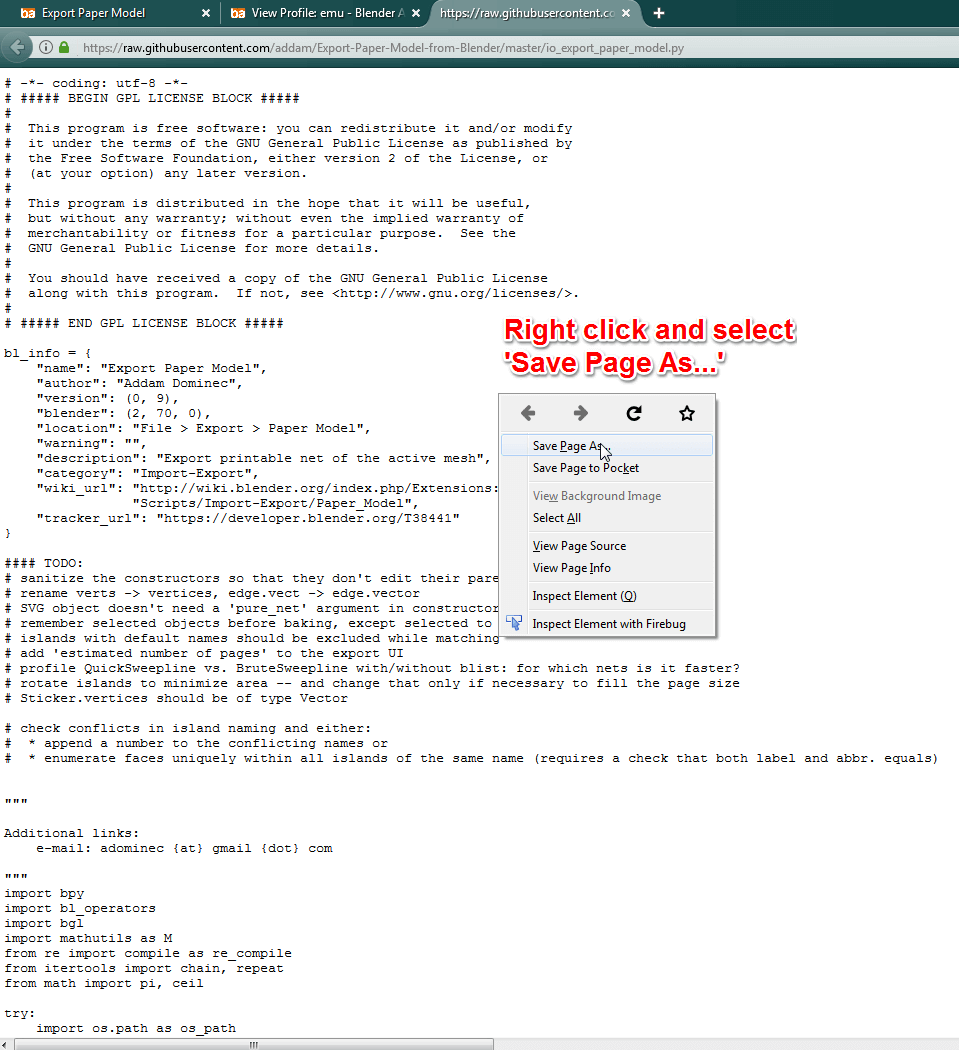
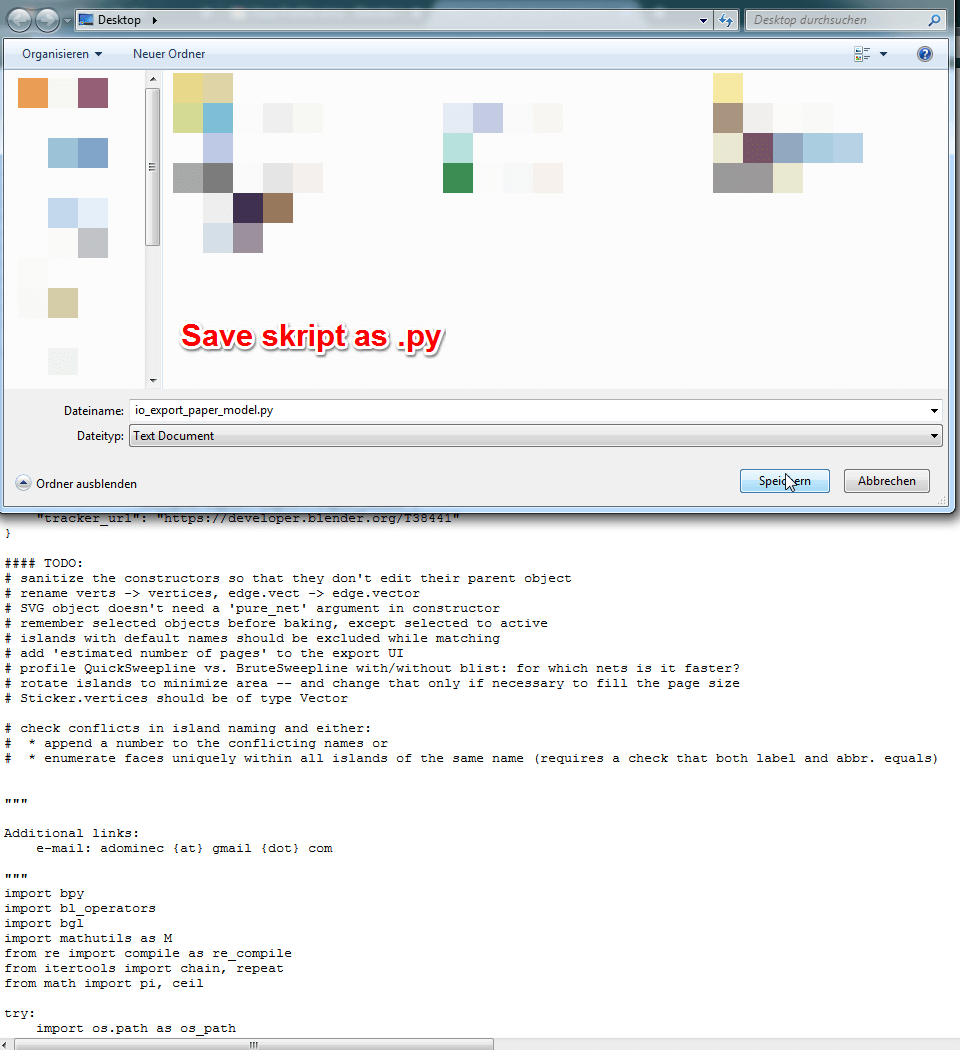
Go to https://blenderartists.org/forum/showthread.php?186071 and click on “Download & Try”. This will open up a new tap with a lot of code in it. Right-click the webpage and click on “Save as”. Choose a folder or your desktop to save the file. Check the file name for the .py at the end. This is very important!
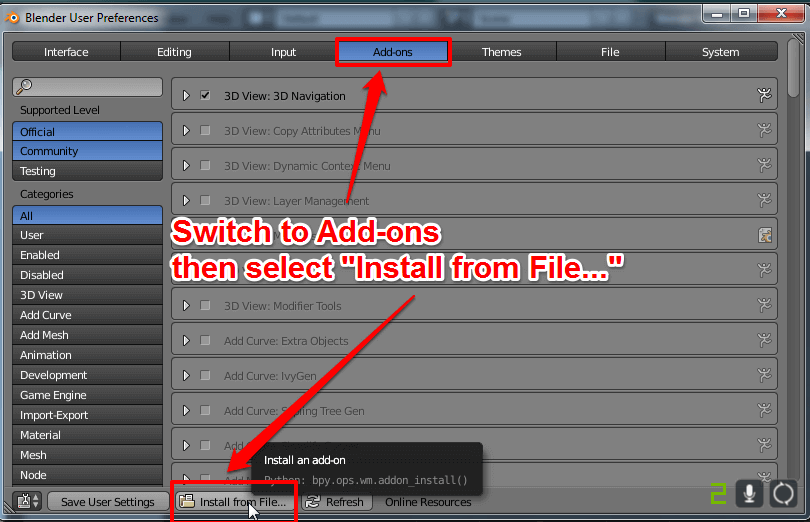
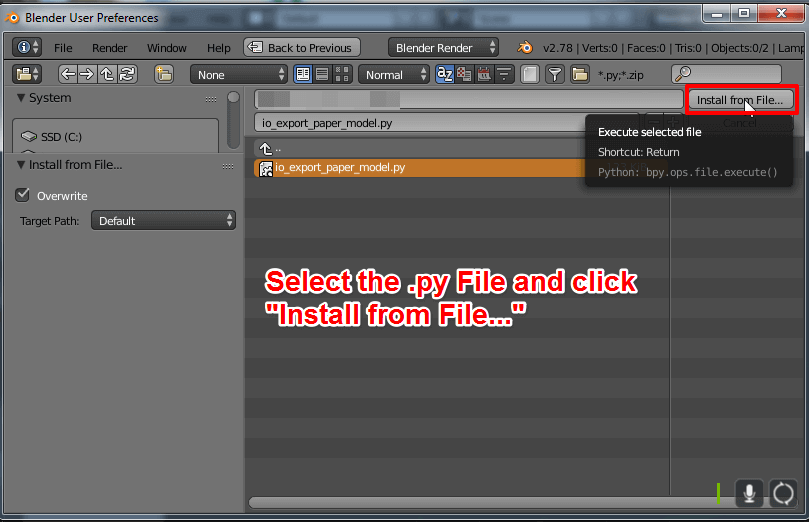
Switch back to Blender and go to File > User Preferences. This will open up the settings menu. Switch to the ‘Add-ons’ tab and select ‘Install from file’ at the bottom of the window. Go to the folder where you have saved the .py file, click on it followed by ‘Install from File…’. Now search for “Export Paper Model” using the search bar and click on the checkbox to activate the plugin.

3. 3D Pen Templates: Import Your File
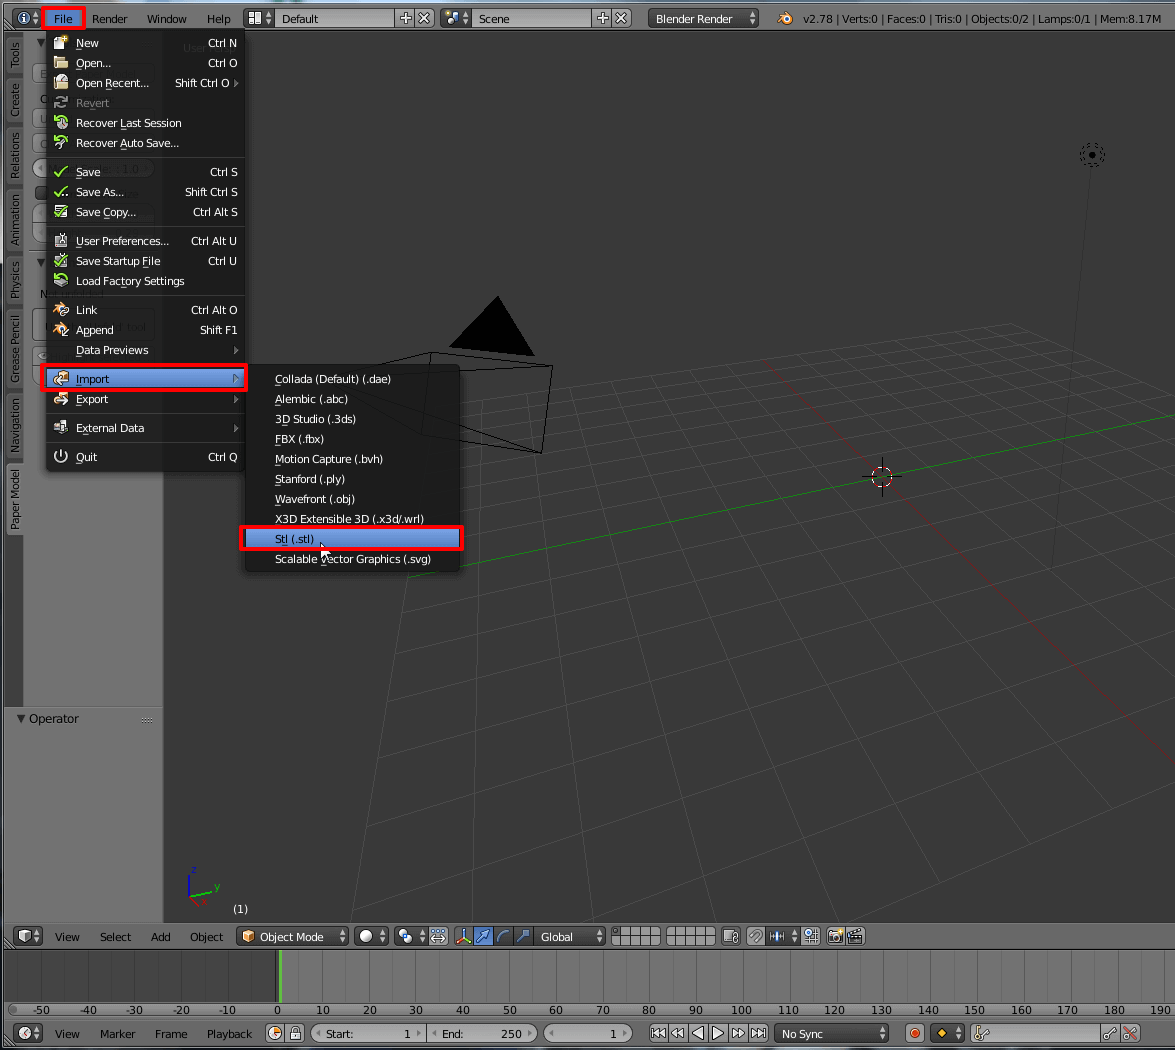
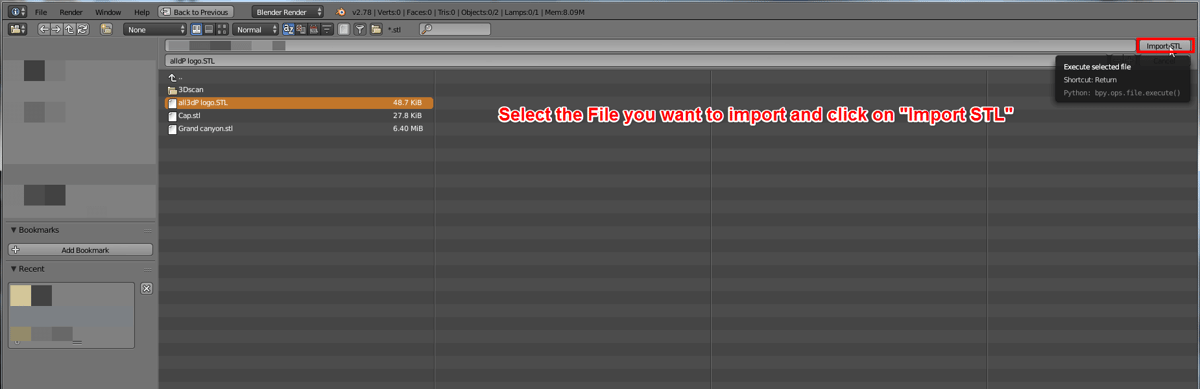
Start creating your own stencil for your 3D Pen by importing a .stl file. Click on File > Import > STL and select the file in the explorer you want to import.
4. 3D Pen Templates: Export a 3D Pen Template
In this step of creating 3D pen templates, click on the ‘Paper Model’ tab on the left of the Toolbox. Also, switch from ‘Object Mode’ to ‘Edit Mode’ in the bottom left corner. You can now see how your object is built out of many triangular shapes.
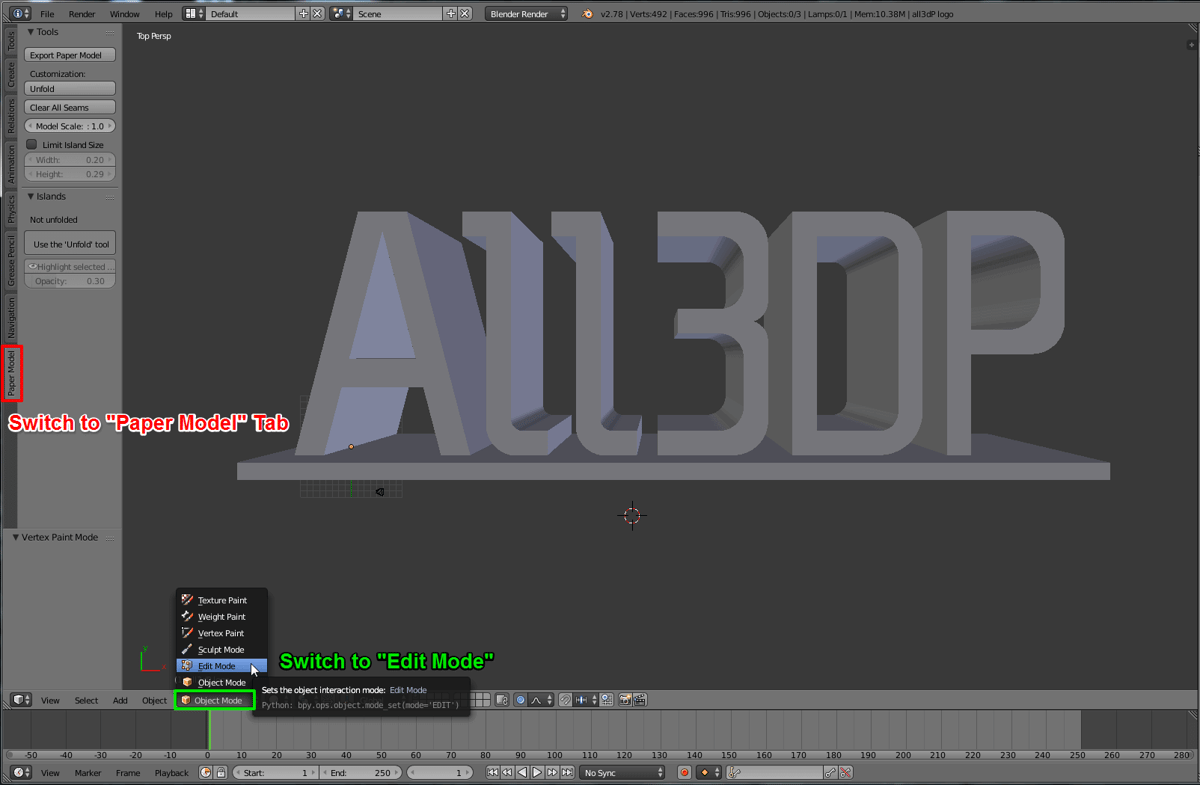
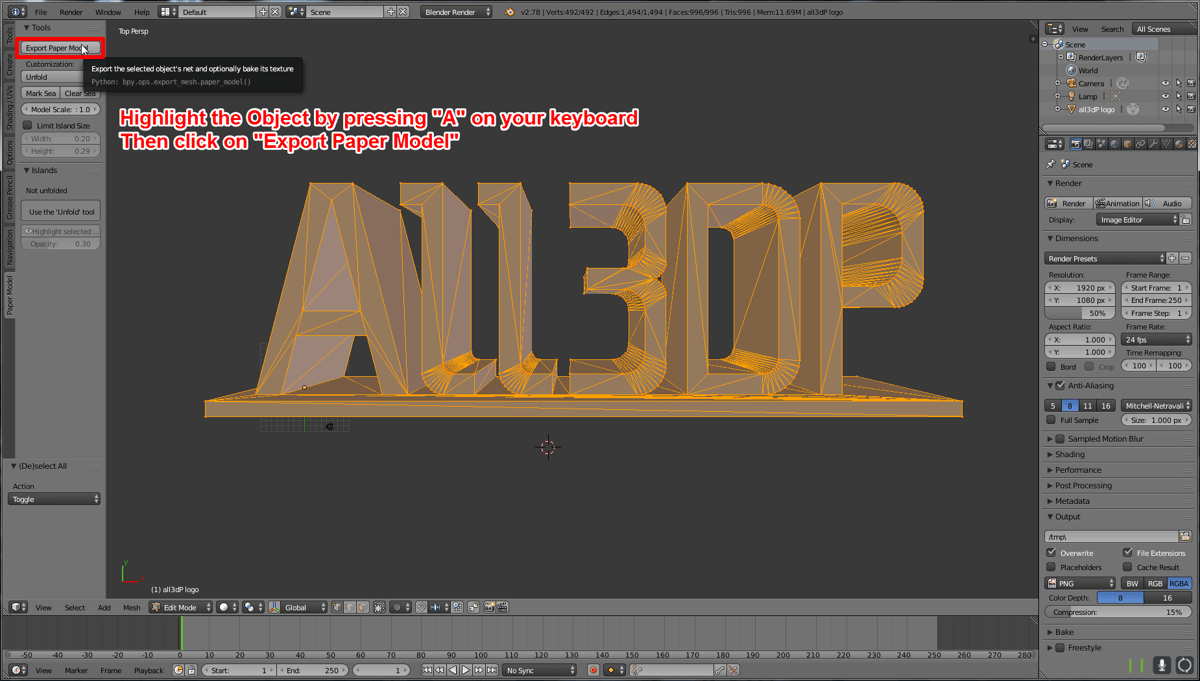
Mark your entire model by pressing “A” on your keyboard so it shines orange. Now click on ‘Export Paper Model’, this will open a new window.
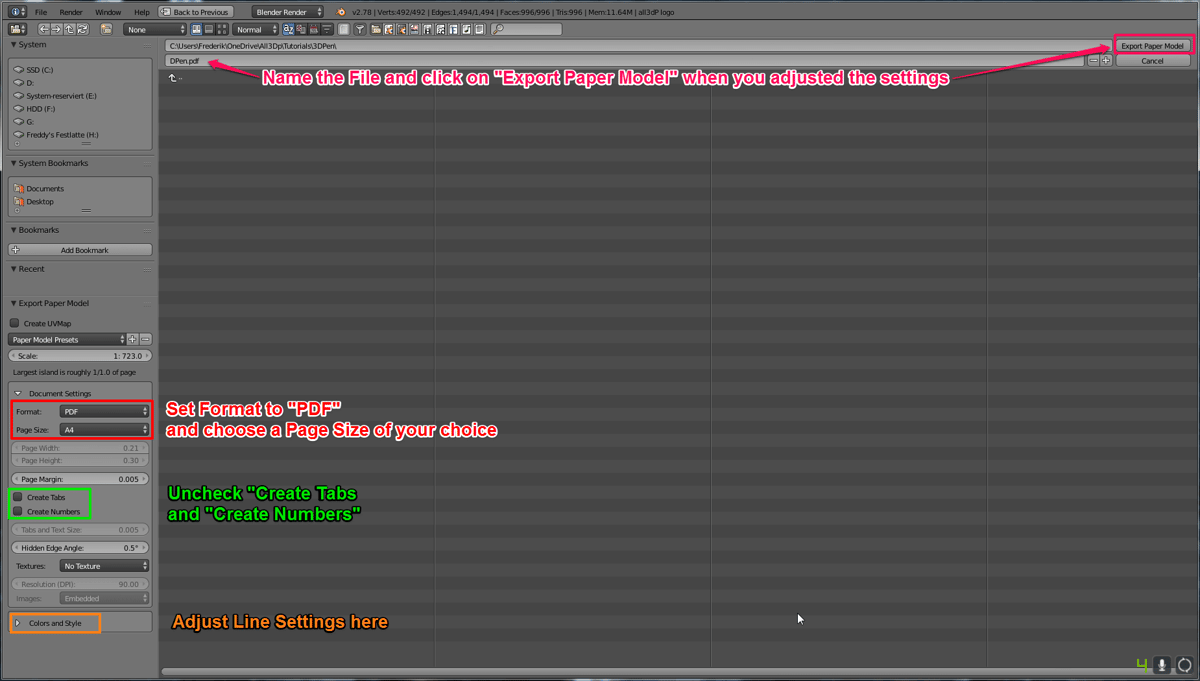
In the bottom left corner, you can adjust the properties of your template. Choose your file format, for 3D pen stencils PDF is best, and the size of your paper you want to print the 3D pen template on. You can also set the scaling of the stencil. By default the script will enter the ideal scaling. Small numbers will largen your object and the other way around. If islands won’t fit on your choice of paper you will get a warning and you will have to choose a different scaling or a larger sheet of paper. Also uncheck ‘Create Tabs’ and ‘Create Numbers’. If you want to create a paper model, leave these boxes checked. Click on the arrow next to colors and style to adjust the line settings. Change the ‘Style’ of the ‘Inner Convex Lines’ to solid and set the thickness to 3.0. Then choose a folder you want to save your file and name it. Click on ‘Export Paper Model’ to save your 3d pen stencil.
5. 3D Pen Templates: Create a 3D Object from a 2D Stencil
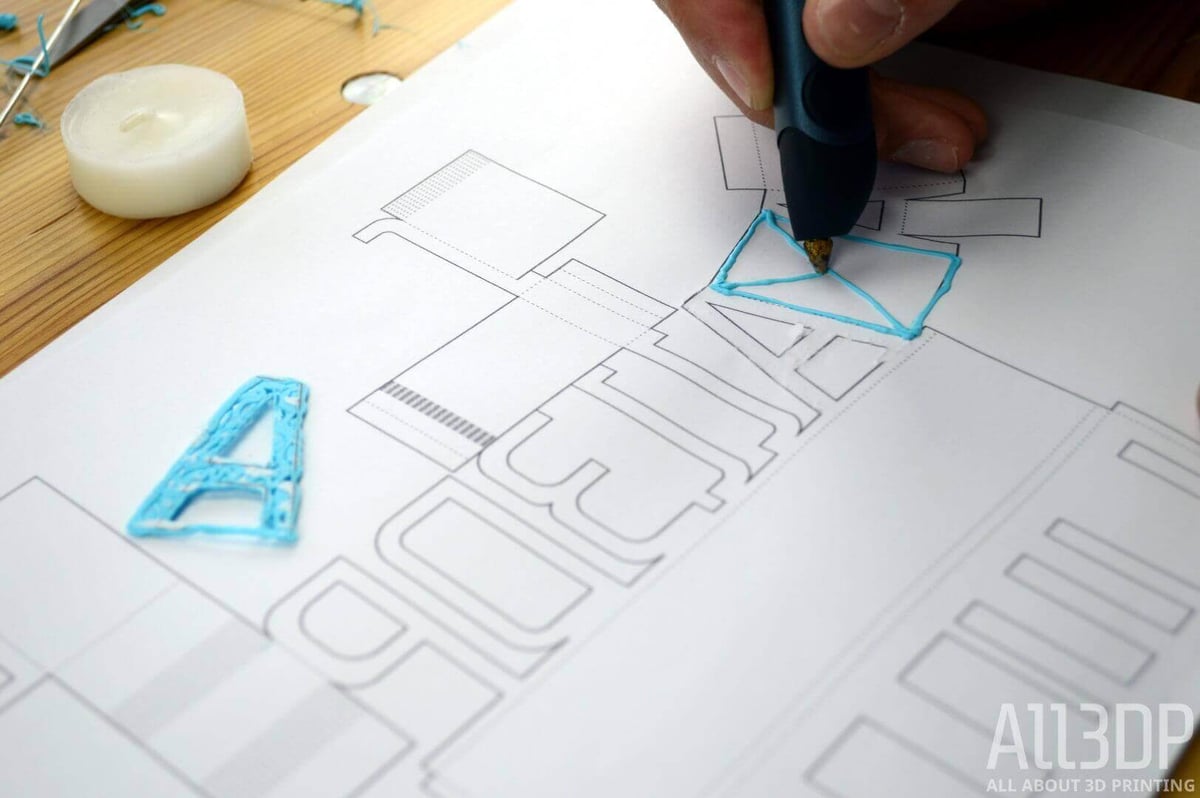
This is the final step in creating 3D pen templates. Open your 3D pen template file with your favorite PDF viewer. Have a look at it to check if your model is displayed correctly. You might need to adjust the scaling. Then print the template on a sheet of paper. Track the lines of one continuous plane and fill it. Remove the finished plane when it has cooled down. Then draw another plane and weld them together. When you encounter multiple dotted or solid lines close to each other do not print them on the paper. Those lines represent curved edges and are easily drawn in 3D directly onto your object.
I hope this tutorial helps you with your 3D Pen and getting your own 3D pen stencils started! If you have any question regarding this article, do not hesitate to ask in the comments. And now have fun with your 3D Printing Pen and visualize your ideas!
License: The text of "3D Pen Tutorial: 3D Sketch and Create Free 3D Pen Stencils" by All3DP is licensed under a Creative Commons Attribution 4.0 International License.