Ultimaker 2+ Review – Is It Still State-Of-The-Art?
Rating

The Ultimaker 2+ is a great 3D printer for reliability and quality, but is it still state-of-the-art? Check out our review to find out if it is a 3D printer you should buy.
A surprise announcement at CES 2016 was a “new and improved” version of the legendary Ultimaker 2, the imaginatively titled Ultimaker 2+ (or Ultimaker 2 Plus).
What does the addition of a little plus sign signify, exactly? After spending a couple of weeks with an Ultimaker 2+ review unit from online retailer iGo3D, we set about finding some answers.
Don’t Miss: Best 3D Printers of 2025: Top Picks in 26 Categories
Ultimaker 2+ Review: PROS
- Incredibly easy to set up and use.
- Significantly reduced noise levels.
- Design improvements to material feeder and extruder fans.
- Included “Olsson Block” kit allows for interchangeable extruders.
- Prints with most categories of filament types.
- Capable of high resolutions.
- Accepts third-party filament.
- Works with Windows, OS X, and Linux.
- Supports open-source hardware and software.
Ultimaker 2+ Review: CONS
- No auto-calibration.
- Open frame design means prints are sensitive to changes in atmosphere.
- Foul odors when printing with ABS.
- Sometimes difficult to remove finished objects from print-bed.
- Basic control panel interface.
- Cura software not keeping pace with other slicer applications.
Ultimaker 2+ Review: VERDICT
The Ultimaker 2+ is an evolution — but not a revolution — of an important brand in the fused deposition modeling (FDM) printer space. Blink and you’ll miss them, but a series of small but critical refinements have made the machine more of a pleasure to use than ever before.
However, at this price, certain features are still lacking. Are the improvements big enough to justify upgrading from an Ultimaker 2? Probably not. But if you’re looking to buy a new 3D printer for the first time, the Ultimaker 2+ is highly recommended.
Ultimaker 2+ Review: Ultimaker 2 vs 2+
UPDATE 14/3 Ultimaker have just released the Extrusion Upgrade Kit, which allows existing Ultimaker 2 and Ultimaker 2 Extended owners to upgrade their machines to all the capabilities of the Ultimaker 2+.
Really and truly, if you are the owner of an Ultimaker Original or Ultimaker 2, there’s no reason why you shouldn’t go ahead and purchase the upgrade kit. It will prolong the life of your machine, for one thing. For another, the upgrades are ridiculously easy to implement, thanks to step-by-step instructions and video tutorials provided by the company.
Ultimaker deserve massive plaudits for their forward thinking with the Extrusion Upgrade Kit. In the spirit of inclusivity, they’ve made it possible for long-standing customers to participate in the latest and greatest innovations they have to offer.
Any owner, that is, except for the diminutive Ultimaker 2 Go. The smaller dimensions of this machine pose more of a logistical challenge for physical upgrades, so it’s been left out in the cold.
With that out of the way, let’s get on with the rest of the Ultimaker 2+ review!
Ultimaker 2+ Review: The Loooooong Read
The Ultimaker 2+ is an incremental upgrade to the venerable workhorse of the 3D printing world, the Ultimaker 2. That means it has the exact same user base as its predecessor: home-users, schools, and libraries, as well as small businesses, academic institutions, and industrial designers who need a 3D printer for rapid prototyping and production.
It’s made by Ultimaker, a company based in Geldermalsen in the Netherlands, which has steadily built up a complete range of 3D printers and supporting ecosystem. This includes the Ultimaker Original+ in kit form, the Ultimaker 2+ Extended (replacing the Ultimaker 2 Extended), and the Ultimaker 2 Go. The company is committed to the open source movement, so the hardware and software it creates is fully documented and free to be copied, modified, and converted by all users.
Ultimaker describes the Ultimaker 2+ as one of “the most advanced, accurate and reliable desktop 3D printers around”, and we broadly agree with that statement. For one thing, none of our test objects have failed during printing (yet), so the machine scores highly in terms of reliability. And the quality of the individual print objects is pretty astonishing (even at medium settings), so it wins again on the accuracy front.
But in terms of advanced technology? We’re not so sure that the Ultimaker 2+ is innovative enough to keep pace with other printers in the market.
Ultimaker 2+ Review: Design and Features
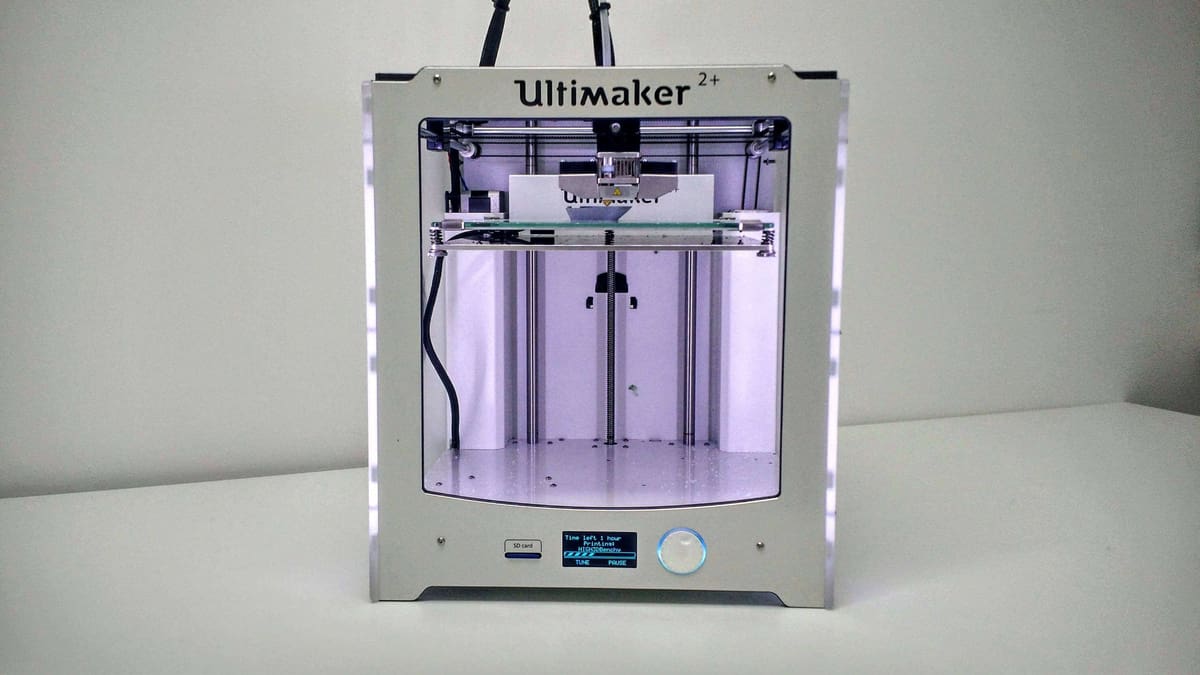
The white, plastic acrylic-framed Ultimaker 2+ measures 15.3 x 13.5 x 14 inches (HWD). It has a semi-open frame, meaning that it’s partially enclosed on four sides but has no door, or top cover. Its build area is 8.8 x 8.8 x 8.1 inches, exactly the same as the Ultimaker 2. Resolution ranges from 600 microns down to 20 microns, where a micron is 0.001mm. The print bed is a heated plate of glass. Both the print bed and extruder assembly are positioned on moveable, motorized carriages. The print bed moves on the Z (vertical) axis, while the extruder moves on the X and Y (horizontal) axes.
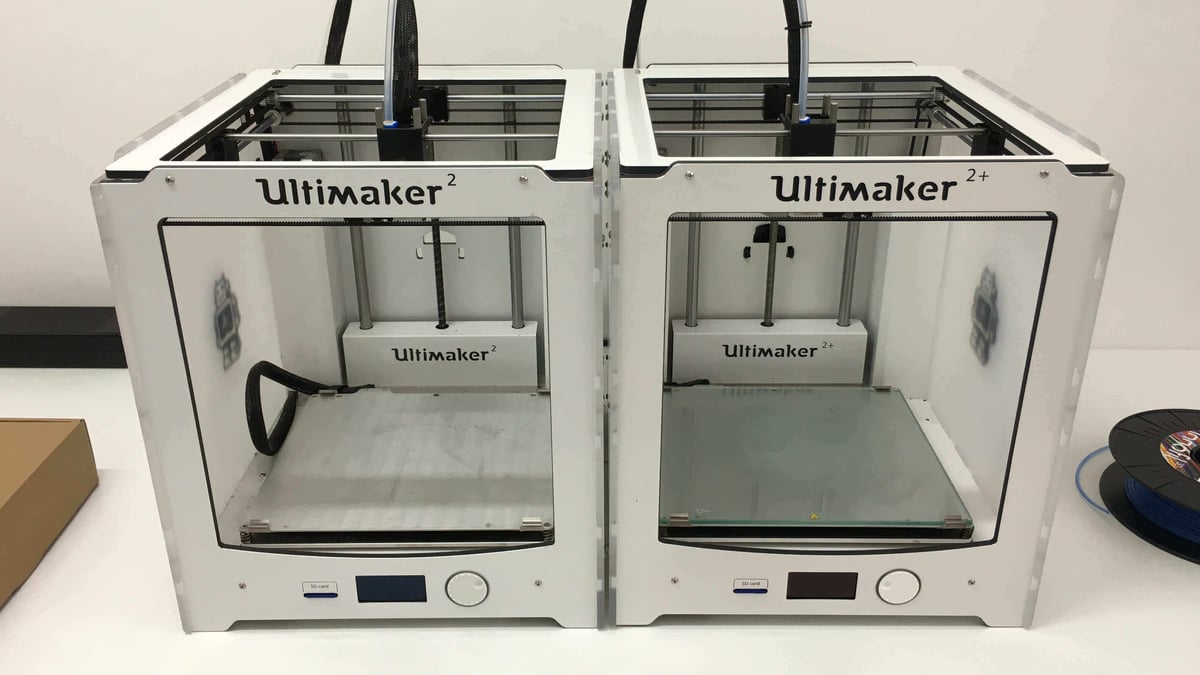
Positioned side-by-side, the Ultimaker 2+ is very hard to distinguish from the Ultimaker 2. In fact, there are hardly any cosmetic differences at all. But look closer, and you’ll find some very interesting changes.
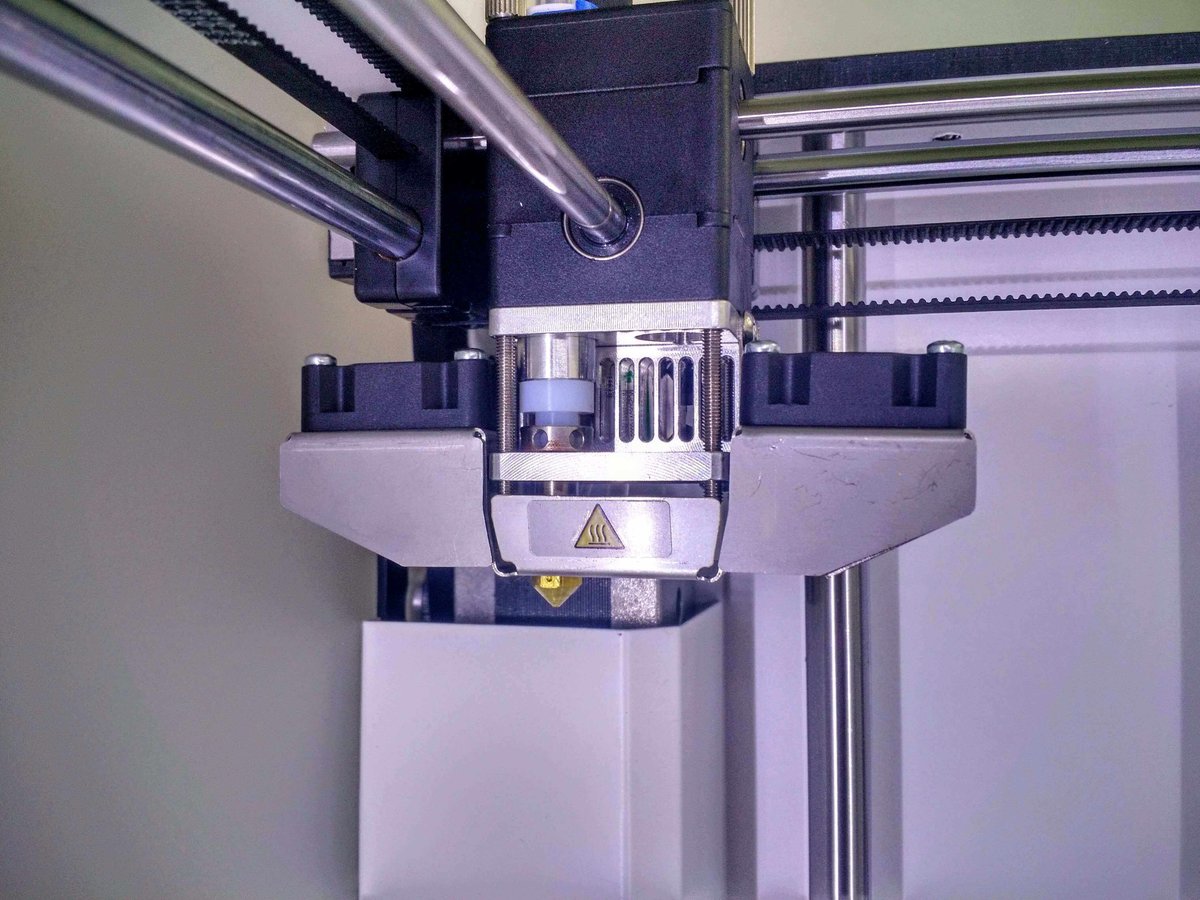
First things first, the extruder assembly has a redesigned cooling fan attached. It’s noticeably flatter, with the fans attached adjacent to the extruder rather than at an angle. How does that work? Well, now we have the cooling air funneled towards the print head, as opposed to fans blowing directly on it. This allows for greater consistency and control.
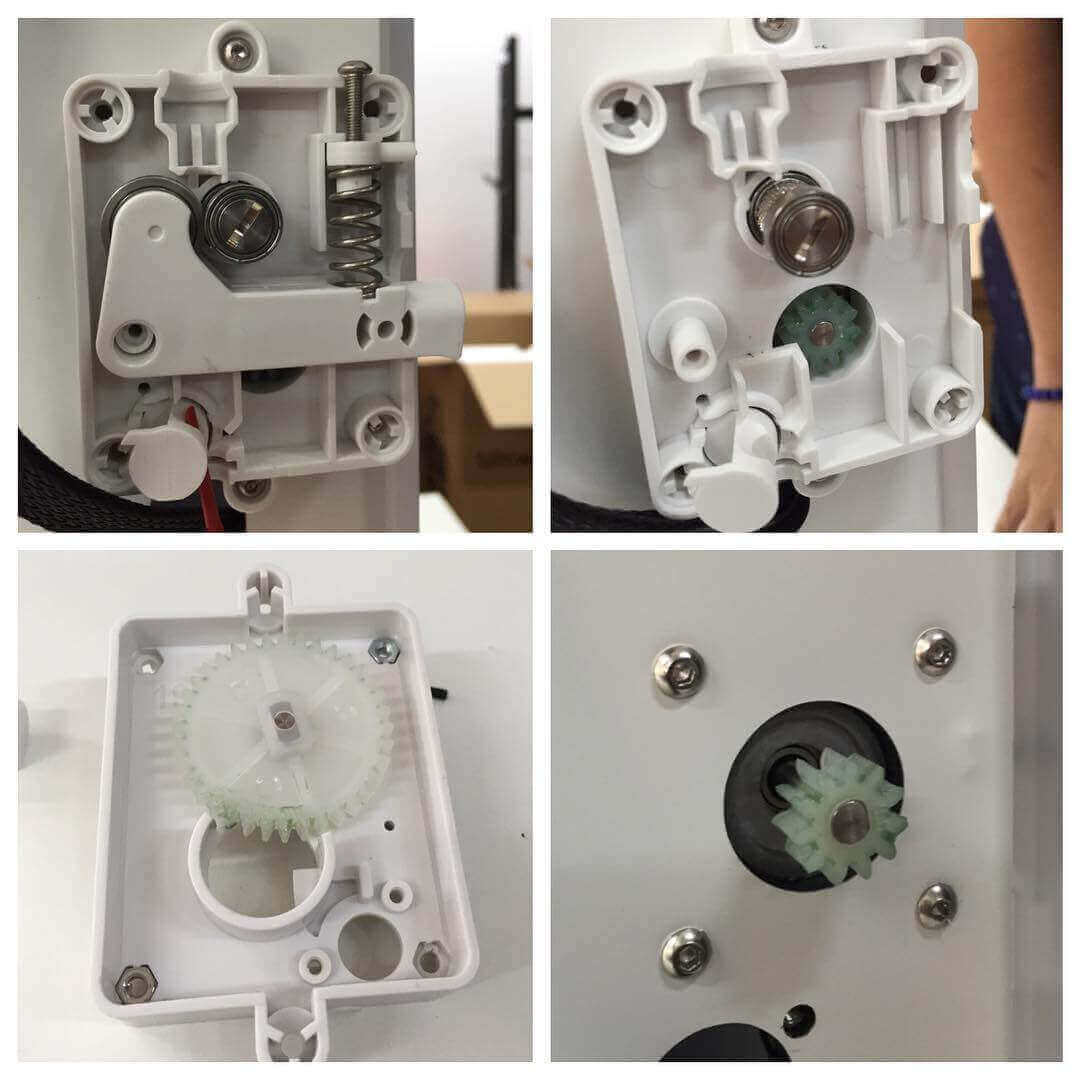
Secondly, flip around the back and you’ll find a new and improved material feeder servicing the filament. Perhaps the single biggest reason why a print job would fail on the old Ultimaker 2 (in our experience) was the filament being “stripped” as it moved back and forth in the old material feeder. That meant the teeth in the feeder couldn’t get a grip on the filament, and the extruder assembly up front would no longer be fed any filament to print with. It was maddening! This new design looks promising, and we’re excited to see whether incidences of filament stripping are greatly reduced over the long term.
And what’s the third design improvement? Well, we’ll wait to tell you about that one later. It’s a doozy.
Ultimaker 2+ Review: 3D Printer Setup
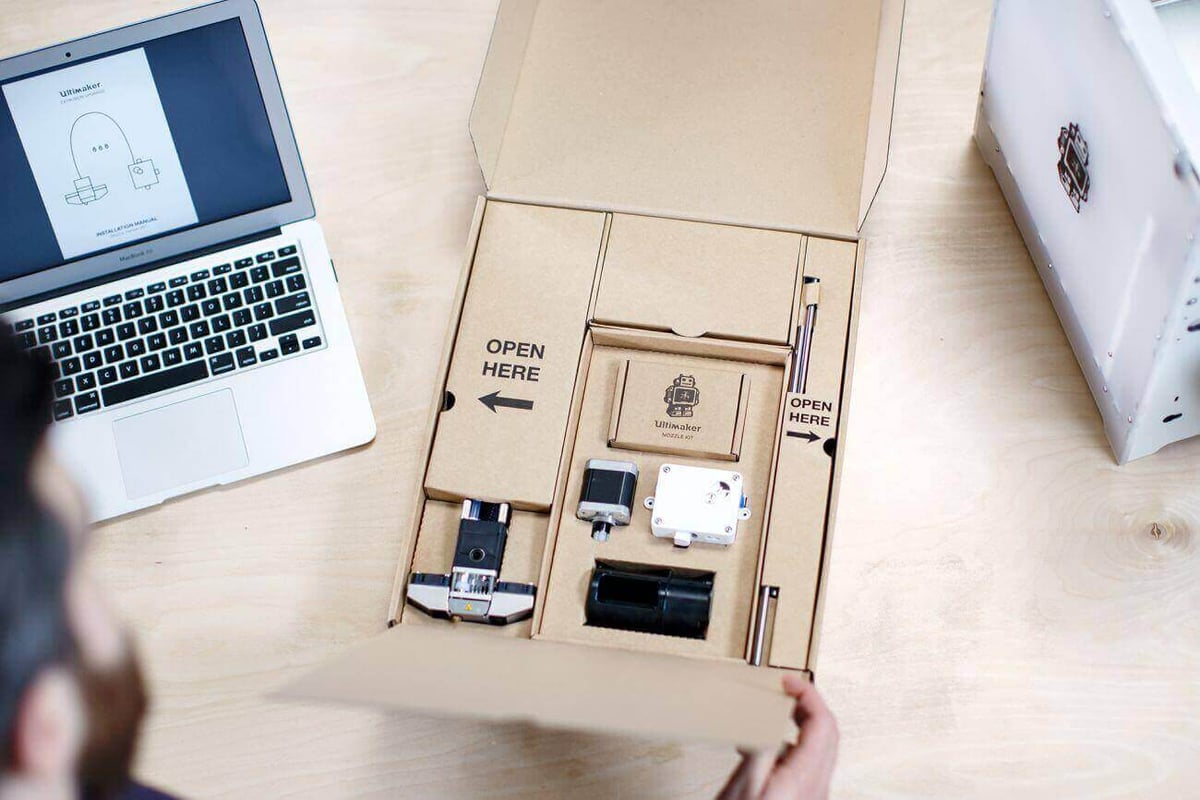
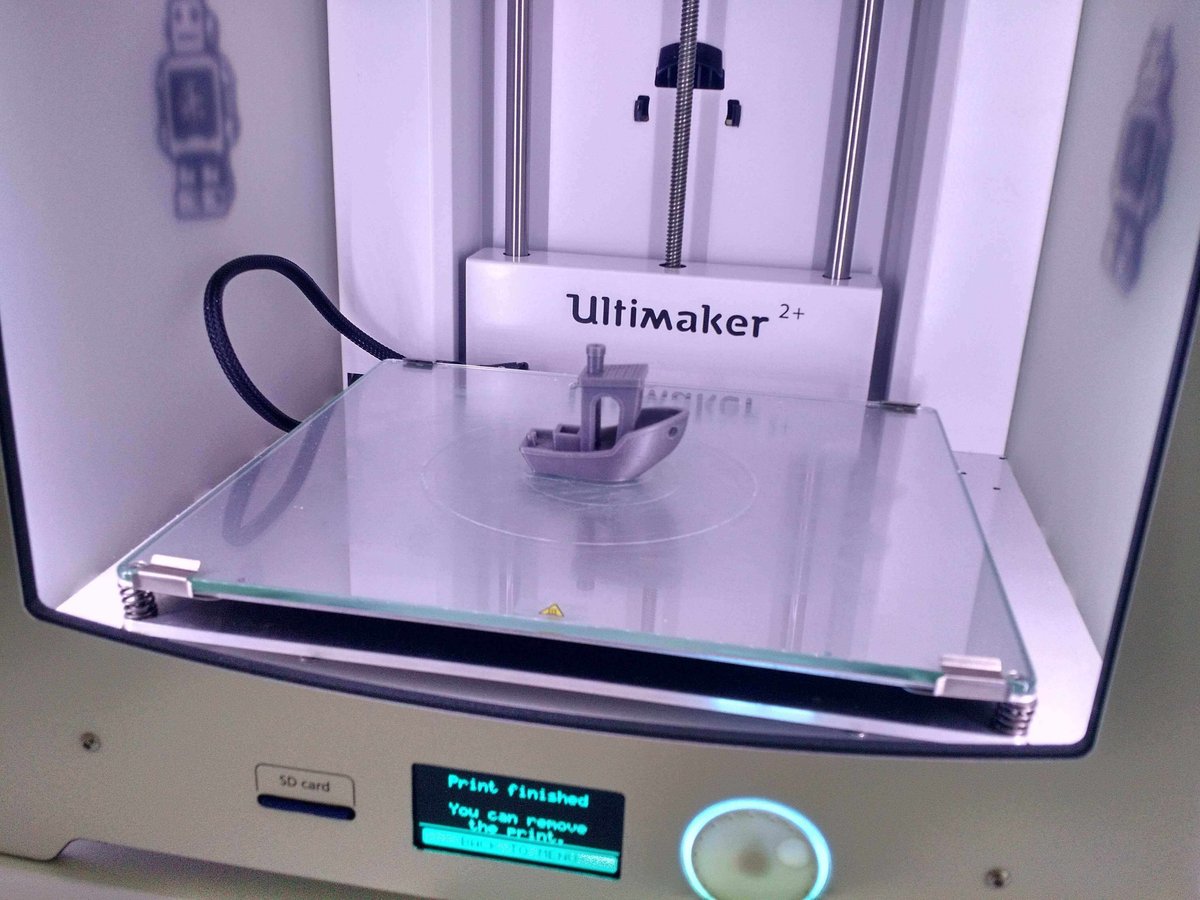
The setup process for the Ultimaker 2+ remains the easiest for any 3D printer we’ve tested. Unpack it, remove bits of foam, cardboard and plastic ties which were inserted between components to prevent them from movement during shipping, and then plug it in and switch it on.
Thereafter, follow the steps on the tiny LED interface to load up the spool of filament and calibrate the print bed, and you’re ready to print. A 4GB SD card comes preloaded with test files (including a little retro robot that represents the company mascot), so you can start with those straight away.
The SD card is important because there’s no other way for the printer to communicate with your computer. Some folks may object to this, especially those who are too stingy to buy an SD card reader, but we find this aspect keeps things admirably simple in day to day operation.
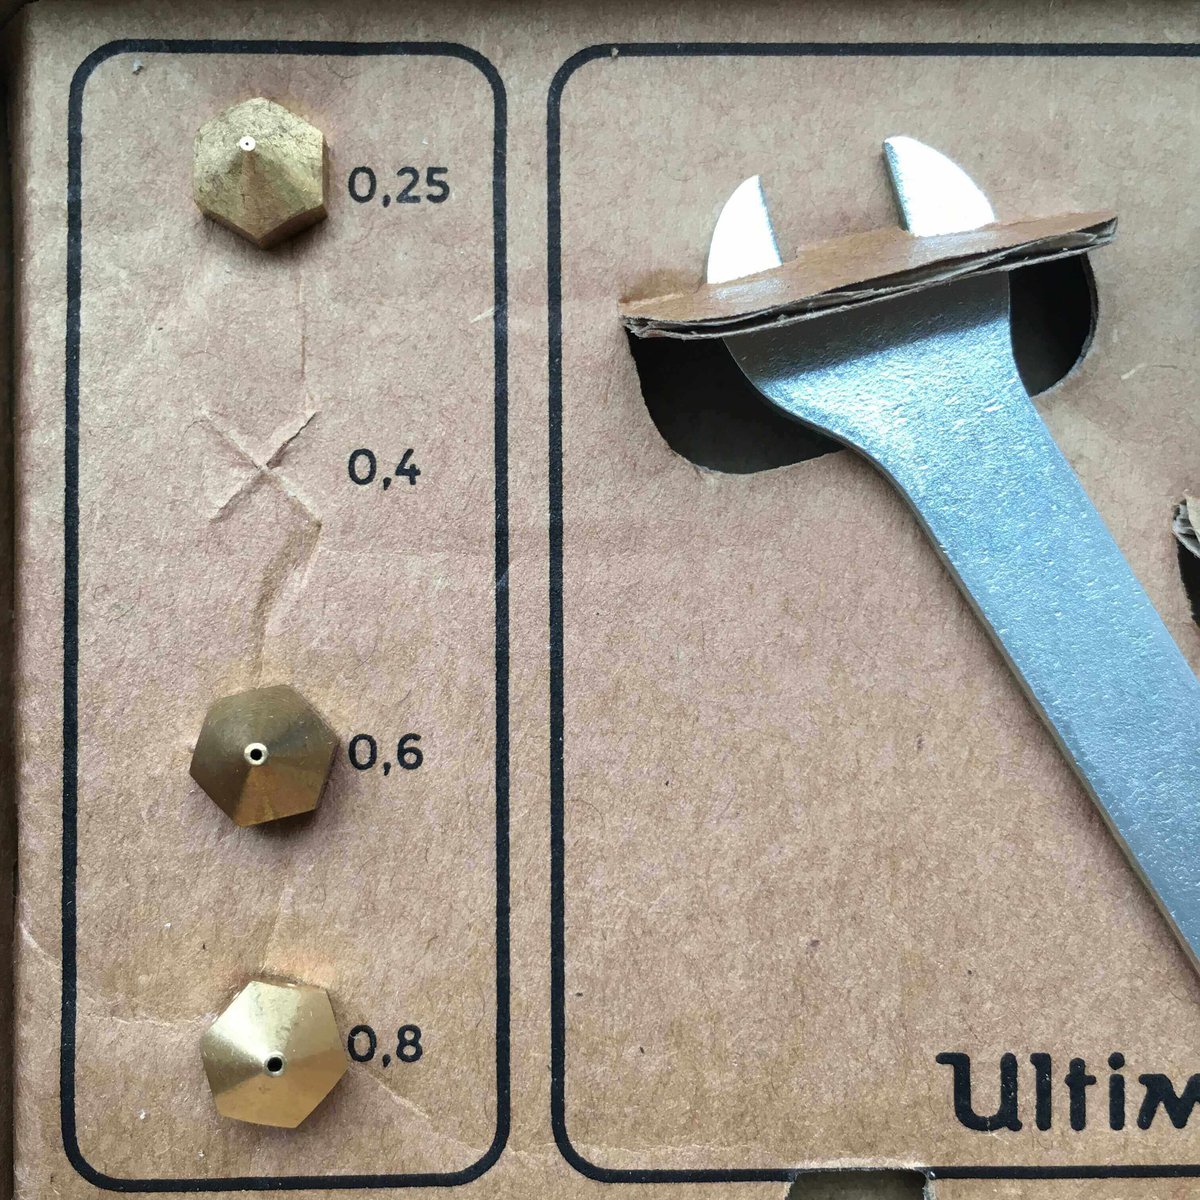
Also in the box is an impressive new feature for the Ultimaker family — the Olsson Block Kit. This kit actually became available to all Ultimaker owners to buy late last year, but is now included with all new machines as standard. It’s a set of four printhead extruders with variable nozzle diameters ranging from 0.25, 0.4, 06, to 0.8mm. This provides greater flexibility in terms of printing objects ultra fast or ultra detailed or ultra large, whatever your project requirements may be.
(NOTE: This is an exciting new feature, but since it applies to the entire Ultimaker range and not just the Ultimaker 2+, we’ll be reviewing the Olsson Block separately at a later date. Stay tuned!)
For printing your own models, the manufacturer recommendation is to download and install the latest version of the Cura slicing software to your computer. When you open the software for the first time, you have to set up it for the machine you’re using — in this case, the Ultimaker 2+. Of course, you’re free to use any other slicing software of your choice, but at time of writing the Ultimaker 2+ machine profile hasn’t trickled out to other applications yet, so you’re safest to stick with Cura for the time being.
Ultimaker 2+ Review: 3D Printer Filament
The Ultimaker 2+ (2 plus) takes 2.85mm filament, the thicker of the two common sizes (the other being 1.75mm). A big advantage of this printer is that it can work with a range of filaments that goes far beyond the acrylonitrile butadiene styrene (ABS) and polylactic acid (PLA) typically used in 3D printing. Ultimaker are also pushing a new filament category called CPE for complex, technical prints. Details are pretty scarce on the thermoplastic composition, but we understand it’s as strong as ABS but without the stinky odor.
Other supported filaments include wood-filled filaments, bronze- and copper-filled filaments, polycarbonate, nylon, conductive PLA and ABS, and UV luminescent filaments. We’re often printing with recycled polyethylene terephthalate (PET) on the Ultimaker machines, another great material with the strength of ABS but the ease of printing of PLA.
The Ultimaker 2+ has a dedicated spool holder that extends outwards behind the printer and can fit any standard filament spool. Included with the printer is a 750g sample spool of Ultimaker brand Silver PLA.
After using this included filament, if you find that it’s not to your taste, it’s very simple to remove old filament from the extruder and replace with another of your choice. Via the LED control panel, you can call up a dialog that guides you through the process. In a nutshell, the extruder is heated up and then the material feeder reverses out the old filament until you can pull it out. Then you insert the new filament, and the feeder guides it forward until it starts oozing out the extruder. And that’s it.
Ultimaker 2+ Review: 3D Printer Software
The Ultimaker 2+ supports a variety of open source 3D printing programs, but most first-timers will adopt the software developed in-house by Ultimaker. Cura 3D printing software is also open source, just like the hardware, and to its credit it’s very easy to use.
When you first open the application, a representation of the print bed appears on the screen, with the position of the Ultimaker logo mirroring as it appears on the physical printer, so you can easily determine the direction your model is facing.
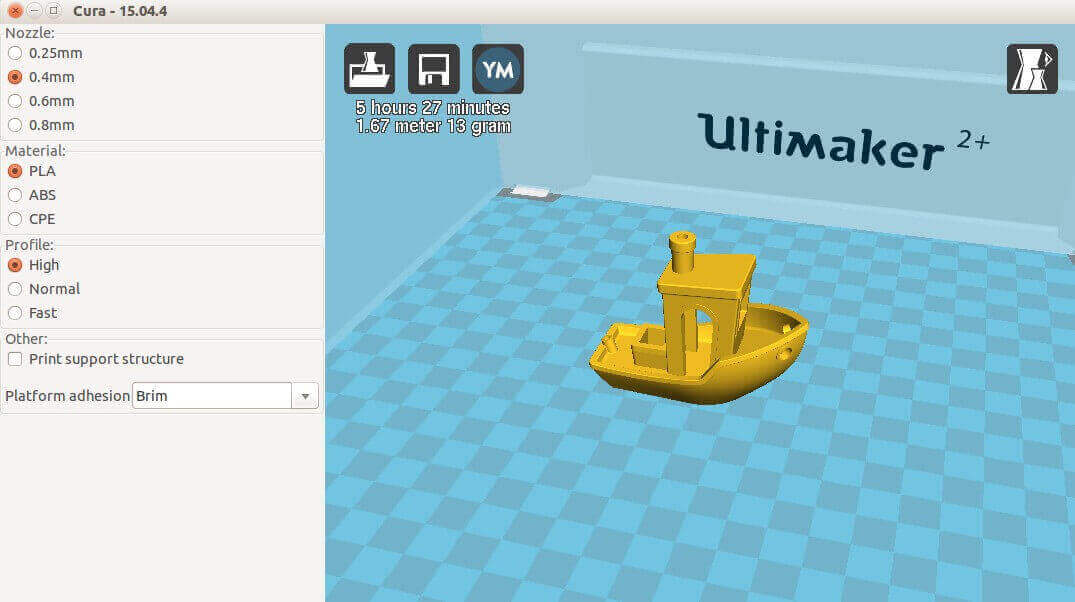
At the left edge of the screen by default is the QuickPrint menu, which is broken down into three choices: “Nozzle”, “Material”, and “Profile”. Unless you’ve gone and changed the nozzle, the typical setting is 0.4mm and doesn’t need to be revised. Material is between PLA, ABS and the aforementioned mysterious CPE. Finally, the profile lets you pick the resolution, “High-Quality Print” (with a 0.06mm layer height), “Normal-Quality Print” (0.1mm layer height), or “Fast Low-Quality Print” (0.15mm layer height).
You can add print supports to hold overhanging parts of the object in place during printing, or a print brim, a thin extension of plastic around the base to help secure it. Along the top of the screen is a pull-down menu with items named “File”, “Tools”, “Machine”, “Expert”, and “Help”.
The easiest way to get printing is to click on the “Load” icon, the furthest left of three buttons in the upper-left corner of the screen. It will call up your computer’s system dialogue to find to any 3D printable STL files stored on your computer. When you’ve selected and opened one, it will be shown to scale on the virtual on-screen print bed. From there, you can tweak, resize and rotate the model to your satisfaction. When you’re done, click on the “Save” icon to save the prepared model to an SD card, and then you’re ready to slot it into your Ultimaker 2+ to get printing.
For a deeper dive, you can access Full Settings from the “Expert” tab. This lets you set extrusion speed, resolution (layer height), infill, and a wide range of other settings. The best resolution that the Ultimaker 2+ can offer is 20 microns, and that’s nothing to be sneezed at: it’s still the benchmark that all other printers are measured by.
Cura does the job, but it has to be said that we’re starting to feel the limitations of the software. For every little tweak or change that’s made to a model, it chugs away behind the scenes to recalculate the print time and filament required. Regardless of how powerful your computer, there seems to be a bottleneck in the software architecture that makes it less than nimble.
Moreover, the options for tweaking are not as rich or as deep as other applications out there. Being able to change the infill pattern, for example, is a small but important change to the structural integrity of your model. With Cura, the sole option is a square grid.
But this is open source software, so it seems churlish and ungrateful to complain too much. And you’re not strictly confined to using Cura, either. Intermediate to advanced users can move on to alternatives like Slic3r, Repetier, or a paid application like Simplify3D.
Ultimaker 2+ Review: 3D Printer Calibration
The vast majority of 3D printers that use plastic filament require a tedious procedure to ensure the extruder is set at the proper height above the build platform. This is called calibration, and ensures that the first layer of filament (and every subsequent layer) is properly applied when printing begins.
Unfortunately, the Ultimaker 2+ has the exact same calibration process as the Ultimaker 2, and we were surprised to find that this was the case. Newer models of FDM machines are capable of automatically setting the extruder height and makes sure the print bed is level before each job starts. We cannot emphasize enough how useful this feature is; it’s one less thing to worry about when troubleshooting or prepping a model for printing.
So we’re guessing that, while auto-calibration must be on the Ultimaker engineering team’s to-do-list, implementing it into the Ultimaker 2+ would have necessitated a top to bottom redesign — in which case, we’d be looking at a new machine entirely.
Ultimaker 2+ Review: Print Quality Tests
For our print quality testing, we opted to use slicing software Simplify3D, because it’s our favorite slicing software to use on a daily basis.
We printed about a dozen test objects with the Ultimaker 2+, switching between three different quality settings of fast (0.25mm layer height), medium (0.15mm layer height) and high (0.1mm layer height). The difference between objects printed at Normal and at High print-quality settings is hard to distinguish without closer scrutiny with a magnifying glass. On that basis, you might be dissuaded from ever using the higher quality setting, because it takes more time to print than normal quality without a noticeable gain.
Impressively, the Ultimaker 2+ printed out all our test objects without a single misprint. That’s not to say that all the prints were perfect, but that none were considered outright borked, faulty or unusable. A few were slightly deformed at the base because we didn’t wait for the plastic to cool properly, and in our haste to shunt it off the build platform they got warped or dented. We take the blame for that one!
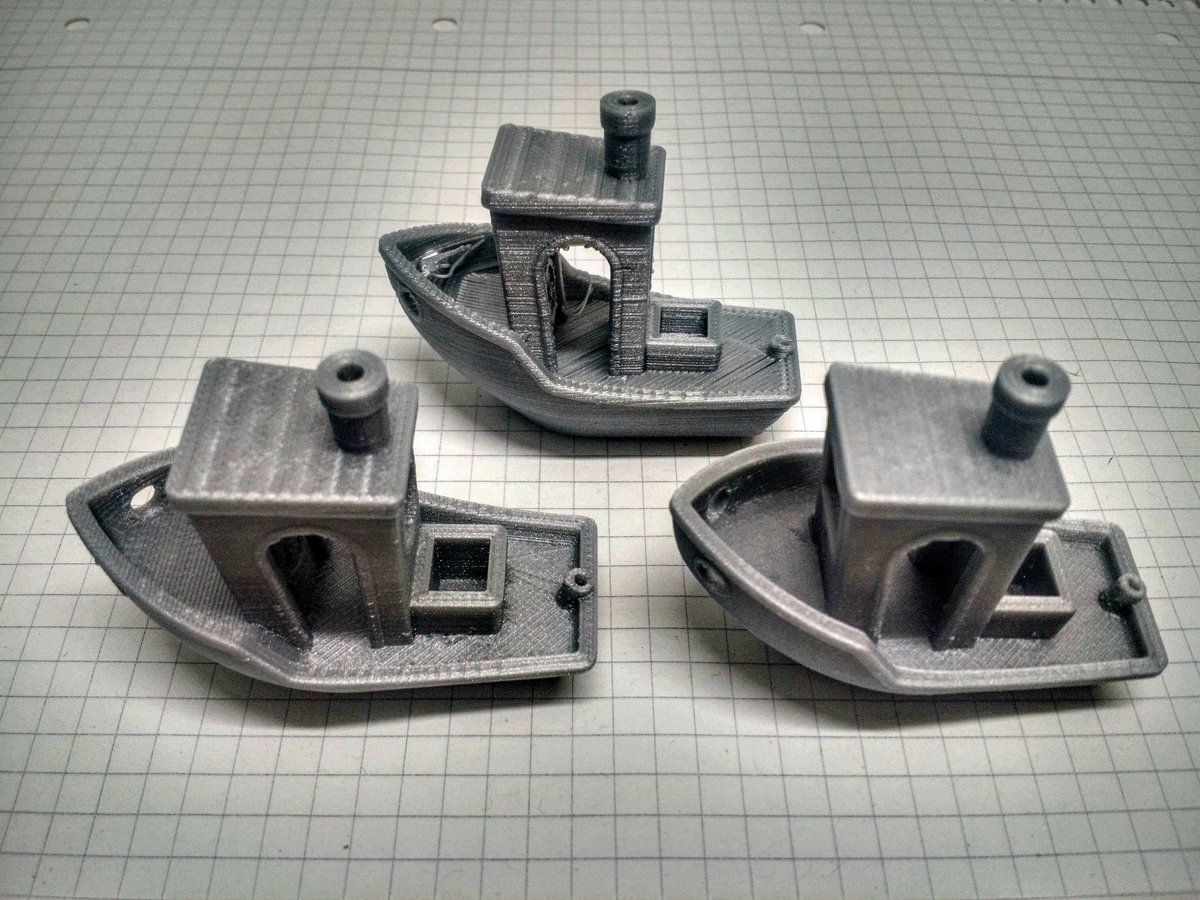
The overall print quality is, in a word, excellent. We printed off the obligatory 3DBenchy model in fast, medium and high settings, and the machine blitzed through the jolly 3D printing stress test over the course of an afternoon. The fast version (top) is a bit of a shambles, as you can see, but the medium (left) and high (right) models turned out in tip-top shape. And we could easily make out finer details at medium resolution on areas like the name-plate and the underside.
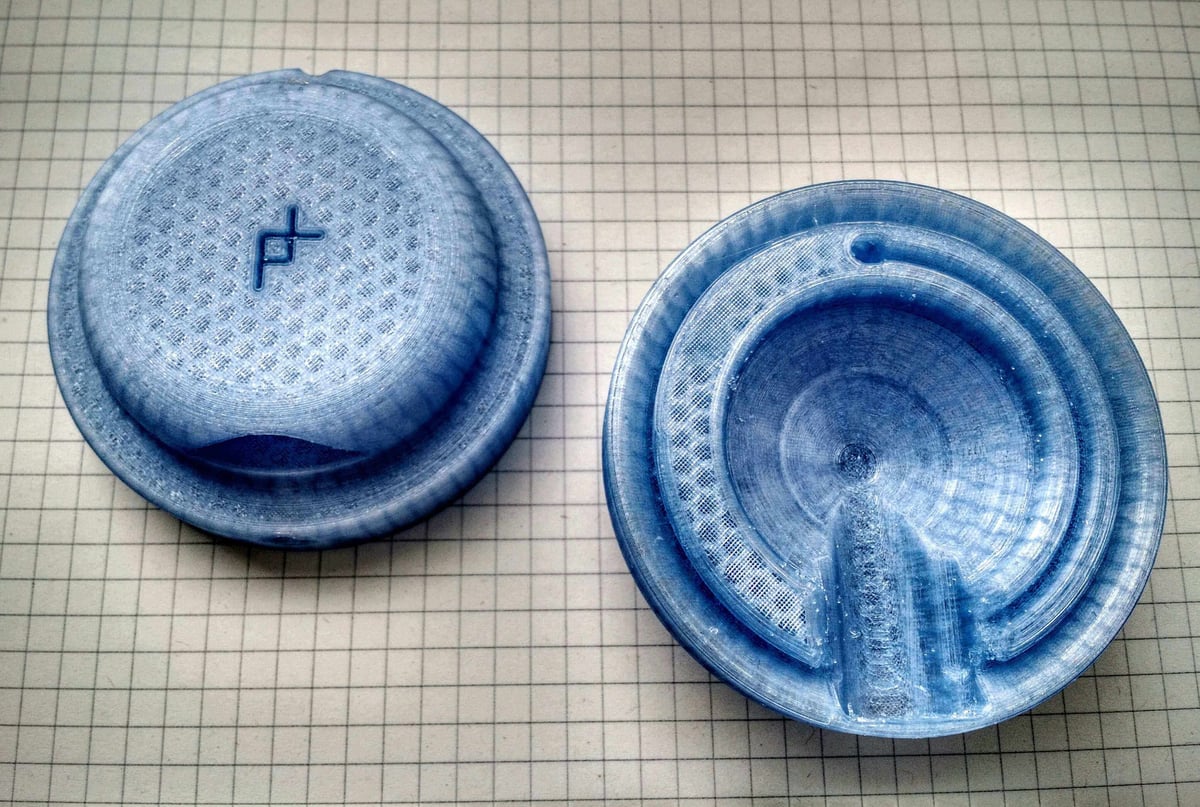
We downloaded some beta files for the Print+ Kickstarter headphones, and printed off the speaker housing at high quality. For the sake of variety, we also swapped out the PLA filament for recycled PET. The printed object was lightweight and solidly built, and flaws were minimal except for the underside bridging (which will be concealed when the headphones are assembled). Oh, and baby blue transparent jelly wouldn’t be our first style choice for ear furniture, but that’s the joy of building your own headphones.
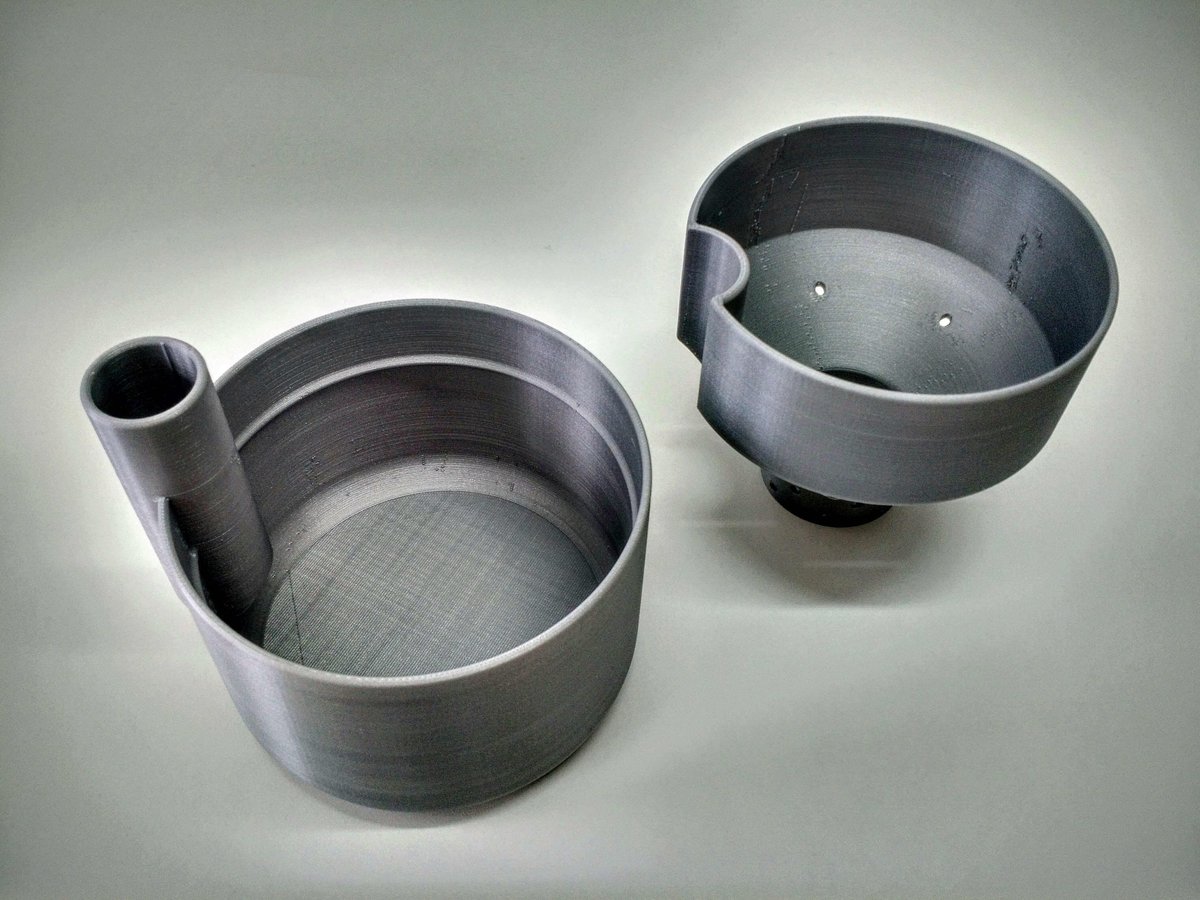
We also printed off a large, two-part self-watering plant pot at medium quality, designed by Parallel Goods. The design is very sophisticated and would look great in any home or office space, but the crucial thing here is to test for water tightness. No one wants a puddle of muddy water on their desk. Unfortunately, after a day of sitting in a bowl (filled with water inside and tissues underneath), the pot sprang a leak. But to be honest, this was a bit of an ambitious project to get right first time, and we can’t fault the Ultimaker 2+ for the problem. We’ll just have to find a post-processing solution to seal the leak.
And oh yes, what is the third design improvement in the Ultimaker 2+? It’s the noise. The buzzing and whirring of motors and fans are dramatically quieter than previous models, and it sounds like significant upgrades were made to the stepper motors. It’s quite incredible how they achieved this, actually. Compare and contrast with the unbearable racket from the Ultimaker 2 Go, which is like ten hairdryers switched on at once, and it’s a blessed relief.
There’s one sound effect in the mix which we didn’t notice before, and that’s a beeping noise the printer makes as it switches gears. It’s not annoying, but it’s a new addition.
Ultimaker 2+ Review: Pitfalls of an Open Frame
Another missed opportunity for the Ultimaker 2+ is the semi-open frame design. Although an open frame provides the user an unobstructed view of the printing process, it also has disadvantages. When printing with ABS filament, for example, you will definitely notice the wretched stink of burning plastic, and the lack of a hood leaves nothing to contain the odor. It’s simply not acceptable in a home, classroom, or office environment.
There also remains the danger that small children could touch the hot extruder head and get burned. Parents are still advised to keep young children away from the machine when it’s operating. If used in primary schools, the teacher must do all the printing.
Finally, it’s easy to forget how sensitive your printer can be to changes in the ambient temperature. Something as nondescript as opening a window or a door can have dramatic repercussions for the final outcome of your printed object. And the longer the print job, the more likely the shift in temperature, and the higher the probabilities of failure.
So yes, we’d like to see an option for future Ultimaker 3D printers to seal up the chamber completely. Other manufacturers have adopted closed-frame designs, and with good reason.
Ultimaker 2+ Review: It Remains The Gold Standard… But for how long?
There’s a lot to love about the Ultimaker 2+, from its easy setup and operation to its support of a variety of filament types. There are some magical new design features, especially the new material feeder, but we were disappointed to find the omission of a self-leveling build platform. That said, the printer is still capable of some of the finest and most consistent resolutions available on an FDM machine. There’s a reason why the Ultimaker 2 built up a reputation as a workhorse, and that responsibility is confidently shouldered by its replacement.
The Ultimaker 2+ is a high-end 3D printer that’s a great match for anyone looking for reliability and print quality. But the wish-list for new features is starting to stack up in 2016, ranging from auto-calibration to a closed frame design to improved software development. Looking further ahead, blue-skies features like being able to manage your printer over a local network, or preview models on the control panel via a touchscreen interface; these innovations would also cause us to sit up and pay attention.
But then again, there’s a reason why this is called the Ultimaker 2+ and not the Ultimaker 3. This is a quiet evolution of a classic machine, building on the foundations of a tried and tested platform. For the eventual release of the Ultimaker 3 (whenever that may be), that’s when we’re expecting to see a 3D printer with some real fire in the belly. Until then, this is one of the best FDM 3D printers on the market.
License: The text of "Ultimaker 2+ Review – Is It Still State-Of-The-Art?" by All3DP is licensed under a Creative Commons Attribution 4.0 International License.
CERTAIN CONTENT THAT APPEARS ON THIS SITE COMES FROM AMAZON. THIS CONTENT IS PROVIDED ‘AS IS’ AND IS SUBJECT TO CHANGE OR REMOVAL AT ANY TIME.