Warp: Finally, There’s a Way To Measure it

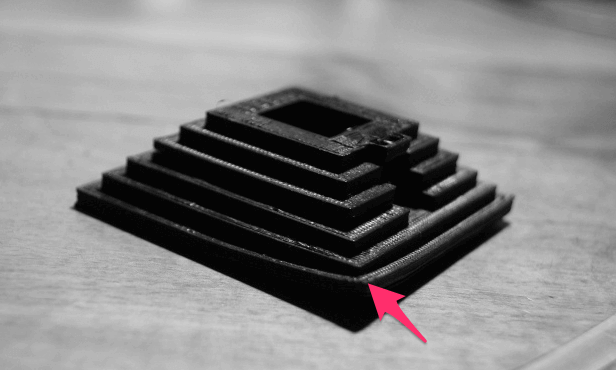
Warping and shrinking of 3D printing materials, esp. thermoplasts, is the most obstructive restriction for 3D printing; especially if you’re using PLA, ABS or Nylon filament. It‘s a common problem known to anyone who prints with an FDM, FFM or FFF printer (other common 3D printing problems in this article).
We also know about a lot of warp-prevention techniques. One is the heated print-environment (invented and patented by Stratasys). Many 3D printers offer heated print beds (developed and published by the reprap community). Thirdly, there are methods to avoid warp on a constructive way (e.g. source: BFB forum).
Why is a Warp Indicator Important?
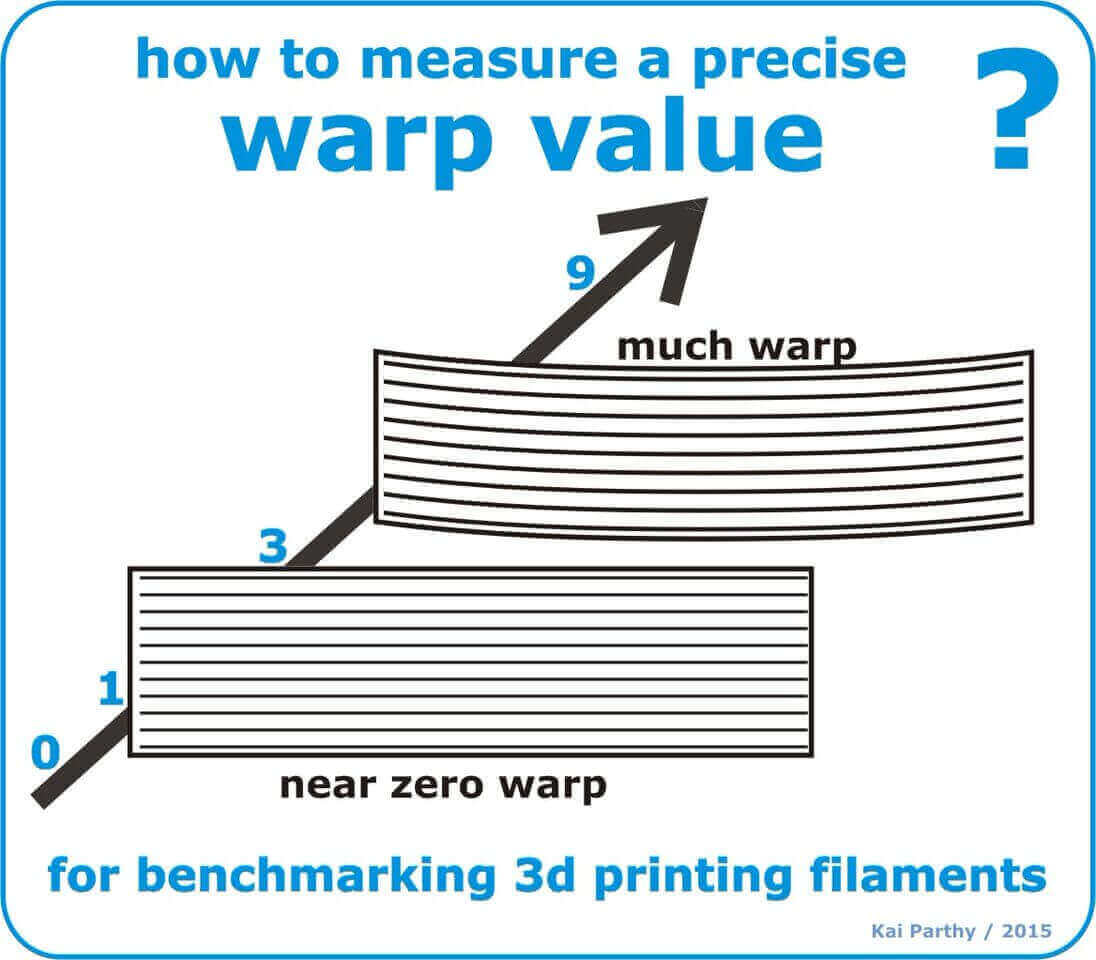
Most of the filament manufacturers claim that their material has “no“ or “nearly zero warp“. But how is it classified? In general, these statements are empty marketing phrases.
How Can You Measure Warp?
As you know from your 3D prints, you will get different results with different objects on different printers. To numeralize, classify and standardize these factors, Kai Parthy (who is known for his “Lay”-filaments) developed a procedure to “name“ warp/shrinkage for 3D printing.
He calls it the “warp-index”.
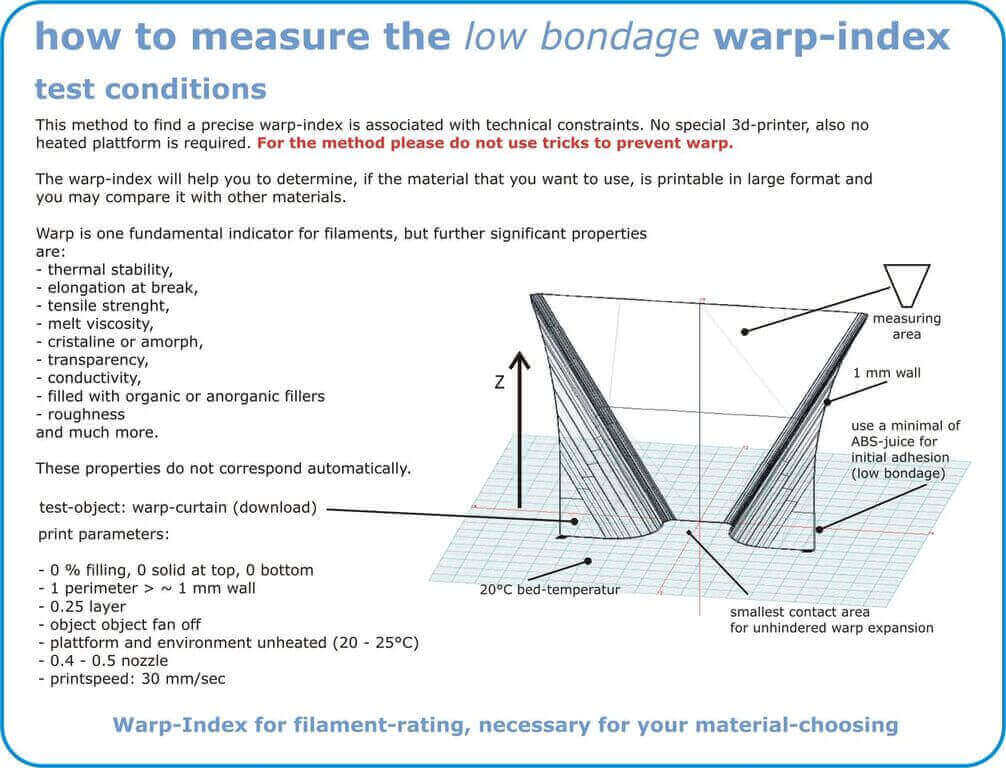
This is by no means a way to prevent warp. It’s a procedure to find the warp-factor for your material and it is standardized to make it possible on every 3D printer. Now you can evaluate which material to use, depending on the size (use case) of your object.
Kai Parthy engineered an object that is mechanically decoupled from other influences than warp and a way for measurement that anyone can perform with simple tools. All you need is a 3D printer, a permanent marker, a graphics software (e.g. Inkscape), a flatbed scanner and a calculator.
Here’s how to Measure Warp
The print should be performed on a cold print-bed. Do not use any warp prevention techniques, this might falsify the results. To make the object stick to the bed use “blue tape“ and “ABS paint“.
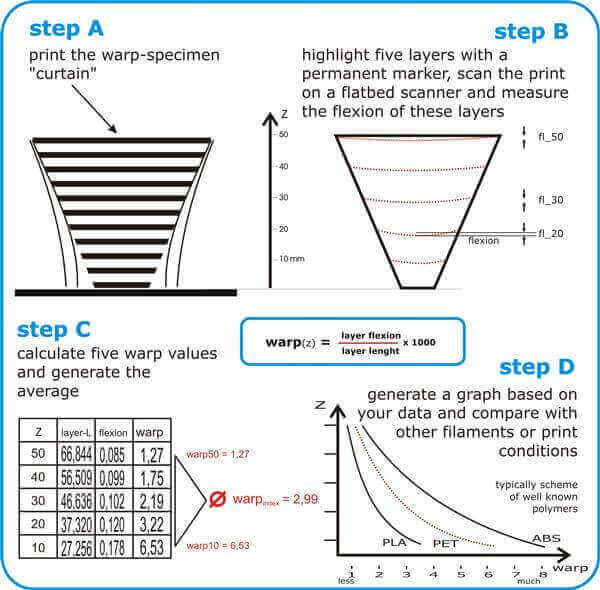
- Print the “curtain“ testobject from Kai Parthys page. Mark it on the specified Z-heights (refer to the white papers) with a permanent marker and scan the object on your (2D-)flat bed scanner. You might not be able to close the top of your scanner because of the objects dimensions, so you should cover it with some (black) fabric.
- Do a high-quality scan (.bmp) and open it in your graphics software. Follow the base of each (per Z-height predetermined) marked layer with a tool of your graphics software that allows you to draw free lines (curve), in very small steps. Apply a second (straight) line from one end of the curve to the other end.
- Use the measurement tool of your graphics software to measure the distance (to 1/100 mm) of both lines in the middle of the X-direction, where the most flexion occurs. Note the evaluated values for each predetermined Z-height and calculate the warp-index according to way that is shown in the white papers.
You can find more information in this PDF from Kay Parthy right here. That’s it! Now you know about the warp-index of your material according to the standard.
You are now able to evaluate the best layer/temperature/speed combination for your material and check if the filament manufacturer told the truth.
License: The text of "Warp: Finally, There’s a Way To Measure it" by All3DP is licensed under a Creative Commons Attribution 4.0 International License.